Safety Track UCIT, User Manual And Installation Manual
Introducing Safety Track UCIT - a cutting-edge surveillance solution. Streamline your monitoring experience with our easy-to-use Desktop Viewer User Manual. Enhance your understanding of our product through our comprehensive manual available for free download at manualshive.com. Discover the power of Safety Track UCIT and maximize your safety.
Share
Download


Reviews:
No comments
Related manuals for UCIT

C1440W
Brand: GE Pages: 76

C1033
Brand: GE Pages: 78

C1033
Brand: GE Pages: 78

A835
Brand: GE Pages: 106

C1440W
Brand: GE Pages: 76

UD02783B
Brand: HIKVISION Pages: 13

KAACAM4KDSA
Brand: Kogan Pages: 12

SKYE WiFi 3
Brand: Accu-Scope Pages: 19

GL-H02
Brand: Greenleaf Pages: 4

SNC-521IR/W
Brand: Santec Pages: 40

Vizioncam Series
Brand: TechNexion Pages: 2
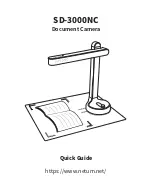
SD-3000NC
Brand: Netum Pages: 6

Actioncam 430
Brand: Rollei Pages: 10

DBB43TL
Brand: FLIR Pages: 2

IR CAMERA
Brand: Avtech Pages: 3

IP20MP
Brand: PNI Pages: 4

WG-30W
Brand: Ricoh Pages: 208

AWOR-315
Brand: Alfa Network Pages: 2


