

© Safe Fleet 2020 | All rights reserved
Part # 700-1233 R1
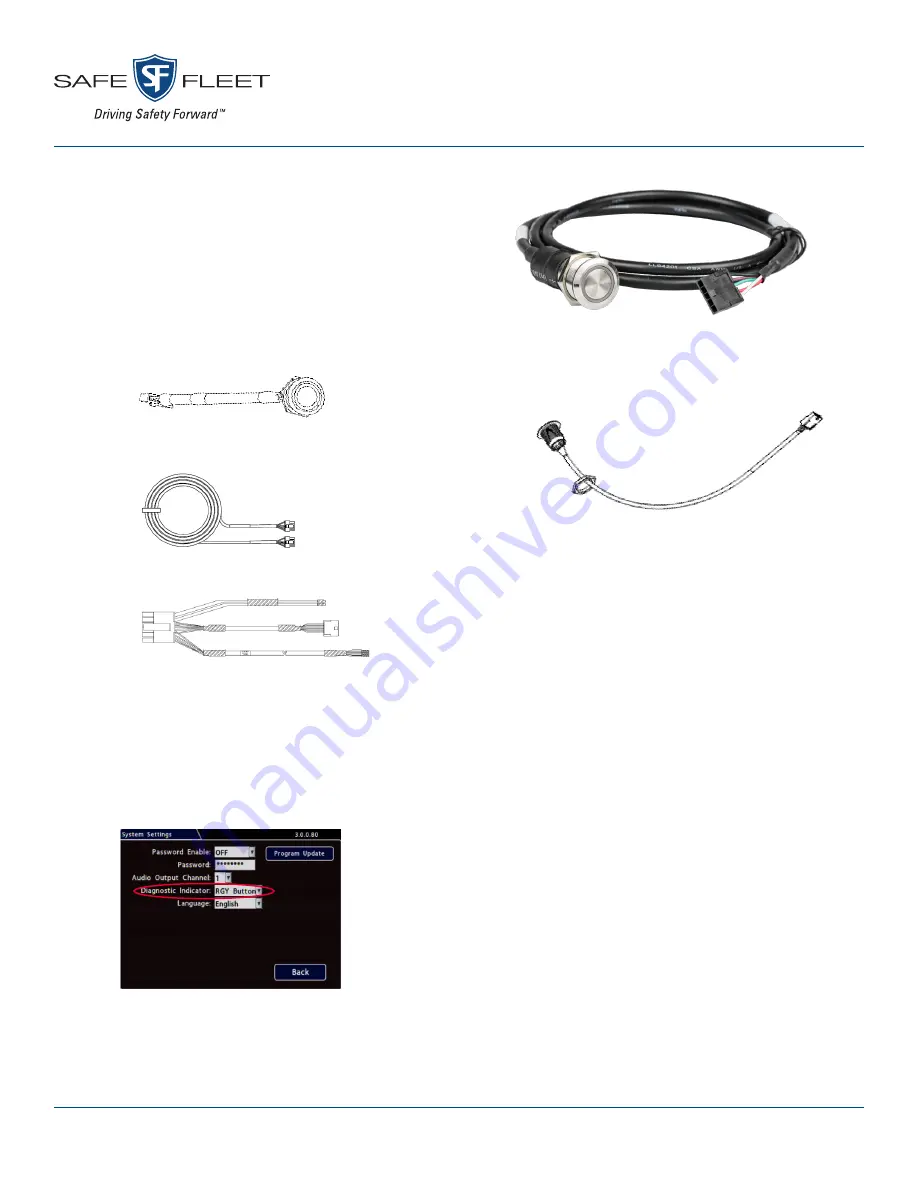
RGY Button
Quick Start Guide
The RGY Button’s tri-color LED light ring provides
recorder system status, and indicates video loss
conditions. The button activates an alarm/event input
to mark video. The RGY Button is compatible with
TH8, NH16, and DH series recorder platforms.
Typical Installation Package
• RGY Button with 5 ft./1.5m pigtail
(part # 065-1010)
• RGY extension harness (20ft./6m)
(part # 060-1197)
• Button & Signals harness (part # WT2)
Installation Procedure
1.
Determine the proper location before drilling
the mounting hole. Ensure the area behind the
hole is clear of obstructions before drilling.
2. Drill a 3/4” hole in the desired location. File the
edges if necessary.
3.
Remove the mounting nut from the
button as
shown.
4. Feed the connector and the cable through the
mounting hole, and re-attach the nut.
5.
Connect the RGY Button’s 5-pin connector to
the RGY extension harness (060-1197),
6.
Connect the extension harness to the Button &
Signal harness’ (WT2) 5-pin connector.
7. Connect the WT2’s 2x6 Microfit to the
SIGNALS
socket on the recorder.
8.
Set up the recorder for the RGY Button (see
“Recorder Configuration”).
Recorder Configuration
1.
Power up the recorder with a monitor and
USB mouse connected, then right-click in Live
view and select
Configuration
.
2.
Select
System
to open System Settings.
3.
In the
Diagnostic Indicator
drop-down menu,
select
RGY Button
.
4.
Click
Back
to save changes..


