manualshive.com logo in svg
background image

Your laminate trimmer has been engineered and manufactured to Ryobi’s high standard for dependability, ease of operation, 
and operator safety. When properly cared for, it will give you years of rugged, trouble-free performance.

WARNING:


To reduce the risk of injury, the user must read and understand the operator's manual before using    

this product. 

Thank you for buying a Ryobi product.
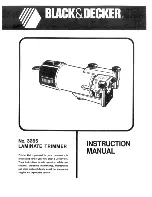
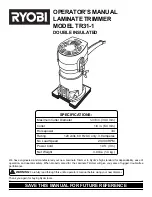
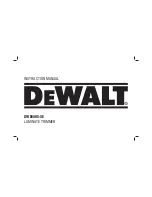
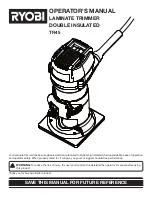
OPERATOR'S MANUAL 

LAMINATE TRIMMER 
DOUBLE INSULATED

TR45

SAVE THIS MANUAL FOR FUTURE REFERENCE

Содержание TR45

Страница 1: ...fety When properly cared for it will give you years of rugged trouble free performance WARNING To reduce the risk of injury the user must read and understand the operator s manual before using this product Thank you for buying a Ryobi product OPERATOR S MANUAL LAMINATE TRIMMER DOUBLE INSULATED TR45 SAVE THIS MANUAL FOR FUTURE REFERENCE ...

Страница 2: ...for two years HOW TO GET SERVICE Just return the power tool properly packaged and postage prepaid to an Authorized Service Center You can obtain the location of the Service Center nearest you by contacting a service representative at One World Technologies Inc P O Box 1207 Anderson SC 29622 1207 by calling 1 800 525 2579 or by logging on to www ryobitools com When you request warranty service you ...

Страница 3: ...our finger on the switch or plugging in tools that have the switch on invites accidents n Remove adjusting keys or wrenches before turning the tool on A wrench or a key that is left attached to a rotating part of the tool may result in personal injury n Do not overreach Keep proper footing and balance at all times Proper footing and balance enables better control of the tool in unexpected situatio...

Страница 4: ...maged should be carefully checked to determine that it will operate properly and perform its intended function Check for alignment of moving parts binding of moving parts breakage of parts mounting and any other conditions that may affect its operation A guard or other part that is damaged should be properly repaired or replaced by an authorized service center Following this rule will reduce the r...

Страница 5: ...f injury user must read and understand operator s manual before using this product Eye Protection Always wear safety goggles or safety glasses with side shields and a full face shield when operating this product Precautions that involve your safety Failure to keep your hands away from the blade will result in serious personal injury Failure to keep your hands away from the blade will result in ser...

Страница 6: ...entially hazardous situation which if not avoided may result in minor or moderate injury CAUTION Without Safety Alert Symbol Indicates a situation that may result in property damage WARNING To avoid serious personal injury do not attempt to use this product until you read thoroughly and understand completely the operator s manual Save this operator s manual and review frequently for continuing saf...

Страница 7: ... check the power supply EXTENSION CORDS When using a power tool at a considerable distance from a power source be sure to use an extension cord that has the capacity to handle the current the tool will draw An un dersized cord will cause a drop in line voltage resulting in overheating and loss of power Use the chart to determine the minimum wire size required in an extension cord Only round jacket...

Страница 8: ...mm Collet 1 4 in 6 35 mm No Load Speed 25 000 min Input 120 V 60 Hz AC only 4 5 Amps Net Weight 3 lbs 1 36 kg Cord Length 10 ft 3 m WRENCHES ON OFF SWITCH MOTOR HOUSING LAMINATE SUB BASE BASE COLLET NUT DEPTH OF CUT SCALE DEPTH ADJUSTMENT LATCH WOODWORKING SUB BASE SUB BASE HANDLES ...

Страница 9: ...lly remove the tool and any accessories from the box Make sure that all items listed in the packing list are included n Inspect the tool carefully to make sure no breakage or damage occurred during shipping n Do not discard the packing material until you have care fully inspected and satisfactorily operated the tool n If any parts are damaged or missing please call 1 800 525 2579 for assistance PA...

Страница 10: ...ved before using the trimmer n The collet is machined to precision tolerances to fit cut ters with 1 4 in 6 4 mm diameter shanks n With the trimmer still upside down on a workbench insert the shank of the cutter into the collet The shank of the cutter should be close to but not touching the bottom of the collet This allows for expansion when the cutter gets hot A clearance of 1 16 in is adequate n...

Страница 11: ...he ON I position Return the switch to the OFF O position when finished HOW TO OPERATE THE TRIMMER See Figure 5 Before starting the trimmer unplug it and make sure the cut ter is securely tightened in the collet and that the depth of cut is properly set Never start the trimmer while the cutter is in contact with the workpiece After completing a cut pull the cutter slightly away from the cut surface...

Страница 12: ...d with under normal conditions However should the cutter strike a knot hard grain foreign object etc that would affect the normal progress of the cutting action there will be a slight kickback Kickback could be sufficient to spoil the trueness of your cut if you are not prepared Such a kickback is always in the direction opposite the direction of cutter rotation To guard against kickback plan your...

Страница 13: ...or burn the wood If the trimmer is fed too fast it will take large chips out of the wood and leave gouge marks Always test a cut on a scrap piece of the workpiece wood or laminate before you begin Always grasp and hold the trimmer firmly with both hands when trimming Ifyouaremakingasmall diameter shallowgrooveinsoft dry wood the proper feed rate may be determined by the speed at which you can trav...

Страница 14: ...t to guide and control the cutter as desired It is recommended that you do not exceed 1 8 in 3 2 mm depth of cut in a single pass regardless of the cutter size or the softness or condition of the workpiece This will result in a higher quality cut To make deeper cuts it is necessary to make as many suc cessive passes as required lowering the cutter 1 8 in 3 2 mm for each new pass To save time perfo...

Страница 15: ... area of trimmer base Serious personal injury will result from contact with a rotating cutter NOTE When adjusting the base note the groove that serves as a stop to prevent the motor housing from sliding directly off and separating from the base REMOVING THE BASE See Figure 11 n Unplug the trimmer n Open the depth adjustment latch n Holding the trimmer by the motor housing slide the base downward a...

Страница 16: ...G GROOVES IN A CIRCLE See Figure 12 n There are three holes marked R2 R2 1 2 and R3 on the sub base Each number represents a radius and may be used when cutting circular grooves that are 4 in 101 6 mm 5 in 127 mm or 6 in 152 4 mm in diameter n Select the radius for the desired circle place a finish ing nail through the hole and securely tack it into the workpiece This will create a pivot axis for ...

Страница 17: ...dwork ing sub base to the guiding portion of the straight guide Tighten the knob on the straight guide securely n Using C clamps and a board to act as the straight edge place the cutter at the desired position on the workpiece and make the cut from right to left as shown by the arrow in figure 13 NOTE The board being used as a straight edge must be 1 4 in 6 4 mm thick or less to prevent contact wi...

Страница 18: ...ard spackling compounds or plaster are subject to accelerated wear and possible premature failure because the fiberglass chips and grindings are highly abrasive to bearings brushes commu tators etc Consequently wedonotrecommendedusingthis tool for extended work on these types of materials However if you do work with any of these materials it is extremely important to clean the tool using compresse...

Страница 19: ...ot replace one side without replacing the other n Make sure the wire terminals are secured to the brush tubes prior to reassembly n Reassemble using new brush assemblies Make sure the curvature of the brush matches the curvature of the motor and that the brush moves freely in the brush tube n Replace the brush assemblies n Reconnect the red and black lead terminals to the brush tubes n Ensure that...

Страница 20: ...mplete list of Authorized Service Centers MODEL NO AND SERIAL NO The model number of this tool will be found on a plate attached to the motor housing Please record the model number and serial number in the space provided below HOW TO ORDER REPAIR PARTS When ordering repair parts always give the following information MODEL NUMBER SERIAL NUMBER TR45 OPERATOR S MANUAL LAMINATE TRIMMER DOUBLE INSULATE...

Отзывы: