background image

Rollei Fototechnic GmbH, Salzdahlumer Strasse 196, D-38126 Braunschweig, Tel 0531-6800-0, Fax 0531-6800-243, eMail [email protected]
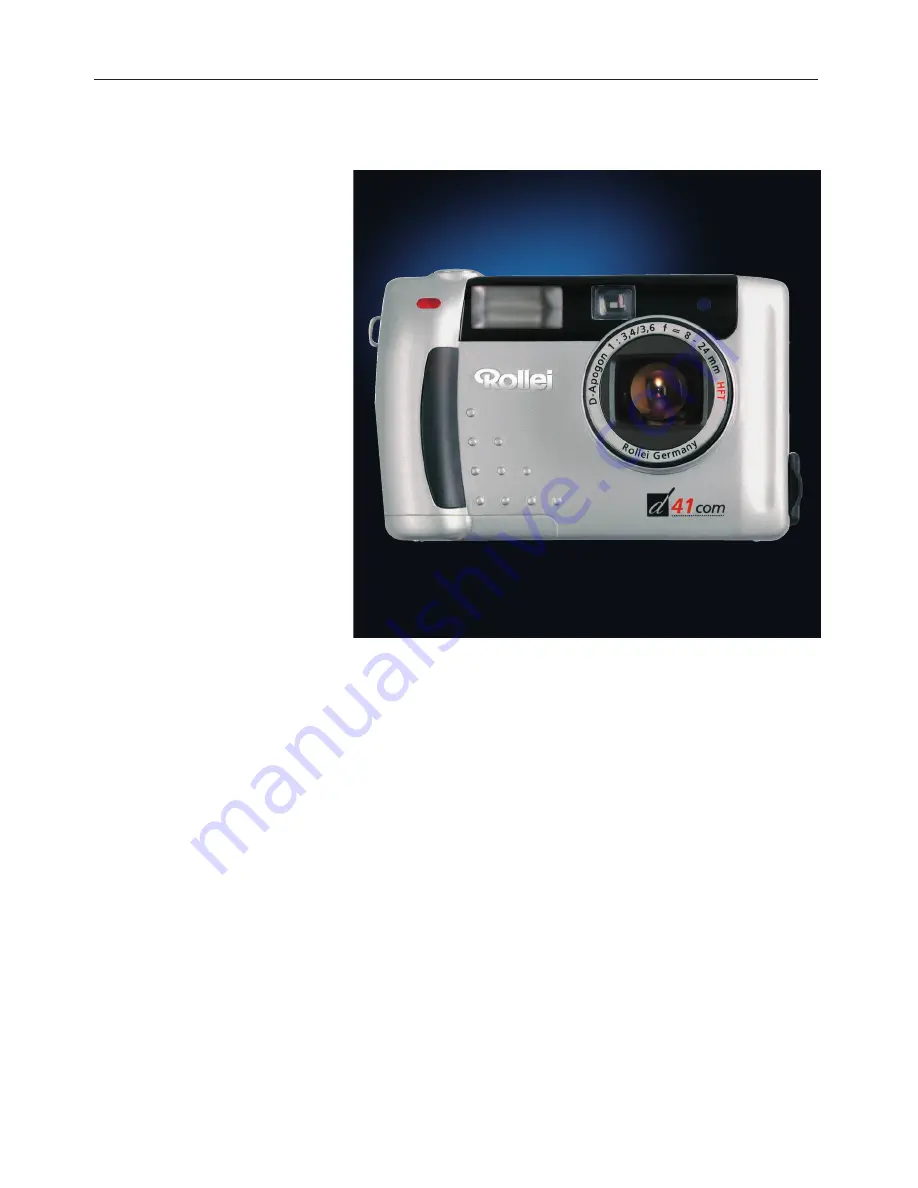
Rollei d41 com

Owner‘s Manual

4.1-megapixel digital camera (2272x1704 pixels)

3x zoom lens 8-24mm (38-114mm in 35mm terms),

Macro down to 0.08 m

Automatic flash unit with five modes

Automatic exposure control, single frames, continuous shooting and multishot 

images

Various autofocus and exposure modes

Shutter speeds 2 – 1/500 s, apertures f/3.4-3.6 to f/15

1.8-inch TFT screen (220 x 280 pixels)

Type I CompactFlash‘ cards as storage medium

Professional image management with camera folders

Video Out for TV/beamer

Power supplied by four size AA alkaline or rechargeable NiCd or NiMH batteries

Optional external 6V DC power supply

USB image transfer to PC or Macintosh

Summary of Contents for d41

Page 1: ... five modes Automatic exposure control single frames continuous shooting and multishot images Various autofocus and exposure modes Shutter speeds 2 1 500 s apertures f 3 4 3 6 to f 15 1 8 inch TFT screen 220 x 280 pixels Type I CompactFlash cards as storage medium Professional image management with camera folders Video Out for TV beamer Power supplied by four size AA alkaline or rechargeable NiCd ...

Page 2: ...areful when using the camera near small children to avoid accidents Always keep batteries and other small objects that might be swallowed out of reach of small children Immediately call a doctor if such an object has been swallowed If you have dropped the camera or if it has received a severe blow that might have damaged its interior components immediately remove the batteries and do not use the c...

Page 3: ...e contact your dealer or an authorized service center Camera 1x Size AA alkaline batteries 4x Video cable 1x Wrist strap 1x Camera case 1x USB cable 1x Software on CD ROM USB drivers for Windows 98 Windows 98 Second Edition Windows 2000 Prof Me Windows XP USB drivers for Mac OS 8 6 9 9 0 2 9 0 4 Owner s Manual PDF Windows Macintosh Adobe Photoshop LE CD ROM for Windows Macintosh Printed documentat...

Page 4: ...e 10 LCD monitor 11 Viewfinder 12 Focus flash ready indicators 13 Brief instructions 14 Getting ready 14 Shooting 14 Playback 16 Deleting images 17 Power supply Loading the alkaline or rechargeable batteries 18 Checking battery power 19 Automatic cutoff 19 Using the optional power supply unit 20 Memory card Inserting and removing the CF memory card 21 Basic functions The TFT screen in Camera mode ...

Page 5: ...des 36 Automatic exposure control 38 Exposure compensation 39 Selecting resolution file size 40 Selecting the compression level 41 Selecting pixel sharpness 42 Selecting white balance 43 Resetting camera functions to default settings 44 Default camera settings 44 Selecting screen brightness 46 Image playback Displaying individual images 48 Displaying several images Index Mode 49 Magnified playback...

Page 6: ...ge storage 60 Basic settings Basic camera settings and functions 62 Default settings for Playback Set and Transfer modes 64 PC linkup Connecting the camera to PC 66 Connecting the camera to Macintosh 67 Tips and tricks How to handle batteries 69 Notes on the use of CompactFlash cards 70 Care of TFT screen 70 Taking care of your digital camera 71 Cleaning your digital camera 71 Questions and servic...

Page 7: ...7 Rollei Fototechnic GmbH Salzdahlumer Strasse 196 D 38126 Braunschweig Tel 0531 6800 0 Fax 0531 6800 243 eMail info rollei de ...

Page 8: ... D 38126 Braunschweig Tel 0531 6800 0 Fax 0531 6800 243 eMail info rollei de Names of parts and controls Camera front Shutter release Mode dial LCD monitor Self timer indicator Flash unit Lens Flash sensor Terminal cover Do not touch Viewfinder window ...

Page 9: ...avigate through the display of stored images and select camera functions As a rule the selection made in the different setting menus is confirmed by depression of the Right arrow The enter button at the back of the camera is enabled only when the four way control is needed for example for selection in index displays Focus indicator green Flash ready indicator Viewfinder enter button Strap lug Four...

Page 10: ...alzdahlumer Strasse 196 D 38126 Braunschweig Tel 0531 6800 0 Fax 0531 6800 243 eMail info rollei de Names of parts and controls Camera terminals bottom plate Video Out Power supply terminal USB terminal Tripod socket Battery cover ...

Page 11: ...nschweig Tel 0531 6800 0 Fax 0531 6800 243 eMail info rollei de Names of parts and controls LCD monitor Self timer Image size Battery status Frame counter No card Flash mode The max number of images is approximate The actual number is a function of JPEG compression ...

Page 12: ... 243 eMail info rollei de Names of parts and controls Viewfinder Parallax marks At distances of less than 1 m only the subject detail below these marks will be recorded It is therefore advisable to use the TFT screen for framing at short range Parallax marks Focus indicator green Flash indicator orange ...

Page 13: ...trast subject too dark or too close In macro mode subject too far away Blinks slowly Image being written to CompactFlash card approx 2x per second or loaded from card Focus area Flash indicator orange Lights Flash fully charged and ready to fire Blinks rapidly Flash being recycled approx 8x per second shutter cannot be released Blinks slowly With flash switched off approx 2x per second camera uses...

Page 14: ...oks Rollei Fototechnic GmbH Salzdahlumer Strasse 196 D 38126 Braunschweig Tel 0531 6800 0 Fax 0531 6800 243 eMail info rollei de Brief instructions Load batteries Insert memory card Shoot Turn mode dial to camera icon Press power switch on off ...

Page 15: ...iewfinder or on the TFT screen If necessary zoom in or out pressing the four way control Right wide angle Left telephoto Press shutter release halfway until the green lamp beside the viewfinder eyepiece lights green Press shutter release fully to take your picture Please note The shutter release works in two stages pressed halfway it activates the autofocus system that needs a few fractions of a s...

Page 16: ...g Tel 0531 6800 0 Fax 0531 6800 243 eMail info rollei de Brief instructions Playing back images Turn the mode dial to the Playback icon If the camera is still off press the power switch Your last shot will be displayed using the four way control you can navigate between all the pictures stored on your memory card ...

Page 17: ...way control on Delete item of menu 3 Right hand arrow of four way control once more on Select Image item of submenu An overview of six images will be displayed the image to be deleted being highlighted 4 Once more select this image by pressing the DISP on off button until delete icon recycle bin appears in image 5 Finally press enter button and answer the following dialog by 6 pressing the Down ar...

Page 18: ...then open the flap 2 Load the batteries in accordance with the marks Loading alkaline or rechargeable batteries The camera should prefer ably be used with high capacity NiMH batteries After changing batteries check whether the built in clock is set to the correct date and time If the camera is without power supply for over five minutes the clock may be slow or it may reset In this case set date an...

Page 19: ...nd disappearing once more battery power is insufficient for camera operation Replace all batteries by fresh ones or use the optional power supply unit If the LCD monitor is blank replace all batteries and make sure they are inserted with their poles properly oriented If left unused for three minutes the camera will automatically switch off to save power To resume operation press the power switch I...

Page 20: ... unit is particularly helpful when the camera is linked up with a PC Before changing over from battery power to AC or vice versa make sure that your camera is turned off Never change the power supply with the camera switched on Connect the plug to the power supply terminal of the camera Plug the power supply unit into a wall outlet Note that the power supply unit will not recharge any batteries in...

Page 21: ...tilt or jam the card To avoid jamming make sure the card is inserted with the proper end facing the camera Never use force to avoid damage to card and camera The card slot of the camera has a small hinged safety and ejector lever This holds the card in place and when folded serves to eject it After properly inserting the card push it as far as it will go The safety lever will move out and can be f...

Page 22: ...el 0531 6800 0 Fax 0531 6800 243 eMail info rollei de Basic functions The TFT screen in Camera mode Each depression of the Display button will change the screen display as follows Live image Camera settings displayed TFT screen turned off Live image Camera settings not shown ...

Page 23: ...531 6800 0 Fax 0531 6800 243 eMail info rollei de Basic functions Screen settings Focusing mode see page 42 White balance see page 43 Flash mode see page 33 Image quality see page 40 Frame counter Exposure compensation see page 39 Image size see page 40 Drive Modus siehe Seite 36 ...

Page 24: ...tter release to take your picture Should the green lamp blink check the following points Did you try to focus on a detail that is difficult to focus on See page opposite Is your subject less than the minimum focusing distance away or over 40 cm in Macro mode The autofocus system is center weighted If your subject is off center the camera will focus on the background In this case use focus lock Pla...

Page 25: ...etect focus This is why there are some subjects that make autofocusing impossible In this case either use focus lock focusing on a subject at the same distance or switch to manual focusing Special focusing situations Your subject is too dark Your subject has insufficient contrast such as blue sky or a white wall Subjects located at different distances overlap in the focus area Your subject is too ...

Page 26: ...tal zoom is operative only with the TFT screen switched on To turn on the digital zoom press the Right arrow of the four way control beyond the maximum value for two seconds Note Use this feature only in exceptional cases and for pictures that require only lesser resolution because the camera will automatically change over to 480x640 pixel resolution The digital zoom should not be confounded with ...

Page 27: ...27 Rollei Fototechnic GmbH Salzdahlumer Strasse 196 D 38126 Braunschweig Tel 0531 6800 0 Fax 0531 6800 243 eMail info rollei de ...

Page 28: ...te saving Only then is it ready for the next shot Switch the camera on Look through the viewfinder or switch the TFT screen on by pressing the screen icon on the camera back Press the shutter release fully down The camera will save your picture to the memory card Because of autofocusing the shutter release operates in two stages To take your picture always press it fully Always reset the camera fr...

Page 29: ...epiece focus indicator and a short beep will be heard Only now should you press the shutter release fully for exposure Always wait for the green light beside the viewfinder to come on before pressing the shutter release fully The beep may be disabled via the Set menu accessible with the mode dial It is advisable to practice the two stage release of the shutter For critical subjects you have the ad...

Page 30: ...center weighted it may also be switched to spot focusing Switching to spot autofocus Press the MENU button on the camera back and use the four way control to select Focusing Then select Area followed by Spot As the camera is turned off it will reset to normal center weighted auto focusing Choose spot autofocusing if you wish to focus precisely on a specific part of your subject Taking pictures Mod...

Page 31: ... button on the camera back and use the four way control to select Focusing Then select Focus and from there Manual Confirm your selection by pressing the Right arrow of the four way control To focus press the four way control Depression of the Up arrow will shift focus towards infinity of the Down arrow towards close up down to 8 cm Manual focusing is possible from infinity right down to close up ...

Page 32: ...ressing the Right arrow of the four way control If at all possible mount your camera on a tripod for close up shots Close up photography makes sense only if you use the TFT screen for framing This is why the TFT screen cannot be switched off in this mode The built in flash is unsuit able for close range photography It is therefore automatically disabled in the close up mode Macro autofocusing is p...

Page 33: ...ion Slow sync Flash is synchronized with a slow shutter speed Use this standard mode for candid photography Shooting against the light this mode will help you fill in deep foreground shadows if necessary with reduced output This is ideal for atmospheric available light shots in situations where flash would disturb the evocative mood of the scene The flash emits preflashes to reduce the risk of red...

Page 34: ...nk Releasing the shutter is then impossible For prolonged shooting sessions with flash impor tant events etc always use fresh or fully charged batteries Turn off the TFT screen and use the optical viewfinder if you have to use flash while the camera is warning of low battery power only two bars remaining Experiment with the different flash modes More often than not available light shots of station...

Page 35: ...Right arrow of the four way control In digital photography the high sensitivity of the CCD sensor may result in relatively bright flash pictures This is why you should experiment with flash exposure compensation described at left as well as with slow sync that brings out weaker background illumination in addition to your flash illuminated foreground subject Be sure to experiment with all available...

Page 36: ...e Right arrow Flash is disabled in the Continuous and Multishot 16 modes The Continuous mode is ideal for shooting motion sequences sports dance action since it allows photos to be taken con tinuously at intervals of just a few seconds These picture series are limited exclusively by the capacity of the memory card used This is why there should be sufficient storage space available for your picture...

Page 37: ...framing slightly the result will be particularly fasci nating In the Self timer mode the shutter will be released 10 seconds after depression of the shutter release The red lamp on the camera front will blink ever more rapidly reflecting the countdown In addition a beep will be heard This can be disabled via the Set menu and the mode dial under Beep When pressing the shutter release be sure not to...

Page 38: ... In the Area submenu you may select Full Central or Spot using the four way control pressing the Right arrow A blinking red lamp beside the viewfinder eyepiece warns against camera shake when the flash is off and recommends use of a tripod To lock in exposure settings press and hold the shutter release in its halfway position This allows pinpoint exposure control in the case of high subject contra...

Page 39: ... your selection Experiment with exposure compensation to optimize your digital images Slight compensation for example by 0 5 may be useful above all if you wish to print out your pictures directly i e without subsequent manipulation by PC image processing software be it on your own printer or through an Internet printing service since different printers and printer software interpret digital image...

Page 40: ...ess of whether or not the camera is switched off Selecting resolution file size 1704 x 2272 1200 x 1600 480 x 640 Resolutions file sizes available If you have sufficient storage space that is a sufficient number of or sufficiently powerful memory cards always use the highest possible resolution 1704 x 2272 pixels Reduce the resolution setting only if you are sure you need only a smaller file size ...

Page 41: ...rox 1 26 MB Fine approx 630 kB Standard and approx 310 kB Economy File sizes for 1704 x 2272 pixel resolution The compression level selected will remain in effect even if the camera is switched off In conjunction with the different resolution settings variation of the compression level allows very precise tailoring of the desired picture quality to your specific requirements Optimum quality is obt...

Page 42: ...under Image Sharpness When the camera is switched off it will auto matically reset to Normal unchanged saving of image data In most cases it is advisable to save the image data unchanged that is neither digitally sharpened nor softened Digital sharpening enhances the visual impression of sharpness by contour sharpening through numerical manipulation of pixel characteristics for example at the bord...

Page 43: ...ontrol When the camera is switched off it will auto matically reset to automatic white balance Similar to a video camera a digital still camera also has to adjust to the color temperature of the pre vailing light to render color as naturally as possible Automatic white balance will be entirely sufficient for a large number of subjects Only in extreme lighting situations which you can recognize fro...

Page 44: ...ults select Yes and press the Right arrow of the control Resetting camera functions to default settings The camera offers a multitude of settings for shooting However since only some of these are reset when the camera is switched off the Reset mode is a convenient means of defaulting all of them This reset within the Camera menu mode dial on top plate set to red camera icon affects only the shooti...

Page 45: ...s default to the following settings Flash Autoflash with red eye reduction Focus Mode Autofocus Focus Area Center weighted Drive Mode Single frames Image size Full format 1704 x 2272 pixels Quality Medium compression White Balance Automatic Exposure EV Zero exposure compensation Exposure Area Center weighted metering Sharpness No sharpening Camera TFT screen LCD Screen brightness set to a medium 5...

Page 46: ...ghtness where values from 0 to 9 can be set on a scale Confirm by pressing the Right arrow of the control Your setting will remain effective even when the camera is switched off Screen brightness can also be set in the Playback menu Taking pictures Mode dial set to Camera icon Screen dark Camera defective Not necessarily Before turning the camera in for repairs check preferably in a dark room whet...

Page 47: ...47 Rollei Fototechnic GmbH Salzdahlumer Strasse 196 D 38126 Braunschweig Tel 0531 6800 0 Fax 0531 6800 243 eMail info rollei de ...

Page 48: ...mber the shooting date and time Pressing the screen display button again will display the entire image without these data To navigate through the pictures saved on your memory card press the Left arrow of the four way control to go back the Right arrow to go forward The possibility of checking all your pictures right after the shot is one of the main advantages of digital photography Immediately a...

Page 49: ...the first image on your card which will be highlighted in color Using the four way control you can shift this frame to select separate images After the first nine another nine images will be opened To open up the selected image to full size press the ENTER button on the camera back Go back to Index view pressing the screen display button twice The Index mode is very convenient above all with high ...

Page 50: ...now press the Right arrow of the control the details of the image will be displayed at 2x magnification A magnifier icon and 2 0x will also appear on the screen The image section displayed can now be shifted in all four directions with the aid of the four way control To go back to standard display press the MENU button The magnifier mode is ideal for checking image detail and focus In portraits or...

Page 51: ... screen time of the pictures can be set via the Time submenu to either 2 3 5 or 10 seconds The order of the pictures shown can be selected via the Direct submenu with the options Forward Backward and Random Your slide show will be particularly impressive if you show your pictures on a TV screen see Playback via TV set To do this connect the video cable supplied to the Video Out terminal of your ca...

Page 52: ... camera single frames zoom magnifier and above all slide show Dark TV screen Check whether the right video input of your TV set is activated Many TV sets have several video inputs Connecting your digital camera to a TV set is a neat way of viewing your pictures quickly and hassle free on a large screen or showing them to your friends You may have to turn up the color of your TV set and reduce brig...

Page 53: ...53 Rollei Fototechnic GmbH Salzdahlumer Strasse 196 D 38126 Braunschweig Tel 0531 6800 0 Fax 0531 6800 243 eMail info rollei de ...

Page 54: ...the four way control to select Delete Press the Right arrow of the control to access a submenu where depression of the same arrow under Select Image lets you delete one of six pictures displayed The image selected is highlighted in color and has to be confirmed by pressing the screen display button Then select Yes in the dialog that follows and confirm by pressing the Right arrow of the control Pl...

Page 55: ...ress the MENU button then select Delete using the four way control Press the Right arrow of the four way control to access a submenu where another depression of under All Images will delete all the pictures on your card In the submenu that follows confirm Yes by pressing again Please note that deleted images are irreversibly lost Frequently used memory cards should occasionally be reformatted Form...

Page 56: ...D a set of thumbnails is displayed for selection with the four way control Preset the number of prints desired for the image selected by pressing the Up arrow of the control A compatible printer will then print the desired number of copies from the card The DPOF function lets you select right in the camera and thus without connection to a PC individual images for subsequent printout on DPOF compat...

Page 57: ...57 Rollei Fototechnic GmbH Salzdahlumer Strasse 196 D 38126 Braunschweig Tel 0531 6800 0 Fax 0531 6800 243 eMail info rollei de ...

Page 58: ...enu with the options New and Select New lets you generate and name new folders Select letters or numbers with the Up or Down arrow of the control Select lets you select the folders available on your card You don t normally need to pay attention to folder management since the required folders are automatically generated for each card However for special projects or in the case of cards of very high...

Page 59: ...play all the folders on your card that can be deleted with the exception of the write protected Default folder Caution You will also delete all the images contained in these folders This delete function only serves to delete folders created either by the camera or by you in the camera Folders created on your card in a PC will not be displayed Note regarding the use of memory cards in different dig...

Page 60: ...been adopted for storing images in digital cameras This worldwide standard guarantees that The pictures taken with this camera cannot only be displayed on the camera screen but also on other digital cameras as well as other multimedia equip ment such as video beamers The images can be printed out on different printers The memory cards can be used interchangeably in different cameras and camera sys...

Page 61: ...e four way control to select LCD and Brightness where values from 0 to 9 can be set on a scale Confirm by pressing the Right arrow of the control Your setting will remain effective even when the camera is switched off Screen brightness can also be set in the Camera mode in the Camera menu Screen dark Camera defective Not necessarily Before turning the camera in for repairs check preferably in a da...

Page 62: ...es to format memory cards Caution Formatting will auto matically delete all images even those in new folders Power Save Here you can set the interval after which the camera will automatically cut off to save power The following settings are available 1 min 3 min 5 min 10 min and 30 min When the camera is connected to a PC or used with the power supply unit the interval is fixed at 30 min default F...

Page 63: ...TV standard PAL is fixed Language This menu allows the selection of either German or English for the camera menus Default The Default Reset menu lets you reset all Playback Set and Transfer functions to default Note The Camera menu has its own reset function Always set date and time since these data are very useful in filing and managing your pictures Here you can cancel the beeps which in certain...

Page 64: ...faults are reset in the Playback Set and Transfer modes In Playback menu Delete Selected image single frame Slide Show Time Screen time 5 seconds Slide Show Direction Forward playback Print STD standard Folders Numbering of folders 100SK330 LCD camera screen 5 medium brightness In Camera Set menu Power Save Automatic cutoff after 3 minutes Beep On In Transfer menu Storage Transfer to PC On This is...

Page 65: ...65 Rollei Fototechnic GmbH Salzdahlumer Strasse 196 D 38126 Braunschweig Tel 0531 6800 0 Fax 0531 6800 243 eMail info rollei de ...

Page 66: ...alog box is displayed Please wait When the Welcome dialog box appears click Next When the Software License Agreement appears please read it carefully and take your decision Back Back to preceding dialog box Yes Agrees and takes you to next screen No Exit When the Start Copying Files box is displayed select Next Start installation Back Back to preceding dialog box Cancel Exit When the Setup Complet...

Page 67: ...Welcome box appears click Continue Start installation by clicking on Install Read warning then click on Continue If necessary exit by clicking on Cancel Installation has been successfully completed To initial the program installed restart your computer suggested or click on Continue if the Twain driver is to be activated right away This is how it works This is how it looks ...

Page 68: ... long as the camera is connected to your PC it will automatically switch off after 30 minutes Connecting the camera to PC Macintosh When linking up your camera with a computer and transferring data the batteries should have full power If the batteries have only limited power there is a risk that the camera will cut off during data transmission An error message will be displayed and the camera and ...

Page 69: ...es may damage the battery compartment With alkaline batteries the battery status indicator may signal less power than is actually available When you use the camera the icon disappears Caution Batteries may get hot during use and should therefore be handled with care when removing or replacing them Switch the camera off and wait long enough for the batteries to cool down Your camera has been design...

Page 70: ... away from electrical fields and static charges Do not bent the card nor expose it to heavy impact Do not touch the electrical contacts with your fingers or a metallic object Protect the card from humidity heat and direct sunlight Keep the card away from powerful magnets such as in loudspeakers Keep the card in its case when not using it Care of TFT screen The TFT screen of the camera is a highly ...

Page 71: ...mera To clean your camera and lens use a soft clean and dry cloth First blow off sand or dust Do not try to wipe it off right away since this might cause scratches To clean the lens surface first use a blower brush to remove dust or sand then apply some lens cleaning fluid to a clean cloth Never use organic solvents to clean your camera Avoid touching the lens as much as possible Cleaning your dig...

Page 72: ...prox 8x per second when shutter release is depressed halfway Are you trying to shoot Step back to maintain a 24 a subject that is less distance of at least 40 cm than 40 cm away or Use macro mode for in macro mode subjects that are between over 40 cm away 8 cm and 40 cm away Shutter does not Is camera switched off Turn control dial 32 release to and switch camera on Is camera set to Record Does gr...

Page 73: ...s full Shutter does not release Is camera switched on Turn control dial to and switch camera on 54 32 Are batteries spent Replace all four batte ries or use the AC adapter sold sepa rately 18 Have batteries been inserted with wrong polarity Reload them with proper polarity 18 Is LCD screen switched off Press DISPLAY button to switch it on 22 Camera has turned off automatically to save power Turn i...

Page 74: ...s no CF card loaded Insert a card Green focus lamp blinks slowly about twice per second and PLAYBACK blinks on screen Camera is reading data from CF card Wait until it has finished and the focus lamp as well as PLAY BACK stop blinking Flash picture comes out underexposed Was your subject within flash range Make sure your subject is within range of the built in flash unit 0 4 3 m ...

Page 75: ...e display will go dead after five seconds while the lens moves out Replace the batteries Image file damaged Did you remove your CF card while it was accessed by the camera Never remove your CF card while the green focus lamp is blinking slowly after exposure about twice per second 21 Camera does not work properly Remove the batteries and replace them If the camera malfunctioned while it was powere...

Page 76: ... Shooting modes Mode Single frame continuous shooting 16 image multishot self timer Self timer Delay approx 10 s Built in flash unit Recycling time approx 8 s for fill flash Flash modes Autoflash fill flash flash off autoflash with red eye reduction default setting slow sync flash disabled in macro mode Interfaces Video Out Composite signal PAL H resolution 220 lines PC interface USB terminal Univ...

Page 77: ...00Prof Me 16MB RAM preferably 32 MB 110 MB free disk space VGA color monitor CD ROM drive 3 5 diskette drive USB and Video Out terminals System requirements for iMac ibook G3 blue white series G4 series Mac OS 8 6 9 9 0 2 preferably 9 0 4 32MB RAM or higher 110 MB free disk space VGA color monitor CD ROM drive USB and Video Out terminals All data at time of going to print subject to change without...

Reviews: