background image

OWNER’S MANUAL

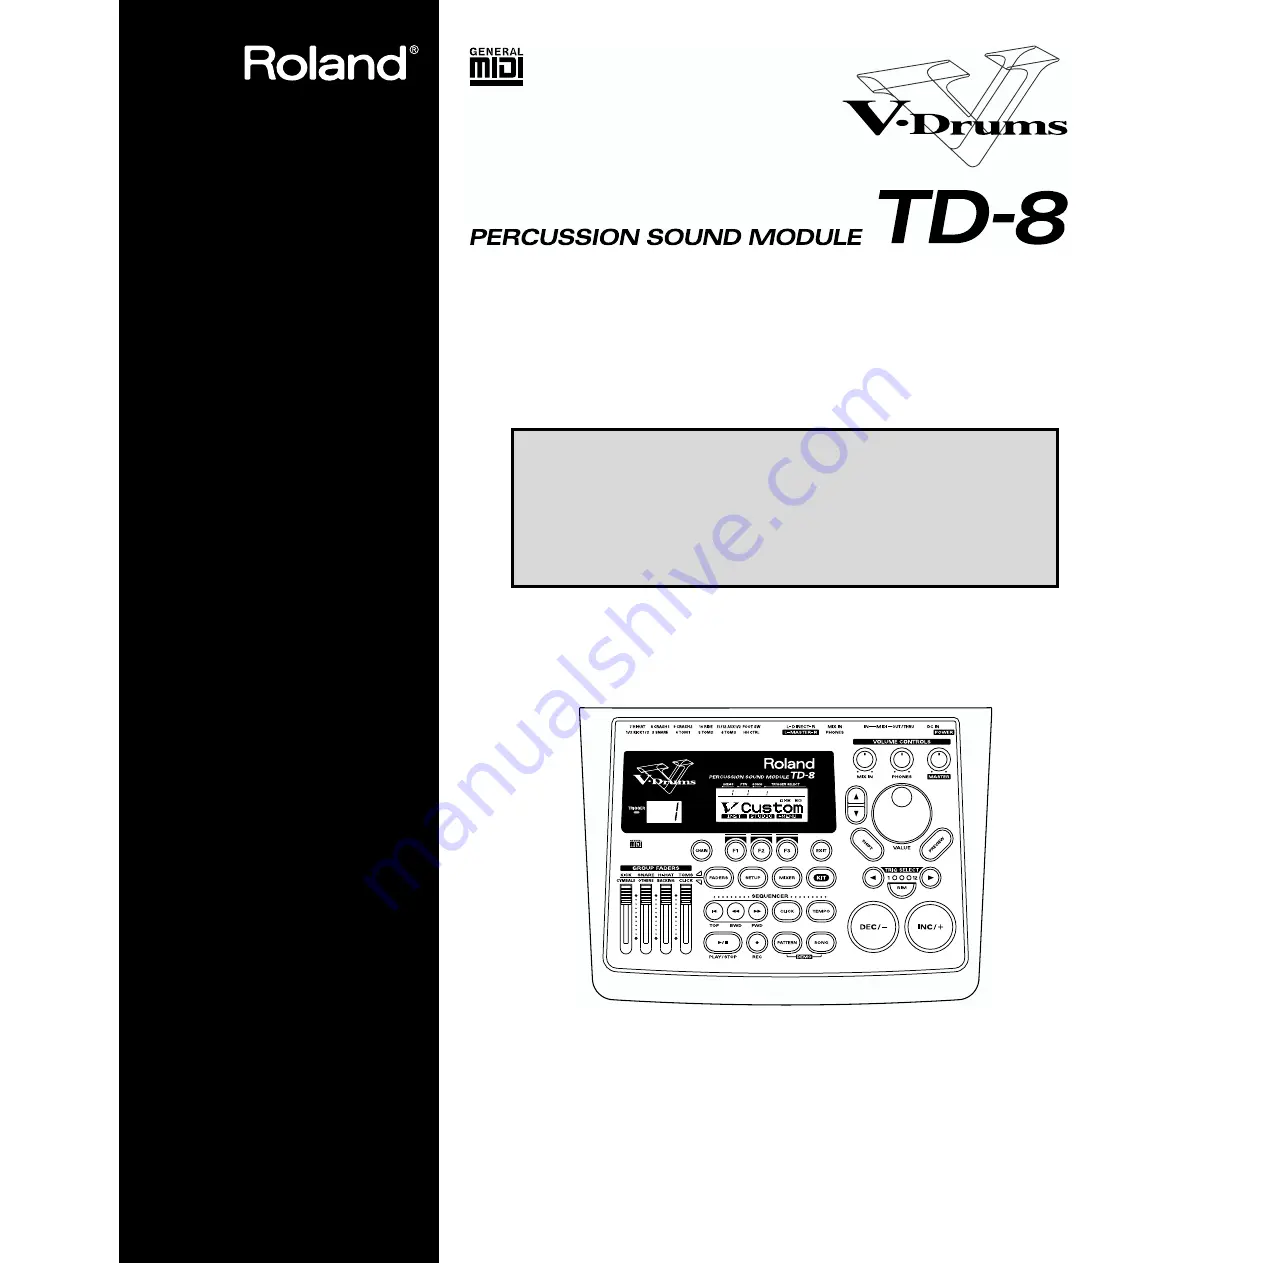
Thank you, and congratulations on your choice of the Roland Percussion Sound 
Module TD-8.

* All product names mentioned in this document are trademarks or registered trademarks of their 

respective owners.

Copyright © 1999 ROLAND CORPORATION

All rights reserved. No part of this publication may be reproduced in any form 

without the written permission of ROLAND CORPORATION.

Before using this unit, carefully read the sections entitled: “USING THE 

UNIT SAFELY” (p. 2–3) and “IMPORTANT NOTES” (p. 4). These sections 

provide important information concerning the proper operation of the unit. 

Additionally, in order to feel assured that you have gained a good grasp of 

every feature provided by your new unit, Owner’s manual should be read 

in its entirety. The manual should be saved and kept on hand as a 

convenient reference.

Summary of Contents for V-Drums TD-8

Page 1: ...eproduced in any form without the written permission of ROLAND CORPORATION Before using this unit carefully read the sections entitled USING THE UNIT SAFELY p 2 3 and IMPORTANT NOTES p 4 These sections provide important information concerning the proper operation of the unit Additionally in order to feel assured that you have gained a good grasp of every feature provided by your new unit Owner s m...

Page 2: ...y become a shock or fire hazard Never use a power cord after it has been damaged IMPORTANT THE WIRES IN THIS MAINS LEAD ARE COLOURED IN ACCORDANCE WITH THE FOLLOWING CODE BLUE BROWN As the colours of the wires in the mains lead of this apparatus may not correspond with the coloured markings identifying the terminals in your plug proceed as follows The wire which is coloured BLUE must be connected ...

Page 3: ...outlet with an unreasonable number of other devices Be especially careful when using extension cords the total power used by all devices you have connected to the extension cord s outlet must never exceed the power rating watts amperes for the extension cord Excessive loads can cause the insulation on the cord to heat up and eventually melt through 016 Before using the unit in a foreign country co...

Page 4: ... this message have the battery replaced with a fresh one as soon as possible to avoid the loss of all data in memory To have the battery replaced consult with your retailer the nearest Roland Service Center or an authorized Roland distributor as listed on the Information page Additional Precautions 551 Please be aware that the contents of memory can be irretrievably lost as a result of a malfuncti...

Page 5: ... Accompaniment of Several Measures 22 About the Display in the Upper Part of the Screen 23 Quick Start 25 Before You Begin Playing 26 Mounting the TD 8 to the Stand 26 Connecting Pads and Pedals 27 Connecting Your Audio System or Amp 29 Turning on the Power 30 Turning Off the Power 31 Listening to the Demo Song 32 Specifying Pads and Performing 34 Specifying the Types of Pads to Be Connected 34 Ma...

Page 6: ... 68 Playing Back Patterns Accompaniment of Several Measures 68 Playing Back Songs 70 Adjusting the Volume of the Accompaniment and Click Sound 71 Muting the Drums in Patterns and Songs 72 Using the Pads to Play Patterns 74 Playing Along with General MIDI Scores 75 Advanced Use 77 Chapter 1 Making the Settings for the Drum Kit 78 Choosing a Drum Kit 78 About the DRUM KIT Screen 78 Naming the Drum K...

Page 7: ...the Relative Volume of Pads 92 Adjusting the Panning Stereo Position 93 Adjusting the Overall Drum Kit Volume 93 Chapter 4 Playing While Listening to Metronome Clicks 94 Switching the Click On Off and Setting the Volume 94 Setting the Tempo 94 Setting the Time Signature 94 Setting How the Sound Plays Interval 95 Choosing a Sound 95 Changing the Panning Stereo Position 95 Choosing the Output Destin...

Page 8: ...D START 112 Importing Data from Another Sequencer 112 Editing a Pattern 113 Copying a Pattern COPY 113 Copying Part of a Pattern by Measures 114 Inserting a Blank Measure INSERT 115 Deleting a Pattern DELETE 116 Deleting an Unneeded Measure 116 Erasing a pattern ERASE 117 Erasing Unneeded Data to Make a Measure Blank 117 Naming a Pattern NAME 118 Setting Write Protection for a User Pattern PATTERN...

Page 9: ...ions FOOT SWITCH 144 Copying Various Settings 145 Copying a Drum Kit DRUM KIT COPY 145 Copying a Drum kit Instrument INSTRUMENT COPY 146 Copying Mixer Settings MIXER COPY 147 Copying Studio Settings EFFECT COPY 147 Making Settings for the Preview Button 148 Chapter 9 Features Using MIDI 149 Saving Data to an External MIDI Instrument BULK DUMP 149 Saving Data 149 Returning Saved Data to the TD 8 15...

Page 10: ...and Pedal Issues 168 MIDI related Problems 168 Sequencer related Problems 169 Click Issues 170 Display related Problems 171 Restoring Settings to Their Default Values 172 How to Use the Acoustic Drum Trigger 173 Messages and Error Messages 174 About MIDI 176 Preset Drum Kit List 179 Drum Instrument List 180 Preset Percussion Set List 184 Backing Instrument List 186 Preset Pattern List 188 Paramete...

Page 11: ...as patterns and songs performance recording click settings and pattern and song editing Chapter 7 Settings for the entire TD 8 This describes functions for controlling the TD 8 such as adjusting the sound and making settings to the sound generator Chapters 8 Convenient functions and how to use them These chapters explain functions such as copy how to use pads or pedals for pattern and song play ba...

Page 12: ...age the head but the brush tips present a great danger of piercing and snagging the fine mesh of the head itself Cross Stick Closed Rim Shot Technique Available p 42 When a PD 80 or PD 120 pad is used you can play using the cross stick technique Detecting the strike position and using cross stick closed rim shot performance with brushes is possible with TRIGGER INPUT3 SNARE Pitch Control Available...

Page 13: ...ctice along with patterns and songs You can also practice with the drum instruments of patterns and songs muted out You can also create your own original backing patterns If you want to record brush swish sweep sounds to MIDI the only brush kit that can record MIDI data is MIDIbrsh Support for General MIDI p 159 The TD 8 has a GM mode that can play back GM scores This mode includes a function allo...

Page 14: ... and number of measures in indicated in the upper part of the screen In this owner s manual this will be referred to as the display CHAIN Button Lets you make Drum Kit Chain settings a function that allows a user specific order or arrangement of drum kits p 138 F1 F2 F3 Button These buttons change their function depending on the contents of the display The lower part of the display will indicate t...

Page 15: ...his dial has the same function as the INC and DEC buttons Use this dial when you wish to make large changes in drum kit settings or edited values p 20 SHIFT Button Used in conjunction with other buttons When the functions are as shown below pressing the SHIFT button changes the indicated functions For more detailed information refer to p 19 fig 003 PREVIEW Button Used to audition an INST instrumen...

Page 16: ...onal cable PCS 31 or standard insert cable two pads may be connected to this trigger input jack With two pads you can switch drum kits or patterns and songs PAD SWITCH p 142 HH CTRL Jack Accepts connection of a hi hat control pedal FD 7 p 27 FOOT SWITCH Jack Accepts connection of an optional foot switch FS 5U A foot switch can be used to select kits and start stop the sequencer etc Use a special P...

Page 17: ...PHONES jack MIDI Connector IN OUT THRU Use these connectors when playing sounds from the TD 8 s sound generator with an external MIDI sequencer and when loading saved settings data bulk data p 149 POWER Switch This switch turns the power on off p 30 DC IN Jack Connect the included AC Adapter here p 29 Cord Hook Anchor the power cord p 29 Security Slot http www kensington com ...

Page 18: ...g SETUP Cursor fig 004 Cursor refers to the highlighted characters indicating an on screen item that can be set If the screen contains more than one item that can be set use the CURSOR and buttons to move it to the parameter to be set Hold down CURSOR and press or hold down CURSOR and press to move the cursor more rapidly Function buttons F1 F2 F3 The F1 F2 F3 buttons are called the function butto...

Page 19: ...unction button that displays is pressed the following menu like screen appears in the display This menu is called a pop up menu You can move the cursor within the menu with the INC or DEC buttons the VALUE dial or the or buttons After this when you once again press a function button under the pop up menu the settings screen then appears fig 007 Example Carry out the following operation 1 Press KIT...

Page 20: ... pressed the value decreases This is convenient for fine adjustments When making an on off setting INC will turn the setting on and DEC will turn it off If you hold down INC and press DEC the value will increase rapidly If you hold down DEC and press INC the value will decrease rapidly Holding down SHIFT while pressing INC or DEC magnifies all the values being changed VALUE dial Since the dial all...

Page 21: ...ng the Snare Volume 1 Press FADERS lighting the upper indicator 2 Move the GROUP FADERS SNARE slider The slider position shows the current snare volume KICK SNARE HI HAT TOMS 1 2 KICK1 2 3 SNARE 7 HI HAT 4 TOM1 5 TOM2 6 TOM3 11 12 AUX1 2 CYMBALS OTHERS BACKING CLICK 8 CRASH1 9 CRASH2 10 RIDE Percussion part p 102 Backing part p 102 Metronome click Even when the indicators are switched with FADERS ...

Page 22: ...save these changes you can also restore the original factory settings The drum kits included with the TD 8 are called Preset drum kits For more on the actual procedures involved refer to Kit Copy to restore single patches or copy patches to other locations p 145 and Factory Reset p 172 About the Patterns Accompaniment of Several Measures The TD 8 also comes with Patterns 1 700 Preset patterns alre...

Page 23: ...UT 3 pad rim fig 01 007 Checking the Number of the Currently Selected Pattern or Song and the Measure Number Check here to determine whether a pattern or song is to begin playback when PLAY STOP is pressed If a pattern number appears in the upper part of the screen a pattern will begin playback fig 02 001b If a song number appears in the upper part of the screen a song will begin playback fig 02 0...

Page 24: ...24 ...

Page 25: ...25 Quick Start Quick Start ...

Page 26: ... the diagram fig Q1 001 e 2 Attach the TD 8 to the drum stand MDS 7U MDS 8 or MDS 10 For details on assembling the drum stand and attaching the TD 8 refer to the owner s manual for the drum stand The TD 8 can be restored to factory settings Refer to Restoring Settings to Their Default Values on p 172 Use the screws provided with the TD 8 Use of other screws may result in damage to the unit To atta...

Page 27: ...le fig Q02 e Before using pads with mesh heads PD 80 PD 80R PD 100 PD 120 KD 80 or KD 120 be sure to adjust the head tension Striking the head when the head tension is loose may damage the sensor For more information on adjusting the head tension refer to the owner s manual for each pad To enjoy optimum expression in your performances we recommend the use of the Roland line of pads PD 5 PD 7 PD 9 ...

Page 28: ...the trigger inputs 1 2 KICK1 2 and 11 12 AUX1 2 fig Q1 005 e If you are using the PD 7 PD 9 or KD 7 move the pad s polarity switch to the Roland position For more detailed information regarding the polarity switch refer to your PD 7 PD 9 or KD 7 owner s manual fig Q1 003 POLARITY Roland PCS 31 optional PD 7 KD 80 ...

Page 29: ... should the plug be pulled out accidentally and to avoid applying undue stress to the AC adaptor jack anchor the power cord using the cord hook as shown in the illustration 3 Connect the MASTER L MONO and R jacks on the rear panel to your audio system or amp If using headphones connect them to the PHONES jack 4 Plug the AC adaptor plug into a power outlet Stereo headphones Stereo set etc AC adapto...

Page 30: ... system 3 Turn on the POWER switch 942 1 3 5 6 Depressing the hi hat control pedal FD 7 when turning on the power prevents proper functioning of the hi hat s opening and closing control Striking the pads when turning on the power degrades the pad response when the pads are struck lightly This unit is equipped with a protection circuit A brief interval a few seconds after power up is required befor...

Page 31: ...ed Check the following Is the volume turned down in the GROUP FADERS sliders Press the FADERS button to switch the function then readjust the volume When using headphones Are the headphones connected to the headphone jack Is PHONES turned completely to the left When using an external amp Is the amp connected to the MASTER OUTPUT jacks Is the input of the amp or other device properly connected Is t...

Page 32: ...GROUP FADERS function 2 Hold down PATTERN and press SONG The DEMONSTRATION screen appears fig Q1 011 Following Drum Kits are used for the demo songs 2 JazzFunk for FUSION 3 HardRock for ROCK 21 TR 808 for ANALOG 63 Jazz for JAZZ 1 2 4 5 3 6 Even when the indicators are switched with FADERS the settings values for the GROUP FADERS sliders do not change In other words current slider positions and ac...

Page 33: ...bbs Scott Tibbs has performed and conducted for several orchestral groups including the Atlanta Symphony Orchestra throughout the United States Canada Latin America and Japan His diverse compositional output ranges from numerous film theater and television projects to the symphonic concert stage He has received a Ph D degree in composition from UCLA and has recently composed music for recordings w...

Page 34: ...nals from each pad you must specify the trigger type of each pad connected to the TRIGGER INPUTS Making Roland Drum System V Custom Kit Settings Settings trigger bank for V Custom Kit are preset fig Q2 001 1 Press SETUP SETUP lights and the SETUP screen appears fig Q2 002 2 Press F1 TRIG The TRIGGER screen appears fig Q2 003 1 5 2 3 4 ...

Page 35: ...necting the PD 80 PD 80R PD 100 or PD 120 to TRIGGER INPUT 3 SNARE follow the procedure described on p 38 to set the head tension This completes the settings for all pads used for V Custom Kit Follow the procedure described on p 40 to check the settings If the setting differs from that in the following figure set the pad using the procedure described in Specifying Pads Individually p 36 V Custom K...

Page 36: ...he SETUP screen appears fig Q2 009 2 Press F1 TRIG The TRIGGER screen appears fig Q2 010 This screen shows a list of the pads specified for each TRIGGER INPUT Display Pad name Display Pad name PD5 PD 5 10A PD 100 PD7 PD 7 12A PD 120 PD9 PD 9 KD7 KD 7 KD 5 8 A PD 80 K 8 KD 80 8RA PD 80R K12 KD 120 1 9 2 3 5 4 7 For more on 8 B 8RB 10B 12B KIK SNR TOM FLR etc refer to p 128 ...

Page 37: ...ad being struck 7 Press INC or DEC or rotate the VALUE dial to select the name for the type of pad used Trigger type 8 Repeat Steps 6 and 7 to set the trigger type for each pad 9 Press KIT The DRUM KIT screen appears fig Q2 013 10 When connecting the PD 80 PD 80R PD 100 or PD 120 to TRIGGER INPUT 3 SNARE follow the procedure described on p 38 to set the head tension This completes the settings for...

Page 38: ...r accurate detection of the point where the pad is struck The tension of the head may change when the pad has been used for a length of time If this occurs use the following procedure to make adjustments as necessary fig Q2 014 1 Press SETUP SETUP lights and the SETUP screen appears fig Q2 016 2 Press F1 TRIG The TRIGGER screen appears fig Q2 017 2 4 1 9 6 ...

Page 39: ...n a setting of NORMAL gives a standard tension and TIGHT provides a stronger tension For now set this to NORMAL 7 Use your drumstick to strike the PD 80 PD 80R PD 100 or PD 120 head Strike a position approximately 1 inch 3 cm from the rim The indicator in the lower left of the display will indicate how far off the adjustment is fig Q2 020 e If a different TRIGGER TYPE is indicated refer to p 36 th...

Page 40: ...ctly If any sound is not correctly played check the settings once again and refer to Troubleshooting p 166 The PD 80 and PD 80R have tuning bolts at five positions around the head the PD 100 and PD 120 at six positions If the indicator moves greatly to the left or right adjust the tension of the entire head before making this setting The head tension adjustment does not work correctly when the SCA...

Page 41: ...and PD 120 also provide you with an additional head shot sound when playing rim shots fig Q2 023 e To play a rim shot you must strike both the head and the rim of the pad simultaneously When you play the rim shot the instrument assigned to the rim will sound Rim shot Normal shot Head Head Rim Head Head Rim When specifying the rim during editing with the PD 7 and PD 9 you also need to strike the he...

Page 42: ...ion of the pad you can mute the note while the note is still sounding This performance technique is known as choking Positional Sensing This function simulates movement across the snare drum head This function can be used with a PD 7 PD 9 PD 80 PD 80R PD 100 or PD 120 connected to TRIGGER INPUT 3 SNARE fig Q2 025 e The cross stick sound is also referred to as a closed rim shot The preset drum kit ...

Page 43: ...splay fig Q2 026 e Hi Hat Control Pedal Connecting a hi hat control pedal FD 7 allows you to play the hi hat with continuous control from open to closed positions fig Q2 027 Open hi hat Strike the pad without pressing the pedal Closed hi hat Strike the pad while pressing the pedal Pedaled closed Step on the pedal to trigger the foot close hi hat sound Pedaled open Depress then quickly release peda...

Page 44: ...for each pad room settings and mixer settings 2 Press INC or DEC or rotate the VALUE dial to select a kit 1 2 Pattern Inadvertently Starts Playing When Pad is Struck The pad is set to start playing a pattern when struck Pad Pattern p 139 To stop the song currently playing Press the PLAY STOP button on the panel the PLAY STOP light goes off To stop the song from playing when the pad is struck Turn ...

Page 45: ...to right the cymbals percussion part backing parts and the click sound Adjusting the Overall Volume The volume for each input and output are adjusted with the VOLUME CONTROLS fig Q3 004 MASTER Adjusts the volume of the MASTER OUTPUTS PHONES Adjusts the volume of the output from the PHONES jack MIX IN Adjusts the volume of the input from the MIX IN jack Signals from MIX IN are always sent to the MA...

Page 46: ...rforming Adjusting the TD 8 s sensitivity allows you to change the correlation between your playing velocity strength and the response and volume of the sound fig Q3 005 1 Press SETUP SETUP lights and the SETUP screen appears fig Q3 006 2 Press F1 TRIG The TRIGGER screen appears fig Q3 007 3 Press F1 BASIC The TRIGGER BASIC screen appears 1 7 2 3 4 6 ...

Page 47: ...ot increase the volume much As a general rule of thumb set the sensitivity so that the indicator reaches the maximum position when you play with your maximum dynamics 7 Press KIT The DRUM KIT screen appears fig Q3 007a You can also use TRIG SELECT to select the pad With electronic drum kits overall volume is another important element Listening at low volumes may make it seem that there is too litt...

Page 48: ...he click is heard only through headphones and is not output from the MASTER OUTPUT jacks fig Q3 010 1 Press CLICK CLICK lights and the click sound begins to play fig Q3 011 Adjust the click volume using the CLICK slider in the GROUP FADERS You can also change the tempo time signature sound etc For more on these procedures refer to p 94 Click is sounded Lit Click is not sounded Unlit 1 6 5 2 3 4 ...

Page 49: ...n appears fig Q3 012 3 Press CURSOR to move the cursor to OUTPUT 4 Press INC or DEC or rotate the VALUE dial to select PHONES fig Q3 013 5 Press KIT The DRUM KIT screen appears fig Q3 013a 6 To stop the click sound press CLICK CLICK light is turned off fig Q3 011 ...

Page 50: ...fects On and Off fig Q3 014 1 Press KIT The DRUM KIT screen appears fig Q3 015 2 Press F3 MENU A pop up menu appears fig Q3 016 3 Press INC or DEC rotate the VALUE dial or press CURSOR or to select FX SW fig Q3 017 1 6 2 4 5 3 ...

Page 51: ...f with F3 AMB Ambience The size of the room and the type of walls can be adjusted to modify the sound EQ Equalizer This adjusts the overall tone quality of the drum kit 6 Press KIT The DRUM KIT screen appears fig Q3 018a Turning these switches off removes the effects without influencing any of the other settings Before using the Ambience or Equalizer check to make sure that these switches are set ...

Page 52: ...f the person creating the sound thus providing a new type of user interface fig Q4 001 e Instrument INST This includes the materials used shape and other elements of the drums Studio STUDIO This covers the type of room in which the drums are played as well as the room s wall surfaces Mixer MIXER Here the finishing touches are made by changing mixer settings such as volume and pan that determine th...

Page 53: ...rum Kits p 44 to select the drum kit Here select the Drum Kit 1 V Custom The DRUM KIT screen appears fig Q4 002 2 Strike the pad to listen to the sound of the drum kit 3 To hear differences in the sound more clearly follow the procedures described in Turning Effects On and Off p 50 to turn all effects off When KIT F3 MENU FX SW is selected the settings screen appears 1 3 1 3 ...

Page 54: ...ou wish to change In this case strike the pad being used as the snare drum The instrument select page for the snare appears in the display fig Q4 012 1 5 1 4 2 When making rim settings the two steps described below apply Striking both the head and the rim Striking only the head then press RIM TRIGGER INPUT 1 KICK1 2 KICK2 11 AUX1 and 12 AUX2 cannot be selected for the rim TRIGGER INPUT 2 KICK2 and...

Page 55: ...ed below apply 1 Press CURSOR buttons to move the cursor to GROUP 2 Press INC or DEC or rotate the VALUE dial to select the instrument group You can also preview instrument sounds by pressing PREVIEW About the Material Used for the snare s Shell V SNARE only The shell drum body material of the instrument being used for the snare is indicated by an icon at the right of the screen Wood shells fig Q4...

Page 56: ...ell depth for the snare drum fig Q4 021 1 Follow the procedures described in Choosing Drum Kits p 44 to select the drum kit to be edited Here select the Drum Kit 1 V Custom The DRUM KIT screen appears fig Q4 022 2 Press F1 INST The INST screen appears Even with a pad actually connected to the TD 8 for the procedures in this section you can use TRIG SELECT to select the pad and then use PREVIEW whi...

Page 57: ... fig Q4 026 6 Press CURSOR to move the cursor to DEPTH 7 Press INC or DEC or rotate the VALUE dial to select the shell depth The instrument MEDIUM4S is set to NORMAL Let s change this to DEEP4 The shell s resonance increases fig Q4 028 8 Press KIT The DRUM KIT screen appears fig Q4 028a In the SHELL screen you can make settings for the shell depth type of head material and tuning ...

Page 58: ...low the procedures described in Choosing Drum Kits p 44 to select the drum kit to be edited Here select the Drum Kit 1 V Custom The DRUM KIT screen appears fig Q4 030 2 Press F1 INST The INST screen appears 3 Strike the pad being used for the snare The snare settings screen appears fig Q4 033 4 Press F2 EDIT 1 10 1 7 9 4 2 5 6 8 ...

Page 59: ...from CLEAR to COATED and compare the difference in sound fig Q4 036 This completes selection of the head material Next tune the head 8 Press CURSOR to move the cursor to TUNING 9 Press INC or DEC or rotate the VALUE dial to adjust the tuning Here change the setting from 0 to 30 fig Q4 038 10 Press KIT The DRUM KIT screen appears fig Q4 038a In the SHELL screen you can make settings for the shell d...

Page 60: ...e snare does not come into contact with the lower head fig Q4 039 1 Follow the procedures described in Choosing Drum Kits p 44 to select the drum kit to be edited Here select the Drum Kit 1 V Custom The DRUM KIT screen appears fig Q4 040 2 Press F1 INST The INST screen appears 3 Strike the pad being used for the snare The snare settings screen appears fig Q4 043 4 Press F2 EDIT When selecting the ...

Page 61: ...e is reduced resulting in a more closed sound fig Q4 046 This completes the muffling settings Next adjust the strainer tension 8 Press CURSOR to move the cursor to STRAINER ADJ 9 Press INC or DEC or rotate the VALUE dial to adjust the strainer tension Here select LOOSE and compare the difference in sound fig Q4 048 10 Press KIT The DRUM KIT screen appears fig Q4 048a In the MUFFLE screen you can s...

Page 62: ...en the instrument was selected When KIT F3 MENU FX SW is selected the settings screen appears fig Q4 055 1 Follow the procedures described in Choosing Drum Kits p 44 to select the drum kit to be edited Here select the Drum Kit 1 V Custom The DRUM KIT screen appears fig Q4 056 2 Press F2 STUDIO The STUDIO screen appears fig Q4 057 Turning Ambience switch off removes the Ambience without influencing...

Page 63: ...he cursor to TYPE 4 Press INC or DEC or rotate the VALUE dial to select the studio type Here select STADIUM and compare the difference in sound fig Q4 059 5 Press KIT The DRUM KIT screen appears fig Q4 059a These settings can be made for each individual drum kit ...

Page 64: ...Drum Kit 1 V Custom The DRUM KIT screen appears fig Q4 059a 2 Set each of the GROUP FADERS sliders KICK SNARE HI HAT TOMS CYMBALS and OTHERS to the same volume Here you should raise the volume to the maximum level 3 Press MIXER MIXER lights and the MIXER screen appears fig Q4 061 2 1 6 3 1 7 5 The GROUP FADERS functions are switched by pressing the FADERS button For details on using this refer to ...

Page 65: ...IT screen appears fig Q4 063a You can also select the pad with TRIG SELECT When setting the volume make sure that GROUP FADERS are all at the same level Using this method allows you to reproduce the same balance merely by selecting that kit The group faders should be used for making temporary adjustments to the volume Adjustments to the GROUP FADERS have no effect on settings in the mixer screen T...

Page 66: ... when the instruments were selected When KIT F3 MENU FX SW is selected the settings screen is displayed fig Q4 070 1 Follow the procedures described in Choosing Drum Kits p 44 to select the drum kit to be edited Here select the Drum Kit 1 V Custom The DRUM KIT screen appears fig Q4 071 2 Press F2 STUDIO The STUDIO screen appears fig Q4 072 Turning Equalizer switch off removes the Equalizer without...

Page 67: ...73 4 Press CURSOR to move the cursor to HIGH GAIN 5 Press INC or DEC or rotate the VALUE dial to change the value Here set this to 10 and compare the difference in sound fig Q4 075 6 Press KIT The DRUM KIT screen appears fig Q4 075a These settings can be made for each individual drum kit ...

Page 68: ...e PATTERN screen appears fig Q5 002 2 Press CURSOR to move the cursor to CATEG fig Q5 003 You can create your own original patterns as well Creating a Pattern by Recording a Performance REALTIMERECORDING p 108 The pattern s overall volume is adjusted with PHONES and MASTER Before starting play make sure you turn down these knobs and lower the volume You can then adjust to a suitable volume while t...

Page 69: ...5 004a The end of the Preset pattern name indicates the division type of phrase For more information see p 97 You can also do this with songs For details see p 122 Playing Back and Stopping Patterns Each press of PLAY STOP toggles between playback and stopping Stopping playback of the pattern returns you to the beginning of the measures played When playback of a pattern is stopped you can do the f...

Page 70: ...LAY STOP The PLAY STOP light goes off fig Q5 013a You can create songs by combining Preset patterns as well as original patterns that you record p 124 The song s overall volume is adjusted with PHONES and MASTER Before starting play make sure you turn down these knobs and lower the volume You can then adjust to a suitable volume while the song plays back For instructions on adjusting the relative ...

Page 71: ...o select the drum kit to be played 2 Bring down the GROUP FADERS OTHERS BACKING and CLICK sliders so that they are lower than the other sliders 3 Follow the procedures described in Playing Back Patterns Accompaniment of Several Measures p 68 or Playing Back Songs p 70 to play back a pattern or song 4 Press CLICK CLICK lights and the click sound begins to play fig Q5 006 5 Adjust the GROUP FADERS O...

Page 72: ...Here select the Pattern 75 A O R A PLAY STOP lights and playback of the pattern begins fig Q5 007a 2 Press F2 PART A pop up menu appears 3 Press DEC rotate the VALUE dial or press CURSOR to select MUTE fig Q5 007b Note numbers for muted drum sounds are predetermined and cannot Refer to p 185 for a list of mute note numbers 2 4 5 6 7 8 9 3 1 All percussion instruments in the Preset patterns except ...

Page 73: ... muted fig Q5 009 7 Again press F2 DRM PC The DRM PC icon is highlighted as shown below all of the percussion part are sounded fig Q5 008 8 Press PATTERN The PATTERN screen appears fig Q5 010 9 To stop playback of the pattern press PLAY STOP The PLAY STOP light goes off fig Q5 013a You can also make part mute setting with songs For details see p 124 For instructions on muting the performance of th...

Page 74: ...vides the kind of individualized performances available only with electronic drums This function is used in some of the preset drum kits Here let s play using Kit 6 1ManBand fig Q6 011 1 Follow the procedures described in Choosing Drum Kits p 44 to select the drum kit Here select the Drum Kit 6 1ManBand KIT lights and the DRUM KIT screen appears fig Q6 012 2 You can play the bass line note by note...

Page 75: ...ng with a GM Score p 160 The TD 8 can also be used as a sound module along with MIDI keyboards and MIDI sequencers For details refer to Using the TD 8 As a Sound Module p 156 When Using the TD 8 as a GM Sound Module The TD 8 functions as a 16 part multi timbre sound module The internal sequencer is disabled Drum kit parts cannot be played using MIDI messages sent from an external device They can b...

Page 76: ...76 ...

Page 77: ...77 Advanced Use Advanced Use ...

Page 78: ...es are indicated by BRUSH in the display No indication is shown with kits to be played using sticks For instructions on making the settings refer to Playing With Brushes p 80 5 Overall Kit Effects On Off When the effects are on the effect name appears in the screen When off nothing is indicated For instructions on making the settings refer to Switching Effects On and Off p 81 6 Number and Measure ...

Page 79: ...changed 5 Press INC or DEC rotate the VALUE dial or press CURSOR or to change the character 6 Press EXIT to finish F1 LEFT Move the cursor to the left F2 RIGHT Move the cursor to the right F3 CHAR Cycle between uppercase lowercase symbols SHIFT F1 INSERT A blank space is inserted at the cursor position and the characters after the insertion are moved back one space SHIFT F2 DELETE The character at...

Page 80: ...brushes If you wish to create a new brush kit it s simpler to copy an existing one and then edit it as you wish The setting you make here can also be viewed in the drum kit name page DRUM KIT fig 02 004 About Brush Trigger Settings Turning the Brush switch on switches the TD 8 to Brush trigger settings fig 02 004a e In the Brush settings the sensitivity is set at a high level to ensure reception o...

Page 81: ...or DEC or rotate the VALUE dial to make the setting 7 Press KIT The DRUM KIT screen appears PEDAL HI HAT VOLUME 0 15 Use MIXER to adjust the volume of other pads Switching Effects On and Off Ambience and the equalizer setting can be turned on off for each kit fig 02 006 1 Press KIT then F3 MENU KIT lights and a pop up menu appears 2 Press INC or DEC rotate the VALUE dial or press CURSOR or to move...

Page 82: ...ing the Settings Screen from Being Switched EDIT LOCK p 83 Choosing with the Trigger Select Button 1 Press KIT then F1 INST KIT lights and the INST screen appears 2 Press TRIG SELECT or to select the trigger input number The selected trigger input number is indicated in the upper part of the screen 3 Press RIM and select either the head or rim Head RIM is unlit Rim RIM is lit The rim cannot be sel...

Page 83: ...sing an Instrument On the TD 8 each sound is referred to as an instrument INST fig 03 001 1 Press KIT then F1 INST KIT lights and the INST screen appears 2 Strike a pad The settings screen for the struck pad appears GROUP The instrument type INST The instrument name 3 Press INC or DEC or rotate the VALUE dial to select the instrument You can select an instrument from the group name by pressing CUR...

Page 84: ... the INST screen appears 2 Strike a pad The settings screen for the struck pad appears GROUP The instrument type INST The instrument name 3 Press CURSOR to move the cursor to GROUP 4 Press INC or DEC or rotate the VALUE dial to select the group name 5 Press CURSOR to move the cursor to INST 6 Press INC or DEC or rotate the VALUE dial to select the instrument 7 Press KIT The DRUM KIT screen appears...

Page 85: ...e snare NORMAL DEEP1 DEEP2 DEEP3 and DEEP4 Making the shell deeper will increase the richness of the low range and make the sound fatter fig 03 004 Instrument group names that can be edited V KICK V SNARE V TOM 1 First press KIT then F1 INST then F2 EDIT and then F1 SHELL KIT lights and the SHELL screen appears 2 Strike a pad The settings screen for the struck pad appears 3 Press CURSOR to move th...

Page 86: ...the Head Here you can tune the drum head very accurately fig 03 006 Instrument group names that can be edited V KICK V SNARE V TOM 1 First press KIT then F1 INST then F2 EDIT and then F1 SHELL KIT lights and the SHELL screen appears 2 Strike a pad The settings screen for the struck pad appears 3 Press CURSOR to move the cursor to TUNING 4 Press INC or DEC or rotate the VALUE dial to make the setti...

Page 87: ...e of contact between the lower head and the snare resonating wires stretched across the lower head Tightening the strainer decreases the amount of time the snare continues to resonate resulting in shorter overall snare drum sound You can select from four tension settings no contact between the snare and head OFF loose LOOSE normal tension MEDIUM and strong tension TIGHT fig 03 008 Instrument group...

Page 88: ...ck pad appears 3 Press INC or DEC or rotate the VALUE dial to select an instrument other than the V KICK V SNARE or V TOM 4 Press F2 EDIT 5 Press CURSOR or to move the cursor to the parameter to be set 6 Press INC or DEC or rotate the VALUE dial to make the setting 7 Press KIT The DRUM KIT screen appears PITCH 480 480 Adjusts the pitch of the sound DECAY 31 31 Adjusts the decay time of the sound F...

Page 89: ...played fig 04 003 1 Press KIT then F2 STUDIO KIT lights and the STUDIO screen appears 2 Press CURSOR or to move the cursor to WALL 3 Press INC or DEC or rotate the VALUE dial to make the setting 4 Press KIT The DRUM KIT screen appears WALL WOOD PLASTER GLASS WOOD Simulates the sound of a wood walled room producing a warm sound PLASTER Simulates a plaster walled room producing a more naturally live...

Page 90: ... 2 KICK2 and 12 AUX2 can be used only when two pads are connected to TRIGGER INPUT 1 2 KICK1 2 or 11 12 AUX2 respectively p 27 Adjusting the Ambience Level for Each Individual Part Group AMBIENCE GROUP SEND LEVEL This adjusts the amount of Ambience effect for the drum kit part percussion part and other parts fig 04 005b 1 Press KIT then F2 STUDIO then F2 AMBSND and then F1 GRPSND KIT lights and th...

Page 91: ...Q Frequency Set the cutoff frequency in the range being boost and cut with the equalizer You can set the high range cutoff frequency with HIGH and the low range cutoff frequency with LOW GAIN Set the amount of boost or cut GAIN in the high frequencies HIGH and low frequencies LOW Raise to boost the sound lower to cut The equalizer has no effect when GAIN is set to 0 fig 04 006a Gain dB GAIN Cutoff...

Page 92: ...r 11 12 AUX2 respectively p 27 You can jump directly to the next screen by pressing F1 MENU 1 Press F1 MENU A pop up menu appears 2 Press CURSOR or to select the screen to be displayed 3 Press F1 to confirm the selection AMB AMBIENCE Jumps you to the Ambience send level settings screen p 89 OUT OUTPUT Jumps you to the Output settings screen p 137 Adjusting the Relative Volume of Pads Here s how to...

Page 93: ...The DRUM KIT screen appears PAN L15 CTR R15 RND ALT CTR CENTER Positions the sound in the center RND RANDOM The pan changes randomly each time the pad is struck ALT ALTERNATE The pan alternates left and right each time the pad is struck Adjusting the Overall Drum Kit Volume You can adjust the overall volume of the drum kit while preserving the volume balance between each of the pads fig 04 010 1 P...

Page 94: ...O screen is removed from the display TEMPO 20 260 Setting the Time Signature fig 05 002 1 Press CLICK then F1 INTRVL CLICK lights and the CLICK INTERVAL screen appears 2 Press CURSOR to move the cursor to the numerator upper numeral of the TIME SIGNATURE 3 Press INC or DEC or rotate the VALUE dial to set the numerator 4 Press CURSOR to move the cursor to the denominator lower numeral of the TIME S...

Page 95: ...e the setting INST VOICE CLICK BEEP METRONOME CLAVES WOOD BLOCK STICKS CROSS STICK TRIANGLE COWBELL CONGA TALKING DRUM MARACAS CABASA CUICA AGOGO TAMBOURINE SNAPS 909 SNARE 808 COWBELL Changing the Panning Stereo Position You can localize the metronome click within the stereo sound field fig 05 005 1 Press CLICK then F2 INST CLICK lights and the CLICK INST screen appears 2 Press CURSOR or to move ...

Page 96: ...DI keyboard Realtime Recording p 108 Changes in User pattern settings are saved automatically Basic operation The SEQUENCER buttons located on the front panel are used to perform basic operations and access the setting pages fig 06 001 TOP When pressed while the pattern is stopped this returns you to the beginning of the pattern BWD When pressed while the pattern is stopped this returns you to the...

Page 97: ...hereby grants to purchasers of this product the permission to utilize the sound recordings contained in this product for the creation and recording of original musical works provided however the sound recordings contained in this product may not be sampled downloaded or otherwise re recorded in whole or in part for any other purpose including but not limited to the transmission of all or any part ...

Page 98: ...ehearsal p 110 erase p 110 8 Part Mute Status p 108 The muted part icon is cleared Function buttons F1 F3 are used for various functions as explained below When you have finished making the settings press PATTERN to bring up this screen This prevents data from being overwritten inadvertently during performance Choosing with List Display Like the PATTERN page here you can select patterns from a lis...

Page 99: ...The cursor moves to the pattern name 5 Follow the instructions in Choosing with List Display p 98 to select the pattern Playing Back a Pattern fig 06 007 1 Follow the instructions in Choosing a Pattern p 97 to select the pattern to play 2 Press PLAY STOP PLAY STOP lights and playback of the pattern begins 3 Press PLAY STOP to stop playback of the pattern The PLAY STOP light goes out When SONG is p...

Page 100: ...hange to tempo for playback fig 06 009 1 Follow the instructions in Choosing a Pattern p 97 to select the pattern the tempo of which is to be set 2 Press TEMPO TEMPO lights and the TEMPO screen appears 3 Press INC or DEC or rotate the VALUE dial to set the tempo 4 When you have finished making the settings press TEMPO The TEMPO light goes out and the TEMPO screen is removed from the display TEMPO ...

Page 101: ...ing Supplementary function for LOOP and 1SHOT QUICK PLAY OFF ON QuickPlay starts playback of the pattern from the first note first event even if when you recorded the pattern you left a pause at the beginning For example if you had just played recorded freely ignoring the tempo clock In Step 5 above move the cursor to QUICK PLAY to switch this on or off Supplementary function for TAP RESET TIME OF...

Page 102: ...ng or Playback COUNT IN p 112 Making the Settings for the Part For the drum kit part settings refer to Chapters 1 3 Choosing a Part fig 06 013 1 Press PATTERN then F2 PART PATTERN lights and a pop up menu appears 2 Press INC rotate the VALUE dial or press CURSOR to move the cursor to SETUP 3 Press F2 to confirm your choice 4 Press F1 PAGE 1 The PART PAGE 1 screen appears 5 Press CURSOR o move the ...

Page 103: ...EVEL 0 127 This adjusts the Ambience send level PAN L15 CTR Center R15 This adjusts the left right placement of the sound L15 is far left CTR is center and R15 is far right BEND RANGE 0 24 This adjusts the amount of change in pitch with pitch bend at the maximum level You can adjust this from 0 to 24 up two octaves Adjusting the Overall Ambience of the Backing Parts AMBIENCE GROUP SEND LEVEL This ...

Page 104: ...ou attempt to change the settings fig 06 016 1 Follow the procedures described in Choosing a Part p 102 to select the percussion part 2 Press CURSOR to move the cursor to PERC SET 3 Press INC or DEC or rotate the VALUE dial to choose the percussion set 4 Press PATTERN The PATTERN screen appears Adjusting the Volume and Ambience AMBIENCE SEND LEVEL fig 06 017 1 Follow the procedures described in Ch...

Page 105: ...es in the way the pattern is played 1 Follow the procedures described in Choosing a Part to select the percussion part 2 Press F3 INST The PERC INST screen appears 3 Press CURSOR or to move the cursor to the note to be set 4 Press INC or DEC or rotate the VALUE dial to choose instrument 5 Press PATTERN The PATTERN screen appears You can confirm the sound of the selected instrument by pressing PREV...

Page 106: ... PITCH and DECAY settings beyond a certain fixed value Muting a Specific Part PART MUTE You can mute specific parts in patterns or songs The part mute settings will remain in effect even if you change the pattern or song fig 06 022 e 1 Press PATTERN then F2 PART PATTERN lights and a pop up menu appears 2 Press DEC rotate the VALUE dial or press CURSOR to move the cursor to MUTE 3 Press F2 to confi...

Page 107: ...for a list of mute note numbers 1 Press PATTERN then F2 PART PATTERN lights and a pop up menu appears 2 Press DEC rotate the VALUE dial or press CURSOR to move the cursor to MUTE 3 Press F2 to confirm your choice The PART MUTE screen appears You can also set this by pressing SHIFT MIXER 4 Press F2 DRM PC The percussion part is indicated as shown below fig 06 024 5 Press PATTERN The PATTERN screen ...

Page 108: ...only brush kit that can record MIDI data is MIDIbrsh Please keep in mind that even though there are 100 user patterns the amount of memory available will be determined by how much data is recorded into each pattern Storing performance data that describes every instance where the Hi Hat Control Pedal is used and that includes strike position detection rapidly consumes the User memory For more on ho...

Page 109: ...e until you press PLAY STOP and the number of measures recorded will automatically become the LENGTH setting TEMPO 20 260 If you are recording from the pads disregard paragraphs 3 and 4 of this section 3 Select a MIDI channel Be sure that the transmit channel on your keyboard corresponds to the MIDI channel of the part you wish to record Each of the 4 parts has it s own MIDI channel The factory pr...

Page 110: ...stop recording The PLAY STOP and REC lights go out Checking the Tones and Phrases During Realtime Recording REHEARSAL FUNCTION The Rehearsal function is a feature that temporarily suspends recording during Realtime Recording This allows you to check the next instrument or phrase to be recorded while recording is in progress fig 06 038 1 Start Realtime Recording p 108 2 While the recording is under...

Page 111: ...set to OFF then Tap Playback cannot be executed correctly When set to OFF the pattern is then recorded with the timing used in performance fig 06 040 1 Press PATTERN then REC PLAY STOP flashes and REC lights The REC STANDBY appears and the click sound begins to play 2 Press CURSOR to move the cursor to QUANTIZE 3 Press INC or DEC or rotate the VALUE dial to make the setting 4 Begin Realtime Record...

Page 112: ...s and REC lights The REC STANDBY appears and the click sound begins to play 2 Press CURSOR to move the cursor to HIT PAD START 3 Press INC or DEC or rotate the VALUE dial to select ON 4 In record standby mode recording starts the instant you strike a pad Importing Data from Another Sequencer Data created on another sequencer can be imported via the MIDI IN and recorded on the TD 8 s sequencer The ...

Page 113: ... CURSOR or to move the cursor to EDIT 3 Press F3 to confirm your choice The PATTERN EDIT screen appears 4 Press CURSOR to move the cursor to EDIT 5 Press INC or DEC or rotate the VALUE dial to select COPY The COPY screen appears 6 Press CURSOR to move the cursor to SOURCE 7 Press INC or DEC or rotate the VALUE dial to choose the copy source pattern 8 Press CURSOR to move the cursor to DEST 9 Press...

Page 114: ...E dial to specify 7 Press CURSOR to move the cursor to DEST PART 8 Press INC or DEC or rotate the VALUE dial to choose the copy destination part 9 Press CURSOR to move the cursor to DEST MEAS 10 Press INC or DEC or rotate the VALUE dial to specify the first measure within the copy destination 11 Press F3 EXEC The confirmation screen appears fig 06 049 12 Again press F3 EXEC Press F1 CANCEL to canc...

Page 115: ...e VALUE dial to select INSERT The INSERT screen appears 6 Press CURSOR to move the cursor to PATTERN 7 Press INC or DEC or rotate the VALUE dial to select the pattern into which one or more blank measures are to be inserted 8 Press the CURSOR to move the cursor to MEASURE Indicated from the left is the first measure followed by the number of measures Press CURSOR or to move the cursor to the item ...

Page 116: ... This deletes unneeded measures from the pattern then connects the portions before and after the resulting gap fig 06 051 e The performance data following the deleted range is moved forward and the performance data for that part is shortened When all parts in the targeted range are specified deletion results in the pattern itself becoming shorter When all measures for all parts are deleted the pat...

Page 117: ...ess CURSOR to move the cursor to PATTERN 7 Press INC or DEC or rotate the VALUE dial to select the pattern to be erased 8 Press F3 EXEC The confirmation screen appears fig 06 057 9 Again press F3 EXEC Press F1 CANCEL to cancel the operation PATTERN 701 800 Select the pattern to be erased Indicated from left to right are the pattern number and pattern name Erasing Unneeded Data to Make a Measure Bl...

Page 118: ...rn can be given a name of up to 8 characters fig 06 067 e 1 Follow the procedures described in Choosing a Pattern p 97 to select the pattern to be named 2 Press PATTERN then F3 MENU PATTERN lights and a pop up menu appears 3 Press INC or DEC rotate the VALUE dial or press CURSOR or to move the cursor to NAME 4 Press F3 to confirm your choice The PATTERN EDIT screen appears 5 Press CURSOR F1 LEFT o...

Page 119: ...terns fig 06 068 1 Follow the procedures described in Choosing a Pattern p 97 to select the User pattern to be locked 2 Press PATTERN then F3 MENU 3 Press INC rotate the VALUE dial or press the CURSOR to move the cursor to LOCK 4 Press F3 to select The LOCK screen is displayed fig 06 069 5 Press INC or DEC or rotate the VALUE dial to make the setting PATTERN LOCK OFF ON OFF This unlocks the User p...

Page 120: ...uring playback of the song CLICK Turn the click on off TEMPO Set the Tempo PLAY STOP This starts and stops playback of the pattern REC The SONG REC screen for creating songs opens PATTERN Select patterns For more detailed information refer to Chapter 5 Playing Along with Patterns p 96 SONG Select songs Read the explanations that follow for more detailed information about the function of each butto...

Page 121: ...left of song name 6 Playback Method Setting p 123 This indicates the song playback type 7 Sequencer Status This indicates the status of the pattern playback or stop 8 Part Mute Status p 124 The muted part icon is cleared Function buttons F1 F3 are used for various functions as explained below When you have finished making the settings press SONG to bring up this screen This prevents data from bein...

Page 122: ... Press SONG then F3 MENU SONG lights and a pop up menu appears 3 Press DEC rotate the VALUE dial or press CURSOR to move the cursor to FUNC 4 Press F3 to confirm your choice 5 Press F1 TEMPO The SONG TEMPO screen appears 6 Press INC or DEC or rotate the VALUE dial to set the Tempo 7 Press SONG The SONG screen appears SONG TEMPO 20 260 Temporarily Changing the Tempo of a Song During Playback TEMPO ...

Page 123: ... move the cursor to FUNC 3 Press F3 to confirm your choice 4 Press F2 TYPE The PLAY TYPE screen appears 5 Press INC or DEC or rotate the VALUE dial to choose a playback method PLAY TYPE LOOP 1SHOT Repeated Playback of a Song LOOP PLAYBACK You can loop playback of a song even without changing the song s playback method Using the following procedure to loop playback of the song still leaves the song...

Page 124: ...21 to select the song 2 Press SONG then REC SONG and REC light and the SONG REC screen appears From the left to right the step number the pattern number the pattern name the transpose bias and the number of measures are displayed 3 Press INC or DEC or rotate the VALUE dial to select pattern Pattern playback method settings p 100 are disabled To audition or test listen a pattern after the pattern i...

Page 125: ... then REC SONG and REC light and the SONG REC screen appears 3 Press CURSOR or to select the step from which the pattern is to be deleted fig 07 011 4 Press F2 DELETE The step at the cursor position is deleted and later steps are each moved forward one place fig 07 012 5 Press EXIT to finish The REC light is turned out Transposing a Pattern TRANSPOSE This transposes patterns recorded in a song Add...

Page 126: ...ress INC or DEC or rotate the VALUE dial to choose the copy destination song 10 Press CURSOR to move the cursor to START 11 Press INC or DEC or rotate the VALUE dial to select the position step where copying is to begin 12 Press F3 EXEC The confirmation screen appears fig 07 015 Are You Sure 13 Again press F3 EXEC Press F1 CANCEL to cancel the operation SOURCE 1 50 This selects the copy source son...

Page 127: ...ur choice The SONG NAME screen appears 4 Press CURSOR F1 LEFT or F2 RIGHT to move the cursor to the character to be changed 5 Press INC or DEC rotate the VALUE dial or press CURSOR or to change the character 6 Press EXIT to finish F1 LEFT Move the cursor to the left F2 RIGHT Move the cursor to the right F3 CHAR Cycle between uppercase and symbols SHIFT F1 INSERT A blank space is inserted at the cu...

Page 128: ... you use acoustic drums to sound the TD 8 For details refer to Using the TD 8 with Acoustic Drums Acoustic Drum Trigger p 134 If you want the tone to be affected by the strike position on the PD 80 PD 80R PD 100 or PD 120 select 8 A 8RA 10A or 12A With 8 B 8RB 10B or 12B strike position is not detected but more rapid trigger response can be achieved If you wish to make even more detailed settings ...

Page 129: ...wing example signal 2 will sound but signals 1 and 3 will not sound fig 08 005 e fig 08 006 1 Press SETUP then F1 TRIG and then F1 BASIC SETUP lights and the TRIGGER BASIC screen appears 2 Press CURSOR or to move the cursor to THRESHOLD 3 Strike a pad The settings screen for the struck pad appears and an input indicator will move in the right part of the screen 4 Press INC or DEC or rotate the VAL...

Page 130: ...hen the PD 80R or PD 120 is used with TRIGGER INPUT 3 SNARE you can adjust the sensitivity of the rim Higher settings will increase the sensitivity of the rim With a setting of Off only the head will sound fig 08 013 1 Strike the pad used for the snare to select TRIGGER INPUT 3 2 Set the trigger type to either 8RA 8RB 12A or 12B For this setting refer to Specifying the Pad Type TRIGGER TYPE p 128 ...

Page 131: ... The following parameters Advanced Trigger Parameters are automatically set to the most efficient values for each pad when you select the TRIGGER TYPE p 128 and don t require adjustment except if you experience any of the problems that are discussed in the explanation of each parameter SCAN TIME Since the rise time of the trigger signal waveform may differ slightly depending on the characteristics...

Page 132: ... notes may be lost during fast playing a drum roll for example Set this to as low a value as possible RETRIGCANCL 1 16 MASK TIME On a kick pad for example if the beater bounces back and strikes the pad a second time immediately after the intended stroke or like with acoustic drums if you leave the bass drum beater against the head it can cause a single strike to double trigger two sounds instead o...

Page 133: ...th the head and rim are struck simultaneously As the CROSS STICK settings value is decreased you will gradually be able to produce the rim shot sound even striking only the rim by striking with greater force When set to 1 the rim shot sound is always played when only the rim is struck Only instruments with XS after the instrument can be used for playing the cross stick sound fig 08 013b Screen 1 S...

Page 134: ...s the TRIGGER BASIC screen Use CURSOR or to move the cursor to the parameters and use INC or DEC or rotate the VALUE dial to make the following setting THRESHOLD 0 CURVE LINEAR 3 Set the SENSITIVITY In the setting page of step 2 use CURSOR or to move the cursor to the SENSITIVITY Make settings so that the input indicator in the right part of the display reaches the maximum level when the pad is st...

Page 135: ...otate the VALUE dial to make the setting The higher the value selected the darker the screen becomes LCD CONTRAST 1 16 You can also adjust it by holding down KIT and rotating the VALUE dial Tuning the TD 8 MASTER TUNING This tunes Parts 1 4 as a whole Tuning of the drum kit part and percussion part instruments is not affected by this setting The reference pitch is 440 0 Hz fig 08 019 1 Press SETUP...

Page 136: ...50 50 is displayed for SONG Switching the Setting Display Automatically NOTE CHASE Note Chase This is a convenient function for use in editing tones When MIDI data corresponding to a pad is received this function automatically displays the settings screen for the instrument used by that pad and automatically moves the cursor Turning Note Chase On Off With the setting below even with NOTE CHASE set...

Page 137: ...T 2 KICK2 and 12 AUX2 can be used only when two pads are connected to TRIGGER INPUT 1 2 KICK1 2 or 11 12 AUX2 respectively p 27 5 Press INC or DEC or rotate the VALUE dial to make the setting OUTPUT MAS M_L M_R DIR D_L D_R M D MAS Stereo output from MASTER L MONO R according to the mixer pan settings M_L Monaural output from MASTER L MONO regardless of the mixer pan settings M_R Monaural output fr...

Page 138: ...in number 7 Press F1 LIST to move the cursor to the order in which the drum kits will be selected the step located in the right of the screen If the cursor is at any position other than 1 then press CURSOR or to move the cursor to 1 fig 09 003b 8 Press INC or DEC or rotate the VALUE dial to select the kit that will be selected first 9 Press CURSOR to move the cursor to the next step 10 Press INC o...

Page 139: ...ore you can also use a foot switch to switch drum kits Playing a Pattern by Hitting a Pad PAD PATTERN PAD PATTERN This function starts playback of a pattern when a pad is struck This function provides a very convenient way to use patterns during a live performance If different patterns have been assigned to two or more pads striking another pad while a pattern is playing back will cause pattern pl...

Page 140: ... PLAY STOP light goes off By pressing F1 LIST you can have a list of the patterns assigned to the pads displayed For more on PAD PATTERN VELO refer to Playing Back Patterns with the Velocity Changing in Response to the Strength with Which the Pad is Struck p 141 Selecting from the List Select the pattern to be assigned to the pad from the displayed list fig 09 005 1 Confirm that CHAIN is not lit T...

Page 141: ...s struck ON The pattern plays back with the velocity changing in response to the strength with which the pad is struck Changing an Instrument s Pitch with the Hi Hat Control Pedal PITCH CONTROL This setting allows you to change the pitch of an instrument in response to the degree the hi hat control pedal is pressed Releasing the pedal returns the instrument to its original pitch To stop the pedal ...

Page 142: ... and instrument pitch settings are used no change may be realized even when the pedal is pressed Using a Pad to Perform Button Operations PAD SWITCH With two pads connected with cables PCS 31 or standard insert cable you can switch drum kits patterns or songs fig 09 006 1 Connect pads to TRIGGER INPUT 11 12 AUX1 AUX2 Use PCS 31 cables optional or standard insert cable when connecting two pads to T...

Page 143: ...n a song number is indicated in the upper part of the screen a song will call up fig 02 001c To prevent an instrument assigned to a pad from sounding set the volume level for the pad to 0 using LEVEL in the MIXER screen p 92 In order to be able to use pads to switch kits in a DRUM KIT CHAIN p 138 the function setting mentioned previously should be set to KIT SELECT and you need to press the CHAIN ...

Page 144: ...T lights and the DRUM KIT screen appears 12 The selected foot switch functions as a switch when stepped on Note 1 ASSIGNABLE KIT DEC KIT INC SEQ DEC SEQ INC SEQ TOP PLAY STOP SEQ BWD SEQ FWD KIT DEC Call up the previous kit KIT INC Call up the next kit SEQ DEC Call up the previous pattern or song SEQ INC Call up the next pattern or song SEQ TOP Return to the beginning of the pattern or song PLAY S...

Page 145: ...estination of your choice However doing so will overwrite the data that was in the new destination So take caution when performing this operation Copying a Drum Kit DRUM KIT COPY fig 09 008 1 Press KIT then F3 MENU KIT lights and a pop up menu appears 2 Press INC rotate the VALUE dial or press CURSOR to move the cursor to COPY 3 Press F3 to confirm your choice The COPY screen appears 4 Press CURSO...

Page 146: ...d 12 Only the instrument assigned to the head is copied fig 09 010a 1 Press KIT then F3 MENU KIT lights and a pop up menu appears 2 Press INC rotate the VALUE dial or press CURSOR to move the cursor to COPY 3 Press F3 to confirm your choice The COPY screen appears 4 Press CURSOR move the cursor to COPY 5 Press INC or DEC or rotate the VALUE dial to select INST 6 Press CURSOR to move the cursor to ...

Page 147: ...ppears fig 09 015 11 Press F3 EXEC to carry out the procedure Press F1 CANCEL to cancel it Copying Studio Settings EFFECT COPY fig 09 012 1 Press KIT then F3 MENU KIT lights and a pop up menu appears 2 Press INC rotate the VALUE dial or press CURSOR to move the cursor to COPY 3 Press F3 to confirm your choice The COPY screen appears 4 Press CURSOR to move the cursor to COPY 5 Press INC or DEC or r...

Page 148: ... press CURSOR or to move the cursor to PREV 3 Press F3 to confirm your choice The PREV screen appears 4 Press CURSOR or to move the cursor to VELOCITY 1 5 Press INC or DEC or rotate the VALUE dial to make the setting 6 Set VELOCITY 2 and VELOCITY 3 in the same manner Pressing PREVIEW allows you to preview at the velocity indicated by the cursor position 7 Press KIT The DRUM KIT screen appears VELO...

Page 149: ...DUMP Saving Data To save data use the external sequencer as you would when recording musical data and perform the following steps on the TD 8 as shown in the following diagram 1 Use a MIDI cable to connect the TD 8 s MIDI OUT connector to the MIDI IN connector of the external sequencer fig 10 001 e 2 Press SETUP then F2 MIDI and then F3 BULK SETUP lights and the BULK DUMP screen appears ffig 10 00...

Page 150: ...es In addition confirm that the sequencer is not set to Do not receive System Exclusive messages Returning Saved Data to the TD 8 1 Use a MIDI cable to connect the TD 8 s MIDI IN connector to the MIDI OUT connector of the external sequencer fig 10 002 e 2 Send the settings data from the external sequencer to the TD 8 The transmitted settings are reproduced At this time the TD 8 s data is overwritt...

Page 151: ...nd module can play simultaneously Use a MIDI cable to connect the TD 8 s MIDI OUT to the MIDI IN connector of the external MIDI sound module fig 10 005 e Specifying the Note Numbers the Pads Send You can select the MIDI note number key number that each pad will transmit Set this to the note number of the sound that you wish to play on the external sound module or sampler fig 10 006 1 Press KIT the...

Page 152: ...ppears in the display when the same note number is selected for more than one pad For more detailed information refer to the column in the foregoing paragraph 4 Strike a pad The cursor moves to the setting for the pad that was struck You can make the selection by pressing CURSOR or and TRIG SELECT 5 Press INC or DEC or rotate the VALUE dial to make the setting When Setting Multiple Pads to the Sam...

Page 153: ...CURSOR or or press TRIG SELECT to move the cursor fig 10 008a GATE TIME 0 1 8 0 Setting the MIDI Channels For setting the MIDI channel refer to Setting the MIDI Channel for a Part p 154 Performance on the pads is transmitted from MIDI OUT on the same channel as the channel setting for the Drum kit part KIT in the setting page Using with the Roland SPD 20 SOFT THRU This section explains how you can...

Page 154: ...o Channel 10 This setting selects which instrument has priority in being played when the same note number is assigned to both a pad and an instrument in the percussion set When data is imported to the TD 8 from an external sequencer p 112 the part selected here is recorded fig 10 011a e 1 Press SETUP then F2 MIDI then F1 GLOBAL and then F1 PAGE 1 SETUP lights and the MIDI GLOBAL screen appears fig...

Page 155: ...not be played correctly 1 Press SETUP then F2 MIDI then F1 GLOBAL and then F1 PAGE 1 SETUP lights and the MIDI GLOBAL screen appears fig 10 013 2 Press CURSOR or to move the cursor to LOCAL CONTROL 3 Press INC or DEC or rotate the VALUE dial to set this to OFF LOCAL CONTROL OFF ON Stopping Exchange of Program Change Messages You can specify whether or not the TD 8 will transmit and or receive prog...

Page 156: ...DI channel selected in Setting the MIDI Channel for a Part p 154 is used The settings discussed here are necessary only when using the TD 8 as a MIDI sound module For information on creating drum kit sounds refer to Chapters 1 3 If you are playing back music data for GM sound modules on the TD 8 refer to Using the TD 8 As a General MIDI Sound Module p 159 Use a MIDI cable to connect the TD 8 s MID...

Page 157: ...t For more detailed information refer to the column in the foregoing paragraph PROGRAM NUMBER 1 128 Program Change 0 127 Factory set program number settings are same as drum kit numbers About Drum Kit and Percussion Set Program Changes When the Same Program Change is Specified for the Drum Kit and Percussion Set When the drum kit part and percussion part are assigned to the same MIDI channel and t...

Page 158: ...8 Program Change 0 127 For more on drum kit and percussion set program changes refer to the column on p 157 For information on factory set program change settings refer to Preset Percussion Set List p 184 Changing the Settings for Parts and Percussion Sets For more information on the procedures for making these settings refer to Making the Settings for the Part p 102 By using an external MIDI devi...

Page 159: ...rcussion set Numbers Called Up with Program Change Messages p 158 cannot be used Drum kit parts cannot be played using MIDI messages sent from an external device They can be played only by playing pads connected to the TD 8 The pan of the percussion set is based on how the set sounds from where the drums are played Be aware that the panning recommended with General MIDI is reversed Sequencers cann...

Page 160: ... 159 to set GM mode to ON Normally the GM SYSTEM ON MESSAGE is recorded at the very beginning of the GM score so the TD 8 automatically switches to GM mode when a GM score is played back from the beginning However if playback starts from somewhere within the GM score the TD 8 fails to switch to GM mode and the data is not played back properly When playing back GM scores use the button to be sure y...

Page 161: ...ages for Hi Hat Control The TD 8 s hi hat controller also transmits the depth to which the pedal is pressed using control change messages By default factory preset control change 4 is used Reception transmission to from an external MIDI sequencer will use this number If a MIDI device that you are using already uses control change numbers 4 you can change these numbers fig 10 023 1 Press SETUP then...

Page 162: ... applied to reception via MIDI IN and transmission from MIDI OUT Synchronizing with an External MIDI Instrument This section discusses the settings that allow an external MIDI sequencer and the TD 8 s sequencer to be synchronized The device that is playing back is called the master and the device that is synchronizing to the playback is called the slave SYNC MODE INT EXT REMOTE INT INTERNAL The TD...

Page 163: ...connect the MIDI OUT of the TD 8 to the MIDI IN connector of the external device fig 10 027 e fig 10 028 1 Press SETUP then F2 MIDI then F1 GLOBAL and then F1 PAGE 1 SETUP lights and the MIDI GLOBAL screen appears 2 Press CURSOR or to move the cursor to SYNC MODE 3 Press INC or DEC or rotate the VALUE dial to set this to INT 4 Make settings on the external sequencer so that it will synchronize For...

Page 164: ...164 ...

Page 165: ...165 Appendices Appendices ...

Page 166: ...R LEVEL Press INC or DEC or rotate the VALUE dial to raise the value p 92 Are The Pads Connected Correctly Make sure that the pad connections are correct and that each pad is connected to the proper input p 27 Use only the provided cables to connect the pads If playing rim shots on the PD 80R or PD 120 is the pad connected to TRIGGER INPUT 3 SNARE Has the TD 8 been set to not output sounds Check t...

Page 167: ...el from the MASTER OUTPUT jacks and does not affect the volume of the output from the headphones or the DIRECT OUTPUT jacks No Ambience Applied Check the following points Is Ambience turned off KIT F3 MENU FX SW Press F1 to turn the Ambience effect on p 81 Has the Ambience level for individual instruments been lowered KIT F2 STUDIO F2 AMBSND Strike the pad to which Ambience is not being applied an...

Page 168: ... the most efficient values for each pad when you select the TRIGGER TYPE again SETUP F1 TRIG Have you set the brush switch BRUSH SW p 80 to ON KIT F3 MENU FUNC You cannot adjust the head tension when the brush switch is set to ON A Sound Other Than the Assigned Instrument Plays Is there a mistake in the choice of head and rim With some parameters you can make separate settings for the head and rim...

Page 169: ...layed Is the TD 8 in GM mode SETUP F2 MIDI F1 GLOBAL F3 PAGE 3 Set GM MODE to OFF p 159 The sequencer does not function when the TD 8 is in GM mode No Sound When PLAY STOP is Pressed Are the GROUP FADERS sliders lowered Press the FADERS button and proceed with making the necessary adjustments p 21 Use KICK SNARE HI HAT TOMS and CYMBALS to adjust the drum kit parts OTHERS to adjust the percussion p...

Page 170: ... Not Being Played Back Is the song selected When the song is selected patterns set to 1SHOT or LOOP cannot be played back with the Pad Pattern function p 139 Only patterns set to TAP can be played back Cannot Record or Edit User Pattern Is Pattern Lock turned on PATTERN F3 MENU LOCK Press INC or DEC or rotate the VALUE dial to set this to OFF p 119 Click Issues No Click Sound Is the CLICK button l...

Page 171: ...ther move the speaker or change the angle of the pad Also verify the mounting of the pads and that the stand is stable in order to eliminate excess vibrations The vibration of the speaker can sometimes be detected by the pad as a trigger signal Display Is Too Light Or Too Dark The visibility of the display will change depending on the viewing angle and on room lighting conditions The visibility of...

Page 172: ...IS DRUM KIT Restore the currently selected drum kit to its factory presets ALL DRUM KITS Restores all drum kit settings to their factory presets ALL PERC SETS Restores all User percussion set settings to their factory presets ALL PATTERNS Restores all User pattern data settings to their factory presets ALL SONGS Restores all song data settings to their factory presets When Factory Reset is carried...

Page 173: ... 4 When the drum is struck the TD 8 sounds If poor quality sound is produced reposition the drum trigger and referring to Using the TD 8 with Acoustic Drums Acoustic Drum Trigger p 134 make any necessary adjustments So that the acoustic drum trigger does not pick up extraneous vibrations do not allow it s cable to contact the rim or shell body Be sure to mute the bass drum and snare drum If you us...

Page 174: ...arry out Factory Reset you will then be able to use the unit temporarily Carrying out a Factory Reset deletes all of the current TD 8 s data and settings and returns them to the original factory settings BACKUP BATTERY LOW fig e 04 The internal backup battery of the TD 8 a battery that maintains data in the user memory has run down Contact your dealer or a nearby Roland service center to have the ...

Page 175: ...PTY PATTERN fig e 13 This pattern contains no performance data it cannot be edited NO EMPTY PATTERN fig e 14 There are no empty patterns for recording Delete unneeded data p 116 EMPTY SONG fig e 14a This song contains no performance data it cannot be edited 99 STEP MAXIMUM fig e 14b The maximum number of steps that can be recorded to one song has been exceeded no further editing that adds steps ca...

Page 176: ...s Bulk Dump p 149 THRU MIDI messages received at MIDI IN are re transmitted without change from this connector MIDI Channels and Multi timbral Sound Sources MIDI transmits many types of data over a single MIDI cable This is made possible by the concept of MIDI channels which allow a device to distinguish the data that is or is not intended for it In some ways MIDI channels are similar to televisio...

Page 177: ...hen sent to the sound module for playback When recording drum kit and percussion set performance the performance data is sent to the drum kit part and percussion part according to the setting of channel 10 priority p 154 When using the TD 8 as a GM sound module the internal sequencer is disabled Part 1 Part 2 Part 3 Part 4 Percussion part Drum kit part Internal sequencer TD 8 Internal sound genera...

Page 178: ...178 ...

Page 179: ...Hop 43 Ringer 44 Melody 45 Tabla 46 Gate 47 Mondo 48 Timbongo 49 Mexi Mix 50 LiteFunk 51 Metal 52 BrikHous 53 Snowki 54 CoprTubs 55 Hi Loose 56 Lo Loose 57 LatnSqnc 58 Syn Bass 59 Standrd1 60 Standrd2 61 Room 62 Power 63 Jazz 64 UserKit Cross stick A velocity switching snare rim sound that when played softly produces a cross stick sound p 42 and when played harder produces a rim shot sound p 41 Br...

Page 180: ... 149 PCO3 RS 150 PCO3BR S position 151 PCO3BRRS 152 PCO3ST S position 153 PCO3STRS 154 MEDIUM1S position 155 MED1 RS 156 MED1 XS x stick 157 MED1BR S position 158 MED1BRRS 159 MED1BRXS x stick 160 MED1ST S position 161 MED1STRS 162 MED1STXS x stick 163 MEDIUM2S position 164 MED2 RS 165 MED2BR S position 166 MED2BRRS 167 MED2ST S position 168 MED2STRS 169 MEDIUM3S position 170 MED3 RS 171 MED3BR S ...

Page 181: ... T4 425 PUNCH T1 426 PUNCH T2 427 PUNCH T3 428 PUNCH T4 429 OAK T1 430 OAK T2 431 OAK T3 432 OAK T4 433 BALSA T1 434 BALSA T2 435 BALSA T3 436 BALSA T4 437 VINTGET1 438 VINTGET2 439 VINTGET3 440 VINTGET4 441 BRSH1 T1 442 BRSH1 T2 443 BRSH1 T3 444 BRSH1 T4 445 BRSH2 T1 446 BRSH2 T2 447 BRSH2 T3 448 BRSH2 T4 449 DARK T1 450 DARK T2 451 DARK T3 452 DARK T4 453 ATTACKT1 454 ATTACKT2 455 ATTACKT3 456 A...

Page 182: ...LSHAKR 708 TAMBRN 1 709 TAMBRN 2 710 TAMBRN 3 711 TAMBRN 4 712 TMBL1 HI 713 TMBL1 RM 714 TMBL1 LO 715 PAILA 716 TMBL2 HI 717 TMBL2 LO 718 VIBRASLP 719 AGOGO HI 720 AGOGO LO 721 AGOGO2HI 722 AGOGO2LO 723 CABASAUP 724 CABASADW 725 CABASAVS 726 CUICAMT1 727 CUICA OP 728 CUICA LO 729 CUICAMT2 730 PANDROMT 731 PANDROOP 732 PANDROSL 733 PANDROVS 734 SURDOHMT 735 SURDOHOP 736 SURDOHVS 737 SURDOLMT 738 SU...

Page 183: ...8 COUNT 5 959 COUNT 6 960 COUNT 7 961 COUNT 8 962 COUNT 9 963 COUNT 10 964 COUNT 11 965 COUNT 12 966 COUNT 13 967 COUNTAND 968 COUNT E 969 COUNT A 970 COUNT TI 971 COUNT TA REVERSE 972 RVSKICK1 973 RVSKICK2 974 RVSSNR 1 975 RVSSNR 2 976 RVSTOM 977 RVSCRSH1 978 RVSCRSH2 979 RVSCHINA 980 RVSBELTR 981 RVS HI Q 982 RVSMFAZE 983 RVSAIRDR 984 RVSBOIN1 985 RVSBOIN2 986 RVS BEND 987 RVSVOCOD 988 RVSCARCL ...

Page 184: ... 1 WDBLK HI 1 WDBLK LO 1 CUICAMT1 1 CUICA OP 1 TRINGLMT 1 TRINGLOP 1 SHAKER 1 SLEIBELL 1 BELLTREE 1 CASTANET 1 SURDOLMT 3 SURDOLOP 2 OFF 0 R8CNG HI 2 TINYGONG 1 GONG 1 PANDROMT 1 PANDROOP 2 PANDROSL 1 TREECHIM 1 CAXIXI 1 2 STNDRD2 PC66 STD2 2 K STD2 1 K CRSSTK 3 STD2 1 S STD2 2 S STD 2 T6 STD2 CH STD 2 T5 STD2 PDH STD 2 T4 STD2 OH STD 2 T3 STD 2 T2 STD 2 T1 JAZZ RD JAZZ RDB COWBELL2 JAZZ RDE 3 ROO...

Page 185: ...IKO R70TRIOP R70TRIMT TIMPANIG TIMPANIG TIMPANIG TIMPANIG TIMPANIG TIMPANIC TIMPANIC TIMPANIC THAIGONG THAIGONG THAIGONG THAIGONG PERCHIT1 PERCHIT2 ORCH MAJ ORCH MIN ORCH DIM KICK ROL KICK CYM ORCHROLL ORCHCHOK HIT ROLL FINALE APPLAUSE ENCORE TREECHIM 808CLAP 808CWBL1 808CWBL2 808MARCS 808CLAVS 808CONGA 909RIM 909CLAP 78COWBEL 78GUIRO 78GIROST 78MARACS 78MBEAT 78TAMBRN 78BONGO 78CLAVES 78RIM 55CLA...

Page 186: ... 64 FDBK ODRV GT 2 31 0 DISTORTIONGT 1 8 FEEDBACK GT 2 64 HEAVY GT 1 65 FDBK HVY GT 2 66 MUTED DIS GT 1 67 ROCK RHYTHM 2 32 0 GT HARMONICS 1 8 GT FEEDBACK 1 VELOCITY SWITCH The tone switches at velocity 116 BASS 33 0 ACOUSTIC BS 2 64 ELCTRC AC BS 2 34 0 FINGERED BS 1 64 FUNK BASS 2 65 REGGAE BASS 2 35 0 PICKED BS 1 64 MUTE PICKBS1 1 65 MUTE PICKBS2 1 36 0 FRETLESS BS 1 37 0 SLAP BASS 1 1 64 SLAP B...

Page 187: ...101 0 BRIGHTNESS 2 102 0 GOBLIN 2 103 0 ECHO DROPS 1 1 ECHO BELL 2 2 ECHO PAN 2 64 ECHO PAN 2 2 65 BIG PANNER 2 66 RESO PANNER 2 104 0 STAR THEME 2 ETHNIC MISC 105 0 SITAR 1 1 SITAR 2 2 106 0 BANJO 1 107 0 SHAMISEN 1 108 0 KOTO 1 8 TAISHO KOTO 2 109 0 KALIMBA 1 110 0 BAGPIPE 1 111 0 FIDDLE 1 112 0 SHANAI 1 PERCUSSIVE 113 0 TINKLE BELL 1 114 0 AGOGO 1 115 0 STEEL DRUMS 1 116 0 WOODBLOCK 1 8 CASTANE...

Page 188: ...KYHR B 4 90 FNKYHR 2 4 91 FNKYHR E 3 METAL 92 OLD_HM I 4 4 2 120 LOOP 93 OLD_HM A 4 94 OLD_HM 1 4 95 OLD_HM B 4 96 OLD_HM 2 4 97 OLD_HM E 6 98 SPEED1 I 4 4 2 182 LOOP 99 SPEED1 A 4 100 SPEED1 1 4 101 SPEED1 B 4 102 SPEED1 2 4 103 SPEED1 E 5 104 THRASH I 4 4 4 195 LOOP 105 THRASH A 4 106 THRASH 1 4 107 THRASH B 4 108 THRASH 2 4 109 THRASH E 4 110 SPEED2 I 4 4 4 236 LOOP 111 SPEED2 A 4 112 SPEED2 1 ...

Page 189: ... 273 ROKBLY A 4 274 ROKBLY 1 2 275 ROKBLY B 4 276 ROKBLY 2 2 277 ROKBLY E 3 278 ROCKIN I 4 4 4 170 LOOP 279 ROCKIN A 4 280 ROCKIN 1 4 281 ROCKIN B 8 282 ROCKIN 2 8 283 ROCKIN E 4 284 SURF_R I 4 4 4 150 LOOP 285 SURF_R A 4 286 SURF_R 1 4 287 SURF_R B 4 288 SURF_R 2 4 289 SURF_R E 4 COUNTRY 290 BLGRS I 4 4 2 142 LOOP 291 BLGRS A 4 292 BLGRS 1 2 293 BLGRS B 4 294 BLGRS 2 3 295 BLGRS E 7 296 C BLD1 I ...

Page 190: ...NK2 B 4 462 FUNK2 2 4 463 FUNK2 E 4 464 FUNK3 I 4 4 4 113 LOOP 465 FUNK3 A 4 466 FUNK3 1 4 467 FUNK3 B 4 468 FUNK3 2 4 469 FUNK3 E 3 470 FUNK4 I 4 4 4 132 LOOP 471 FUNK4 A 4 472 FUNK4 1 5 473 FUNK4 B 4 474 FUNK4 2 5 475 FUNK4 E 4 476 FUNK5 I 4 4 4 102 LOOP 477 FUNK5 A 4 478 FUNK5 1 4 479 FUNK5 B 4 480 FUNK5 2 4 481 FUNK5 E 5 482 808HP1 I 4 4 2 102 LOOP 483 808HP1 A 4 484 808HP1 1 4 485 808HP1 B 4 ...

Page 191: ...P 639 SAMBA1 A 4 640 SAMBA1 1 4 641 SAMBA1 B 4 642 SAMBA1 2 4 643 SAMBA1 E 2 644 SAMBA2 I 4 4 4 136 LOOP 645 SAMBA2 A 4 646 SAMBA2 1 4 647 SAMBA2 B 4 648 SAMBA2 2 4 649 SAMBA2 E 4 WORLD 650 TANGO I 4 4 2 120 LOOP 651 TANGO A 2 652 TANGO 1 2 653 TANGO B 2 654 TANGO 2 2 655 TANGO E 2 656 AFROJZ I 4 4 8 194 LOOP 657 AFROJZ A 4 658 AFROJZ 1 6 659 AFROJZ B 4 660 AFROJZ 2 6 661 AFROJZ E 9 LOOP 662 LATN ...

Page 192: ...138 Drum kit chain 1 16 Parameter Value LEVEL p 64 p 92 Level 0 127 PAN p 93 Pan L15 CTR R15 RND ALT MASTR p 93 Master Volume 0 127 Parameter Value TYPE p 62 p 89 Studio type 1 WALL p 89 Wall type WOOD PLASTER GLASS ROOM p 89 Room size SMALL MIDIUM LARGE LEVEL p 89 Ambience level 0 127 AMBIENCE SEND LEVEL p 90 Ambience send level 0 127 Parameter Value AMB p 50 p 81 Ambience OFF ON EQ p 50 p 81 Equ...

Page 193: ...4 DST KIT p 146 Destination drum kit USER 1 64 Parameter Value SRC KIT p 147 Source drum kit PRESET 1 64 1 USER 1 64 DST KIT p 147 Destination drum kit USER 1 64 Parameter Value SRC KIT p 147 Source drum kit PRESET 1 64 1 USER 1 64 DST KIT p 147 Destination drum kit USER 1 64 Parameter Value GROUP p 54 p 83 Instrument group 1 INST p 54 p 83 Instrument 1 Parameter Value DEPTH p 85 Shell depth NORMA...

Page 194: ...arameter Value PITCH CTRL ASSIGN p 141 Pitch control assign OFF ON Parameter Value NOTE NUMBER p 151 Note number 0 C 1 127 G 9 GATE TIME p 153 Gate time 0 1 8 0 Parameter Value PAD PTN VELO p 141 Pad pattern velocity OFF ON CATEGORY p 139 Category 1 USER PATTERN p 139 Pattern PRESET 1 700 1 USER 701 800 Parameter Value CATEGORY p 68 p 97 Category 1 USER PATTERN p 68 p 97 Pattern PRESET 1 700 1 USE...

Page 195: ... 800 DEST p 113 Destination pattern USER 701 800 SOURCE PART p 113 Source part 2 SOURCE MEAS p 113 Source measure ALL First Measure 1 99 Last Measure 1 99 DEST PART p 113 Destination part 2 DEST MEAS p 113 Destination measure 1 98 END Parameter Value PATTERN p 115 Pattern USER 701 800 MEASURE p 115 Measure First Measure 1 98 END Number of Measures 1 99 Parameter Value PATTERN p 116 Pattern USER 70...

Page 196: ...IT PARTS 1 4 OFF ON PERC OFF DRM OFF PC ON ON Parameter Value PERC SET p 104 Percussion set 1 10 1 11 12 LEVEL p 104 Level 0 127 AMB LEVEL p 104 Ambience level 0 127 COPY p 104 Copy SOURCE 1 10 1 USER 1 2 DEST USER 1 2 Parameter Value INST p 105 Percussion instrument 1 LEVEL p 105 Level 0 127 AMB p 105 Ambience send level 0 127 PAN p 105 Pan L15 CTR R15 RND ALT PITCH p 105 Pitch 480 480 Decay p 10...

Page 197: ...LOUD1 LOUD2 Parameter Value SONG p 121 Song 1 50 NAME p 127 Song name 8 characters 1 TEMPO p 122 Song tempo 20 260 PLAY TYPE p 123 Play type LOOP 1SHOT Parameter Value SOURCE p 126 Source song 1 50 DEST p 126 Destination song 1 50 START p 126 Start 1 98 END Parameter Value SONG p 126 Song 1 50 Parameter Value PTN p 124 Pattern PRESET 1 700 1 USER 701 800 TRANS p 125 Transpose 24 24 Parameter Value...

Page 198: ...ck sensitivity 1 16 Parameter Value TX RX CHANNEL p 154 TX RX channel CH1 CH16 OFF NOTE CHASE p 136 Note chase OFF ON LOCAL CONTROL p 155 Local control OFF ON SYNC MODE p 162 Sync mode INT EXT REMOTE CH10 PRIORITY p 154 Channel 10 priority KIT PERC PEDAL DATA THIN p 156 Pedal data thin OFF 1 2 PEDAL CC p 161 Pedal CC 1 ZONE CC p 162 Zone CC 2 GM MODE p 159 GM mode OFF ON RX GM ON p 160 RX GM on OF...

Page 199: ...ing cannot be made in GM mode GM Mode Parameters on p 192 p 199 marked with a cannot be set in GM mode Parameter Value TIME SIGNATURE p 94 Time signature Numerator 1 13 Denominator 2 4 8 16 INTERVAL p 95 Interval 1 2 3 8 1 4 1 8 1 12 1 16 INST p 95 Click instrument 1 PAN p 95 Pan L15 CTR R15 OUTPUT p 95 Output BOTH PHONES Parameter Value PLAY p 112 Play count in OFF 1 MEAS 2 MEAS REC p 112 Rec cou...

Page 200: ...in the sequencer Modulation Controller number 1 Status 2nd byte 3rd byte BnH 01H vvH n MIDI channel number 0H FH ch 1 ch 16 vv Modulation depth 00H 7FH 0 127 Only the channel assigned to the drum kit part can be received If the SETUP MIDI GLOBAL PAGE 2 PEDAL CC or ZONE CC are set to MOD the effect will apply to the specified parameter During recording this will be recorded in the sequencer data as...

Page 201: ...d on that channel will modify the value of that parameter To prevent accidents it is recommended that you set RPN null RPN number 7FH 7FH when you have finished setting the value of the desired parameter Refer to Examples of actual MIDI message Example 4 p 212 On the normal mode of TD 8 RPN can be used to modify the following parameters Regarding the value of each parameter refer to Data Entry Con...

Page 202: ...cturer ID is 41H ID numbers 7EH and 7FH are extensions of the MIDI standard Universal Non realtime Messages 7EH and Universal Realtime Messages 7FH dd ee data 00H 7FH 0 127 F7H EOX End Of Exclusive The System Exclusive Messages received by the normal mode of TD 8 are Universal Non realtime System Exclusive Messages Data Requests RQ1 and Data Set DT1 System Exclusive Message Turn General MIDI Syste...

Page 203: ... p 211 If Data Set 1 is transmitted successively there must be an interval of at least 40ms Regarding the checksum please refer to p 212 Section 2 Transmit data When SETUP MIDI GLOBAL PAGE 3 SOFT THRU is set to ON messages received in addition to the following messages are also sent Channel Voice Messages The following channel voice messages are transmitted on the channel specified as the SETUP MI...

Page 204: ...ed to the drum kit part This will be transmitted if the SETUP MIDI GLOBAL PAGE 2 PEDAL CC or ZONE CC are set to GEN2 Hold 1 Controller number 64 Status 2nd byte 3rd byte BnH 40H vvH n MIDI channel number 0H FH ch 1 ch 16 vv Control value 00H 7FH 0 127 0 63 OFF 64 127 ON Only the channel assigned to the backing part are sent Transmitted only when the TD 8 is in play for Pattern in which Hold 1 is r...

Page 205: ...ress and size Refer to the Address and Size listed in Parameter Address Map p 208 Data larger than 128 bytes must be divided into packets of 128 bytes or less If Data Set 1 is transmitted successively there must be an interval of at least 40 ms between packets Regarding the checksum please refer to p 212 GM mode Section 1 Receive data Channel Voice Messages The following Channel Voice messages can...

Page 206: ...ogram change is received Voices which were already sounding before the program change was received will not be affected Channel Pressure Status 2nd byte DnH vvH n MIDI channel number 0H FH ch 1 ch 16 vv Channel pressure 00H 7FH 0 127 When channel pressure is received the effect selected for channel pressure in global parameter control p 207 is applied In the rhythm part ch 10 ignored this message ...

Page 207: ...e and the next Universal Non realtime System Exclusive Messages Identity Request Regarding the Identity Request refer to p 202 Global Parameter Control Channel Pressure Status Data byte Status F0H 7FH dev 09H 01H 0nH ppH rrH F7H Byte Explanation F0H Exclusive status 7FH ID number Universal Realtime Message dev Device ID dev 00H 1FH Initial value is 10H 17 09H Sub ID 1 Controller Destination Settin...

Page 208: ...SITIVITY 0 15 OFF 1 15 3 SNARE only 02 0000 aaaa CROSS STICK SENSITIVITY 0 15 1 16 3 SNARE only 03 0000 aaaa STICK SENSITIVITY 0 15 1 16 04 0000 aaaa STICK THRESHOLD 0 15 05 0000 0aaa STICK SENS CURVE 0 7 LINEAR EXP1 EXP2 LOG1 LOG2 SPLINE LOUD1 LOUD2 06 00aa aaaa STICK SCAN TIME 0 40 0 0ms 4 0ms 0 1ms step 07 0000 aaaa STICK RETRIGGER CANCEL 0 15 1 16 08 000a aaaa STICK MASK TIME 0 16 0ms 64ms 4ms...

Page 209: ...meters 2 KICK2 1 2 2 03 00 Pad parameters 3 SNARE 1 2 2 04 00 Pad parameters 4 TOM1 1 2 2 05 00 Pad parameters 5 TOM2 1 2 2 06 00 Pad parameters 6 TOM3 1 2 2 07 00 Pad parameters 7 HI HAT 1 2 2 08 00 Pad parameters 8 CRASH1 1 2 2 09 00 Pad parameters 9 CRASH2 1 2 2 0A 00 Pad parameters 10 RIDE 1 2 2 0B 00 Pad parameters 11 AUX1 1 2 2 0C 00 Pad parameters 12 AUX2 1 2 2 1 2 1 DRUM KIT Common paramet...

Page 210: ...0000 000a SHELL DEPTH 0 1 NORMAL DEEP 28 0000 00aa HEAD TYPE 0 2 CLEAR COATED PINSTRIPE PINSTRIPE is a registered Trademark of Remo Inc U S A 29 0000 0aaa MUFFLING 0 4 OFF TAPE1 TAPE2 FELT1 FELT2 2A 0000 0000 DUMMY ignored Instrument Group KICK SNARE TOM HI HAT CRASH RIDE PERC SPECIAL MELODIC VOICES REVERSE FIXED HH Offset address Size Description 27 0000 0000 DUMMY ignored 2A 0000 0000 1 3 USER P...

Page 211: ... 84 54H 116 74H 21 15H 53 35H 85 55H 117 75H 22 16H 54 36H 86 56H 118 76H 23 17H 55 37H 87 57H 119 77H 24 18H 56 38H 88 58H 120 78H 25 19H 57 39H 89 59H 121 79H 26 1AH 58 3AH 90 5AH 122 7AH 27 1BH 59 3BH 91 5BH 123 7BH 28 1CH 60 3CH 92 5CH 124 7CH 29 1DH 61 3DH 93 5DH 125 7DH 30 1EH 62 3EH 94 5EH 126 7EH 31 1FH 63 3FH 95 5FH 127 7FH Decimal values such as MIDI channel bank select and program chang...

Page 212: ...size and checksum itself and inverting the lower 7 bits Here s an example of how the checksum is calculated We will assume that in the exclusive message we are transmitting the address is aa bb cc ddH and the data or size is ee ff gg hhH aa bb cc dd ee ff gg hh sum sum 128 quotient remainder 128 remainder checksum However the checksum will be 0 if the remainder is 0 Example 1 Setting Shell depth o...

Page 213: ...O O O O 0 127 O X X X X X X X X X O X 1 16 OFF 1 16 OFF MODE 3 X O 9nH v 1 127 O 8nH v 64 0 127 0 127 O X O O 0 127 O X X X X X O 120 126 127 O X O 123 127 O X Bank Select Modulation Foot Control Data Entry Volume Panpot Expression Generalpurposecontroller1 Generalpurposecontroller2 Hold 1 Effect1 ReverbSendLevel RPN LSB MSB 1 One is selected as the strike position 2 One is selected as the hi hat ...

Page 214: ...record X X X X X O O X O 123 127 O do not record X Bank Select Modulation Foot Control Data Entry Volume Panpot Expression Generalpurposecontroller1 Generalpurposecontroller2 Hold 1 Effect1 ReverbSendLevel RPN LSB MSB 1 One is selected as the strike position 2 One is selected as the hi hat control pedal 3 Drum kit part only 4 Percussion part and backing part only 5 Backing part only 6 Transmits wh...

Page 215: ...e Sensing System Reset X X X X X X X X X X X X X X X X X X X X X X X O X O O O O X X O O O X O X X X X X X X X X O X 1 16 OFF 1 16 OFF MODE 3 X O 9nH v 1 127 O 8nH v 64 0 127 0 127 X O O O 0 127 O X X X X X O O X O O X Bank Select Modulation Foot Control Data Entry Volume Panpot Expression Generalpurposecontroller1 Generalpurposecontroller2 Hold 1 Effect1 ReverbSendLevel RPN LSB MSB 1 Not received...

Page 216: ...on Programmable Preview Velocity 3 steps Connectors Trigger Input Jacks dual x 10 Master Output Jacks L MONO R Direct Output Jacks L R Phones Jack stereo Mix in Jack stereo Hi Hat Control Jack Foot Switch Jack dual MIDI Connectors IN OUT THRU Output Impedance 1 5 k ohms Power Supply AC Adaptor DC 9 V Current Draw 600 mA Dimensions 293 W x 223 D x 80 H mm 11 9 16 x 8 13 16 x 3 3 16 inches Weight 1 ...

Page 217: ... AMBSND KIT STUDIO AMBSND MIXER PAN KIT INST PERC LEVEL AMB OTHERS KIT STUDIO AMBSND AMBGRP KIT B INST AMBIENCE MASTER MASTER DIRECT PHONES MIX IN SETUP MENU OUT PATTERN PART SETUP PAGE 1 GROUP FADERS AMBLEVEL CLICK INST CLICK BUTTON CLICK OUTPUT PATTERN PART SETUP INST EDIT KIT STUDIO EQ KIT STUDIO MASTER L MASTER R DIRECT L DIRECT R Head Rim Head Head Rim Head Rim Head Rim Head Rim Head Rim Head...

Page 218: ...80 C CHANNEL 154 Channel 10 priority 154 177 Choking 42 Click Instrument 95 Interval 95 ON OFF 48 On Off 94 Output 95 Pan 95 Parameter list 199 Tempo 94 Time signature 94 Contrast of the display 135 COPY 113 126 Copy Drum instrument 146 Drum Kit 145 Effect 147 Mixer 147 Pattern 113 Percussion set 104 Song 126 Cross stick 42 133 CROSSTALK 133 Cursor 18 CURVE 129 D DECAY 88 106 DELETE 116 125 Demo s...

Page 219: ...neral MIDI sound module GM mode 159 GM system ON message 159 Parameter list 199 Playback GM scores 160 Reception of MIDI messages 161 RX GM ON 160 GROUP FADERS 21 H HEAD TENSION 131 Head tension adjustment 38 HEAD TYPE 86 HIGH FREQ 91 HIGH GAIN 91 Hi hat control pedal 43 I INC DEC buttons 20 INSERT 115 124 INST 83 95 INTERVAL 95 L LCD CONTRAST 135 LENGTH 109 LEVEL 92 103 104 106 List Backing instr...

Page 220: ...ivity 46 Type 128 Pad pattern 139 List 140 Velocity 141 Pad switch 142 PAN 93 95 103 106 Parameter list Click parameters 199 GM General MIDI mode 199 Kit parameters 192 Pattern parameters 194 Setup parameters 197 Song parameters 197 Tempo parameters 199 PART 102 111 118 Part Ambience send level 103 Backing instrument 102 Backing instrument list 186 Choose 102 Level 103 Mute 72 PAN 103 Part mute 10...

Page 221: ...vel 104 Choose 104 Choosing a percussion instrument 105 Copy 104 Level 104 List 184 Settings for each instrument 105 PITCH 88 106 Pitch control 141 On Off 141 Pedal pitch control range 142 PITCH CTRL ASSIGN 142 PLAY TYPE 101 123 Pop up menu 19 Positional sensing 42 Preset pattern list 188 Preview button 22 Preview 55 103 105 Setting 148 PROGRAM CHANGE 157 158 Program change Drum kit 157 Exchange 1...

Page 222: ...2 T TAP 100 TAP EXC SW 101 TEMPO 94 100 123 THRESHOLD 129 TIME SIGNATURE 94 109 TRANSPOSE 125 TRANSPOSE BIAS 102 125 TRIG SELECT button 22 Trigger Advanced trigger parameter 131 Bank number 128 Basic trigger parameters 129 Trigger bank 34 128 Trigger type 34 128 Trigger parameter Cross stick sensitivity 133 Crosstalk cancel 133 Curve 129 Head tension 131 Mask time 132 Retrigger cancel 132 Rim sens...

Page 223: ...ment requires shielded interface cables in order to meet FCC class B Limit This product complies with the requirements of European Directive 89 336 EEC For EU Countries For EU Countries Apparatus containing Lithium batteries ADVARSEL Lithiumbatteri Eksplosionsfare ved fejlagtig håndtering Udskiftning må kun ske med batteri af samme fabrikat og type Levér det brugte batteri tilbage til leverandøren...

Page 224: ... Sound Equipment Ltd 17 Diagorou Street Nicosia CYPRUS TEL 022 66 9426 DENMARK Roland Scandinavia A S Nordhavnsvej 7 Postbox 880 DK 2100 Copenhagen DENMARK TEL 3916 6200 FRANCE Roland France SA 4 Rue Paul Henri SPAAK Parc de l Esplanade F 77 462 St Thibault Lagny Cedex FRANCE TEL 01 600 73 500 FINLAND Roland Scandinavia As Filial Finland Elannontie 5 FIN 01510 Vantaa FINLAND TEL 0 9 68 24 020 GERM...

Reviews: