RockJam RJ361, User Manual
The RockJam RJ361 is a versatile electric guitar perfect for beginners and experienced players alike. It comes with a User Manual to help you get started and unlock its full potential. You can download the manual for free from manualshive.com to enhance your playing experience and master this exceptional instrument.
Share
Download


Reviews:
No comments
Related manuals for RJ361

Keystation Mini 32
Brand: M-Audio Pages: 45

KEYRIG 25
Brand: M-Audio Pages: 27

PROKEYS SONO 61
Brand: M-Audio Pages: 49

Ozonic
Brand: M-Audio Pages: 38

NPL-TV 7874 DIGITAL
Brand: Napoli Pages: 20

TS-04-W
Brand: TextSpeak Pages: 11

RF666C
Brand: ZIPPY Pages: 5

RFKBS-25A
Brand: A4Tech Pages: 9
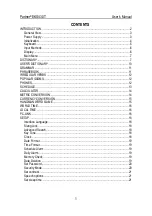
Partner EKS430T
Brand: Ectaco Pages: 21

KBD-USB-J Series
Brand: Stahl Pages: 16

Kiss Cartridge
Brand: Utopia Plantia Pages: 9

Compact Break
Brand: R-Go Pages: 10

KB-1010-R
Brand: Bolin Technology Pages: 6

PortaSound PSS-30
Brand: Yamaha Pages: 11

PortaSound PSS-450
Brand: Yamaha Pages: 16

PortaSound PSS-570
Brand: Yamaha Pages: 23

PortaSound PSS-560
Brand: Yamaha Pages: 23

PortaSound PSS-270
Brand: Yamaha Pages: 16


