RKI Instruments SDM-2012, Operator'S Manual
The RKI Instruments SDM-2012 Operator's Manual is available for free download on our website. This comprehensive manual provides detailed instructions and guidelines for operating the SDM-2012, ensuring efficient and safe usage. Access the manual now at manualshive.com and get to know your product inside out.
Share
Download


Reviews:
No comments
Related manuals for SDM-2012

ET107
Brand: Campbell Pages: 106

012
Brand: Campbell Pages: 34

7160-0486
Brand: Gamber Johnson Pages: 5

Leit WWS
Brand: DIG Pages: 7

ID 4216
Brand: AEG Pages: 14
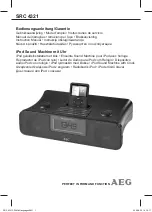
SRC 4321
Brand: AEG Pages: 47

SRC 4333 iP
Brand: AEG Pages: 74

AA-RD4NDOC
Brand: Samsung Pages: 1

HT-WDC10
Brand: Samsung Pages: 11

SMD-750E
Brand: Samsung Pages: 13

DA-E570
Brand: Samsung Pages: 44

AARD7NSDOUS
Brand: Samsung Pages: 36

DA-E560
Brand: Samsung Pages: 63

DA-E650
Brand: Samsung Pages: 112

DeX Station EE-MG950
Brand: Samsung Pages: 594

YHT-593
Brand: Yamaha Pages: 12

WP1510
Brand: Proove Pages: 24

TR-525 Series
Brand: Texas Electronics Pages: 20


