

4001942_B
Page 1
Copyright © 2017 Rimage
Rimage
®
Allegro™ 100 Setup and Installation
Guide
2
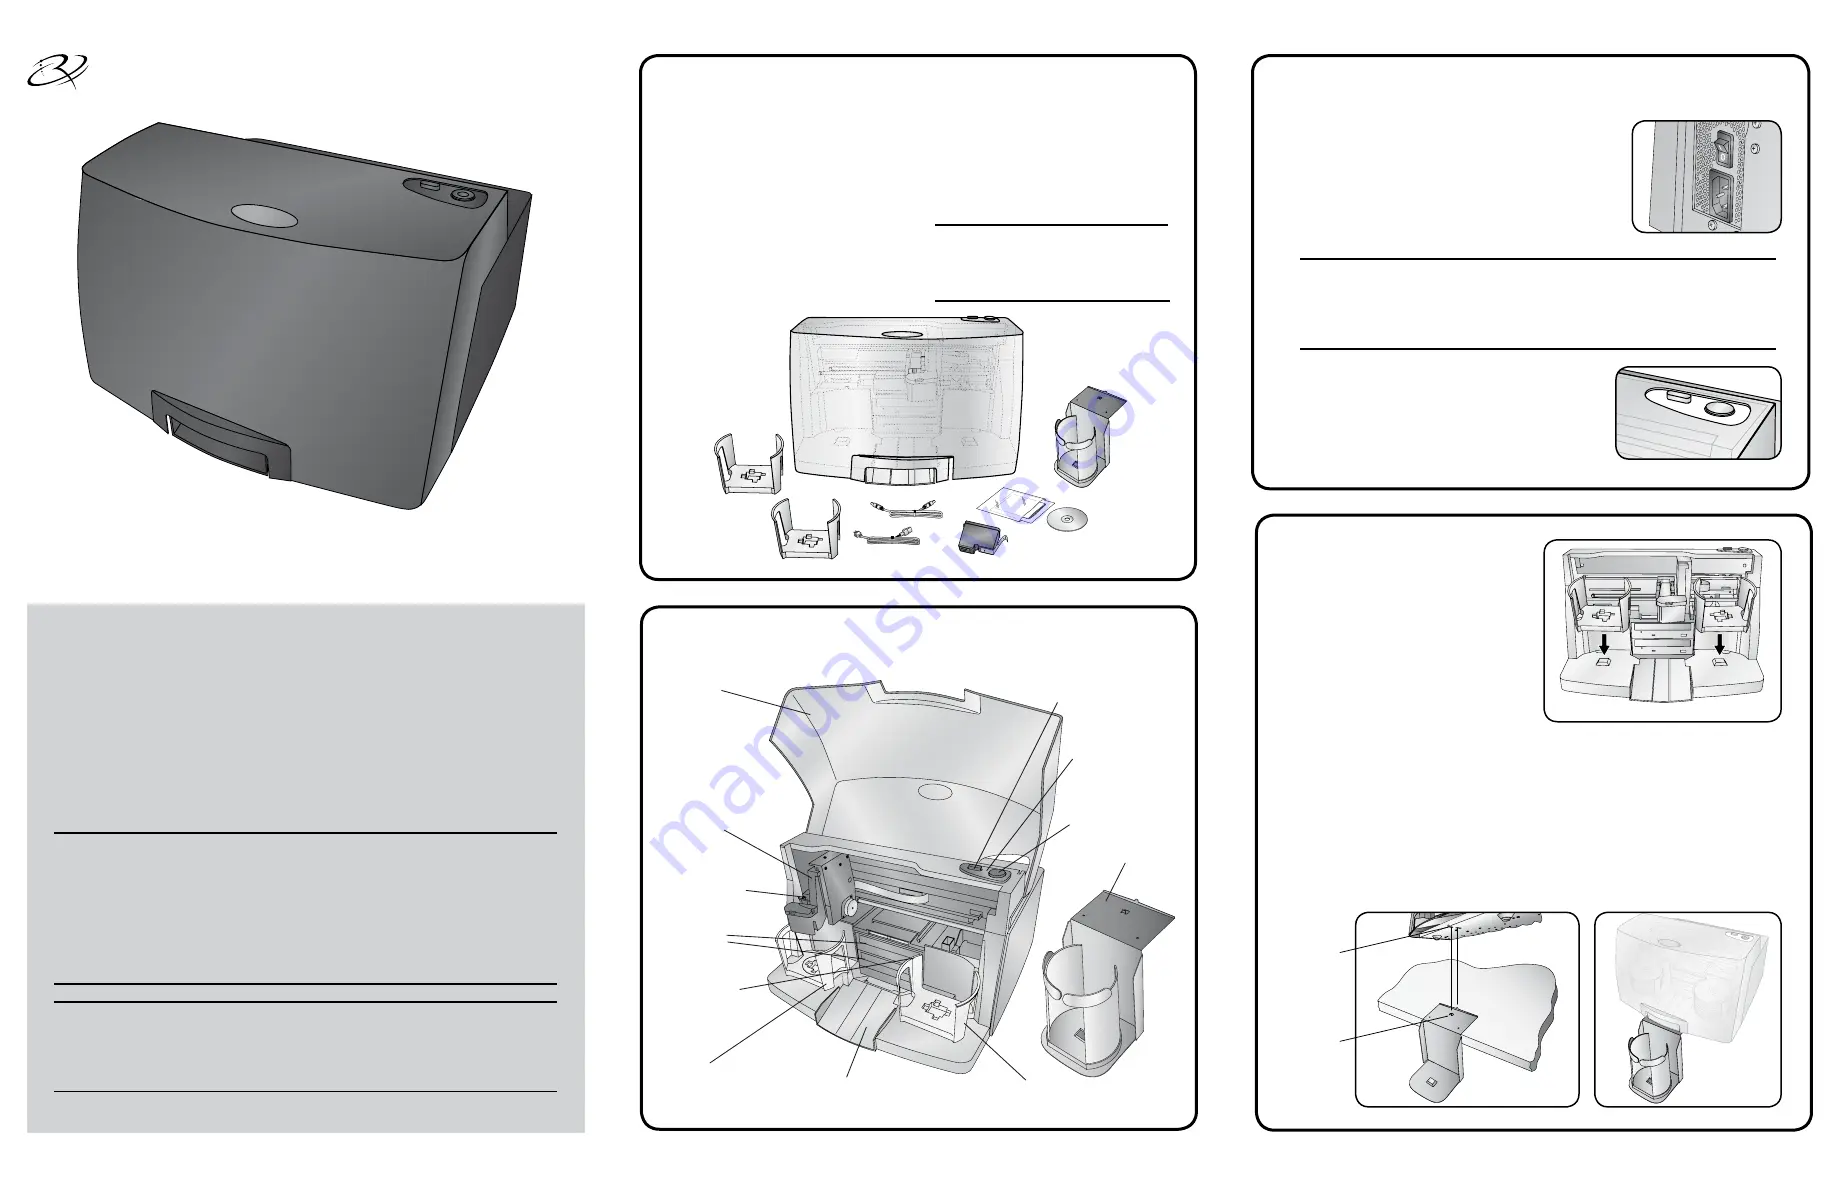
Get to know your Rimage Allegro 100
4
3
1
Unpack the accessory kit
Install the bins
Thank you for selecting the Rimage Allegro 100
disc publishing system.
Reject/Kiosk Area
CD/DVD
Recorders
Front Cover
Control Panel /
Status Lights
Ink Cartridge
Carrier
Robotic Disc
Transporter
Output Bin
Power Button
Ink Cartridge
Button
Input Bin
Recorder Tray
Button
Power
Button
External Output
Bin and Holder
Control Panel/
Status lights
Ink Cartridge
Button
Front Cover
Robotic Disc
Transporter
CD/DVD
Recorders
Recorder
Tray Button
Input/
Output Bin
Intput Bin
Output/Reject Area
Ink Cartridge
Carrier
As you unpack your system, remove any tape or cardboard restraints from the
system. The accessory kit contains:
•
Allegro Setup and Installation Guide
(this document)
•
Rimage Product Warranty/Guarantee
• A/C cord
• USB cable
• All-in-one ink cartridge
• Rimage Allegro User Guide disc
Connect the power cable and power on the system
Before you begin:
This document describes how to set up your Rimage Allegro™ 100 disc
publishing system. It is intended for people who are familiar with hardware
setup, software installation, and Windows operating systems. If you do not
understand the procedures in this document, ask your computer technician
for help.
Documents referenced in this procedure shipped with your system and
are also available online at www.rimage.com/support under
Autoloader &
Printer Support
.
Important!
• Read all setup instructions thoroughly before you begin.
• Save all packing boxes and packing materials.
• Refer to the
PC Specifications
document at www.rimage.com/support for
minimum PC requirements.
• Do not plug in any cables until you are instructed to do so.
Notes:
• Your system may not look exactly like the system pictured.
• You must have administrative privileges to install the Rimage Software Suite.
a. Install both
bins
by placing them
on the mounting pegs as shown
in Figure 1.
b.
(Optional) Install
external output
bin
if you want to use both
internal bins for input.
i.
Attach the
external
output
bin holder
by first allowing
the holder to hang off the edge of the table.
ii. Align the
locating tabs
on the
external output bin holder
with the
slots
located on the underside of the Allegro 100, as shown in Figure
2, and lower the Allegro 100 carefully into place onto the
external
output bin holder
. Notice that the slots allow for adjusting the
position of the
external output bin holder
. If your discs are not falling
into the bin, you will be able to move the holder slightly to align it.
iii. Place the
external output bin
on the
external output bin holder
as
shown in Figure 3.
a. Connect the
power cord
to the
power/
input port
on the back of the Allegro 100.
b. Plug the other end of the
power cord
into an
electrical outlet.
c. Ensure that the
main power switch
at the back
of the Allegro 100 system is in the “on” position.
Important!
• Do not connect the USB cable at this time.
• The outlet must be an earth-grounded outlet.
d. Press the
power button
on the top of the
Rimage Allegro 100 system. The power
indicator light illuminates solid blue.
e. Power on the
external PC
that will send
content to the Allegro 100 for output.
Note:
Your Allegro system may come
with an extra
power cord
. Please use
the correct
power cord
for your region.
•
Rimage Software Suite disc
• External output bin
• Two internal bins
Figure 1
Figure 3
Figure 2
Slots
Locating
Tabs


