background image

RICOH IMAGING COMPANY, LTD.

1-3-6, Nakamagome, Ohta-ku, Tokyo 143-8555, JAPAN
(http://www.ricoh-imaging.co.jp)

RICOH IMAGING EUROPE 
S.A.S.

Parc Tertiaire SILIC 7-9, avenue Robert Schuman - B.P. 70102, 
94513 Rungis Cedex, FRANCE
(http://www.ricoh-imaging.eu)

RICOH IMAGING AMERICAS 
CORPORATION

2 Gatehall Drive Suite 204, Parsippany, New Jersey 07054, U.S.A.
(http://www.us.ricoh-imaging.com)

RICOH IMAGING CANADA 
INC.

5560 Explorer Drive Suite 100, Mississauga, Ontario, L4W 5M3, CANADA 
(http://www.ricoh-imaging.ca)

RICOH IMAGING CHINA CO., 
LTD.

Room A 23F Lansheng Building, 2-8 Huaihaizhong Road, Huangpu District, 
Shanghai, 200021, CHINA 
(http://www.ricoh-imaging.com.cn)

http://www.ricoh-imaging.co.jp/english

This contact information may change without notice.
Please check the latest information on our websites.
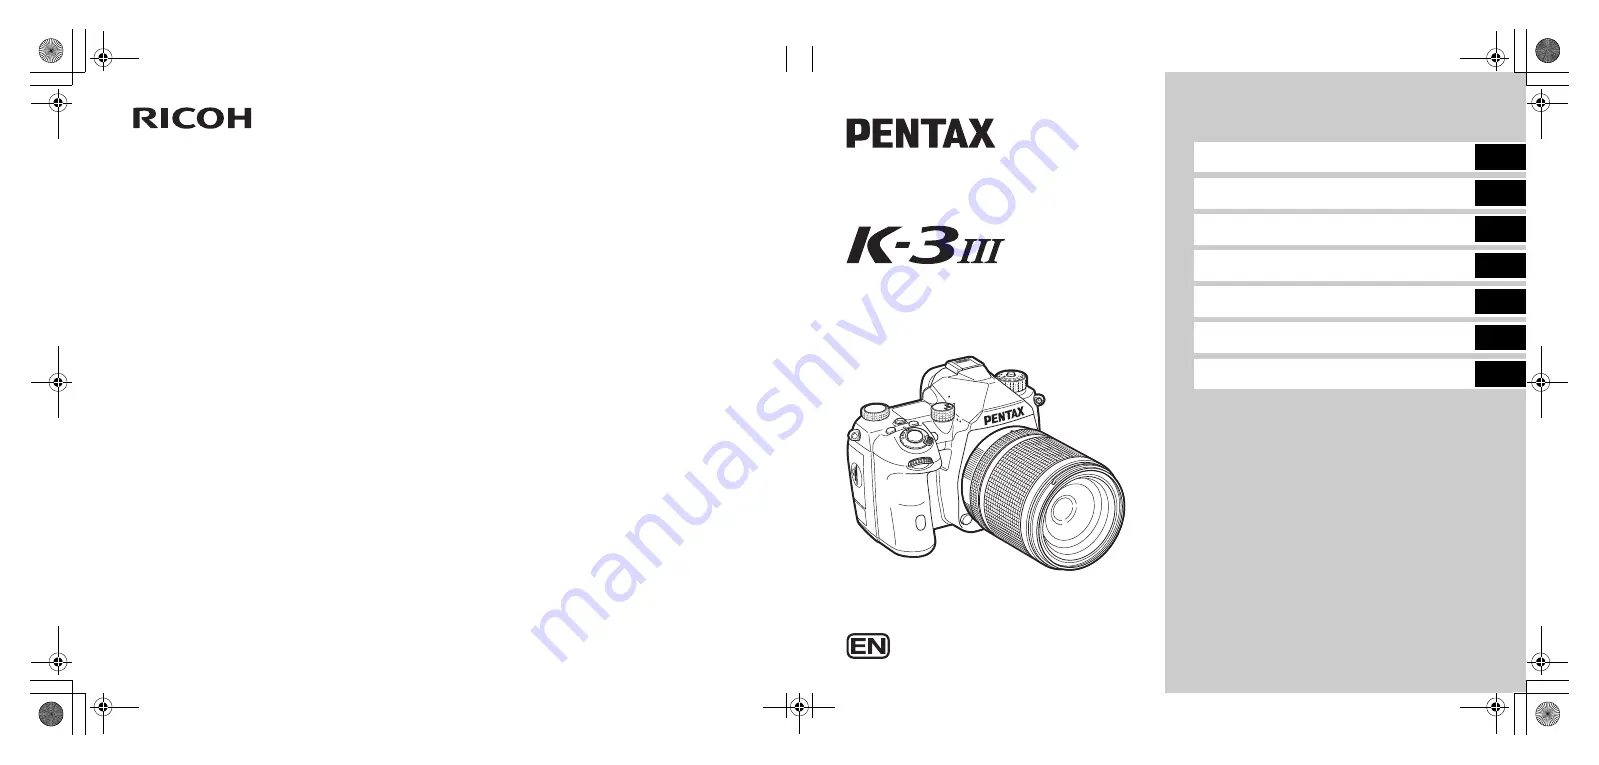
SLR Digital Camera

Operating Manual

This Operating Manual provides information on how to use the 
shooting and playback functions of this camera and related 
precautions.
Thoroughly read this Operating Manual to make the best use of 
the functions available with this camera. Be sure to keep this 
Operating Manual for future reference.
It is recommended to update the camera firmware to the latest 
version before using the camera.
For details on the latest firmware version, refer to the firmware 
download site.

http://www.ricoh-imaging.com/

RICOH IMAGING COMPANY, LTD.

Introduction

1

2

Getting Started

3

Shooting

4

Playback

5

Sharing

6

Settings

7

Appendix

Model No. R03010

• Specifications and external dimensions are subject to 

change without notice.

51553

Copyright © RICOH IMAGING COMPANY, LTD. 2020

R01DTL20 Printed in Philippines

*4RE2Z020*

e_kb582_cover_6mm.fm  Page 1  Thursday, December 10, 2020  1:19 PM

Summary of Contents for Pentax K-3 III

Page 1: ...ck the latest information on our websites SLR Digital Camera Operating Manual This Operating Manual provides information on how to use the shooting and playback functions of this camera and related precautions Thoroughly read this Operating Manual to make the best use of the functions available with this camera Be sure to keep this Operating Manual for future reference It is recommended to update ...

Page 2: ... the liquid crystal to get on your skin or in your eyes or mouth Depending on your individual factors or physical condition the use of the camera may cause itching rashes or blisters In case of any abnormality stop using the camera and get medical attention immediately Warning Wipe off the power plug if it should become covered with dust Accumulated dust may cause a fire Do not handle the power pl...

Page 3: ...ean water and get medical attention immediately Caution Only use the specified battery with this camera Use of other batteries may cause an explosion or fire Do not disassemble the battery Disassembling the battery may cause an explosion or leakage Remove the battery from the camera immediately if it becomes hot or begins to smoke Be careful not to burn yourself during removal Keep wires hairpins ...

Page 4: ...king Still Images p 49 Recording Movies p 54 Setting the Exposure p 57 Setting the Focus Method p 59 Selecting the Drive Mode p 66 Setting the White Balance p 74 Using a Flash p 77 Controlling the Image Finishing Tone p 78 Correcting Images p 80 How to Use This Manual 1 Introducing the K 3 Mark III p 8 Gives you an overview of the K 3 Mark III Read this and get to know your K 3 Mark III 2 Getting ...

Page 5: ...Unit p 121 Troubleshooting p 123 Main Specifications p 126 Index p 131 Care to be Taken During Handling p 135 WARRANTY POLICY p 138 There is a possibility that the illustrations and the display screen of the monitor in this manual are different from the actual ones 4 Playback Functions p 85 Explains various operations for playing back and editing images 5 Sharing Images p 97 Explains how to connec...

Page 6: ...ng the Camera On 42 Setting the Display Language Date and Time and Color 43 Formatting a Memory Card 43 Basic Shooting Operation 44 Shooting with the Viewfinder 44 Shooting while Viewing the Live View Image 46 Reviewing Images 47 Taking Images 48 Configuring the Capture Settings 48 Memory Card Recording Settings 48 Still Image Capture Settings 48 Movie Capture Settings 49 Taking Still Images 49 Ex...

Page 7: ...ages 91 Processing Images with Digital Filters 91 Developing RAW Images 92 Changing the Image Size 93 Correcting JPEG Images 94 Editing Movies 96 Sharing Images 97 Using the Camera with a Computer 97 Setting the Connection Mode 97 Copying an Image on the Memory Card 97 Installing the Provided Software 98 Operating the Camera with a Computer 98 Using the Camera with a Communication Device 99 Changi...

Page 8: ...or damage the stored data or affect the camera s internal circuitry and cause camera misoperation The liquid crystal panel used for the monitor is manufactured using extremely high precision technology Although the level of functioning pixels is 99 99 or better you should be aware that 0 01 or fewer of the pixels may not light up or may light up when they should not However this has no effect on t...

Page 9: ...7 1 2 3 4 5 6 7 Introducing the K 3 Mark III Getting Started Taking Images Playback Functions Sharing Images Changing the Settings Appendix ...

Page 10: ...lled on the camera Battery grip terminal cover Installed on the camera Rechargeable lithium ion battery D LI90 USB power adapter AC U1 or AC U2 Differs depending on the region Power plug USB cable I USB166 Strap O ST162 Operating Manual this manual Wireless Communication Guide Lenses You Can Use Lenses that can be used with this camera are D FA DA DA L FA and FA J lenses and lenses that have an 9 ...

Page 11: ...cator Viewfinder Monitor Dual card slot for SD Memory Cards Dial indicator Eye sensor Self timer lamp Remote control receiver AF coupler Mirror Lens unlock button Lens information contacts Strap lug Hot shoe Lens mount index Microphone X sync socket AF assist light Speaker Headphone terminal Tripod socket Battery cover Battery cover unlock knob Battery grip contacts USB terminal USB Type C HDMI te...

Page 12: ...ange the menu type when a menu screen is displayed p 20 In the playback mode use this dial to select a different image 7 EV Compensation button J Press to change the exposure compensation value p 54 8 Mode dial lock button Press to allow the mode dial to be turned p 44 9 Mode dial Changes the capture mode p 49 0 Mode dial lock release lever Use this lever to release the mode dial lock to operate t...

Page 13: ...or display multiple images at the same time p 47 p 85 m AF point selector lever 6 Changes the AF point p 60 The AF point can be moved up down left right and diagonally When an image is magnified during shooting with Live View or in the playback mode use this lever to move the display area Push the lever in to return the display area to the center of the image p 46 p 47 n Four way controller ABCD D...

Page 14: ...9 34 24 9 8 7 6 01 01 2021 01 01 2021 9999 9999 9999 9999 1 400 1 400 F5 6 F5 6 1600 35 11 10 5 32 4 2728 3 26 1 2 21 36 3940 37 38 13 16 14 15 17 33 32 34 9 8 7 6 9999 9999 9999 9999 1 Capture mode p 49 17 EV bar scale 2 AE Lock 18 Focus method p 59 3 Clarity p 83 Skin Tone p 83 Digital Filter p 79 HDR Capture p 81 Pixel Shift Resolution p 82 19 Hold AF Status p 61 20 Operation guide for 5 21 Ope...

Page 15: ...s Screen of Monitor Display in the E4 menu p 108 Outdoor View Setting Outdoor View Setting Cancel Cancel OK OK 10 10 10 10 1 1 250 250 F F5 6 5 6 1600 SR 01 01 2021 01 01 2021 9999 9999 9999 9999 Control Panel 1 Function name 14 HDR Capture p 81 2 Setting 15 Pixel Shift Resolution p 82 3 File Format p 48 4 Number of recordable still images Movie recordable time 16 Distortion Correction p 81 17 Per...

Page 16: ...ack is set to Z On in Memory the last image played back is displayed first next time p 111 27 Camera battery level 35 Wind Noise Reduction p 49 28 Battery grip battery level when D BG8 is attached 36 Headphone Volume p 49 29 Operation guide for the control panel customization p 106 37 Framerate p 49 38 Grid Style 39 Live View Shooting Touch AF p 51 30 Parameter 31 AF Active Area p 63 40 Movie Reco...

Page 17: ...ABCDEF 1234567890ABCDEF 10 30 00 10 30 00 359 359 9999m 9999m 1 400 1 400 F5 6 F5 6 1600 1600 9999 9999 9999 9999 59 999 59 999 59 999 59 999 179 179 89 89 01 01 2021 01 01 2021 Still Images Movies Page 2 20 Drive Mode p 66 36 Diffraction Correction p 81 21 Number of shots for IntervalShooting Interval Composite p 71 37 Color Fringe Correction p 92 38 Highlight Correction p 80 22 Total shooting ti...

Page 18: ...ed Noise Reduction p 52 AF Mode p 60 Number of shots for Bracketing p 67 4 EV Compensation p 54 Bracketing p 67 5 EV bar scale 6 Card slot number 7 Flash Exposure Compensation p 77 8 Multi exposure p 70 2 Aperture value 9 Continuous Shooting p 67 3 ISO Sensitivity p 57 Exposure compensation value Image storage capacity AF Active Area p 60 10 Remote Control p 73 11 AE Metering p 59 12 Mirror Up 13 ...

Page 19: ...unction p 19 37 AF Active Area p 60 18 Focus indicator 38 AE Metering p 59 19 HDR Capture p 81 39 EV Compensation p 54 20 Focus method p 59 40 Program Line p 52 21 File Format p 48 41 E Dial 22 AE Lock 42 Flash Exposure Compensation 23 Shake Reduction p 83 24 Pixel Shift Resolution p 82 43 Custom Image p 78 44 Crop p 48 25 Anti Aliasing Filter Simulator p 82 45 Zoom Review 46 Outdoor View Setting ...

Page 20: ...us Frequently used functions can also be set by operating buttons using the Smart Function or selecting on the control panel The functions set with the button operation Smart Function and control panel can be customized Press ABCD in the standby mode By default the following functions can be set t Memo The functions of ABCD and other buttons such as O can be changed in Fx Button of the E2 menu p 1...

Page 21: ... setting of the last selected function can be changed with V in the standby mode Using the Smart Function Function Setting Description Page User AF Switches between the settings of AF Mode AF Active Area and Hold AF Status specified in advance p 60 E Dial Changes the exposure value p 50 Drive Switches between the drive modes of Drive in Drive Mode specified in advance p 66 Crop Switches between th...

Page 22: ...e to eight menus Turn R to switch between menus 4 Find a function to set and press D The settings for the selected function are displayed Using the Control Panel Q Changes the parameter for the selected function when detailed settings can be made E Displays the menu screen for the selected function J Customizes the control panel 409600 6400 12800 25600 51200 102400 204800 3200 ISO AUTO MAX 6400 IS...

Page 23: ...ed the last used menu screen appears first To display the most appropriate menu for the camera settings at that time set Store Cursor Position to Off in the D2 menu The changed settings remain even after the camera is turned off For some functions you can set whether to keep the changed settings in Memory of the E5 menu p 111 Each menu type can be restored to the default settings in Reset of the D...

Page 24: ... the focus for a certain amount of time when the subject happens to move out of the selected focusing area after being focused during shooting with Continuous AF Low p 61 Action When AF Fails Sets the camera operation for when autofocus fails Drive Lens p 61 AF Point Tracking in AF C Sets the method for tracking AF points when the autofocus mode is set to Continuous AF Type 1 p 62 Subject Recognit...

Page 25: ...Standard Minimum Shutter Speed Sets the shutter speed at which the ISO sensitivity is increased when Min Shutter Speed Op is set to Shutter Speed Control 1 125 Flash Mode Sets the flash mode Flash On or Auto Flash Discharge p 77 Program Line Selects the Program Line setting Standard p 52 Auto EV Compensation Automatically compensates the exposure when the correct exposure cannot be achieved with t...

Page 26: ...Selects one of the memory cards inserted in the SD1 and the SD2 slots to use when Memory Card Options is set to Sequential Use SD1 File Format Sets the file format of images JPEG p 48 Crop Sets the angle of view for shooting Off JPEG Recorded Pixels Sets the recording size of JPEG images q JPEG Quality Sets the quality of JPEG images Super Fine RAW File Format Sets the RAW file format PEF Color Sp...

Page 27: ...ion setting when shooting with a high ISO sensitivity Auto p 58 Custom Options Sets the noise reduction level for each ISO sensitivity setting for High ISO Noise Reduction Medium A7 Shooting Assist Shake Reduction Activates the Shake Reduction function Auto p 83 Auto Shake Reduction Off Automatically sets the Shake Reduction function to Off when Self timer or Remote Control is used Enable Auto SR ...

Page 28: ...f p 73 B5 Movie Capture Settings Memory Card Options Selects one of the memory cards inserted in the SD1 and the SD2 slots for recording movies SD1 p 48 Recorded Pixels Sets the number of recorded pixels of the movie z p 49 Framerate Sets the number of framerate of the movie 30p Recording Sound Level Sets the sound volume level for recording Auto Wind Noise Reduction Reduces wind noise On Headphon...

Page 29: ... Sets whether to use the screen effect when the previous or next image is displayed by touch operation On C2 File Management Delete Deletes images p 88 Protect Protects images from being accidentally erased p 89 Image Rotation Changes the rotation information of an image p 89 Image Copy Copies images between cards in the SD1 and the SD2 slots p 90 File Transfer Sets the transfer reservation for im...

Page 30: ... Save Cross Processing Saves the settings used for an image captured with Cross Processing of Custom Image as your favorite settings p 79 E Customization Menus Item Function Default Setting Page E1 User Mode Save User Mode Settings Saves frequently used capture settings in up to ten setting boxes p 100 Rename User Mode Changes the name of a setting box Recall User Mode Setting Assigns the saved se...

Page 31: ... Shake Reduction Sets the Shake Reduction operation switching pattern when the button is pressed OFF AUTO PAN p 103 Operation Control Lock Sets the type of buttons to lock the operation when the button is pressed Exposure Change Lock AF AE Lock Settings Still Image Sets the autofocus operation when 0 is pressed halfway or I is pressed in A mode Enable AF Enable AF Off p 104 Movie Sets the autofocu...

Page 32: ... exposure mode Off Off J I I Off J J Off J J K I J J L I J G LINE ISO Rotation Direction Reverses the effect obtained when Q or R is turned Rotate Right p 105 HYPER P Sv Options Sets the camera operation when the camera enters the Hyper mode in G or H mode Standard p 105 Smart Function Function 1 Registers the functions to use with the Smart Function User AF p 106 Function 2 E Dial Function 3 Driv...

Page 33: ...ization Eye Sensor Link Monitor Display Turns off the monitor backlight when the eye sensor detects the user s eye On p 107 AE with Eye Sensor Starts metering when the eye sensor detects the user s eye Off Detection Sensitivity Sets the eye sensor detection sensitivity Medium Viewfinder Display Viewfinder Screen Sets the display in the viewfinder F1 p 107 Electronic Level Type Displays the electro...

Page 34: ...n Deletes the displayed image with L during Instant Review On Manage Img AE L Btn Displays the file management screen with H during Instant Review On Histogram Displays the histogram during Instant Review Off Highlight Alert Sets overexposed areas to blink red during Instant Review Off Zoom Review Quick Zoom Sets the display magnification and trigger operation for the quick zoom function during In...

Page 35: ...f Night Vision Display Off EV Steps Sets the adjustment steps for the exposure 1 3 EV Steps p 51 ISO Sensitivity Steps Sets the adjustment steps for the ISO sensitivity 1 EV Step p 57 Meter Operating Time Sets the time to continue metering after it is started 10sec p 17 Bulb B Mode Options Sets the camera operation when 0 is pressed in M mode Bulb p 53 X Mode Sync Speed Sets the flash sync speed 1...

Page 36: ... with the camera s autofocus system Off p 64 D Setup Menus Item Function Default Setting Page D1 File Setting Format Formats a memory card p 43 Create New Folder Creates a new folder on the memory card p 111 Folder Name Sets the folder name in which images are stored Date p 112 File Name Sets the file name assigned to an image IMGP p 113 Sequential Numbering Continues the sequential numbering for ...

Page 37: ...Sound Effects Setting Electronic Shutter Sound Makes a shutter sound while shooting with the electronic shutter On In focus Makes a beep sound when the subject is focused On AE Lock Makes a beep sound when the exposure value is locked On Count Down Makes a beep sound during the countdown for shooting with the self timer or remote control unit shutter release after 3 seconds On Mirror Up Makes a be...

Page 38: ...en to reduce battery consumption High p 40 Battery Grip Settings Sets the camera operation for when the optional battery grip is attached to the camera Auto p 39 USB Power Supply to Ext Supplies power to an external device via the USB cable p 40 D6 Maintenance Firmware Info Options Displays the camera s firmware version You can check the current firmware version before running an update Certificat...

Page 39: ...After removing the cover be sure to put the lens down with the lens mount side facing upward 3 Align the lens mount indexes red dots 4 on the camera and the lens and secure by turning the lens clockwise until it clicks To remove the lens Attach the lens cap and then turn the lens counterclockwise while pressing the lens unlock button Attaching the Strap When the Battery Grip is Used When the optio...

Page 40: ... of each lens Use the battery D LI90 exclusively developed for this camera u Caution Insert the battery correctly If the battery is inserted incorrectly it may not be removed Wipe the electrodes of the battery with a soft dry cloth before inserting Do not remove the battery while the power is on Be careful as the camera or battery may become hot after the camera has been used continuously for a lo...

Page 41: ... at hand and keep them warm in your pocket Battery performance will return to normal at room temperature Have extra batteries ready when traveling overseas or taking a lot of images When the optional Battery Grip D BG8 is used you can set the priority order of battery use in Battery Grip Settings of the D5 menu 1 Insert the power plug to the USB power adapter until it clicks 2 Connect the USB cabl...

Page 42: ...nal Battery Grip D BG8 is used you can charge the battery in the battery grip The battery set in Battery Grip Settings of the D5 menu of the camera is charged first The self timer lamp blinks twice continuously while charging the battery in the camera and three times continuously while charging the battery in the battery grip You can also charge the battery by connecting a commercial portable char...

Page 43: ...ls The memory card or data may be corrupted if the connection to the power supply is lost while the card is being accessed Be sure to read the manual of the AC adapter kit before using the AC adapter The following memory cards can be used with this camera SD Memory Card SDHC Memory Card SDXC Memory Card In this manual these cards are referred to as memory cards 1 Make sure that the camera is turne...

Page 44: ... If the writing speed cannot keep up with the recording speed writing may stop during recording t Memo For details on how the data is recorded when two memory cards are inserted refer to Memory Card Recording Settings p 48 Memory cards compatible with the UHS I UHS II standard can be used However if an UHS II memory card is inserted in the SD2 slot it operates at a speed equivalent to UHS I Turn t...

Page 45: ...rd slot in which the memory card to format is inserted and press D 5 Use A to select Execute and press E Formatting starts When formatting is completed the screen of Step 4 reappears 6 Press F twice The screen in the capture mode reappears u Caution Do not remove the memory card while formatting or the card may be damaged Formatting deletes all data both protected and unprotected t Memo When a mem...

Page 46: ...llustration When a retractable lens is attached extend the lens before turning the camera on y How to Use a Retractable Lens p 46 2 Turn the camera on 3 Set the A K B dial to A 4 Set the focus method switch to v 5 Set the mode dial to R while pressing the mode dial lock button Basic Shooting Operation Shooting with the Viewfinder Sv P AUTO U 1 U2 U3 U5 X M TAv B Av Tv S v P AUTO U1 U 2 U 3 U 5 X M...

Page 47: ... on the subject p 59 You can preview the image on the monitor and check the depth of field before shooting p 65 You can set the operation and display settings for Instant Review in Instant Review of the E4 menu p 109 When you want to lock the exposure value AE Lock by pressing 0 halfway make settings in Still Image of AF AE Lock Settings in the E2 menu u Caution Some functions are not available in...

Page 48: ...mporarily disabled to prevent misoperation during shooting Turning R while pressing 7 disables the operation of buttons and dials Turning R again enables the operation of them e is displayed on the status screen as well as in the viewfinder and Live View while the operation of buttons and dials is disabled The group of buttons and dials to be disabled can be selected in Operation Control Lock of F...

Page 49: ...wer is on the last played image is stored If you want to store the last played image even when the camera is turned off set Image for Playback to Z On in Memory of the E5 menu p 111 Reviewing Images CD Q Flick Displays the previous or next image L Deletes the image R to the right Pinch out Double tap Magnifies the image up to 16 Use 6 to change the area to display Push the lever in to return the d...

Page 50: ...p is set to 1 3x the cropping frame is displayed in the viewfinder p 16 Perform shooting so that the subject is positioned in the frame Configuring the Capture Settings Memory Card Recording Settings A5 B5 Sequential Use When the memory card in one slot becomes full saves data to the card in the other slot The slot to use can be switched with Card Slot Sequence Save to Both Saves the same data to ...

Page 51: ...era Movie Capture Settings B5 Recorded Pixels z x Framerate 60p 30p 24p Recording Sound Level Auto Manual 0 to 40 Wind Noise Reduction On Off Headphone Volume 0 to 40 Recorded Pixels Framerate Recording Sound Level Wind Noise Reduction Headphone Volume Custom Image Memory Card Options Movie Capture Settings Taking Still Images Capture Mode Function Page R Scene Analyze Auto mode Automatically sets...

Page 52: ...ged with Q R or V When the camera is in the mode to change values after operations such as pressing a function button D appears next to the value that can be changed on the outside field of view information in the viewfinder and on the LCD panel Exposure Modes Mode Changing Shutter Speed Changing Aperture Value Changing ISO Sensitivity EV Com pensation G Program AE 1 1 x x H Sensitivity Priority A...

Page 53: ...e exposure setting To not adjust the brightness according to the exposure setting set Exp Simulation LV to Off in the D2 menu u Caution The correct exposure may not be obtained with the selected shutter speed and aperture value when the ISO sensitivity is fixed at a certain sensitivity If the ISO sensitivity is set to ISO Auto the correct exposure may be obtained In M mode Drive Mode cannot be set...

Page 54: ...ens the aperture for a shallow depth of field MTF Priority Sets the sharpest aperture of the attached lens when a D FA DA DA L FA or FA J lens is used Slow Shutter Speed NR Auto On Off Cancel Cancel OK OK Program Line Auto Standard Hi speed Priority DOF Priority Deep DOF Priority Shallow MTF Priority Cancel Cancel OK OK Hyper Program You can shift the shutter speed and aperture value while keeping...

Page 55: ...re modes assign the hyper mode function to dials in E Dial Programming of the E2 menu p 104 If you change the ISO sensitivity shutter speed and aperture value the camera enters the hyper mode for each item in the order in which the value is changed When all the ISO sensitivity shutter speed and aperture value are changed the camera enters the hyper L mode Press M to return to the exposure mode set...

Page 56: ...re Reset of the E2 menu 1 Set the A K B dial to B Live View appears 2 Use the mode dial to select an exposure mode G I J K or L mode can be selected 3 Use Q or R to set the exposure 4 Focus on the subject When the focus method is set to v press 0 halfway 5 Press 0 fully Movie recording starts 6 Press 0 fully again Movie recording stops EV Compensation J Starts ends adjusting the compensation value...

Page 57: ...B1 menu When Continuous AF is set autofocus is always performed even while recording a movie To disable the autofocus operation with 0 pressed halfway in B mode set Movie to Off in AF AE Lock Settings of the E2 menu You can record a movie continuously up to 4 GB or 25 minutes When the memory card is full recording stops Movie Recording Using the Touch Panel When recording a movie you can start and...

Page 58: ...ity of recording camera operation sounds by connecting a commercially available stereo microphone to the microphone terminal on the camera The following specifications are recommended for external microphones A monaural microphone cannot be used with this camera You can record and play back movies while listening to the sound by connecting commercially available headphones to the headphone termina...

Page 59: ...ettings in ISO Sensitivity Setting of the A2 menu Setting the Exposure ISO Sensitivity N Starts ends changing the ISO sensitivity M Resets the ISO sensitivity to ISO Auto Setting the Range of ISO Auto A2 ISO Auto Upper Limit Sets the ISO sensitivity upper limit for ISO Auto ISO Auto Lower Limit Sets the ISO sensitivity lower limit for ISO Auto Min Shutter Speed Op Sets whether to automatically det...

Page 60: ...Reducing Noise when Shooting with a High ISO Sensitivity A6 Auto Applies noise reduction at optimally calculated levels throughout ISO sensitivity range Low Medium High Applies noise reduction at constant chosen level throughout ISO sensitivity range Custom Applies noise reduction at user defined levels for each ISO sensitivity setting Off Does not apply noise reduction at any ISO sensitivity sett...

Page 61: ...nsor In backlit conditions this mode automatically adjusts the exposure Center weighted Meters the brightness with an emphasis on the center of the sensor The sensitivity increases at the center and no automatic adjustment is performed even in backlit conditions Spot Meters the brightness only within a limited area at the center of the sensor Highlight weighted Meters the exposure in multiple area...

Page 62: ... Area AF Area Restriction Off AF S Setting 1st Frame Action in AF C Action in AF C Cont 1 1 250 250 1600 F F5 6 5 6 SR 9999 9999 9999 9999 AF Active Area AF Point Auto Area Automatically selects the optimum focusing points out of all AF points Zone Select Automatically selects the optimum focusing points out of the selected 21 AF points Select Sets the AF points to the user selected five points Ex...

Page 63: ...shooting when the autofocus mode is set to Continuous AF from Auto Focus priority and FPS priority You can set whether to immediately reactivate autofocus or to maintain the focus for a certain amount of time before reactivating autofocus when the subject happens to move out of the selected focusing points while tracking the subject with Continuous AF The setting can be selected from Off Low Mediu...

Page 64: ...pport such as tripods 5 Adjust the focus to the position where the subject may pass and press 0 fully When the subject comes into focus at the specified position the shutter is released automatically You can set the autofocus operation when shooting with Live View in AF with Live View of the A1 or B1 menu t Memo The AF Active Area setting can be changed by pressing b and then turning R p 63 AF Poi...

Page 65: ...rea Auto Area Automatically selects the optimum focusing area out of all AF active areas Zone Select Performs autofocus in the selected 3 3 areas Tracking 1 Tracks the subject in focus Select L Performs autofocus with more areas than those for Select M Select M Performs autofocus with the selected areas Select S Performs autofocus with fewer areas than those for Select M Spot Sets the AF active ar...

Page 66: ...es You can precisely fine tune your lenses with the camera s autofocus system 1 Select AF Fine Adjustment in the E7 menu and press D The AF Fine Adjustment screen appears 2 Press D The adjustment method selection screen appears 3 Select the adjustment method and press E 4 Press B and adjust the value Available operations 5 Press F twice The camera returns to the standby mode Movie Mode AF Focus Pe...

Page 67: ...ngs 4 Press F two or three times The camera returns to the standby mode u Caution The effects of some functions cannot be checked during Digital Preview or are not applied to the saved preview image Checking the Depth of Field Preview Optical Preview Activates the Optical Preview function to check the depth of field with the viewfinder Digital Preview Activates the Digital Preview function to chec...

Page 68: ...ting M Continuous Shooting L Continuously takes images while 0 is kept pressed p 67 Bracketing Takes consecutive images at different exposure levels p 67 Depth of Field Bracketing Continuously takes images with different depth of field settings aperture values p 68 Drive Mode Drive Mode Single Frame Shooting Single Frame Shooting Cancel Cancel OK OK Drive Drive Single Frame Shooting Single Frame S...

Page 69: ...shooting conditions 5 Press E The camera returns to the standby mode 6 Shoot After images are taken the camera returns to the standby mode Continuous Shooting Performs continuous shooting at high speed Performs continuous shooting at medium speed Performs continuous shooting at low speed Cancel Cancel OK OK Drive Drive Continuous Shooting H Continuous Shooting H Bracketing Q Sets the number of sho...

Page 70: ...are taken with one release of the shutter The camera returns to the standby mode t Memo The bracket value can be set in increments of 1 3 EV Steps or 1 2 EV Steps according to the setting of EV Steps in the E5 menu u Caution Depth of Field Bracketing cannot be selected when a lens with an 9 position is used with the aperture ring set to a position other than 9 Depth of Field Bracketing R Changes t...

Page 71: ...returns to its original position after the image is taken t Memo A beep sound is made during mirror lock up shooting You can also make settings so that a beep sound is not made p 110 During mirror lock up shooting Shake Reduction is fixed to Off in the A7 menu The outside field of view information is not displayed in the viewfinder during mirror lock up shooting The mirror automatically returns to...

Page 72: ...th the cumulatively added exposure Bright Compares the captured image with the previous image pixel by pixel and creates a composite image by replacing only the brightest pixel between the images Save Interim Images Sets whether to save images in the middle of processing Continuous Shooting Sets whether to perform continuous shooting No of Cont Timer Shots Sets the number of images taken continuou...

Page 73: ...tart Time Sets the shooting start time for when Start Interval is set to Set Time Fixed Time Release Sets whether to take images at the interval set in Interval regardless of the shutter speed AF Operation per Shot Sets whether to lock the focus position used when the first image is taken or perform autofocus each time an image is taken 2 2 00 00 00 00 Interval Shooting Interval Shooting Interval ...

Page 74: ...ting start time for when Start Interval is set to Set Time Composite Mode Sets the composite mode The mode can be selected from Average Additive and Bright Save Interim Images Sets whether to save images in the middle of processing Fixed Time Release Sets whether to take images at the interval set in Interval regardless of the shutter speed AF Operation per Shot Setswhether to lock the focuspositi...

Page 75: ... a setting 3 Press 0 halfway 4 Point the remote control unit towards the remote control receiver of the camera and press the shutter release button on the remote control unit Self timer Performs self timer shooting The shutter is released after about 12 seconds Performs self timer shooting The shutter is released after about 2 seconds Timer Remote Control Timer Remote Control Cancel Cancel OK OK S...

Page 76: ...us while shooting with the remote control unit set AF with Remote Control to On in the E6 menu When using the Remote Control Waterproof O RC1 the autofocus system can be operated with the q button on the remote control unit The r button cannot be used The Timer Remote Control setting is saved even after the power is turned off If Timer Remote Control is set to Y Off in Memory of the E5 menu the se...

Page 77: ...e shooting location the camera automatically adjusts the white balance according to the light source of each area The settings for the white balance can be made in the A3 menu You can also correct the white balance after shooting p 95 Manual White Balance 1 to 3 Color Temperature 1 to 3 Main switch to U Uses Digital Preview to preview the background image with the selected setting applied H Saves ...

Page 78: ... of Setting the White Balance p 74 2 Press G 3 Adjust the color temperature Set the color temperature value within the range from 2 500 to 10 000 K Kelvin Available operations 4 Press E The white balance setting screen reappears t Memo Set Color Temperature Steps to Mired in the E6 menu to set the color temperature in mired units The color temperature can be changed in 20 mired units with Q and 10...

Page 79: ...DA DA L FA FA J or F lens is used When the flash is used in I K or L mode any desired shutter speed of 1 200 seconds or slower can be set Using a Flash Connecting a Flash Setting the Flash Mode A2 Auto Flash Discharge Automatically measures the ambient light and determines whether to use the flash Auto Flash Red eye Discharges a pre flash for red eye reduction before an automatic flash 0 0EV 0 0EV...

Page 80: ...he standby mode u Caution In R mode the image finishing tone is fixed to Auto Select Controlling the Image Finishing Tone Custom Image A6 B6 Auto Select Bright Natural Portrait Landscape Vibrant Radiant Muted Flat Bleach Bypass Reversal Film Monotone Cross Processing Main switch to U Uses Digital Preview to preview the background image with the selected setting applied H Saves the preview image on...

Page 81: ...Image p 78 and selecting one of the saved settings F1 to F3 for the parameter 1 Select Digital Filter in the A6 or B6 menu and press D The Digital Filter screen appears 2 Use AB to select a filter Select Off to not shoot with a digital filter 1 Not available in B mode Available operations when shooting with the viewfinder Proceed to Step 6 if you do not need to change the parameters 3 Press G The ...

Page 82: ...nderexposed areas by expanding the dynamic range and enabling a wider range of tones to be recorded by the CMOS sensor Make settings in D Range Correction of the A6 or B6 menu u Caution When the ISO sensitivity is set to less than ISO 200 Highlight Correction cannot be set to On t Memo In B mode Highlight Correction can be set to Auto or Off AB Selects a parameter CD Adjusts the value R 3 3 0 Extr...

Page 83: ...he image The following corrections can be made in Lens Correction of the A6 menu t Memo Corrections can only be made when a compatible lens is attached p 116 The corrections are disabled when using an accessory such as rear converters that is attached between the camera and the lens When File Format is set to RAW or RAW JPEG in the A5 menu correction information is saved as a RAW file parameter an...

Page 84: ...D 2 Select a capture type and press E u Caution This function cannot be used in combination with some other functions p 115 Bracketing Off High and Bracketing Off Lo Hi cannot be selected in the following situations In M mode When Drive Mode is set to other than Single Frame Shooting in the A4 menu While HDR Capture or Pixel Shift Resolution of the A4 menu is used When the shutter speed is faster ...

Page 85: ...camera operation when 5 is pressed in Shake Reduction of Fx Button in the E2 menu p 103 u Caution The operating noise of the Shake Reduction unit may be recorded during movie recording Adjusting the Texture A6 Enhancing the Skin Tone A6 Type 1 Determines the skin tone of the subject by the Face Detection function and creates a natural looking skin tone The skin tone is enhanced only when a face is...

Page 86: ...ACER of the A4 menu is used t Memo The adjusted composition is saved even if Live View is ended or the camera is turned off To reset the saved adjustment value when the camera is turned off set Composition Adjustment to Y Off in Memory of the E5 menu p 111 If Composition Adjustment is registered in Fx Button in the E2 menu you can start the composition adjustment by pressing the button p 102 Corre...

Page 87: ...0 thumbnail images at the same time 1 Turn R to the left in the playback mode The multi image display screen appears Available operations 2 Press E The selected image appears in the single image display Using the Playback Functions Setting the Operation in the Playback Mode C1 Select Playback Card SD1 SD2 Auto Image Rotation On Off Playback Order Options File No Shooting Date Time Playback Sound V...

Page 88: ...nnot be executed for multiple images is selected in Step 2 the selected function is applied to the image with the selection frame When File Transfer is selected in Step 2 you can select Transfer Reservation or Cancel Reservation Select Transfer Reservation to select the format of transferred files and make a transfer reservation Select Cancel Reservation to cancel the transfer reservation for all ...

Page 89: ...ode Make sure to have a commercially available HDMI cable equipped with an HDMI terminal Type D 1 Turn the AV device and camera off 2 Open the terminal cover of the camera and connect the cable to the HDMI terminal 3 Connect the other end of the cable to the input terminal on the AV device 4 Turn the AV device and camera on The camera turns on in the video output mode and the camera information is...

Page 90: ...elete 1 Image or Delete All Images For images captured with File Format set to RAW JPEG select the file format to delete When Delete All Images is selected proceed to Step 4 3 Use Q to select an image 4 Press E When Delete All Images is selected the confirmation screen appears Proceed to Step 5 5 Select Execute and press E Organizing Files Deleting Images C2 100 0001 10 00 10 00 01 01 2021 01 01 2...

Page 91: ...on information during playback The rotation information of an image can be changed by following the procedure below 1 Display the image to rotate in the single image display 2 Select Image Rotation in the C2 menu or on the playback function selection screen 3 Use AB to select the desired rotation direction and press E The image rotation information is saved and the camera returns to the single ima...

Page 92: ...evice via a wireless LAN the file transfer automatically starts 1 Select File Transfer in the C2 menu or on the playback function selection screen 2 Select Transfer 1 Image For images captured with File Format set to RAW JPEG select the file format to transfer 3 Use Q to select an image 4 Press E The transfer reservation is made for the image t Memo To cancel the transfer reservation select Transf...

Page 93: ...isplay the image to edit in the single image display 2 Select Digital Filter in the C3 menu or on the playback function selection screen The Digital Filter screen appears 3 Use AB to select a filter Available operations Proceed to Step 7 if you do not need to change the parameters 4 Press G The parameter setting screen appears Saving the RAW Data C2 Save RAW Data Save RAW Data The RAW data of this...

Page 94: ...hem as new files 1 Display the image to edit in the single image display 2 Select RAW Development in the C4 menu or on the playback function selection screen The RAW development setting screen appears 3 Select the setting item to change Available operations 4 Press G The save confirmation screen appears AB Selects a parameter CD Adjusts the value 0 0 0 0 0 0 0 0 0 0 Base Parameter Adj Base Paramet...

Page 95: ...ring shooting For the RAW images captured using HDR Capture or Pixel Shift Resolution you cannot change the parameters of Digital Filter Clarity and Skin Tone when developing the RAW images With the provided software Digital Camera Utility 5 you can develop RAW images on a computer p 98 u Caution Images already resized or cropped to the minimum file size cannot be processed You can change the numb...

Page 96: ...ack function selection screen and press D The Levels Adjustment screen appears 3 Adjust the value Available operations 4 Press E The save confirmation screen appears 5 Select SD1 or SD2 and press E Cropping Out Part of the Image Cropping C3 R Changes the size of the cropping frame ABCD Moves the cropping frame G Changes the aspect ratio Q Rotates the image by 0 1 H Rotates the cropping frame by 90...

Page 97: ...Color Moiré Correction screen appears 3 Adjust the value Available operations 4 Press E The save confirmation screen appears 5 Select SD1 or SD2 and press E u Caution Some images may not be corrected properly If Color Moiré Correction is executed color loss or color bleeding may occur Correcting the White Balance AB Adjusts the Green Magenta balance CD Adjusts the Blue Amber balance M Resets the a...

Page 98: ...act Movie Saves the range specified with the start and end points as a new file Divide Movie Divides a movie into two files at the specified devision point and saves as new files 00 20 00 45 00 20 00 45 Extract Movie Extract Movie Synchronize Points Synchronize Points Switch Points Switch Points OK OK Cancel Cancel Preview Preview 00 20 00 45 00 20 00 45 Divide Movie Divide Movie Synchronize Point...

Page 99: ...t of the computer 4 Turn the camera on The camera is recognized by the computer For Mac the app Photos starts When the app does not start start it manually 5 Save the captured images to the computer 6 Disconnect the camera from the computer t Memo Charging of the battery starts when the camera is turned off after it is connected to the computer On the computer the memory cards are displayed as SD1...

Page 100: ...g switches to MTP You can perform tethered shooting with the camera connected to a computer using the optional IMAGE Transmitter 2 1 Set USB Setting to MTP in the D4 menu 2 Turn the camera off 3 Connect the camera to a computer using a USB cable 4 Turn the camera on 5 Start IMAGE Transmitter 2 on the computer IMAGE Transmitter 2 is started and the computer recognizes the camera u Caution When the ...

Page 101: ...app Image Sync the camera can be operated from the communication device and the images saved in the memory cards can be displayed on the communication device to import them Refer to the separate Wireless Communication Guide for how to use the camera connected with a communication device Using the Camera with a Communication Device ...

Page 102: ... screen of Step 3 reappears u Caution Save User Mode Settings cannot be selected when the mode dial is set to R t Memo If the box name is not entered the date and time when the settings are saved are used as the box name To change the box name select Rename User Mode in the E1 menu To reset the saved settings select Reset User Mode Settings in the E1 menu Camera Settings Saving Frequently Used Set...

Page 103: ... changed in Exposure in User Mode of the E1 menu t Memo The settings changed in Step 2 are not saved as the user mode settings When the camera is turned off or the mode dial is turned the user mode settings are reset to the originally saved ones The timing to reset the user mode settings can be set in User Settings Restoration in the E1 menu If the settings saved in the box assigned to the mode di...

Page 104: ...set to K 4 Switches to shooting with Live View while keeping the A K B dial set to A 4 Press E The screen of Step 2 reappears Repeat Steps 2 to 4 5 Press F twice Customizing the Operating Controls Setting the Button Operation E2 Fx Button Shake Reduction Button RAW Button Operation Lock Button Shake Reduction Button Unset Face Detection AE Lock AE Metering Flash Mode Focus Peaking Cancel Cancel OK...

Page 105: ...ke the JPEG Options RAW Options and RAW JPEG Options settings Select the file format to change to when each button is pressed 4 Make the Cancel after 1 Shot setting 5 Press F twice The camera returns to the standby mode u Caution The button to which the One Push File Format function is assigned cannot be used when Memory Card Options is set to Separate RAW JPEG in the A5 menu p 48 Shake Reduction ...

Page 106: ...n exposure mode and press E The current settings are displayed 4 Select Basic Operation and press D 5 Use AB to select the combination of functions for when Q R or V is turned and when M is pressed Setting the Autofocus and AE Lock Operations E2 Shutter AF Button Sets the operations when 0 is pressed halfway or I is pressed Shooting AE Lock Sets the timing to lock the exposure value Setting the E ...

Page 107: ...se the effect obtained by turning Q or R If you select HYPER P Sv Options on the screen of Step 2 you can set the camera operation when the camera enters the hyper mode in G or H mode Executes the Program Shift Executes the Program Line Sets the camera to the hyper mode Sets the camera to the advanced hyper mode Cancels the hyper mode Enables Disables the timed exposure Not available Standard Dete...

Page 108: ...Image or Movie and press D The control panel customization screen appears 3 Use ABCD to select the function to change 4 Press E Selectable functions are displayed in the pop up menu 5 Use AB to select the function to save Select if you do not want to save any function 6 Press E The screen of Step 3 reappears Press M to reset to the default functions 7 Press F three times t Memo When the control pa...

Page 109: ...Sound Effects Eye Sensor E4 Link Monitor Display Turns off the monitor backlight when the eye sensor detects the user s eye AE with Eye Sensor Starts metering when the eye sensor detects the user s eye Detection Sensitivity Sets the eye sensor detection sensitivity Viewfinder Display E4 Viewfinder Screen Sets the combination of display items from among the grid guide electronic level AF frame spot...

Page 110: ...Panel Illumination Auto Illuminates the LCD panel when the metering is started while shooting with the viewfinder Manual Illuminates the LCD panel when the button to which LCD Panel Illumination is assigned in Fx Button of the E2 menu is pressed Off Does not illuminate the LCD panel Monitor Display E4 Color Settings Sets Color and Style of the status screen and control panel Status Screen Sets Aut...

Page 111: ...sts the value G Brightness Switches between the automatic adjustment and the manual adjustment M Resets the adjustment value to the default setting Cancel Cancel Auto Brt Adj Auto Brt Adj OK OK Brightness Brightness Instant Review E4 Display Time Sets the Instant Review display time When Display Time is set to Hold Instant Review is displayed until the next operation Zoom Review Displays the magni...

Page 112: ... D3 Self timer Makes the indicator lamps blink during the countdown for shooting with Self timer 12 sec Self timer 2 sec or Remote Control 3 sec in Drive Mode of the A4 menu Remote Control Makes the indicator lamps blink during the standby for shooting with Remote Control in Drive Mode of the A4 menu GPS Unit Lights up the indicator lamps when the GPS unit is attached to the camera Sound Effects D...

Page 113: ...Mode is set to Interval Shooting in the A4 menu p 71 When Save Interim Images is set to Unblended or Blended in Interval Composite of Drive Mode in the A4 menu p 72 When RAW Development of the C4 menu is executed from the multi image display screen folder display screen or shooting date display screen p 92 Selecting Settings to Save in the Camera E5 ISO Sensitivity EV Compensation Flash Mode Flash...

Page 114: ...older with a new number is created when the folder name is changed u Caution The maximum folder number is 999 After the folder number reaches 999 you cannot capture new images if you attempt to change the folder name or create a new folder or when the file name number reaches 9999 In this case perform Reset Numbering in the D1 menu Folder Name Date The four digits of the month and day of the shoot...

Page 115: ...or the one with the entered string of characters In Sequential Numbering of the D1 menu you can set whether to continue the sequential numbering for folder and file names even when a new folder is created or when memory cards are replaced The serial number is continued or reset at the following timings depending on the Sequential Numbering setting When a new image is taken after Reset Numbering of...

Page 116: ...r Copyright Holder and press D The text entry screen appears 4 Change the text Up to 32 single byte alphanumeric characters and symbols can be entered y Text entry p 100 5 Press F twice t Memo The Exif information can be checked in the detailed information display in the playback mode p 15 or using the provided software Digital Camera Utility 5 Setting the Copyright Information D1 XXXXXXXXXXXXXXX ...

Page 117: ...ons AA Filter Simulator HDR Capture Pixel Shift Resolution ASTRO TRACER Digital Filter Clarity Skin Tone Distortion Correction Diffraction Correction Save RAW Data Drive Mode Continuous Shooting 1 Bracketing 1 2 Mirror Lock up Shooting 1 Multi exposure 1 Interval Shooting 1 2 Interval Composite 1 2 AA Filter Simulator 1 2 HDR Capture Pixel Shift Resolution ...

Page 118: ...L IF FA 28mm F2 8 AL FA 31mm F1 8 Limited FA 35mm F2 AL FA 43mm F1 9 Limited FA 50mm F1 4 FA 77mm F1 8 Limited FAk 85mm F1 4 IF FAk 200mm F2 8 ED IF FAk MACRO 200mm F4 ED FAk 300mm F2 8 ED IF FAk 300mm F4 5 ED IF FAk 400mm F5 6 ED IF FAk 600mm F4 ED IF FAk 28 70mm F2 8 ED IF FAk 80 200mm F2 8 ED IF and FAk 250 600mm F5 6 ED IF 9 Fixed to Spot 10 J with the aperture set to wide open The aperture ri...

Page 119: ...e size Without the aperture ring F For 35mm full frame size KAF2 DA For APS C size Compatible with the built in motor Without the aperture ring FA For 35mm full frame size Power zoom compatible KAF3 KAF4 D FA For 35mm full frame size Dedicated for the built in motor Without the aperture ring DA For APS C size Dedicated for the built in motor Without the aperture ring Restrictions on the Selection ...

Page 120: ...ng because the metering is performed immediately before the shutter is released When shooting with Live View you can check the shutter speed and ISO sensitivity before shooting because the aperture is always narrowed down When a lens with automatic diaphragm is attached the aperture is narrowed down immediately before the shutter is released causing a time lag in the shutter release Using the Aper...

Page 121: ...cord the focal length information you input in the image when a lens that cannot automatically obtain the focal length information is attached set Using Aperture Ring to On in the E6 menu Use of the following external flashes optional enables a variety of flash modes such as P TTL auto flash mode x Available Restricted Not available Setting the Focal Length E6 mm 0 0 3 5 Select History MF Lens Foc...

Page 122: ... with accessories that have a different number of contacts such as Hot Shoe Grip as a malfunction may occur Combining with flashes from other manufacturers may cause equipment breakdown t Memo With the AF540FGZ AF540FGZ II AF360FGZ or AF360FGZ II you can use the high speed sync flash to discharge a flash and take an image at a shutter speed faster than 1 200 seconds Set the exposure mode to I K or...

Page 123: ...uction unit built in the camera with the movement of celestial bodies celestial bodies can be captured as individual points even when shooting with a long exposure setting 1 Attach the GPS unit to the camera and turn the camera on 2 Select ASTROTRACER in the A4 menu and press D The ASTROTRACER screen appears 3 Select ASTROTRACER and press D 4 Select a type and press E 5 Select Precise Calibration ...

Page 124: ...for use 2 Set the shooting conditions Available operations 3 Adjust the focus and press 0 When the timed exposure is enabled shooting stops automatically after the set time has elapsed When the timed exposure is not set the exposure continues while 0 is pressed u Caution This function cannot be used in combination with some other functions p 115 Shooting cannot be performed when the GPS informatio...

Page 125: ...walls etc dark colors intricate designs rapidly moving objects or scenery shot through a window or a net like pattern Lock focus on another object located at the same distance as your subject then aim at the subject and take an image Alternatively use w The subject is too close Move away from the subject and take an image The flash does not discharge Flash Mode is set to Auto Flash Discharge When ...

Page 126: ... the blower inside the lens mount area If the power is turned off during cleaning it may cause damage to the shutter the CMOS sensor and the mirror Hold the camera with the lens mount down while cleaning the sensor so dust will fall away from the sensor when the blower is used When the battery level is low the message Not enough battery power remaining to clean sensor is displayed on the monitor I...

Page 127: ...oo low to perform USB Power Supply to Ext of the D5 menu Install a fully charged battery Unable to update firmware There is a problem with the firmware update file The firmware cannot be updated The update file is damaged Try downloading the update file again Image folder cannot be created The maximum folder number 999 is being used and no more images can be saved Insert a new memory card or forma...

Page 128: ... I UHS II compatible UHS II is only available for the memory card inserted in the SD1 slot Dual Card Slots Sequential Use Save to Both Separate RAW JPEG Copying images between slots possible Storage Folder Folder Name Date 100_1018 101_1019 or a user assigned name default PENTX Storage File File Name User assigned name default IMGP File No Sequential Numbering Reset Type Pentaprism finder Coverage...

Page 129: ...e timer control two times the meter operating time set in customization setting continues as long as 0 is halfway pressed Type Electronically controlled vertical run focal plane shutter Electronic shutter is used for Pixel Shift Resolution Shutter Speed Auto 1 8000 to 30 seconds Manual 1 8000 to 30 seconds 1 3 EV steps or 1 2 EV steps Bulb timed exposure settable 1 second to 20 minutes Mode Select...

Page 130: ...arm White Tungsten n Manual White Balance up to 3 settings Color Temperature up to 3 settings Copying the white balance settings of a captured image Custom Image Auto Select Bright Natural Portrait Landscape Vibrant Radiant Muted Flat Bleach Bypass Reversal Film Monotone Cross Processing Cross Processing Random Preset 1 to 3 Favorite 1 to 3 Digital Filter Extract Color Replace Color Retro High Con...

Page 131: ...lts may vary depending on the shooting conditions circumstances Connection Port USB terminal USB Type C Cable release terminal 2 5 mm dia X sync socket HDMI terminal Type D Microphone terminal Headphone terminal USB Connection USB 3 2 Gen 1 Data transfer MTP CD ROM Battery recharge Power supply to the camera when the dedicated AC adapter is used Standards IEEE 802 11b g n standard wireless LAN pro...

Page 132: ...erature Normal Shooting Playback Time D LI90 23 C 73 F 800 250 minutes Approximate Image Storage Capacity by Size Recorded Pixels JPEG Quality RAW m l k q 26M 495 1120 2190 141 p 15M 837 1872 3607 o 9M 1401 3105 5840 r 2M 4717 9812 16353 Operating Environment for USB Connection and Provided Software Windows OS Windows 10 FCU CU 32 bit 64 bit or Windows 8 1 32 bit 64 bit CPU Intel Core i5 or higher...

Page 133: ...hite Balance White Balance 74 Auto White Balance under Tungsten Light 75 Autofocus 59 J bracketing 68 AV device 87 J mode 50 B M mode 53 Base Parameter Adjustment Digital Filter 91 Battery 38 Battery grip 39 Battery grip contacts 9 Battery Grip Settings 39 40 Bleach Bypass Custom Image 78 Bluetooth 99 Bold Monochrome Digital Filter 79 91 Bracketing 67 Bracketing Order 67 Bright Custom Image 78 Bri...

Page 134: ...ce 74 Fluorescent Daylight Color White Balance 74 Fluorescent Daylight White White Balance 74 Fluorescent Warm White White Balance 74 Focal length input 119 Focus Magnification 109 Focus method 59 Focus method switch 44 59 Focus Peaking 64 Folder display 87 Folder Name 112 Format 43 Four way controller 11 18 Frame Composite Digital Filter 91 Framerate 49 Fx Button 102 G GPS 121 GPS Settings 121 Gr...

Page 135: ...age 78 Night Vision Display 13 Noise Reduction 52 58 O One Push Exposure Reset 54 One Push File Format 103 One Push ISO Auto 57 One Push Bracketing 67 Operating environment 130 Operation Control Lock 46 Optical Preview 65 Outdoor View Setting 13 122 P G mode 50 PEF 48 Peripheral Illumination Correction 81 Phase matching detection autofocus 59 Photographer 114 Pixel Mapping 123 Pixel Shift Resoluti...

Page 136: ... 48 Status screen 12 108 Still image setting menus 22 Still image Live View Movie selector dial 44 Store Cursor Position 21 Strap 37 Subject Recognition 62 Supplying power 40 H mode 50 Sync socket 2P cap 120 T K mode 50 Tethered shooting 98 Text entry 100 Texture adjustment 82 Thumbnail display 47 85 TIFF 92 Time 53 Timed exposure 53 Tone Expansion Digital Filter 79 91 Touch Image Browse Effect 85...

Page 137: ...with organic solvents such as thinner alcohol and benzine Use a lens brush to remove dust accumulated on a lens Never use a spray blower for cleaning as it may damage the lens Please contact your nearest service center for professional cleaning of the CMOS sensor This will involve a fee Periodic inspections are recommended every one to two years to maintain high performance Do not store the camera...

Page 138: ... under license Intel and Intel Core are trademarks of Intel Corporation in the U S and or other countries SDXC Logo is a trademark of SD 3C LLC The Bluetooth word mark and logos are registered trademarks owned by Bluetooth SIG Inc and any use of such marks by Ricoh Company Ltd is under license USB Type C is a trademark of USB Implementers Forum This product includes DNG technology under license by...

Page 139: ... displayed based on the abovementioned licensing conditions and are not for the purpose of restricting your use of the product etc Tera Term Copyright C 1994 1998 T Teranishi C 2004 2018 TeraTerm Project All rights reserved Redistribution and use in source and binary forms with or without modification are permitted provided that the following conditions are met 1 Redistributions of source code mus...

Page 140: ...can be returned to you owing to the complicated customs procedures required If the camera is covered by warranty repairs will be made and parts replaced free of charge and the camera will be returned to you upon completion of servicing If the camera is not covered by warranty regular charges of the manufacturer or of its representatives will apply Shipping charges are to be borne by the owner If y...

Page 141: ... power wireless devices are absolutely safe Low power Wireless devices emit low levels of radio frequency energy RF in the microwave range while being used Whereas high levels of RF can produce health effects by heating tissue exposure of low level RF that does not produce heating effects causes no known adverse health effects Many studies of low level RF exposures have not found any biological ef...

Page 142: ... Innovation Sciences et Développement économique Canada ISDE Cet appareil numérique de la classe B est conforme à la norme NMB 003 B du Canada L émetteur récepteur exempt de licence contenu dans le présent appareil est conforme aux CNR d Innovation Sciences et Développement économique Canada applicables aux appareils radio exempts de licence L exploitation est autorisée aux deux conditions suivant...

Page 143: ...ing of used products please contact your local authorities your waste disposal service or the point of sale where you purchased the products 2 In other countries outside the EU These symbols are only valid in the European Union If you wish to discard used products please contact your local authorities or dealer and ask for the correct method of disposal For Switzerland Used electrical electronic e...

Page 144: ...a ku Tokyo 143 8555 Japan Notice to Users in UKCA marking Manufacturer RICOH IMAGING COMPANY LTD 3 6 Nakamagome 1 chome Ohta ku Tokyo 143 8555 Japan For Customers in Thai This telecommunication equipment conforms to the requirements of the Office of the National Broadcasting and Telecommunications Commission The CE Mark is a Directive conformity mark of the European Union The UKCA Mark is a Regula...

Page 145: ...Memo ...

Page 146: ...Memo ...

Page 147: ... the liquid crystal to get on your skin or in your eyes or mouth Depending on your individual factors or physical condition the use of the camera may cause itching rashes or blisters In case of any abnormality stop using the camera and get medical attention immediately Warning Wipe off the power plug if it should become covered with dust Accumulated dust may cause a fire Do not handle the power pl...

Page 148: ...check the latest information on our websites SLR Digital Camera Operating Manual This Operating Manual provides information on how to use the shooting and playback functions of this camera and related precautions Thoroughly read this Operating Manual to make the best use of the functions available with this camera Be sure to keep this Operating Manual for future reference It is recommended to upda...

Reviews: