background image

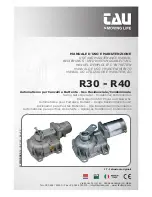
BOSS 230V

ITALIANO pag. 04 / FRANÇAIS pag. 18 / ENGLISH page 32

SLAVE

Brevettato - Patent 0000267203

Operatore
Opérateur

Operator

Alimentazione

Alimentation

Power Supply

Lunghezza max leva 

basculante

Max. longueur levier 

basculante

Door lever’s max. length

Superficie max basculante

Max. surface basculante

Max. door surface

Larghezza max basculante

Max. largeur basculante

Max. door width

Altezza max basculante

Max. hauteur basculante

Max. door height

Codice

Code
Code

BOSS 230V 
SLAVE IP44

230V ~  50Hz

83 cm

12 m

2

(1 BOSS  

1 BOSS SLAVE)

6 m

per applicazione 2 motori

pour application 2 moteurs

for 2 motors application 

2,5 m

AA40836

BOSS 230V 
SLAVE IP30

AA40836B

Summary of Contents for AA40836

Page 1: ...oor lever s max length Superficie max basculante Max surface basculante Max door surface Larghezza max basculante Max largeur basculante Max door width Altezza max basculante Max hauteur basculante Max door height Codice Code Code BOSS 230V SLAVE IP44 230V 50Hz 83 cm 12 m2 1 BOSS MASTER 1 BOSS SLAVE 6 m per applicazione 2 motori pour application 2 moteurs for 2 motors application 2 5 m AA40836 BOS...

Page 2: ...A SECURITE DES PERSONNES IL EST IMPORTANT DE SUIVRE TOUTES LES INSTRUCTIONS CONSERVER SOIGNEUSEMENT CES INSTRUCTIONS 1 Si ce n est pas prévu dans la centrale électrique installer en amont de celle ci un interrupteur de type magnétothermique omnipolaire avec ouverture minimum des contacts de 3 mm qui porte une marque de conformité aux normes internationales Ce dispositif doit être protégé contre la...

Page 3: ...near the controls and the horizontally pivoted door 4 Check frequently the system in particular cables springs and supports to find out possible unbalances wear signs or damages The final user must not operate electrically the horizontally pivoted door if this needs maintenance or repair since a failure in the installation or a non correctly balanced barrier can provoke wounds 5 Before proceeding ...

Page 4: ...otorizzazione oppure ACG8189 L 0 8 m per basculante predisposta alla motorizzazione n 1 ACG8715 Rinvio laterale per 2 motori L 30 cm n 1 ACG8720 Coppia leve diritte oppure ACG8722 Coppia leve curve AA40833B AA40836B ACG8189 ACG8188 ACG8720 ACG8722 ACG8715 CARATTERISTICHE TECNICHE INSTALLAZIONE BOSS 230V SLAVE I Misure in mm 1 102 182 69 5 147 703 800 longherone corto 1950 longherone lungo CARATTER...

Page 5: ...La basculante può essere automatizzata solo se in buono stato e se rispondente alla norma EN 12604 Non bisogna generare punti di intrappolamento ad esempio tra basculante aperta e parete 3 I 5 1 1 Operatore BOSS MASTER 1 operatore BOSS SLAVE 2 Antenna radio 3 Lampeggiatore 4 Selettore a chiave BLOCK Wi Fi 5 Fotocellule interne 2 3 La leva della basculante deve avere una lunghezza massima di 83 cm ...

Page 6: ...ra essere rispettata Nel caso la basculante sia già predisposta per la motorizzazione utilizzare gli appositi agganci Non utilizzare gli angolari forniti Inserire i foderi delle leve negli angolari e fissare con gli appositi perni e copiglie Fig 4 Prestare attenzione affinchè una volta montati i foderi non urtino contro le leve di movimento della basculante MONTAGGIO DELLA COPPIA LEVE CURVE cod AC...

Page 7: ...rone con le viti in dotazione Fig 9 10 11 12 Verificare il bilanciamento della porta basculante Se non corretto in caso di porta non predisposta alla motorizzazione aggiungere 9 kg a ciascun contrappeso per ottenere il corretto bilanciamento 9 10 11 12 13 7 I RIBILANCIAMENTO BASCULANTE Applicando 2 motori BOSS alla basculante i suoi contrappesi devono essere appesantiti di ulteriori 9 kg per parte...

Page 8: ... non in dotazione Inserire le boccole nei supporti Fig 16 tirando i relativi bulloni Fig 17 Controllare che le LEVE DIRITTE cod ACG8720 siano perfettamente perpendicolari e non urtino i cassonetti dei contrappesi o la parte mobile della porta Se lo spazio compreso tra il telaio mobile della porta e i cassonetti che contengono i contrappesi è meno di 15 mm si dovrà usare la COPPIA LEVE CURVE cod AC...

Page 9: ...lle boccole di centraggio e i loro relativi controdadi Fig 21 Fissare poi con il grano ed il controdado le leve al tubolare Fig 22 23 Sbloccare meccanicamente gli operatori utilizzando la manopola in dotazione inserita nei relativi perni di sblocco Fig 24 25 Verificare il corretto movimento poi ribloccare gli operatori Lubrificare con grasso le leve e le guide della basculante 21 19 20 23 22 18 24...

Page 10: ...presente nel quadro elettronico Fig 30 per chiudere la basculante Rilasciare il pulsante una volta completata la chiusura Allentare la vite di tenuta della camme rossa e ruotarla fino a fare scattare il microinterruttore Fig 36 Serrare la vite di tenuta della camme rossa Fig 37 Eseguire un ciclo completo di apertura e chiusura per verificare il perfetto posizionamento delle camme In caso di necess...

Page 11: ...11 32 33 34 35 36 37 REGOLAZIONE FINECORSA CHIUSURA REGOLAZIONE FINECORSA APERTURA 31 FINECORSA CHIUSURA CAMME ROSSA FINECORSA APERTURA CAMME VERDE I ...

Page 12: ... connettore del cavetto che fuoriesce dal contenitore del quadro elettrico Fig 39 e 40 Inserire il carter sul riduttore facendo attenzione a inserirlo sul longherone negli appositi spazi e a centrare l asta di sblocco con il foro sul carter Fissare con le viti in dotazione il carter al motore Fig 42 e 43 e successivamente fissare la maniglia di sblocco Fig 44 all asta di sblocco del motore Applica...

Page 13: ...390N per le porte poste su siti commerciali ed industriali valori indicati nel punto 5 4 5 della norma EN 12453 ATTENZIONE L attivazione dello sblocco può provocare un movimento non controllabile della porta in caso questa non sia correttamente equilibrata In questo caso è necessario bilanciare correttamente la porta basculante SBLOCCO A FILO Con questo tipo di sblocco è possibile sbloccare i moto...

Page 14: ...14 61 62 58 59 60 63 I BOSS MASTER BOSS SLAVE ...

Page 15: ...vo applicato sulla basculante fino ad ottenere lo sblocco dell operatore Fig 67 Per bloccare il riduttore ruotare la chiave esagonale nel senso indicato dall adesivo applicato sulla basculante Fig 67 64 65 66 BOSS MASTER SBLOCCO SBLOCCO BOSS SLAVE 67 ATTENZIONE Il riaggancio dei vari sblocchi a porta chiusa non garantisce la totale chiusura della basculante che rimarrà parzialmente aperta fino a q...

Page 16: ...3 4 5 6 7 8 1 11 12 13 14 22 23 24 19 20 21 2 3 4 5 7 6 8 9 10 Light on Cover Push Button on Cover Common Motor Open V 22 Motor Com U C a p Motor Close W 14 13 11 23 24 BOSS 230V MASTER BOSS 230V SLAVE COLLEGAMENTI ELETTRICI I ...

Page 17: ...od ACG8065 TRASMETTITORE TX SLIM SYNCRO cod ACG8029 SBLOCCO CHIAVE A BRUGOLA CON SERRATURA cod ACG8732 BLOCK BLOCK Wi Fi SELETTORE A CHIAVE BLOCK DA PARETE cod ACG1053 SELETTORE A CHIAVE BLOCK Wi Fi DA PARETE senza fili batterie lithio incluse cod ACG6098 SELETTORE A CHIAVE BLOCK DA INCASSO cod ACG1048 FOTOCELLULE NOVA WIRELESS Segnalazione batteria scarica portata 30 m durata batterie oltre 3 ann...

Page 18: ...risation ou ACG8189 Longeron L 0 8 m pour bascule prévue à la motorisation n 1 ACG8715 Renvoi latéral pour 2 moteurs L 30 cm n 1 ACG8720 Paire de leviers droits ou ACG8722 Paire de leviers courbes AA40833B AA40836B ACG8189 ACG8188 ACG8720 ACG8722 ACG8715 F CARACTERISTIQUES TECHNIQUES INSTALLATION BOSS 230V SLAVE Mesures en mm 1 102 182 69 5 147 703 800 longeron court 1950 longeron long CARACTERIST...

Page 19: ... ne peut être automatisée que si elle est en bon état et si elle répond à la norme EN 12604 Il ne faut pas créer de point de prise au piège par exemple entre la porte basculante ouverte et le mur 5 5 4 1 1 1 Opérateur BOSS MASTER 1 Opérateur BOSS SLAVE 2 Antenne radio 3 Feu clignotant 4 Sélecteur à clé BLOCK Wi Fi 5 Photocellules intérieures 2 3 Le levier de la basculante doit avoir une longueur d...

Page 20: ...tion utiliser les points d attache prévus à cet effet Ne pas utiliser les cornières fournies Insérez les fourreaux des leviers aux cornières et fixez les avec les chevilles et goupilles fournies Fig 4 Faire attention à ce qu une fois montés les fourreaux ne heurtent pas les leviers de mouvement de la porte basculante MONTAGE DE LA PAIRE DE LEVIERS COURBES cod ACG8722 ENTRE LE MOTEUR ET LE CHÂSSIS ...

Page 21: ... au longeron avec les vis fournies Fig 9 10 11 12 Vérifier si la porte basculante est bien équilibrée Dans le cas contraire et dans le cas de porte non motorisée ajouter 9 kg à chaque contrepoids pour bien équilibrer la porte F ÉQUILIBRER A NOUVEAU LA BASCULANTE Lorsque on applique 2 BOSS à la basculante les contrepoids doivent etre rendus plus lourds de 9 kg pour chaque parte 9 10 11 12 13 ...

Page 22: ...nt pas fournies Introduire les bagues dans les supports Fig 16 en tirant les boulons Fig 17 Vérifier que les LEVIERS DROITS cod ACG8720 soient parfaitement perpendiculaires et ne heurtent pas les caissons des contrepoids ou la partie mobile de la porte Si l espace entre le châssis mobile de la porte et les caissons contenant les contrepoids est moins de 15 mm utiliser la PAIRE DE LEVIERS COURBES c...

Page 23: ...0 sur les bagues de centrage et les contre écrous Fig 21 Fixer ensuite avec le goujon et le contre écrou les leviers au tube Fig 22 23 Déblouquer mécaniquement les opérateurs en utilisant la poignée en dotation insérée dans les relatifs goujons de déblocage Fig 24 25 Vérifier le correct mouvement ensuite bloquer de nouveau les opérateurs Lubrifier avec du gras les chemins de la basculante F 23 21 ...

Page 24: ...touche se trouvant dans le tableau électronique Fig 30 pour refermer la porte basculante Relâcher la touche lorsque la porte est complètement fermée Dévisser la vis bloquant la came rouge et la faire tourner jusqu à faire déclencher le microinterrupteur Fig 36 Serrer la vis bloquant la came rouge Fig 37 Effectuer un cycle complet d ouverture et de fermeture pour vérifier que les cames sont bien po...

Page 25: ...RÉGLAGE DU FIN DE COURSE FERMETURE RÉGLAGE DU FIN DE COURSE OUVERTURE 31 FIN DE COURSE FERMETURE CAME ROUGE FIN DE COURSE OUVERTURE CAME VERTE F 25 32 33 34 35 36 37 ...

Page 26: ... avec le connecteur du câble sortant de la boîte du tableau électrique Fig 39 e 40 Introduire le carter sur le réducteur en faisant attention à l introduire sur le longeron dans les espaces prévus et à centrer la tige de déblocage avec le trou sur le carter Fixer à l aide des vis fournies le carter au moteur Fig 42 e 43 et fixer ensuite la poignée de déblocage Fig 44 à la tige de déblocage du mote...

Page 27: ...privés et 390N pour les portes sur les sites commerciaux et industriels valeurs indiquées au point 5 4 5 de la norme EN 12453 ATTENTION Le fait d activer le déblocage peut provoquer un mouvement incontrôlé de la porte si celle ci n est pas équilibrée correctement Dans ce cas il faut bien rééquilibrer la porte basculante DEBLOCAGE A FIL Avec ce type de déblocage il est possible débloquer les moteur...

Page 28: ...28 F 61 62 58 59 60 63 BOSS MASTER BOSS SLAVE ...

Page 29: ...tte appliquée sur la basculante jusqu à ce que l opérateur se débloque Fig 67 Pour bloquer le réducteur tourner la clé hexagonale dans le sens indiqué par l étiquette appliquée sur la basculante Fig 67 64 BOSS MASTER DÉBLOCAGE DÉBLOCAGE BOSS SLAVE 67 ATTENTION Je raccroche des divers débloques à porte fermée ne garantit pas la totale fermeture de la basculante qui restera partiellement ouverte jus...

Page 30: ... 4 5 6 7 8 1 11 12 13 14 22 23 24 19 20 21 2 3 4 5 7 6 8 9 10 Light on Cover Push Button on Cover Common Motor Open V 22 Motor Com U C a p Motor Close W 14 13 11 23 24 BOSS 230V MASTER BOSS 230V SLAVE BRANCHEMENTS ÉLECTRIQUES F ...

Page 31: ...OTOCEL FIT SLIM code ACG8065 TRANSMETTEUR TX SLIM SYNCRO code ACG8029 DEBLOCAGE CLE D ALLEN AVEC SERRURE code ACG8732 BLOCK BLOCK Wi Fi BLOCK SÉLECTEUR À CLÉ MURAL code ACG1053 BLOCK Wi Fi SÉLECTEUR À CLÉ MURAL sans fils batteries lithio inclues code ACG6098 BLOCK SÉLECTEUR À CLÉ ENCASTRER code ACG1048 PHOTOCELLULES NOVA WIRELESS Signalisation batterie déchargée portée 30 m durée batteries de plus...

Page 32: ...er applications or ACG8189 Mounting plate L 0 8 m for automated up and over applications No 1 ACG8715 Lateral transmission for 2 operators L 30 cm No 1 ACG8720 Pair of straight levers or ACG8722 pair of curved levers AA40833B AA40836B ACG8189 ACG8188 ACG8720 ACG8722 ACG8715 TECHNICAL DATA INSTALLATION BOSS 230V SLAVE Measurements in mm in 1 703 27 698 800 31 52 short mounting plate 1950 76 83 long...

Page 33: ...d laws in force The door can be automatized only if in a good state and if in accordance with EN 12604 standard No trapping points must be generated for example between horizontally pivoted open door and wall 33 G B Parts to install according to EN 12453 standard COMMAND TYPE USE OF THE SHUTTER Skilled persons out of public area Skilled persons public area Not skilled persons Hold to run operation...

Page 34: ...e maintained In the event that the up and over door is already pre fitted for automated movement use the attachments provided Do not use the angles provided Insert the sliding arm sleeve into the angles and secure the pivots and split pins Fig 4 Make sure that the casing does not touch the up and over door movement levers when mounted ASSEMBLY OF PAIR OF CURVED LEVERS code ACG8722 BETWEEN MOTOR AN...

Page 35: ...g plate using the screws supplied Fig 9 10 11 12 Check the balance of the up and over door If incorrect and in the event that the doors are not motor driven add 9 kg to each counterweight in order to achieve the correct balance G B RE BALANCING OF THE DOOR When installing 2 BOSS operator on a door 9 kg extra each side must be applied on the existing counterweights 9 10 11 12 13 ...

Page 36: ...Insert bushings in the supports Fig 16 bolt the support structures into place Fig 17 Check that the STRAIGHT LEVERS code ACG8720 are perfectly perpendicular and do not touch the counterweight casing or moving door parts The PAIR OF CURVED LEVERS code ACG8722 should be mounted when there is less than the 15 mm minimum space guaranteed between the moving part of the door and the exterior door frame ...

Page 37: ...position Fig 19 20 on the centring bush and relative lock nuts Fig 21 Fix the lever to the tubing tight with locking pin and lock nut Fig 22 23 With the help of the handles inserted in the relative realease mecanism mechanically release the operators Fig 24 25 Verify the correct movement of the door and then lock the motors again Lubricate the door s levers and guides G B 21 19 20 23 22 18 24 25 ...

Page 38: ...ig 34 Press the key on the electronic switchboard Fig 30 to close the up and over door movement Release the button once the closing operation has been completed Slacken the holding screw for the red cam and turn until the microswitch is activated Fig 36 Tighten the red cam holding screw Fig 37 Carry out a complete opening and closing cycle to check that the cams are positioned perfectly Correct po...

Page 39: ...39 31 CLOSURE LIMIT SWITCHES ADJUSTMENT OPENING LIMIT SWITCHES ADJUSTMENT CLOSURE LIMIT SWITCHES RED CAM OPENING LIMIT SWITCHES GREEN CAM G B 32 33 34 35 36 37 ...

Page 40: ...rom the electrical switchboard Fig 39 and 40 Insert the casing on the reducer making sure to position it on the mounting plate in the appropriate position and centre the release spar with the predrilled holes on the casing Fasten the casing to the motor with the screws supplied Fig 42 and 43 and then fix the release device handle Fig 44 to the motor release device spar Apply the lateral cap Fig 46...

Page 41: ... 390N for doors for commercial or industrial use parameters set by item 5 4 5 of EN 12453 standard WARNING The release mechanism may cause the door to move in an unpredictable fashion if the door has not been correctly centred and balanced In such cases it is necessary to carry out the necessary balancing operations to the up and over doors CABLE UNLOCKING RELEASE With such type of release system ...

Page 42: ...42 G B 61 62 58 59 60 63 BOSS MASTER BOSS SLAVE ...

Page 43: ...he up and over door until the operator unlocking device is activated Pic 68 In order to lock the reducer turn the hexagonal key in the direction indicated on the sticker on the up and over door Pic 67 64 BOSS MASTER RELEASE RELEASE BOSS SLAVE 67 ATTENTION The coupling of the releases with closed door doesn t guarantee the total closing of the door It will partially remain opened until an electrica...

Page 44: ...3 4 5 6 7 8 1 11 12 13 14 22 23 24 19 20 21 2 3 4 5 7 6 8 9 10 Light on Cover Push Button on Cover Common Motor Open V 22 Motor Com U C a p Motor Close W 14 13 11 23 24 BOSS 230V MASTER BOSS 230V SLAVE G B ELECTRIC CONNECTIONS ...

Page 45: ...G8065 SYNCRO TRANSMITTER TX SLIM SYNCRO code ACG8029 ALLEN KEY LOCK UNLOCKING RELEASE code ACG8732 BLOCK BLOCK Wi Fi BLOCK KEY SELECTOR FOR WALL INSTALLATION code ACG1053 BLOCK Wi Fi KEY SELECTOR FOR WALL INSTALLATION without wiring connection lithio batteries included code ACG6098 BLOCK KEY SELECTOR TO BUILD IN code ACG1048 PHOTOCELLS NOVA WIRELESS empty batteries warning range 30 m more than 3 y...

Page 46: ...NOTES 46 ...

Page 47: ...a BOSS CME2039 Campana motore BOSS foro pass CMO1325 Statore 230V BOSS CMO2532 Rot c alb BOSS x encoder CPL1134 Guida Cavi Motore BOSS CPL1352 Carter BOSS CPL1353 Contenitore Q e BOSS CPL1354 Coperchio Conten Qe BOSS CPL1355 Tappi Ferma Cavi BOSS CPL1356 Manopola Sblocco Dx BOSS CPL1357 Manopola Sblocco Sx BOSS CPL1392 Tappo Carter Passante BOSS CPL1393 Tappo Carter Cieco BOSS CTC1008 Chiavetta 6 ...

Page 48: ...rt B of Annex VII such documentation or parts of it will be sent by post or by electronic means in response to a motivated request received from the qualified national authorities This almost complete machinery is conformed with the provisions of these others EC directives Directives 2014 30 EU and 2014 35 EU All relevant essential requirements as given in Annex I of the EU Directive 2006 42 EC ha...

Reviews: