RCA PRO846, User Manual
The RCA PRO846 User Manual is a comprehensive guide that provides step-by-step instructions on operating and maximizing the potential of your RCA PRO846 device. You can easily download this manual for free from our website, where we offer a vast collection of user manuals for various products.
Share
Download


Reviews:
No comments
Related manuals for PRO846

Blackvue DR600GW-HD
Brand: Pittasoft Pages: 47

MyMuvi
Brand: Promaster Pages: 28

uEye
Brand: Swing Catalyst Pages: 9

XCL-S600
Brand: Sony Pages: 4

WEBCAM PRO AVC041
Brand: Targus Pages: 8

DC420
Brand: Canon Pages: 25

HC-X2000
Brand: Panasonic Pages: 215

OPTURA30
Brand: Canon Pages: 166

AG-AC90MC
Brand: Panasonic Pages: 23

ENFORCER EV-5105-N1SQ
Brand: SECO-LARM Pages: 4
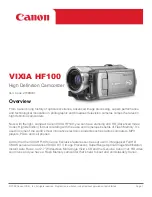
VIXIA HF100
Brand: Canon Pages: 23

VIXIA HF11
Brand: Canon Pages: 154

Vixia mini X
Brand: Canon Pages: 322

VM E 2
Brand: Canon Pages: 56

VIXIA HFR60
Brand: Canon Pages: 306

Vixia HV30
Brand: Canon Pages: 24

VIXIA HFS200
Brand: Canon Pages: 17
VIXIA HFG10
Brand: Canon Pages: 18


