RCA 25250, User Manual
The RCA 25250 is a versatile telephone system designed to meet your communication needs. With its user-friendly interface, getting started is a breeze. Ensure a seamless setup with the helpful Quick Start Manual available for free download from manualshive.com. This comprehensive manual will guide you through every feature and function of the RCA 25250.
Share
Download


Reviews:
No comments
Related manuals for 25250

Colibri
Brand: Necta Pages: 48

Freestyle extractorVAC
Brand: Host Pages: 4

HCH Series
Brand: Happy Pages: 2

Bobbin Winder
Brand: Gammill Pages: 3
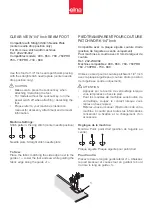
202-239-002
Brand: ELNA Pages: 2

Eagle RA 700 B
Brand: Cleanfix Pages: 16

TFX-1032
Brand: Radio Shack Pages: 36

410W110
Brand: Singer Pages: 7

FAX3700l
Brand: Ricoh Pages: 256

Aria Quilting & Sewing Machine
Brand: Baby Lock Pages: 2

DDL-8700
Brand: JUKI Pages: 59

DDL-5600N Series
Brand: JUKI Pages: 48

DLU-5494N-7
Brand: JUKI Pages: 4

The Monsters
Brand: Stern Pinball Pages: 52

YT-09203
Brand: YATO Pages: 87

SATURN 20DS3
Brand: Edic Pages: 12

522
Brand: Consew Pages: 8

230
Brand: Consew Pages: 6


