background image

INSTALLATION INSTRUCTIONS

Catalog No. 6000.59.1B

Effective: 03-08-12

Replaces: 03-28-07 

P/N 241309 Rev. 3

FOR YOUR SAFETY:

Do  not  store  or  use  gasoline  or  other  flammable  vapors  and  liquids  or  other

combustible materials in the vicinity of this or any other appliance. To do so may result in an explosion or fire.

WHAT TO DO IF YOU SMELL GAS:

•   Do not try to light any appliance.
•   Do not touch any electrical switch; do not use any phone in your building.
•   Immediately call your gas supplier from a neighbor's phone. Follow the gas supplier's instructions.
•   If you cannot reach your gas supplier, call the fire department.

Installation and service must be performed by a qualified installer, service agency or the gas supplier.

NOTE: 

Not for use with millivolt units.

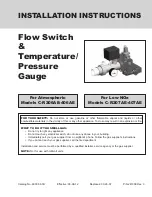
For Atmospheric 

Models C-R206AE-406AE

Flow Switch

&

Temperature/

Pressure

Gauge

For Low NOx 

Models C-R207AE-407AE

Summary of Contents for C-R206AE-406AE

Page 1: ...MELL GAS Do not try to light any appliance Do not touch any electrical switch do not use any phone in your building Immediately call your gas supplier from a neighbor s phone Follow the gas supplier s instructions If you cannot reach your gas supplier call the fire department Installation and service must be performed by a qualified installer service agency or the gas supplier NOTE Not for use wit...

Page 2: ... either the upper right or left side 4 Locate conduit opening above power conduit opening on the waterside of the heater 5 Locate the Inlet Outlet header 6 Install 2 flanges to header ports if not already installed NOTE These instructions are intended primarily for use by qualified personnel specifically trained and experienced in the installation of this type of heating equipment and related syst...

Page 3: ...ing nut to con nect to your outlet plumbing 15 Using the original equipment male CPVC connec tor install your inlet plumbing 16 Locate the pre wired hard conduit off the flow switch and route through the upper control panel as indicated in Fig 2 17 Cut the white spare jumper located on the back of the circuit board in the upper control panel See Fig 3 18 Strip 1 4 of insulation from each end of th...

Page 4: ...all front main panel door onto the heater 23 Turn water on to the heater and check for leaks a If leaks are found repair immediately 24 Turn on gas to the heater 25 Turn on power to the heater 26 Cycle the heater a few times to verify flow switch operation www raypak com Raypak Inc 2151 Eastman Avenue Oxnard CA 93030 805 278 5300 Fax 805 278 5468 Litho in U S A FLOW SWITCH WIRES CONNECTED TO SPARE...

Reviews: