background image

1

A MESSAGE 

FROM 

FORREST WOOD…

Congratulations! As the

owner of a new Ranger

®

boat

you have shown that you are a
knowledgeable buyer. Ranger
has earned the reputation of
being the leading manufacturer
of quality fishing boats and
your investment can, with care,
retain its value while giving
excellent service through the
years.

This manual is intended to

help you better understand
your boat and make basic care and maintenance quite simple.
Additionally, it provides information that could be essential to its
safe operation. Please take the time to study this manual along with
your engine operating manual before operating your boat. 

Should you have questions, contact your Ranger dealer or contact

us at

Ranger

®

Boats

P.O. Box 179
Flippin, AR 72634
(870) 453-2222

Please let me remind you that pleasant boating is safe boating and

the very best safety rules are your COMMON SENSE  and
SOUND JUDGEMENT.

Thank you for becoming a part of the ”Ranger Family”!

Sincerely,

Forrest L. Wood
Founder

Summary of Contents for 522VX

Page 1: ... and make basic care and maintenance quite simple Additionally it provides information that could be essential to its safe operation Please take the time to study this manual along with your engine operating manual before operating your boat Should you have questions contact your Ranger dealer or contact us at Ranger Boats P O Box 179 Flippin AR 72634 870 453 2222 Please let me remind you that ple...

Page 2: ...so protects your accessory equipment and fishing tackle from prying eyes and helps to guard against pilferage Familiarize yourself with the instruments and indicators used with all installed equipment Factory equipment manuals are included to assist you to properly operate your trolling motor depth finders engine tachometer speedometer and any additional accessories that you have installed Natural...

Page 3: ...iew while driving The power pedestal should be pushed down into the lowest position Should there be no base provided in the floor the seat should be removed and securely placed in the floor of the boat When you have cleared the No Wake zone it is time to accelerate and get your new boat on plane Before applying power insure that all passengers are properly and securely seated in appropriate locati...

Page 4: ...ill need to trim for safely handling a turn at various speeds and water conditions Just remember to MAKE SAFETYYOUR GUIDE when attempting any new or unfamiliar maneuver Proceed ONLY AT SPEEDS AT WHICH YOU FEEL SAFE AND IN CONTROL Naturally it is impossible to describe here all the different situations that you may encounter Just remember that COMMON SENSE is your best safety precaution Your new bo...

Page 5: ...pport brace between the trailer frame and the lower unit of your engine to prevent damage to your transom while the boat is in transit For the most possible boating and fishing enjoyment familiarize yourself completely with your boat and with the instruction manuals for all additional equipment If you are a novice there are publications on good seamanship recommended to make your boating safe and ...

Page 6: ...city one third of the fuel to go one third to come back and one third to reserve GOOD BOAT KEEPING A clean boat is a safer boat Take care to see that rods lures nets gaffs and other potentially harmful gear are properly stowed so that it cannot blow or move around while the boat is underway Perform all maintenance and safety checks regularly Secure all icebox or cooler lids and place any trash or ...

Page 7: ...ssengers ventilate the boat by opening the side curtains or forward hatch to remove the fumes and immediately seek medical attention Carbon monoxide can be drawn into the cockpit area over the stern of the boat When operating the engine ventilate the cockpit area by removing side curtains or opening forward hatches to allow fresh air to flow though Do not operate the engine if your boat is moored ...

Page 8: ...Key Locks Carpet and Upholstery 34 Cleaning Marine Vinyl 35 36 Adding Accessories To Your Boat 37 Wiring Diagrams 39 Electrical System 46 Fuse Panel Information 46 Keyless Ignition 51 Saltwater Series 52 Installation of Trolling Motor Plug 53 Installation of Battery Charger Plug 54 Federal Requirements for Recreational Boats 56 Boat Data Owner s Information 58 YOUR RANGER TRAIL TRAILER General Inf...

Page 9: ...epartment for any additional information IMPORTANT Your Ranger Dealer s Responsibilities Generally it is the dealer s responsibility to the customer to make sure that the boat has been equipped as ordered with a properly installed and functioning engine that is within the horsepower rating specified for that model boat The dealer should see that the engine is outfitted with the proper propeller fo...

Page 10: ...r operator s responsibility to return the unit to the Ranger dealer for a periodic checkup The owner operator is responsible for the correct operation of the boat and for the safety of its occupants Be sure that all operators read this manual before attempting to operate the boat Your passengers should be shown the location and use of all emergency equipment and one passenger should be instructed ...

Page 11: ...gine emergency stop switch can lead to property damage injury or death of the boat operator or passenger s or other whether within the boat or outside the boat WARNING WARNING The boat operator should insure that the lanyard connection to the emergency stop switch is of ample length to insure that the inadvertent activation of the switch is not likely Accidental triggering of the emergency stop sw...

Page 12: ...ING Install ski pylon securely before use Insert pin thru receiver and ski tow pylon Pushing pylon into mounting hole until red line is no longer visible Install pin thru receiver and pylon to secure position Failure to secure pylon may result in possible injury or death WARNING AVOID SERIOUS INJURY OR DEATH FROM FIRE OR EXPLOSIION RESULTING FROM LEAKING FUEL INSPECT SYSTEM FOR LEAKS AT LEAST ONCE...

Page 13: ...n stop the tow vehicle alone ANTICIPATE STOPS BRAKE EARLY Allow additional distance for stopping 2 Check lug nuts and tire pressure each trip Make sure that lug nuts are in place and tight Maintain tire pressure at 50 psi for proper load carrying and to avoid irregular wear 50 PSI TIRE PRESSURE MUST BE MAINTAINED FOR PROPER LOAD CARRYING AND TO AVOID IRREGULAR WEAR WARNING BEFORE TOWING ALWAYS INS...

Page 14: ...rmation 1 Boat patent information 2 Model Number This number should be referred to when ordering parts or making other inquiries 3 Hull Identification Number Serial Number Should also be included in any inquiries or when ordering parts The U S C G requires the H I N number be permanently affixed and remain on the starboard transom of the boat Do not alter this plate in any way 14 ...

Page 15: ...um weight in pounds or persons capacity number found on the U S C G capacity information plate attached to your boat Know the ratings and load your boat accordingly It is a must for safe boating 15 Failure to observe maximum weight and horsepower capacities could create conditions favorable to an accident that could result in injury or death to the occupants WARNING ...

Page 16: ... considered safe and suitable for on plane seating The operator of the boat should be familiar with these locations The boat should not be operated at or above planing speeds with persons on board not seated in the designated areas shown FIG 1 16 Do not operate the boat on plane with persons located outside the on plane locations shown on the decal Failure to do so could cause a person s to be thr...

Page 17: ...porting the driver and passenger seat or near the splashwell depending on the models is clearly marked and easily operated Fuel tanks optional on some models SAFETY AND MAINTENANCE TIPS The fuel system in your Ranger requires little or no maintenance However the periodic inspection outlined below is strongly recommended Contact your Ranger dealer for proper fuel tank access for your model 1 Check ...

Page 18: ...at operation The recirc position with aerator running will only recirculate what water is in the well It does not bring in any fresh water This position provides a more positive seal and is good to use if you are going to transport live fish in the well The auto position also holds the water in the well and in conjunction with the aerator will allow a mix of fresh water intake and recirculate exis...

Page 19: ...c position and pull out on the aerator spray head Turn on the aerator and the water in the well will be emptied To fill the livewell and resume normal operation push the aerator spray head in and set the livewell valve to the auto position 19 Pump Out Valve Operation To pump out pull the Power Nozzle aerator head to position shown NOTE Be sure you are operating in recirculation mode ...

Page 20: ...5 Aerator Spray Head 12 7415855 Venturi Air Aeration Sys Kit 13 7415855 Venturi Air Aeration Sys Kit 14 7100125 Blk 90 degree 1 1 8 Elbow w nut 15 6000050 Livewell Pumpout Sprayhead 16 7400225 1 1 8 Blk Spiral Bldg Hose 17 7415855 Venturi Air Aeration Sys Kit 18 7400259 3 4 Hose 19 7100130 Filter Screen 20 7415816 3 4 Male NPT x Male GHT Elbow 21 7415915 3 4 Swivel Female Insert 22 7415766 PVC 3 4...

Page 21: ...Baitwell Continuous Exchange of Water Open valve A leaving valve B closed Turn pump on Tank will fill until water reaches the overflow Leave pump on for continuous exchange of water 2 Re circulate Baitwell Water Close valve A open valve B Turn pump on Water in baitwell will re circulate 3 Drain Baitwell Turn pump off Open valve A and valve B 4 Close valve A when system is not in use ...

Page 22: ...Your Livewell Aeration System SALTWATER RECIRCULATING BAITWELL PLUMBING SYSTEM 22 ...

Page 23: ...apped water Grass sticks or other debris have clogged the filters or cavity around the pump impeller restricting water flow to pump Clean screens or remove screens and flush system with garden hose using moderate pressure Pump will not run no hum is heard Make sure switch is in the Manual position in Automatic the pump could be working but in off time Check master breaker switch in the rear compar...

Page 24: ... wheel is required at all times You should familiarize yourself with the feel of the steering at various speeds and trim settings NEVER exceed speeds beyond your comfort level Steering 24 The steering in your boat is one of the most important items and should be checked by the driver every time the boat is used You should school yourself and make it a habit to check the steering methodically Loose...

Page 25: ...nd service as necessary If you have installed a jack plate make sure that there isn t any interference between the jack plate and your steering cylinder If there is interference it may occur during full tilt Lift restrictors or a Tilt Stop Switch should be installed Please consult your engine manufacturer 25 Failure to comply with maintenance checks may result in loss of steering causing property ...

Page 26: ...ACEMENT KIT PART HS5157 FOR FRONT MOUNT CYLINDER PART HC5345 Item Part Quantity Description 1 797021 2 Seal Gland Only 2 745920 1 Seal Gland Assembly Guide Tool 3 745525 1 Pin Wrench Only 4 828980 1 Bleeder Fitting 5 600601 1 Elbow Fitting SEAL KIT HS5157 1 797021 2 Seal Gland Only 2 745920 1 Seal Gland Assembly Guide Tool 3 745525 1 Pin Wrench Only 26 ...

Page 27: ... Ranger does not supply the cable to engine connectors except on pre rigged packages we will not make specific installation or torque recommendations However Figures 4 5 show maintenance and check points that should be regularly inspected 27 See your authorized marine dealer for specific information concerning maintenance of engine connections CAUTION ...

Page 28: ...Steering 28 See engine owner s manual for proper greasing and maintenance of engine link rod and steering kit CAUTION ...

Page 29: ...eful as you may be you will get that scratch from the dock or beach that will need some attention Most Ranger dealers are equipped to do fiberglass repair and large jobs are better left to the experts However minor scratches chips and gouges may be repaired by you These instructions are to repair solid color gel coat only not poliflake 1 Using masking tape tape around damaged area slightly larger ...

Page 30: ...olor may vary somewhat However we take all the steps to keep our color consistent If for some reason you need to spray gel coat over your patch you will need to follow these steps 1 Mask around area to be sprayed 2 Sand area with 220 grit dry sandpaper removing all shine 3 Clean area with acetone 4 Mix Ranger touch up gel coat by thinning with styrene approximately 2 parts gel coat to 1 part styre...

Page 31: ...ing wax solution approximately 4 ounces of solution to a quart of gel coat then repeat step 5 8 Let set approximately 8 hours or until dry and tack free 9 Wet sand with 600 grit WET sandpaper and buff with light buffing compound 31 Do not sand metalflake surfaces A different procedure is used to repair these finishes You should contact your Ranger dealer for more information NOTICE ...

Page 32: ...ull up position Always lower the seat to the full down position when the boat is underway We recommend that the seat and pedestal be removed from the front casting deck and remounted into the special base mounted in the front of the deck floor when running Should your boat not have the additional base the front fishing seat should be removed and securely placed in the floor of the boat Your power ...

Page 33: ...urn in a counter clockwise direction and try the pedestal again If your seat will not remain in the upright position move the adjustment screw approximately 1 4 one quarter turn in a clockwise direction NOTE You may need to fine tune your pedestal by moving the adjustment screw a bit more in one direction or the other 33 ...

Page 34: ...s Your Ranger upholstery is top grade marine vinyl Naturally the suppleness and color fidelity of the upholstery is best maintained by storing your boat out of direct sunlight Cleaning and conditioning of your upholstery is best accomplished with an approved top quality vinyl cleaner To loosen stubborn soil or embedded dirt in textured surfaces use a soft bristle brush your approved cleanser follo...

Page 35: ...op Kote Sealant Son of a Gun Orange 88 Degreaser Roll Off Bleach Baking Soda Turtle Wax Tar Remover APCO Harbor Mate Certain household cleaners powdered abrasives steel wool and industrial cleansers can cause damage and discoloration and are not recommended Dry cleaning fluids and lacquer solvents acetone for example nail polish remover should not be used as they will remove printed pattern and or...

Page 36: ...first E Denatured Alcohol Rinse Dry F Follow instructions of stain agent manufacturer STEP 1 STEP 2 STEP 3 Ballpoint Ink E B A Chewing Gum D B A Coffee Tea Chocolate B Crayon D B Grease D B F Household Soil A B Ketchup A B Make Up Lipstick eye shadow etc A B Mildew Wet Leaves C B A Motor Oil B Paint Dried Oil Base D B A Paint Fresh Oil Base D A F Paint Latex A B F Permanent Marker E B C Shoe Polis...

Page 37: ...sens the chance of stripping the hold or chipping the gel coat around the hole If additional instruments are desired on the console holes may be drilled using a hole saw of the proper size The underside of the console face is reinforced for support When installing additional electric accessories always use the proper gauge size wire recommended for that item Insure that the proper size breaker or ...

Page 38: ...Should this occur the breaker s can be reset by pushing the switch If this occurs again disconnect battery leads and trace immediately or take it to your Ranger dealer for repair A light switch type circuit breaker is used for the accessories Should a breaker trip simply push to reset This switch should also be in the off position when trailering or storing the boat It acts as a master switch and ...

Page 39: ...39 SOME MODELS HAVE ONLY 1 FUEL TANK IN WHICH CASE THE SENDER WIRE IS PINK AND NO FUEL SWITCH APPEARS ON CONSOLE ...

Page 40: ......

Page 41: ......

Page 42: ......

Page 43: ......

Page 44: ......

Page 45: ......

Page 46: ...asily inspected or replaced The panel has a capacity of twelve to sixteen individual circuits The particular accessory ies they operate are shown on the decal on the right side of the fuse panel or back side of fuse panel cover 46 Do not exceed recommended fuse sizes Always install proper rated fuse when adding accessories to the fuse panel CAUTION ...

Page 47: ...witch can be used to start a timed aeration cycle Pressing the Aerator Timer switch once starts the low aeration cycle of 1 minute on and 2 minutes off Pressing the switch a second time starts the medium aeration cycle of 5 minutes on and 2 minutes off The third press starts the high aeration cycle of 15 minutes on and 2 minutes off The fourth key press will turn off the timer function Fuel Level ...

Page 48: ...ghtness Once the brightness is set the system will remember the setting Accessories There are 5 accessory functions on the system Accessories 1 3 on the console keypad and Accessories A and B on the bow keypad Pressing the corresponding switch once will turn on that accessory Pressing the corresponding switch again will turn off that accessory Horn From the console keypad press and hold for operat...

Page 49: ...he Aerator Timer switch once starts the low aeration cycle of 1 minute on and 2 minutes off Pressing the switch a second time starts the medium aeration cycle of 5 minutes on and 2 minutes off The third press starts the high aeration cycle of 15 minutes on and 2 minutes off The fourth key press will turn off the timer function Fuel Level The switch labeled Fuel on the console keypad controls which...

Page 50: ...ghtness Once the brightness is set the system will remember the setting Accessories There are 5 accessory functions on the system Accessories 1 3 on the console keypad and Accessories A and B on the bow keypad Pressing the corresponding switch once will turn on that accessory Pressing the corresponding switch again will turn off that accessory Horn From the console keypad press and hold for operat...

Page 51: ...then push the Start key 6 The Start LED will burn steady and the system will be in the accessory mode To start and stop the engine 1 Enter your user code the Start LED will burn steady 2 Press and hold the Start key for engine cranking release to stop cranking Note During cranking the 1 key can be used for engine choking if necessary 3 To turn off the engine press the Stop key 4 To restart the eng...

Page 52: ...itch a second time starts the medium cycle of 5 minutes on and 2 minutes off The third press starts the high aeration cycle of 15 minutes on and 2 minutes off A fourth press of the switch will turn off the timer function Bilge System The switch labeled Auto Bilge controls the bilge pump system Pressing the Auto Bilge switch once turns on the bilge pump Pressing the switch a second time turns off t...

Page 53: ... for direct attachment to bare wires All wires must be terminated with a 10 ring terminal of the appropriate wire gauge size When assembling plug insure that two cover screws pass through grooves in plug body 53 Always disconnect trolling motor plug prior to any direct charging to any battery in the rear storage area CAUTION ...

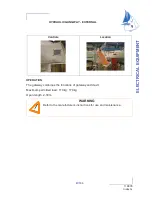
Page 54: ...Electrical System 54 ...

Page 55: ...art of the wiring system should be avoided Such alterations could cause damage and or electrical short Inspect wiring connections and terminals periodically for corrosion etc Replace as needed Replacement components should always be of equal or greater rating and quality We recommend Ranger replacement parts available through your Ranger dealer Always disconnect the positive and negative leads fro...

Page 56: ... visual distress signals One B 1 U S C G or U L approved fire extinguisher unless the construction is such that explosive flammable vapors cannot be trapped there are no closed compartments no permanently installed fuel tanks on board Type I II III or V for each person aboard Type I II III or V for each person aboard and one Type IV All undocumented vessels equipped with propulsion machinery must ...

Page 57: ...g accident report with their state boating law enforcement agency when their boat is involved in certain boating accidents as follows 1 There is loss of life or probable loss of life 2 Personal injury requiring medical treatment other than first aid 3 Damage to property that exceeds 500 57 ...

Page 58: ...BOAT DATA OWNER Address DEALER Address Phone BOAT MAKE MODEL Serial No Key No ENGINE MAKE MODEL Serial No Drive Unit Serial No OTHER 58 ...

Page 59: ...ue lug nuts to 75 85 ft lbs Periodically check the winch strap and winch parts for any wear and replace worn parts Remember a small expense for preventive maintenance is much less expensive now than a road side breakdown later 59 Trailer tires should be properly inflated and maintained The load carrying capacity of your trailer is based on the tire pressure Inadequate tire pressures can void your ...

Page 60: ...l COOL HUBS Contained Oil Orbital Lubrication COOL Hubs feature ADDING LUBRICANT Lubricant is added through threaded port on nose of hub This allows for easy access and maximum filling of hub cavity with oil LUBRICANT Uses standard 50 weight motor oil PRESSURE CONTROL THERMAL EXPANSION Hub cavity is completely filled with oil There is no void which could allow water entry during submersion of trai...

Page 61: ...solenoid valve be connected to the reverse light wire of the tow vehicle When the tow vehicle is put in reverse gear the solenoid will deactivate the brakes and allow you to back up Fig 16 page 63 To check proper operation of solenoid valve place tow vehicle gear shift in reverse with engine shut off and ignition on Backup lights should turn on and an audible click should be heard at the valve If ...

Page 62: ...in situations where you need to back over soft ground or up a hill while electric solenoid is disconnected When hitch is fully extended press down reverse lockout cap and turn clockwise to manually lockout brakes see Fig 14 below Lockout should return to normal position under forward pressure Press down and turn counter clockwise to remove reverse lockout cap to check brake fluid 62 ...

Page 63: ...Your RangerTrail Trailer 63 ...

Page 64: ...er shown 5 1 AXLE WITH BRAKE FLANGE 6 36045 2 MOUNTING BRACKET 7 32372 2 GREASE SEAL 233 168 SP2 8 32351 2 BEARING CONE INNER L 68149 9 32350 2 BEARING CONE OUTER L 44649 10 32409 8 7 16 20 X 1 BOLT 11 32410 8 7 16 LOCK WASHER 12 32411 8 7 16 HEX NUT 13 36075 4 SPRING CLIP 14 32500 2 BLEEDER SCREW 15 32307 2 BANJO BOLT 16 32275 2 BANJO FITTING 17 32230 4 COPPER WASHER 18 33020 2 5 16 18 X 2 1 2 BO...

Page 65: ...Functional Product s customer service department at 1 800 854 1905 or in California 1 800 542 6400 65 If not familiar with disc brake pad replacement have work performed by a qualified individual or service shop CAUTION Rotors must be replaced if distance between brake surfaces becomes less than 0 882 inches 22 4mm due to wear or machining CAUTION Check for leaks in the brake lines and fittings Le...

Page 66: ...ort bar Refer to Figure 17 below Failure to make this connection will result in no braking action and could lead to the brakes locking up due to heat buildup in the closed system The wiring harness connection is also made in this area To remove the coupler support the trailer on the swing away jack stand Disconnect the wire harness and brake line if so equipped Remove the two hitch pins and slide ...

Page 67: ...meter Naturally your tow vehicle should be equipped with a properly rated and substantial towing hitch well braced and firmly connected to your vehicle Make sure that your vehicle is properly wired for the trailer light connection The height of the towing ball above the ground will greatly influence the tongue weight of the trailer The base of the ball should be between 16 to 18 from the ground TO...

Page 68: ...ch pins holding the coupler slide assembly in the receiver are properly installed and seated figure 17 pg 66 If both pins are not inserted through the assembly do not tow your trailer On removable tongue trailers with brakes there is a hydraulic connection that must be made in order for the brakes to work This is a push together quick connect type fitting Failure to make this connection will resul...

Page 69: ...10 Carpeted Fender Backboard R H or L H and serial number 11 Wrap Around Tail Light Assembly R H or L H 12 License Plate Lights 9639504 13 I D Bar Light 9639502 14 Black Keel Roller 9618215 15 Wrap Around Tail Light Lens R H or L H 16 Waterproof Replacement Capsule 9639379 17 Clear Side Marker Lens 9639381 18 Rear Fender Insert specify serial number 19 Rear Fender Step Pad specify serial number 20...

Page 70: ...70 RANGERTRAIL PARTS ...

Page 71: ...71 ...

Page 72: ...ter 9612138 34 13 16 20 Spindle Nut 9612137 35 Spindle Nut Retainer 9612135 36 Bearing Bath Cap O Ring 9606089 37 Bearing Bath Cap 9606088 38 Amber Clearance Light 9639500 39 Ranger Trail Fender specify serial number 40 Ranger Trail Decal Black or White 41 Amber Wedge Light 9639503 TIRE Order by size description WHEEL Order by size description CARPET Order by model color Note 1 Use L number for cr...

Page 73: ...etail purchaser Defects in the exterior cosmetic gelcoat finish cracks or crazing Warranty Period runs sixty 60 days from the date of delivery to the original retail purchaser Repairs will only be authorized after Wood is satisfied that there is a defect in material or workmanship Coverage remaining under the Warranty Periods may be transferred by an authorized Ranger dealer to a 2nd purchaser for...

Page 74: ...er tires paint and trailer components manufactured by companies other than Wood 12 Engines outdrive controls propellers batteries and other equipment or accessories that are not manufactured by Wood whether or not warranted by other manufacturers Remedy under this warranty is expressly limited to repair or replacement of defects in materials or workmanship and does not include incidental or conseq...

Page 75: ...MAINTENANCE NOTES 75 ...

Page 76: ...76 MAINTENANCE NOTES ...

Page 77: ......

Page 78: ......

Reviews: