background image

RAISCUBE FDM 3D Printer 

RAISCUBE 3D Printer User Manual 


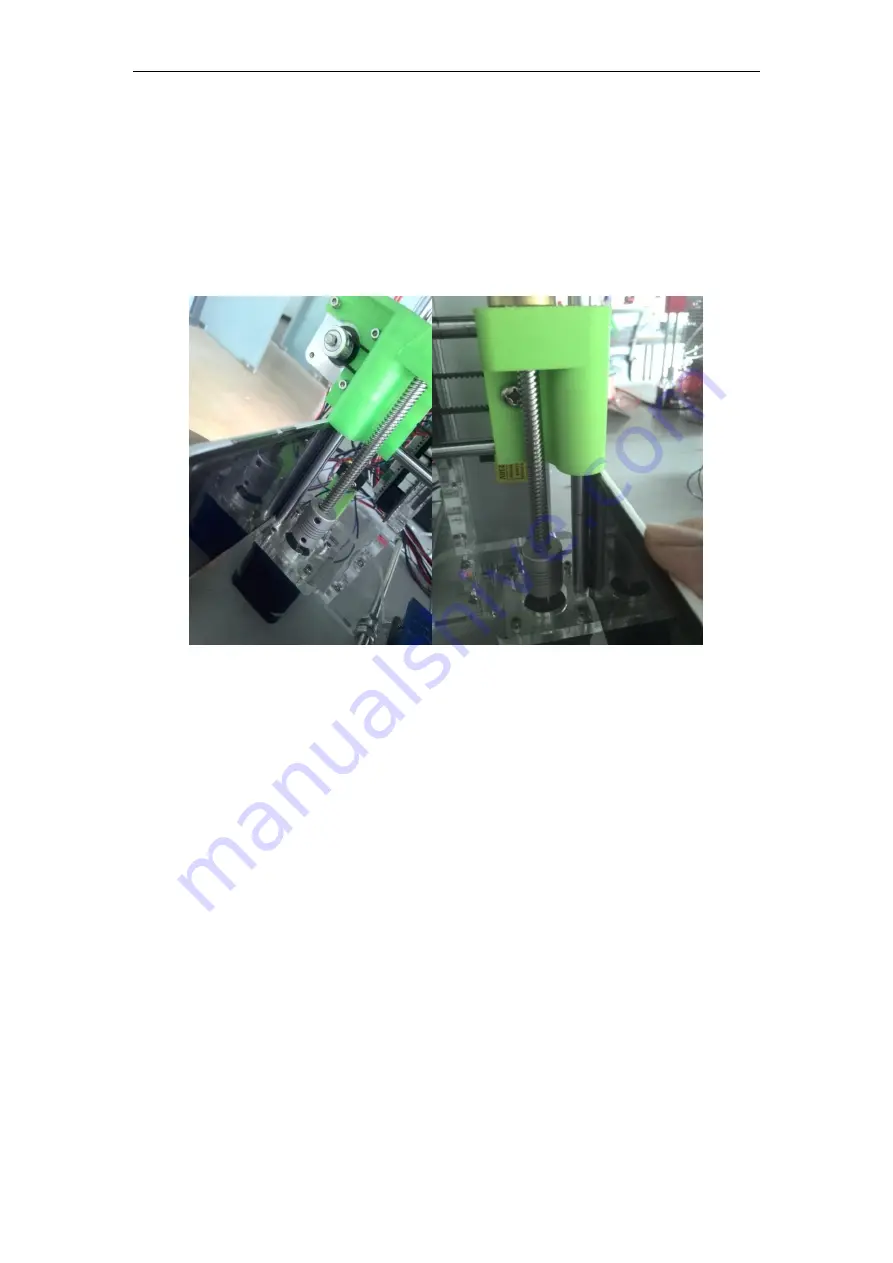
1. X-Motion Leveling. 

Keep a same distance between top surface of Z-Axis Motor Fixed Plate and bottom face of  Z-Axis Link 
Block (Left&Right). If not, turn a side of  “Flexible Coupling” to keep two sides same to make it level.   


2.Hotbed Level. 


2.1  In the control panel, press control button and spin and press it to “Prepare” – “Z Home”, then 

Extruder moves torwards hotbed. Check if nozzle top almost touches hotbed surface. If not, find the 
long screw behind Left Z-Axis Link Block, and adjust it to be. 

2.2 

Panel Control, “Prepare” – “Auto Home”, to move nozzle to origin point. And still check if the 

distance between nozzle top and hotbed surface. It should be only allow a piece of A4 paper to pass 
through. If not, make clockwise (or coutercolockwise) rotation of the Wing Nuts beneath hotbed 
surface. Manually move hotbed or slide Extruder to other vertexes of hotbed to make it level evenly. 


3. CURA 3D Slicing Software 


3.1 

What can CURA help us? 

Cura is mainly used for model slicing. It calculates paths upon the model files, and then generates 3D 
model codes, named “.gcode”. “STL” is the most common origin model files. These files can be save 
as “.stl” in a certain drawing software or download online.  

Summary of Contents for R2

Page 1: ...ink Block and adjust it to be 2 2 Panel Control Prepare Auto Home to move nozzle to origin point And still check if the distance between nozzle top and hotbed surface It should be only allow a piece of A4 paper to pass through If not make clockwise or coutercolockwise rotation of the Wing Nuts beneath hotbed surface Manually move hotbed or slide Extruder to other vertexes of hotbed to make it leve...

Page 2: ...RAISCUBE FDM 3D Printer 3 2 Installation of Cura Just like any other normal software installation Find the Cura exe in SD Card and double click to cause the following window ...

Page 3: ...RAISCUBE FDM 3D Printer ...

Page 4: ...RAISCUBE FDM 3D Printer ...

Page 5: ...RAISCUBE FDM 3D Printer ...

Page 6: ...RAISCUBE FDM 3D Printer Click Finsh after configure the parameters as in pix then Cura is installed successfully and show up ...

Page 7: ...ing Time Save file Open File Layer View Speed at which printing happens A well adjusted Ultimaker can reach 150mm s but for good quality prints you want to print slower Printing speed depends on a lot of factors So you will be experimenting with optimal settings for this Printing Temperature used for printing Set at 0 to pre heat yourself For PLA a value of 210 is usually used For ABS a value of 2...

Page 8: ...er shell is printed If set to 0 then the print speed is used Printing the outer shell at a lower speed improves the final skin quality However having a large difference between the inner shell speed and the outer shell speed will effect quality in a negative way Inner Shell Speed Speed at which inner shells are printed If set to 0 then the print speed is used Printing the inner shell faster then t...

Page 9: ...RAISCUBE FDM 3D Printer Rotate Scale Mirror Click on the model Rotate Scale Mirror 3 buttons appear on left bottom coner ...

Page 10: ...over a none printed area Details about the retraction can be configured in the advanced tab Distance Amount of retraction set at 0 for no retraction at all A value of 4 5mm seems to generate good results Normally set to be 3 5mm Cut off object bottom Sinks the object into the platform this can be used for objects that do not have a flat bottom and thus create a too small first layer Also can be us...

Page 11: ...emp Target Temp HotBed Temp Current Temp Target Temp Present Nozzle position in XYZ coordinate system Nozzle Speed Rate Moving Speed Setting Speed in Cura Nozzle Speed Rate This rate can be changed by LCD Control Panel Status Printing Time used in printing Usage of Cooling Fan Printing Progress Bar ...

Page 12: ...RAISCUBE FDM 3D Printer 4 2 Menu Map ...

Reviews: