If this is the first time setting up Sofia, please review the Sofia User Manual to enable the features on your new Sofia.
Virena Package Contents
The following system components are supplied with the router.
n
Virena Router
n
Cellular Antenna(s)
n
Ethernet Cable
n
Power Supply Adapters [For International]
n
Power Supply
n
Installation Instructions
Note:
If any item is missing or damaged, please contact Quidel Technical Support at 800.874.1517 (in the U.S.)
858.552.1100 (outside the U.S.) or e-mail [email protected].
Sofia Surveillance Mode
Installation Instructions
Set Location Name
If you have already setup Sofia, ensure that the “Location Name” has been set before using the
Surveillance Mode. Please use the instructions below to set up the “Location Name” also known as site
name or facility name. If the “Location Name” is already set, please see the step entitled, “Sofia and
Virena Router Connection”.
1.
Go to Main Menu Supervisor Menu (log in as Supervisor) Settings General Settings
Set
Location Name.
2.
Using the Left/Right/Up/Down arrows, select one letter at a time and press “OK” to construct the
name of up to 20 characters, and/or spaces.
3.
To delete a letter, press the BACKSPACE button
on the keypad. To delete entire entry, select
“Clear All” and press “OK.”
4.
When the name is complete, select “Done” and press “OK” to return to the General Settings Menu.
5.
Pressing “CANCEL” at any time cancels the previous changes and returns the Site Name to the previous setting.
*Only authorized users approved by the Healthcare Provider's Organizational Administrator would have access to registering on MyVirena.com
Sofia and Virena Surveillance Installation Overview
There are a few simple steps required in order to set up your Virena Router and Sofia.
Let’s begin with the Virena Router:
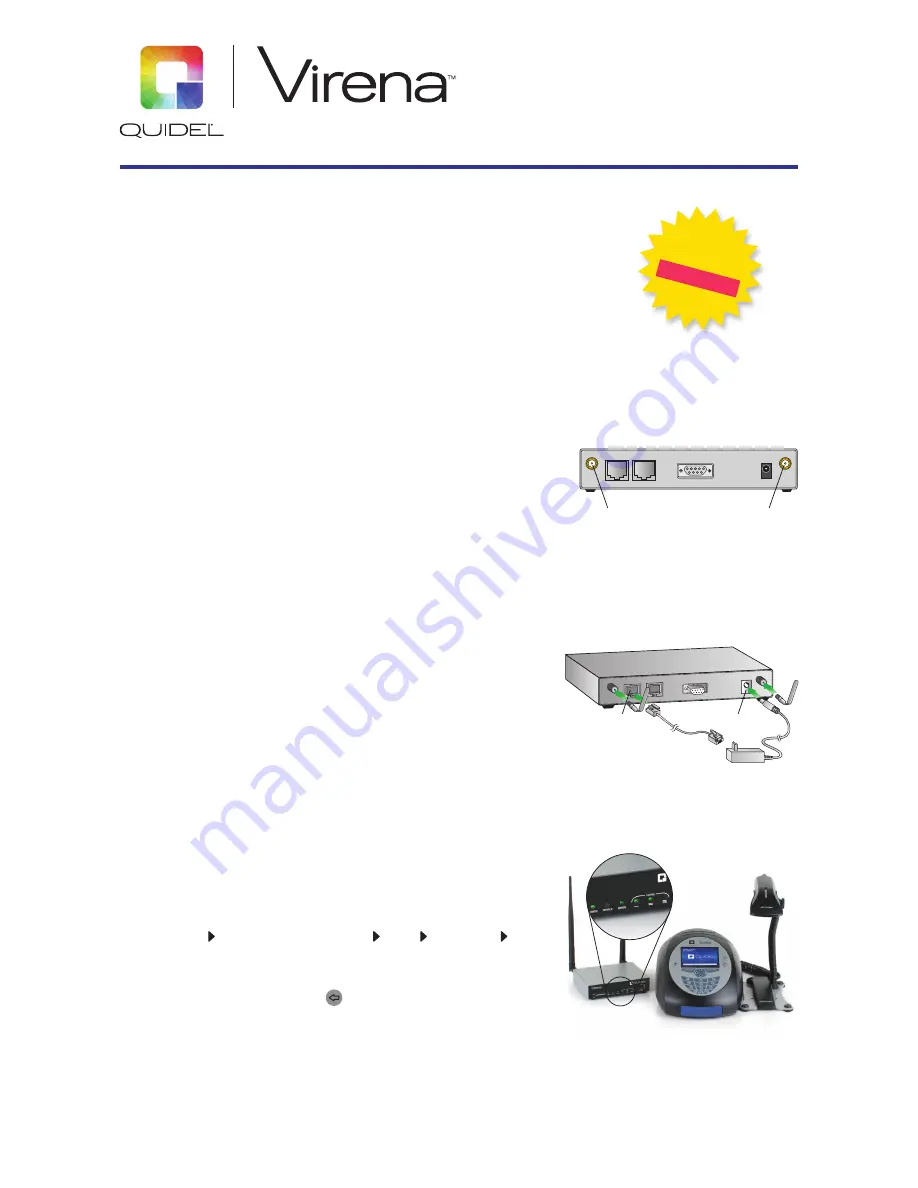
Virena Router Installation and Connection
1.
Connect the Cellular (WWAN) Antenna(s):
Connect the cellular antenna to the “WWAN PRIMARY”
and “WWAN Secondary” (Figure 1) connector on the router. The dual antennas provide improved
signal strength resulting in better performance.
2.
Connect the Power Supply:
Connect the barrel plug end of the power supply to the power
connector on the router, then plug the other end into a wall outlet (Figure 2).
Note:
The barrel plug end of the power supply has a twist lock connector which can be secured by
rotating it 90 degrees once installed into the Virena Router.
3.
Connectivity Verification:
After powering on the Virena Router wait five (5) minutes before
confirming the following lights are illuminated for connection purposes (Figure 3).
n
POWER – solid green light
n
SERVICE – solid green light
n
WWAN – this light should flash three (3) times, pause and repeat
n
SIGNAL – for the initial connection, verify a minimum of two (2) bars illuminated
Note:
The connection provisioning time may take up to 30 minutes. If there is no internet access or if
LAN connection is preferred, please contact Quidel Technical Support at 800.874.1517 (in the U.S.),
858.552.1100 (outside the U.S.) or e-mail [email protected].
Sofia Installation and Connection
There are six (6) steps to establishing the connection between the Sofia and Virena Router.
1.
Set Location Name (if necessary)
2.
Sofia and Virena Router Connection
3.
Set Network Configuration on Sofia
4.
Surveillance Mode Set Up
5.
Virena Router Connection Verification
6.
Performing a Test in Surveillance Mode
Power
Supply
Figure 2
LAN 0
WWAN
SECONDARY
WWAN
PRIMARY
WWAN
SECONDARY
WWAN
PRIMARY
9-30VDC 2A MAX
SERIAL 0
LAN 0
LAN 1
Figure 1
Figure 3
New
Authorized
User,
go to
MyVirena.co
m
to register *


