


Reviews:
No comments
Related manuals for TVS-882BR
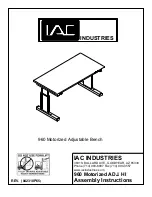
960
Brand: IAC INDUSTRIES Pages: 9

USR8700
Brand: US Robotics Pages: 156

ROCBIT 2
Brand: Rocsecure Pages: 10

RP-IM013
Brand: Ravpower Pages: 15

3401-A00
Brand: IBM Pages: 44

AEIDMD4U2
Brand: Addonics Technologies Pages: 2

expandacom
Brand: extraspace Pages: 16

ST3000VN0001
Brand: Seagate Pages: 27

58073
Brand: U.S. General Pages: 8

DG114
Brand: dellonda Pages: 22

COMMANDER-X
Brand: Rocstor Pages: 10

DUO-LINK
Brand: PNY Pages: 13

GM1515
Brand: GARDEN MASTER Pages: 2

67425
Brand: Karibu Pages: 48

Vess A3340d
Brand: Promise Technology Pages: 38

Smart Photo Manager
Brand: Ibi Pages: 33

ULTRAbloc 320 JBOD
Brand: Adaptec Pages: 10

CUR-WIFI-S250UN
Brand: Power7 Pages: 22


