

Product Overview
Packing List
l
1.1. Screw the wall mount bracket to the desktop stand.
l
1.2. Connect the Touch Panel to network and power up. There are three ways for connection:
(
1
)
Connect Touch Panel to NMP by network cable, and power through 12V adapter.
(
2
)
Connect Touch Panel and NMP to the same switcher, and power Touch Panel through 12V
adapter.
1.
Touch Panel*1
2.
Power Supply*1
3.
I/O Connector*1
User Manual
Q-NEX Touch Panel
CPL10
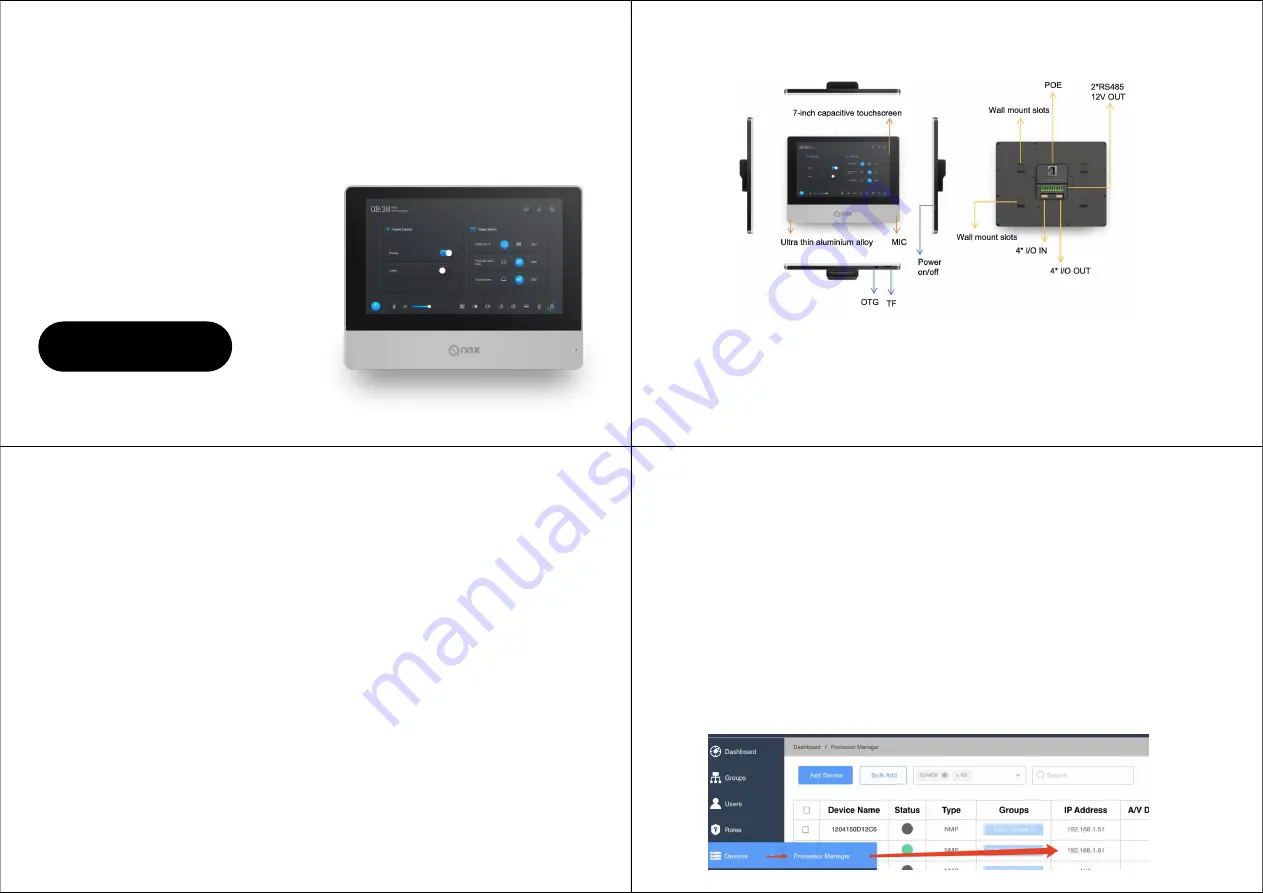
Q-NEX Touch Panel is a versatile control panel with capacitive touch, working with Q-NEX
Networked Media Processor (NMP) to realize central control of classroom devices. Touch Panel
can be connected to NMP on the same LAN. Besides, this panel is with human-centered design
that the homepage template can be changed according to different user habits.
1.Connect to NMP with CAT Cable
4. Wall Mount Bracket*1
5. Desktop Stand*1
6. Screw*8
(
3
)
Connect both Touch Panel and NMP to one PoE switch, then no power supply is required for
Touch Panel.
Note:
(
1
)
The LAN ports of NMP 210-G and NMP 220-R don’t support POE.
(
2
)
Touch Panel must be on the same LAN as NMP.
Warning
Do not power Touch Panel through adapter and POE at the same time, it will cause Touch Panel to
be short-circuited and burned. This kind of damage is not covered by the warranty.
l
1.3. Fasten the wall-mounted bracket into the slots of Touch Panel and make sure it is fixed.
l
1.4. Initial settings
(
1
)
Make sure that NMP is connected to the network (refer to NMP Quick Guide). Log in to the
Q-NEX Dashboard -Devices-Processor Manager and check the IP address of this NMP.