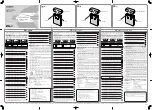
Features
>
ST3006
6-Slot Battery Charger
for Omnii and Ikôn
>
This Guide
Country-specific
Power Cord
Charge indicator LEDs (set of 4 per compartment)
Charging compartments (6)
DC In connector
Mounting holes (2)
Wall mounting
holes (4)
Allow the Batteries to Charge for 3-4 Hours.
Note:
Full battery performance is only reached after the first few
charge/discharge cycles. A table of the charge status indi-
cated by the LEDs is shown overleaf.
Connect the Battery Charger to External Power.
Mount the Battery Charger (if bracket was purchased).
Insert One or More Batteries for Charging.
AC/DC adaptor
DC input plug
Insert the two mounting screws from the Kit into the holes
through the top of the Battery Charger and tighten to the
Mounting Bracket to secure it.
Note:
The LEDs light when first connected to power.
Rubber feet (5)
Bracket mounting holes (2)
Drain holes (6)
Optional - must be ordered separately
Final position with AC/
DC Adaptor in place.
Insert the battery by placing the base into the slot in line with
the pins and pivoting the top of the battery into the charge
compartment.
Then snap the battery tabs into place.
Wall bracket
Choke
Bottom of
charger
Wall mount
Desk mount
Warning: Use an IEC320-C13 power cord approved by
Psion, with the ground pin connected to a proper
earth-grounded receptacle. Check with a qualified
electrician if you are uncertain of your receptacle
grounding.
IEC320-C13
Charger mounting
holes (2)
Screwdriver access
holes (4)
Contents oF the Box
GettinG started
1
over
>
3-4 h
0 - 40 °C
32 - 104 °F
4
3
2
Note:
Use only the universal AC/DC power adaptor approved by Psion
for use with the Battery Charger.
toP
BottoM
Note:
Wall mount or Desk mount bracket
configuration is not recommended when
charging Ikôn CH3000 battery packs.
>
AC Power Supply
(requires an IEC320-C13
power cord approved by
Psion, sold separately)
MT2031 Mounting
Bracket Kit
(contains Wall Mount
Bracket, 4 wall
screws, 4 washers,
2 screws for Charger)
Attach the Mounting Bracket
to the wall using the 4 screws
with washers included in the
MT2031 Mounting Bracket Kit.
See the location guide overleaf
for dimensions.
Power cord
(sold separately)
AC outlet
>
Regulatory and
Warranty Guide
(not shown)
(attachment to either
surface is optional)