PS Audio Power Plant Premier, Service Manual
The PS Audio Power Plant Premier is a top-of-the-line power conditioner that ensures clean and stable power for your audio system. For detailed information on how to maximize its performance, download the Service Manual for free from manualshive.com. This comprehensive manual will guide you through set-up and maintenance procedures.
Share
Download


Reviews:
No comments
Related manuals for Power Plant Premier

ePDU G3
Brand: Eaton Pages: 2

ePDU G3
Brand: Eaton Pages: 20
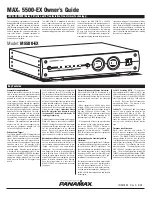
MAX 5500-EX
Brand: Panamax Pages: 4

AC6801B
Brand: Keysight Technologies Pages: 197

PDUMV20HVNET2
Brand: Tripp Lite Pages: 4

miniBMS
Brand: Victron energy Pages: 33

isobar HT7300PC
Brand: Tripp Lite Pages: 2

YEWSERIES 80 SDBS (Style S)
Brand: YOKOGAWA Pages: 38

Tidy
Brand: Hama Pages: 12

PowerStrip PS10
Brand: Samson Pages: 16

SureStart Battery Power Protector
Brand: Electroneering Pages: 2

Powerdome
Brand: Philex Pages: 2

M4400-20A
Brand: Panamax Pages: 1

PDU3VSR10L2130
Brand: Tripp Lite Pages: 4

PDU3VN3H50
Brand: Tripp Lite Pages: 4

PDUH30HV
Brand: Tripp Lite Pages: 12

PDUMH15NET
Brand: Tripp Lite Pages: 32

PDUMH15
Brand: Tripp Lite Pages: 40


