background image

CAUTION

Read all precautions and instruc-

tions in this manual before using

this equipment. Keep this manual

for future reference.

Model No. PFEVEL73908.0

Serial No.

Write the serial number in the

space above for reference.

Serial

Number

Decal

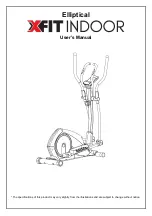
USERʼS MANUAL

QUESTIONS?

If you have questions, or if there are

missing parts, please contact us:

Call: 08457 089 009

Outside UK: 0 (44) 113 3877133
Fax: 0 (44) 113 3877125
Website: www.iconsupport.eu

E-mail: [email protected]
Write:

ICON Health & Fitness, Ltd.

Unit 4

Revie Road Industrial Estate

Revie Road, Beeston

Leeds, LS11 8JG

UK

www.iconeurope.com

Summary of Contents for PFEVEL73908.0

Page 1: ... the space above for reference Serial Number Decal USERʼS MANUAL QUESTIONS If you have questions or if there are missing parts please contact us Call 08457 089 009 Outside UK 0 44 113 3877133 Fax 0 44 113 3877125 Website www iconsupport eu E mail csuk iconeurope com Write ICON Health Fitness Ltd Unit 4 Revie Road Industrial Estate Revie Road Beeston Leeds LS11 8JG UK www iconeurope com ...

Page 2: ...PART LIST 22 EXPLODED DRAWING 23 ORDERING REPLACEMENT PARTS Back Cover 2 PROFORM is a registered trademark of ICON IP Inc WARNING DECAL PLACEMENT This drawing shows the location s of the warning decal s If a decal is missing or illegible see the front cover of this manual and request a free replacement decal Apply the decal in the location shown Note The decal s may not be shown at actual size ...

Page 3: ...ront and rear of your elliptical exerciser and 2 ft 0 6 m on each side 5 Inspect and properly tighten all parts regu larly Replace any worn parts immediately 6 Keep children under age 12 and pets away from your elliptical exerciser at all times 7 Your elliptical exerciser should not be used by persons weighing more than 250 lbs 113 kg 8 Wear appropriate exercise clothes when exercising do not wear...

Page 4: ... have ques tions after reading this manual please see the front cover of this manual To help us assist you note the product model number and serial number before con tacting us The model number and the location of the serial number decal are shown on the front cover of this manual Before reading further please familiarize yourself with the parts that are labeled in the drawing below Pulse Sensor P...

Page 5: ...entheses below each drawing is the key number of the part from the PART LIST near the end of this manual The number following the key number is the quantity needed for assembly Note If a part is not in the hardware kit check to see if it has been preassembled M4 x 16mm Screw 52 4 M10 Split Washer 59 5 M10 Locknut 33 6 M10 Bolt Set 74 2 Upper Body Arm Washer 55 2 Spring Bracket Washer 35 2 M8 Lockn...

Page 6: ...33 34 9 1 2 33 33 1 Identify the Front Stabilizer 10 Make sure that the Wheels 22 are oriented as shown While another person lifts the front of the Frame 1 attach the Front Stabilizer 10 to the Frame with two M10 x 75mm Carriage Bolts 34 and two M10 Locknuts 33 10 33 33 22 22 34 34 1 1 To make assembly easier read the information on page 5 before you begin ...

Page 7: ...ts 28 two M10 Split Washers 59 and two M10 Locknuts 33 Make sure that the Locknuts are in the hexagonal holes Hexagonal Holes 4 While another person holds the Upright Extension 73 near the Upright 2 insert the Extension Wire Harness 44 upward through the Upright Extension Hold the upper end of the Extension Wire Harness 44 and insert the Upright Extension 73 into the Upright 2 Tip Avoid pinching t...

Page 8: ...ontact the store where you purchased this product or call the telephone number on the front cover of this manual To avoid damaging the console use only a manufacturer supplied AC adapter Plug one end of the AC adapter into the jack on the console plug the other end into an outlet installed in accordance with all local codes and ordinances 23 Battery Cover 5 Batteries 6 While another person holds t...

Page 9: ...dy Arm 6 into an Upper Body Leg 5 make sure that the hexagonal holes are in the indicated location Attach the Left Upper Body Arm 6 with two M8 x 45mm Button Bolts 50 and two M8 Locknuts 38 Make sure that the Locknuts are in the hexagonal holes Do not tighten the Button Bolts yet Repeat this step for the Right Upper Body Arm not shown and the other Upper Body Leg not shown 5 Hexagonal Holes 6 8 ...

Page 10: ...n M8 x 25mm Patch Screw 56 and an Upper Body Arm Washer 55 Press the tabs on an Upper Body Arm Cap 46 into the Upper Body Arm Spacer 47 Attach the Right Upper Body Arm 8 in the same way 10 38 11 13 80 Tabs Hole Slots 10 Identify the left Pedal Spring 11 and the Left Pedal 13 which are marked with L stickers Position the Left Pedal 13 and a Pedal Plate 80 around the left Pedal Spring 11 as shown Ma...

Page 11: ...pring Bracket not shown 11 11 40 35 37 63 81 12 Grease 16 13 Make sure that all parts of the elliptical exerciser are properly tightened Note Some hardware may be left over after assembly is completed To protect the floor or carpet from damage place a mat under the elliptical exerciser 12 Hold the lower end of the left Upper Body Leg 5 inside the Front Spring Bracket 76 which is located on the lef...

Page 12: ...m the adhesive pad on the back of the receiver A Press the receiver onto the indicated location inside the battery compartment Then reattach the battery cover Note Discard any other wires that are included with the chest pulse sensor If you purchase the optional chest pulse sensor see page 18 follow the step below to install the receiv er included with the chest pulse sensor Wires 23 Antenna Batte...

Page 13: ...er hold the upper body arms and step onto the pedal that is in the lower posi tion Then step onto the other pedal Push the pedals until they begin to move with a continuous motion Note The pedal discs can turn in either direction It is recommended that you turn the pedal discs in the direction shown by the arrow however for variety you can turn the pedal discs in the oppo site direction To dismoun...

Page 14: ...preset workouts that automatically change the resistance of the pedals and prompt you to vary your pedaling pace while guiding you through an effective workout You can even connect your MP3 player or CD player to the console sound system and listen to your favorite music or audio books while you exercise To use the manual mode see page 15 To use a preset workout see page 17 To use the sound system...

Page 15: ...a moment for the pedals to reach the selected resistance level 4 Follow your progress with the displays Upper right display This display can show the elapsed time the approximate number of calories you have burned and the dis tance total number of revolutions you have ped aled The display will change modes every few seconds Lower right display This display will show your pedaling pace in revolutio...

Page 16: ...our hands or gripping the contacts tightly When your pulse is detected a heart shaped sym bol will flash in the display and then your heart rate will be shown For the most accurate heart rate reading hold the contacts for at least 15 sec onds If your heart rate is not shown make sure that your hands are positioned as described Be care ful not to move your hands excessively or to squeeze the metal ...

Page 17: ... If a differ ent resistance level is programmed for the next segment the resistance level will appear in the display for a few seconds to alert you The resis tance of the pedals will then change During the workout the target pacer will prompt you to keep your pedaling pace near the target pace setting for the current segment When a left indicator lights increase your pace when a right indicator li...

Page 18: ...e that the audio cable is fully plugged in Next press the play button on your MP3 player or CD player Adjust the volume level using the volume con trol on your MP3 player or CD player THE OPTIONAL CHEST PULSE SENSOR The optional chest pulse sensor provides hands free operation and continuously monitors your heart rate during your workouts To purchase the optional chest pulse sensor see the front c...

Page 19: ...he pedal springs the right pedal disc and the shields First see steps 12 and 11 on page 11 and remove the Pedal Springs 11 Next remove the four Screws 51 from the right Pedal Disc 15 and remove the Pedal Disc Remove all Screws 52 64 from the Right Shield 4 and the two Screws 77 from beneath the Pedal Disc and then remove the Right Shield Then remove all Screws 52 from the Left Shield 3 and remove ...

Page 20: ...elt may need to be adjusted To adjust the drive belt you must first remove both shields See HOW TO ADJUST THE REED SWITCH on page 19 and remove the shields Next loosen the M8 x 22mm Flat Head Bolt 68 and turn the M10 x 60mm Screw 62 until the Drive Belt 19 is tight When the Drive Belt 19 is tight tighten the Flat Head Bolt 68 Reattach the shields 68 62 19 ...

Page 21: ...f your goal is to strengthen your cardiovascular system you must perform aerobic exercise which is activity that requires large amounts of oxygen for prolonged periods of time For aerobic exercise adjust the intensity of your exercise until your heart rate is near the highest number in your training zone WORKOUT GUIDELINES Warming Up Start with 5 to 10 minutes of stretching and light exercise A wa...

Page 22: ...r 40 5 M10 x 25mm Patch Screw 41 2 M10 x 45mm Bolt 42 4 M5 Washer 43 2 Wave Washer 44 1 Extension Wire Harness 45 1 Resistance Control Motor 46 2 Upper Body Arm Cap 47 2 Upper Body Arm Spacer 48 2 Upright Spacer 49 6 Upper Body Arm Bushing 50 4 M8 x 45mm Button Bolt 51 8 M6 x 28mm Screw 52 11 M4 x 16mm Screw 53 1 Reed Switch Wire 54 1 Clamp 55 2 Upper Body Arm Washer 56 2 M8 x 25mm Patch Screw 57 ...

Page 23: ...50 48 47 49 24 56 55 57 39 33 58 22 41 21 33 41 21 22 37 33 34 80 80 60 60 60 23 52 52 64 52 77 52 77 64 37 37 49 48 47 49 49 46 11 16 71 35 70 66 36 40 63 40 66 63 36 40 59 59 40 73 36 66 36 66 76 76 71 74 74 74 74 79 15 66 66 72 42 78 67 67 69 27 27 29 29 7 26 52 52 43 65 49 49 28 33 59 59 43 81 81 38 38 75 82 64 64 EXPLODED DRAWING Model No PFEVEL73908 0 R0409B ...

Page 24: ...elp us assist you be prepared to provide the following information when contacting us the model number and serial number of the product see the front cover of this manual the name of the product see the front cover of this manual the key number and description of the replacement part s see the PART LIST and the EXPLODED DRAWING near the end of this manual ...

Reviews: