background image

CAUTION

Read all precautions and instruc-

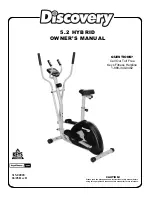
tions in this manual before using

this equipment. Keep this manu-

al for future reference.

Model No. PFEVEL2785.0

Serial No. 

Part No. 229476 R1005A

Printed in China © 2005 ICON IP, Inc.

QUESTIONS?

As a manufacturer, we are com-

mitted to providing complete cus-

tomer satisfaction. If you have

questions, or if there are missing

or damaged parts, please call:

Or write:

ICON Health & Fitness, Ltd.

Unit 4

Revie Road Industrial Estate

Revie Road, Beeston

Leeds, LS11 8JG

UK

email: [email protected] 

www.iconeurope.com

Visit our website at

USER’S MANUAL

Serial Number

Decal

ORDERING REPLACEMENT PARTS

To order replacement parts, contact the ICON Health & Fitness, Ltd. office, or write: 

ICON Health & Fitness, Ltd.

Customer Service Department

Unit 4, Revie Road Industrial Estate

Revie Road

Beeston

Leeds, LS118JG

UK

Tel:

Outside the UK: 0 (044) 113 387 7133

Fax: 0 (044) 113 387 7125

To help us assist you, please be prepared to give the following information:

• the MODEL NUMBER of the product (PFEVEL2785.0)

• the NAME of the product (PROFORM 500 EKG elliptical exerciser)

• the SERIAL NUMBER of the product (see the front cover of this manual)

• the KEY NUMBER and DESCRIPTION of the part(s) (see page 14)

08457 089 009

08457 089 009

PROFORM is a registered trademark of ICON IP, Inc.

Summary of Contents for 500 EKG PFEVEL2785.0

Page 1: ...com Visit our website at USER S MANUAL Serial Number Decal ORDERING REPLACEMENT PARTS To order replacement parts contact the ICON Health Fitness Ltd office or write ICON Health Fitness Ltd Customer Service Department Unit 4 Revie Road Industrial Estate Revie Road Beeston Leeds LS118JG UK Tel Outside the UK 0 044 113 387 7133 Fax 0 044 113 387 7125 To help us assist you please be prepared to give t...

Page 2: ...ke sure that there is enough clearance around the elliptical exerciser to mount dis mount and use the elliptical exerciser 4 Inspect and properly tighten all parts regu larly Replace any worn parts immediately 5 Keep children under 12 and pets away from the elliptical exerciser at all times 6 The elliptical exerciser should not be used by persons weighing more than 115 kg 250 lbs 7 Wear appropriat...

Page 3: ...ur exer cise For your benefit read this manual carefully before using the elliptical exerciser If you have questions after reading this manual please call the telephone number on the front cover of this manual To help us assist you please note the product model number and serial number before calling The model number is PFEVEL2785 0 The serial number is found on a decal attached to the elliptical ...

Page 4: ...on in prepa ration for exercise Training zone exercise consisting of 20 to 30 min utes of exercising with your heart rate in your training zone Note During the first few weeks of your exer cise program do not keep your heart rate in your training zone for longer than 20 minutes A cool down with 5 to 10 minutes of stretching This will increase the flexibility of your muscles and will help to preven...

Page 5: ... feedback When the Reed Switch is correctly adjusted reattach the Left Side Shield 3 and the Left Pedal Arm 11 HOW TO ADJUST THE DRIVE BELT If the pedals slip whilst you are pedaling even when the resistance is adjusted to the highest setting the Drive Belt 19 may need to be adjusted To adjust the Drive Belt you must first remove the left side shield See HOW TO ADJUST THE REED SWITCH at the left a...

Page 6: ...ot get pinched and damaged during this step 44 53 68 59 59 59 5 Whilst another person holds the Upright 2 near the Frame 1 connect the Upper Wire 44 to the Sensor Wire 53 Push the excess wire down into the Frame 1 Slide the Upright 2 onto the Frame Be careful to avoid pinching the wires Attach the Upright with four M8 x 19mm Button Screws 68 and four M8 Split Washers 59 Do not tighten the Button S...

Page 7: ...ile in this section of the large display The display will change from one number to the other every few seconds To view only the elapsed time or your pace press the centre button on the left side of the large dis play until only the word TIME or PACE appears make sure that the word SCAN does not appear To again view both the elapsed time and your pace press the centre button until the word SCAN re...

Page 8: ... instal lation instructions To turn on the console press the On Reset button see the drawing above to identify the On Reset button Note Moving the pedals is another way to turn on the console Begin pedaling and change the resistance of the pedals as desired As you pedal change the resistance of the ped als by pressing the and buttons below the large display There are ten resistance levels level 10...

Reviews: