

1
Unpacking Your Media Cutter
Thank you for purchasing the
LX400e Media Cutter. The
following items are included
in the packaging.
•
LX400e Media Cutter
•
2 Phillips screws
•
This manual and other
printed information.
4
2
Connect the Cutter to the Printer
Turn your LX400e printers on its side to expose the screw holes
near the front of the bottom. Attach the cutter as shown with the
screws provided. Before attaching the cutter, make sure the data
connector cable is routed through the connector plate as shown in
the diagram.
Attach the data / power connector.
3
Using the Cutter
1. Pull the cutter into the up position.
2. Set the
Output Mode
in the printer preferences to
"Cut"
.
To find the printer preferences refer to the PC and Mac
instructions in the next section.
To discontinue use while still keeping the cutter connected push
the cutter to the down position. The media will now feed over
the cutter.
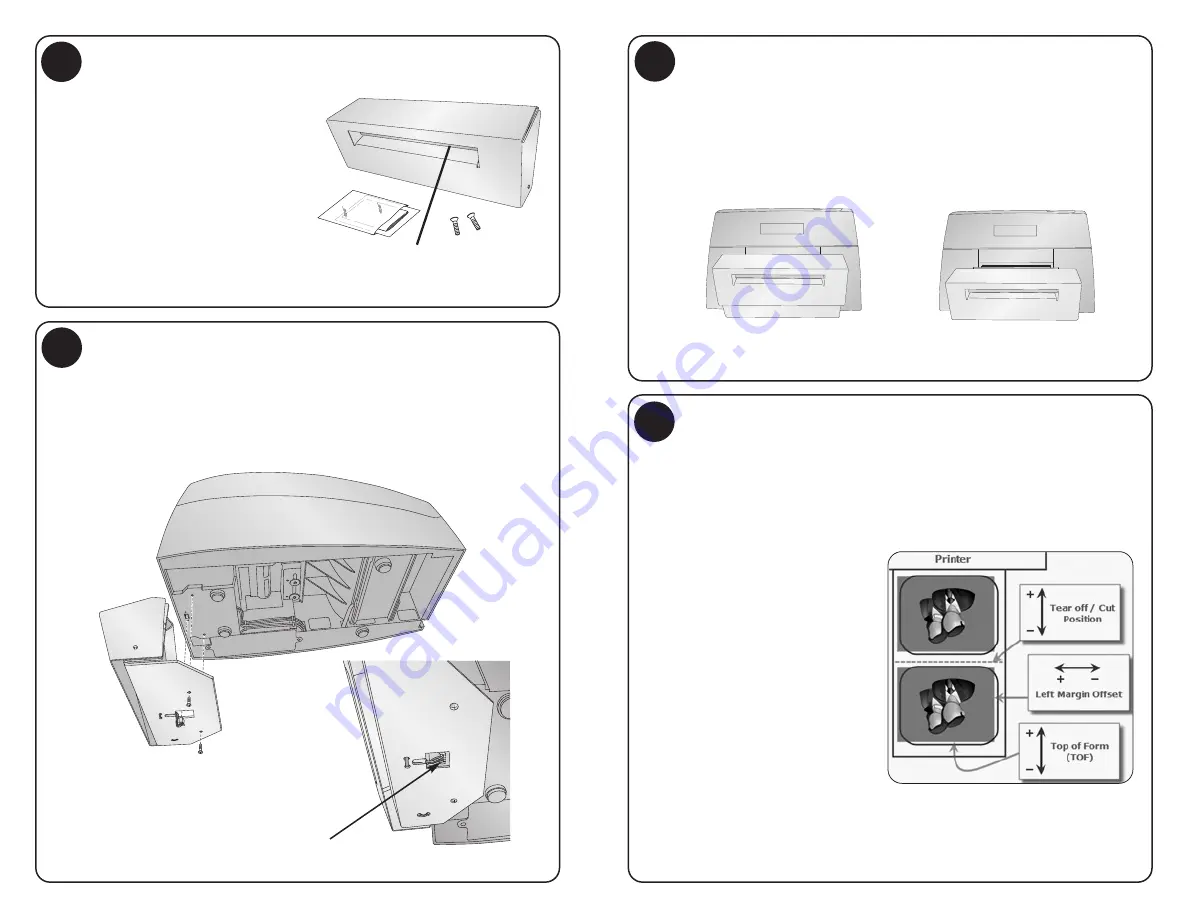
To adjust the cut position on a PC:
Go to the Start Menu - Control Panel - Printers and Faxes. Right
Click on the
Color Label 400 - Choose Printing Preferences
.
Click on
Offsets
. Click
Properties
. The following window will
appear. Adjust the cutter position using the graphic as a guide.
To adjust the cut position
on a Mac:
Go to the Hard Drive -
Applications - Utilities - Open
the Printer Setup Utility.
Select the Color
Label 400 - Click
Configure
.
The Configuration utility
will open. Click the
Label
Offsets
button. The following
window will appear. Adjust
the cutter position using the
graphic as a guide.
Important Note:
If you are using the cutter with adhesive label stock,
the blade is intended to cut through the label liner only. While it will
cut through label and the liner, continued use in this manner will cause
premature wear on the cutter blade and excessive adhesive build up.
Up Position
Down Position
Adjusting the Cut Position
WARNING:
Hazardous Moving Parts. When
handling cutter, keep fingers and other body
parts away from the feed slot.
Note:
Place the printer in an elevated position to prevent cut labels from
building up in the output area and causing interference.


