Summary of Contents for PR1-D60
Page 34: ...34 ...
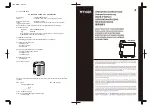
Introducing the Prestige PR1-D60, an exceptional audio device that will elevate your listening experience. To unlock its full potential, simply visit our website and access the Instructions For Use Manual. Download it for free to effortlessly set up, configure, and operate your new PR1-D60, ensuring optimal performance.
Page 34: ...34 ...