Potterton Gold H 15, Installation & Service Instructions Manual
The Potterton Gold H 15 is a reliable heating system for your home. Ensure seamless installation and proper servicing with the comprehensive Installation & Service Instructions Manual. Download this essential manual for free, exclusively from our website manualshive.com, and enjoy optimal performance and longevity for your Potterton Gold H 15.
Share
Download


Reviews:
No comments
Related manuals for Gold H 15

LOGIC SYSTEM S15IE
Brand: Ideal Heating Pages: 80

UNIQA REVOLUTION
Brand: Sime Pages: 52
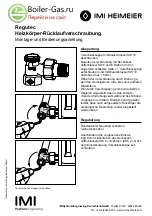
Regutec
Brand: IMI Hydronic Pages: 8

Combi Compact ECO RF 24
Brand: Intergas Pages: 4

AQUA HE 25 INOX ErP BE
Brand: Sime Pages: 100

UB INOX SOLAR 200 V2
Brand: Immergas Pages: 24

REMEHA W40-m ECO
Brand: broag Pages: 40

Mexico Super CF445
Brand: Ideal Boilers Pages: 36

BIOCLASS TR
Brand: DOMUSA Pages: 80

DOMINA N 80 DGT
Brand: Ferroli Pages: 48

DOMItech F 24
Brand: Ferroli Pages: 72

Torrent GreenHeat HP TGH170-HP
Brand: gledhill Pages: 52

CGG-1K-24
Brand: Wolf Pages: 36

CGB-11
Brand: Wolf Pages: 56

Format 25/60
Brand: Sime Pages: 100

816 ThermoKit E Eco
Brand: LK Pages: 8

BIO Lux UNI 20
Brand: Radijator Pages: 57

PROBOIL 3
Brand: Pronteau Pages: 2


