PoolMaster 59025, Instructions Manual
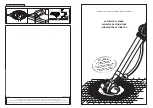
The PoolMaster 59025 is a high-quality pool maintenance device that ensures clean and clear water all year round. For detailed usage instructions, download the free Instruction Manual from manualshive.com. This manual provides step-by-step guidance on operating the PoolMaster 59025 effectively, maximizing its performance and longevity.
Share
Download


Reviews:
No comments
Related manuals for 59025

MX8
Brand: Zodiac Pages: 8

CS3000
Brand: Latham Pages: 20
Mamba
Brand: habitat et jardin Pages: 2

754200
Brand: Lasko Pages: 4

WL41003Y
Brand: Warmlite Pages: 12

AIRFUSOR AFR-0
Brand: Pakole Pages: 30

Under Desk Heater
Brand: Warmly Yours Pages: 6

OCON203B
Brand: Omega Altise Pages: 8

PT-16-TTC
Brand: Protemp Pages: 51

CT22425
Brand: Lasko Pages: 4

ECH106
Brand: Uberhaus Pages: 18

WeedRazer
Brand: Jenlis Pages: 4

IH0003
Brand: Perel Pages: 40

5812
Brand: Lasko Pages: 4

CL20220
Brand: Salvador Escoda Pages: 5

10035112
Brand: Klarstein Pages: 76

Pool-Star 1100-1
Brand: Profi-pumpe Pages: 9

10034761
Brand: Klarstein Pages: 84


