Plustek MobileOffice D430, User Manual
Discover the Plustek MobileOffice D430 User Manual, an essential companion for unlocking the full potential of your scanner. Accessible for free download on our website, this thorough manual provides step-by-step instructions, troubleshooting tips, and expert advice. Unleash the power of your device today, get your manual at manualshive.com!
Share
Download


Reviews:
No comments
Related manuals for MobileOffice D430

imageFORMULA DR-2050C
Brand: Canon Pages: 22

DR-4010C - imageFORMULA - Document Scanner
Brand: Canon Pages: 58
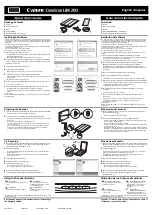
CANOSCAN LIDE 200
Brand: Canon Pages: 2

SmartSource Elite Series
Brand: Digital Check Pages: 32

SD582BT
Brand: geos Pages: 3

DA-70702
Brand: Digitus Pages: 12

Microfilm Scanner 300II
Brand: Cannon Pages: 4

KV-S1020C
Brand: Panasonic Pages: 46

HandScanner MR
Brand: Datalogic Pages: 3

MetalliScanner x8
Brand: Zircon Pages: 21

WI8XX-U
Brand: Omega Pages: 92

Color Image Reader-F1
Brand: Canon Pages: 111

D1250U2F - CanoScan USB Flatbed Scanner
Brand: Canon Pages: 2

CR-50
Brand: Canon Pages: 21

CP Printer Solution Disk Version 4
Brand: Canon Pages: 34
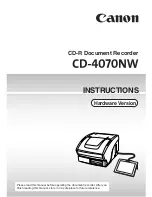
CD-4070NW
Brand: Canon Pages: 57

CR-50
Brand: Canon Pages: 24

CR-180
Brand: Canon Pages: 4


