

PT-PNM6506-BK-C
WIRELESS LASER MOUSE
QUICK SETUP GUIDE
Before using your new product, please read these instructions to prevent any damage.
PACKAGE CONTENTS
• Wireless laser mouse
• AA batteries (2)
• Nano receiver
•
Quick Setup Guide
SYSTEM REQUIREMENTS
• Windows® 10, Windows® 8.1, Windows® 8, Windows® 7, Windows Vista®, or Mac OS 10.X or higher
• One available USB port
FEATURES
• Track-on-Glass Laser Sensor for enhanced tracking
DPI SWITCH
The Power/DPI LED indicator behind the tilt wheel lights up when you plug the mouse into the USB port. The
brightness of the LED indicates the DPI setting in use. There are three different settings:
• Bright: 2400 DPI
• Dim: 1600 DPI
• No light: 800 DPI
The default setting is 800 DPI. You can switch between DPI settings by pressing the swtich and cycling through the
DPI settings. In order to save power, the LED only stays on for 10 seconds.
Forward
• Press this button to view the next page in your Internet browser.
Backward
• Press this button to view the previous page in your Internet browser.
Zoom Key (Zoom in /out)
• Press the Zoom key and turn the scroll wheel at the same time to zoom in and out.
Win Key
• Press this button to access the Start screen.
Nano receiver
Connect
button
ON/OFF
switch
Battery cover
Left button
Right button
Scroll wheel
DPI switch key
DPI LED
Battery status
LED indicator
Backward
Forward
Zoom key
Start menu
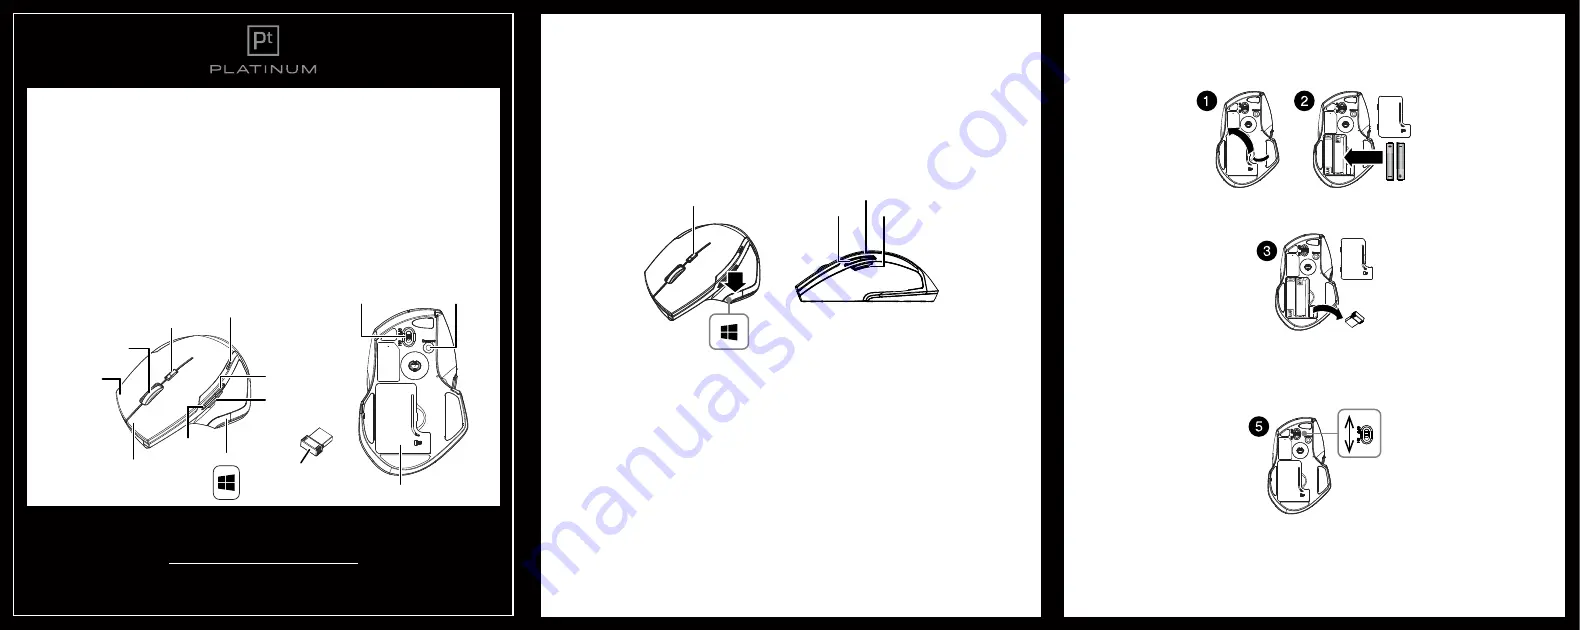
SETTING UP YOUR MOUSE
1
Remove the battery cover.
2
Replace the battery cover.
3
Remove the nano receiver.
4
Insert two AA batteries (included) into the battery compartment. Make sure that the + and – signs match the
symbols in the compartment.
5
Turn on the power switch.
DPI switch key
DPI LED
Forward
Zoom key
Backward
Pull up
AA batteries


