background image

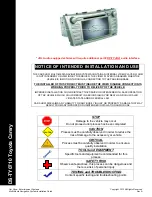
7 inch wide AV system display/CD player

Presentación visual de sistema de AV amplio de 7
pulgadas/CD player

Owner’s Manual

AVX-P7300CD

Manual del Propietario

ENGLISH

ESPAÑOL

DEUTSCH

FRANÇAIS

ITALIANO

NEDERLANDS

This product conforms to new cord colors.
Los colores de los cables de este producto se conforman con un nuevo 
código de colores.

Summary of Contents for AVX-P7300CD

Page 1: ...ma de AV amplio de 7 pulgadas CD player Owner s Manual AVX P7300CD Manual del Propietario ENGLISH ESPAÑOL DEUTSCH FRANÇAIS ITALIANO NEDERLANDS This product conforms to new cord colors Los colores de los cables de este producto se conforman con un nuevo código de colores ...

Page 2: ...ts 13 Head Unit Group 1 Head Unit Group 2 Head Unit Group 3 Function Compatibility Charts Basic Operation of the CD Player 15 CD Loading Slot Eject Selecting the CD Player Source Track Search and Fast Forward Reverse Entering the Function Menu 16 Repeat Play REPEAT 16 Random Play RANDOM 17 Scan Play T SCAN 17 Pause PAUSE 18 Disc Title Input TITLE IN 18 Displaying the Disc Title Detaching and Repla...

Page 3: ... procedures and precautions Always keep the volume low enough for outside sounds to be audible Protect this product from moisture Should this product fail to operate properly contact your dealer or nearest authorized PIONEER Service Station CAUTION USE OF CONTROL OR ADJUSTMENT OR PERFORMANCE OF PROCEDURES OTHER THAN THOSE SPECIFIED HEREIN MAY RESULT IN HAZARDOUS RADIATION EXPOSURE CAUTION THE USE ...

Page 4: ...bags or iii impair the driver s ability to safely operate the vehicle 6 As with any accessory in your vehicle s interior the display should not divert your attention from the safe operation of your vehicle If you experience difficul ty in operating the system or reading the display please park safely before mak ing adjustments 7 Do not attempt to install or service your display by yourself Install...

Page 5: ... functions with the buttons shown below Note For details concerning operation with the Remote Controller refer to the Head Unit s Operation manual ANGLE button Display WIDE button OPEN CLOSE button Signal Receptor BRIGHTNESS button RESET button EJECT button Release Section CD loading slot Wide mode indicators 4 ENGLISH ESPAÑOL DEUTSCH FRANÇAIS ITALIANO NEDERLANDS 5 2 3 buttons BAND button FUNCTION...

Page 6: ... Daytime and Nighttime At night the screen may be too bright because of the surrounding darkness Turning the vehicle s inside light on will lessen the screen s brightness Refer to page 10 Resetting the Microprocessor The microprocessor must be reset under the following conditions When using this product for the first time after installation When the machine fails to operate properly When strange i...

Page 7: ...pproximately 6 seconds When the ignition switch is turned ON again or turned to ACC the display will be deployed automatically When using an AUDIO VISUAL MASTER UNIT turning the power of either of these ON will deploy the display automatically Replacing the front panel will automatically deploy the display Refer to page 20 The automatic close open mode can be canceled Refer to page 9 When the igni...

Page 8: ...ecaution If you can hear the display knocking against your vehicle s console or dashboard press the ANGLE button on the side to move the screen a little forward Note When adjusting the angle be sure to press the ANGLE button Forcible adjusting of the display by hand may damage it The adjusted angle of the display will be memorized and automatically returned to the next time the display is deployed...

Page 9: ... the ignition switch is turned OFF while the display is deployed the display will be closed after approximately 6 seconds When the ignition switch is turned ON again or turned to ACC the display will be deployed automatically Detaching the front panel will close the display Refer to page 19 The automatic close open mode can be canceled Refer to page 9 When the ignition switch is turned OFF after t...

Page 10: ...l be canceled Repeat the preceding operation to turn the automatic close open mode on Note This procedure can also be used to cancel the automatic close open mode when the display is in the open position The automatic close open mode can also be canceled by pressing the OPEN CLOSE button while attaching the front panel When the ignition switch was turned OFF after the display was closed the displa...

Page 11: ...sen the screen s brightness Switching the Auto Dimmer Mode This function is used to automatically adjust LCD brightness according to the ambient brightness in order to always maintain proper LCD visibility Switch the Auto Dimmer mode ON Repeat the preceding operation to switch the Auto Dimmer mode OFF 7Wide Mode Indicator Illumination Color Auto Dimmer mode Selected mode Other modes ON Red Green O...

Page 12: ...Cinema CINEMA Zoom ZOOM Normal NORMAL Just JUST The picture is enlarged slightly at the center and the amount of enlargement increases horizontally to the ends enabling you to enjoy a 4 3 picture without sensing any disparity even on a wide screen Full FULL A 4 3 picture is enlarged in the horizontal direction only enabling you to enjoy a 4 3 TV picture normal picture without any omissions ...

Page 13: ...the normal picture Note Different settings can be memorized for each picture When video is viewed in a wide mode that dose not match its original aspect ratio it may appear differently Remember that using the wide mode feature of this system for commercial or public viewing pur pose may constitute an infringement on the author s right protected by the Copyright Law Video will appear roughened when...

Page 14: ...15 operate following instructions in this manual 7 Head Unit examples KEH P8015 KEH P6015 Head Unit Group 2 These Head Units are AUDIO VISUAL MASTER UNITS You can call up a Menu on this product s display to operate functions When using the CD Player with these Head Units operate while referring to the Head Unit s manual 7 Head Unit examples AVM P9000 AVM P8000 Head Unit Group 3 These Head Units do...

Page 15: ...N OFF Random Play LOCAL BSM Hold for 2 seconds ON OFF Scan Play PAUSE SCAN Hold for 2 seconds ON OFF Pause PAUSE SCAN ON OFF Track Search 2 or 3 Hold for 0 5 seconds or less Select Fast Forward Reverse 2 or 3 Continue pressing Select 7KEH P1015 Function name Button Operation Source Switching SOURCE Select Repeat Play LOCAL BSM Hold for 2 seconds ON OFF Pause LOCAL BSM ON OFF Track Search 2 or 3 Ho...

Page 16: ...se You can select between Track Search or Fast forward Reverse by pressing the 2 2 3 3 button for a different length of time Track Search 0 5 seconds or less Fast forward Reverse Continue pressing Note If a disc cannot be inserted fully or playback fails make sure the recorded side is down Push the EJECT button and check the disc for damage before reinserting it If a CD is inserted with the record...

Page 17: ... automatically canceled Some Head Units feature a Compression and DBE function In this case refer to the relevant sec tions in the Head Unit s Operation Manual for details Repeat Play REPEAT Repeat Play plays the same track repeatedly Note If you perform Track Search or Fast Forward Reverse Repeat Play is automatically canceled RPT 2 Switch the Repeat Play ON OFF with the 5 buttons 1 Press the FUN...

Page 18: ...cks on a disc have been scanned 3 When you find the desired track cancel the Scan Play with the button If the Function Menu has been can celed automatically select the Scan mode in the Function Menu again 2 Switch the Scan Play ON with the 5 button 1 Press the FUNCTION button and select the Scan mode T SCAN in the Function Menu 2 Switch the Random Play ON OFF with the 5 buttons 1 Press the FUNCTIO...

Page 19: ...al Displaying the Disc Title You can display the currently playing Disc Title on the Head Unit s display To switch the Disc Title Display press the DISPLAY button Repeat the preceding operation to return to the normal display Note When not connecting a Multi CD player this function does not work If you switch display when no disc titles have not been input NO TITLE is displayed 2 Switch the Pause ...

Page 20: ...ront panel is detached this product will not be operable as the front panel contains the Signal receptor and OPEN CLOSE button that are necessary for operation Detaching the Front Panel Eject the front panel The LED indicator will flash while the front panel is being detached Note Take care not to grip the front panel tightly or drop it ...

Page 21: ... the front panel with the guide on the main body and clip in Precaution When replacing the front panel avoid pressing any of the buttons Avoid subjecting the front panel to excessive shocks Keep the front panel out of direct sunlight and high temperatures 20 ENGLISH ESPAÑOL DEUTSCH FRANÇAIS ITALIANO NEDERLANDS ...

Page 22: ...t sunlight for a long period of time it will become very hot resulting in possible damage to the LCD screen When not using this product close the display and avoid exposing it to direct sunlight as much as possible The display should be used within the temperature ranges shown below Operating temperature range 20 to 60 C Storage temperature range 40 to 85 C At temperatures higher or lower than the...

Page 23: ...r the power is turned ON The LCD screen will be difficult to see if it is exposed to direct sunlight Keeping the Display in Good Condition When removing dust from the screen or cleaning the display first turn the system power OFF then wipe with a soft dry cloth When wiping the screen take care not to scratch the surface Do not use harsh or abrasive chemical cleaners About the Small Fluorescent Tub...

Page 24: ...t due to disc characteristics or scratches or dirt on the disc Dirt or condensation on the lens inside this product may also prevent playback Read the precautions with the CD R discs before using Wipe dirty or damp discs outward from the center with a soft cloth Avoid touching the recorded iridescent surface when handling discs Store discs in their cases when not in use Keep discs out of direct su...

Page 25: ...sists contact your dealer or your nearest PIONEER Service Station Message Possible cause Recommended action ERROR 11 12 17 30 Dirty disc Clean the disc ERROR 11 12 17 30 Scratched disc Replace the disc ERROR 14 Unrecorded CD Check the disc ERROR 10 11 12 14 Electrical or mechanical Turn the ignition ON and OFF or 17 30 A0 problem switch to a different source then back to the CD player HEAT CD play...

Page 26: ...on and cause a very dangerous short Do not shorten any leads If you do the protec tion circuit may fail to work when it should Never feed power to other equipment by cutting the insulation of the power supply lead of this product and tapping into the lead The current capacity of the lead will be exceeded causing overheating When replacing fuse be sure to use only fuse of the rating prescribed on t...

Page 27: ...se resistor Yellow To terminal always supplied with power regardless of ignition switch position Black ground To vehicle metal body Orange white To lighting switch terminal This Product 26 ENGLISH ESPAÑOL DEUTSCH FRANÇAIS ITALIANO NEDERLANDS ...

Page 28: ...Black Blue Blue Black Blue Green Gray Green Multi CD player sold separately IP BUS cable supplied with the TV tuner Gray Head Unit sold separately V SEL cable supplied IP BUS cable supplied RGB cable supplied This Product Hide away TV Tuner sold separately 3 m 6 m 50 cm 50 cm 20 cm 15 cm 15 cm ...

Page 29: ...e unit anywhere hot for instance near a heater outlet If installation angle exceeds 30 from horizontal this product might not give its optimum perfor mance DIN Front Rear mount This product can be properly installed either from Front conventional DIN Front mount or Rear DIN Rear mount installation utilizing threaded screw holes at the sides of product chas sis For details refer to the following il...

Page 30: ...aching the frame point the side with a groove downwards and attach it 2 Fastening this product to the factory radio mounting bracket Select a position where the screw holes of the bracket and the screw holes of this product become aligned are fitted and tighten the screws at 2 places on each side Use any of binding screws 4 3 mm binding screws 5 6 mm or flush surface screws 5 6 mm depending on the...

Page 31: ...area 154 87 mm Pixels 336 960 1 440 234 Type TFT active matrix transmissive type Color system NTSC PAL SECAM Compatible Operating temperature range 20 to 60 C Storage temperature range 40 to 85 C Angle Adjustment 60 110 Initial setting angle 90 CD player System Compact disc audio system Usable discs Compact disc Signal format Sampling frequency 44 1 kHz Number of quantization bits 16 linear Freque...

Page 32: ...les 2 Grupo de unidades principales 3 Cuadro de compatibilidad de funciones Operación básica del reproductor de CD 15 Ranura de carga de CD Expulsión Selección de la fuente del reproductor de CD Búsqueda de pista y avance rápido retroceso Selección del menú de funciones 16 Reproducción con repetición REPEAT 16 Reproducción aleatoria RANDOM 17 Reproducción con exploración T SCAN 17 Pausa PAUSE 18 I...

Page 33: ...s de la UNIDAD MAESTRA AUDIOVISUAL etc Precaución Guarde este manual a mano como referencia para los procedimientos de operación y precauciones Mantenga siempre el volumen bajo lo suficiente para oír los sonidos de tráfico Proteja el producto contra la humedad Cuando este producto no funciona correctamente comuníquese con su concesionario o centro de servicio PIONEER autorizado 2 ENGLISH ESPAÑOL D...

Page 34: ...incluyendo el air bag o iii afecte a la habilidad del conductor para manejar con seguridad el vehículo 6 Como con cualquier accesorio del interior de su vehículo la presentación visual no deberá ser una distracción para couducir con seguridad su vehículo Si tiene dificultades al utilizar el sistema o al leer el contenido de la presentación visual estacione el vehículo en un lugar seguro antes de h...

Page 35: ...tor de CD con los botones que se muestran a contin uación Nota Para los detalles acerca de la operación con el controlador remoto consulte el manual de operación de la unidad principal Botón ANGLE Presentación visual Botón WIDE Botón OPEN CLOSE Receptor de señal Botón BRIGHTNESS Botón RESET Botón EJECT Sección de liberación Indicadores de modo amplio Ranura de carga de CD 4 ENGLISH ESPAÑOL DEUTSCH...

Page 36: ...he Durante la noche la pantalla puede ser demasiada brillante debido a la oscuridad circundante Al encender la iluminación interior del vehículo hará disminuir el brillo de la pantalla Refiérase a la página 10 Reposición del microprocesador El microprocesador se debe reposicionar en las siguientes condiciones Cuando utilice este producto por la primera vez después de la instalación Cuando el apara...

Page 37: ... aproximadamente 6 segundos Cuando el interruptor de encendido está en ON o girado a ACC la presentación visual será desplegada automáticamente Cuando se usa la UNIDAD MAESTRA AUDIOVISUAL activando la alimentación desplegará la presentación visual automáticamente Fijación del panel delantero despliega la presentación visual automáticamente Refiérase a la página 20 El modo de apertura cierre automá...

Page 38: ...cucha la presentación visual golpeando contra la consola o tablero de su vehículo presione el botón ANGLE en el lado para mover la pantalla un poco hacia adelante Nota Cuando ajuste el ángulo asegúrese de presionar el botón ANGLE Forzando el ajuste de la presentación visual a mano puede dañarla Al ángulo ajustado de la presentación visual será memorizada y retornará automáticamente la siguiente ve...

Page 39: ...or de encendido está en OFF desactivado mientras la presentación visual es desplegada la presentación visual será cerrada en aproximadamente 6 segundos Cuando el interruptor de encendido está en ON o girado a ACC la presentación visual será desplegada automáticamente Extracción del panel delantero cerrará la presentación visual Refiérase a la página 19 El modo de apertura cierre automático puede s...

Page 40: ...tura cierre automático repita la operación precedente Nota Este procedimiento también puede usarse para cancelar el modo de apertura cierre automático cuando la presentación visual se encuentra en la posición de apertura El modo de apertura cierre automático también puede ser cancelado presionando el botón OPEN CLOSE mientras se fija al panel delantero Cuando el interruptor de encendido está en OF...

Page 41: ...sidad automático Esta función se usa para ajustar automáticamente el brillo de la pantalla LCD de acuerdo al brillo ambiental para mantener siempre una visibilidad de la pantalla LCD apropiada Active el modo de regulador de intensidad automático Para desactivar el modo de regulador de intensidad automático repita la operación precedente 7Color de iluminación de indicador de modo amplio Modo de reg...

Page 42: ...ine CINEMA Zoom ZOOM Normal NORMAL Justo JUST La imagen es ampliada ligeramente en el centro y la cantidad de ampliación aumenta hori zontalmente en los extremos permitiéndolo disfrutar una imagen de 4 3 sin observar ninguna distorsión aun en una pantalla amplia Completo FULL Una imagen de 4 3 es ampliada solamente en la dirección horizontal permitiéndole disfru tar una imagen de TV imagen normal ...

Page 43: ... Nota Se pueden memorizar diferentes ajustes para cada imagen Cuando se ve un vídeo en un modo amplio que no coincide con la razón de aspecto original la imagen puede aparecer de manera diferente Tenga en cuenta que utilizar la función de modo amplio de este sistema para propósitos comerciales o públicos puede constituir en infracción de los derechos de autor protegidos por la ley de los derechos ...

Page 44: ...instrucciones de este manual 7 Ejemplo de unidades principales KEH P8015 KEH P6015 Grupo de unidades principales 2 Estas unidades principales son UNIDADES MAESTRAS AUDIOVISUALES Se puede llamar un menú en la pantalla de visualización de este producto para operar las funciones Cuando se usa el reproductor de CD con estas unidades principales opere haciendo referencia al manual de unidad principal 7...

Page 45: ...2 segundos Reproducción con exploración PAUSE SCAN Activ Desactiv ON OFF sostenga durante 2 segundos Pausa PAUSE SCAN Activ Desactiv ON OFF Búsqueda de pista 2 o 3 sostenga durante Seleccione 0 5 segundos o menos tiempo Avance rápido retroceso 2 o 3 continúe presionando Seleccione 7KEH P1015 Nombre de función Botón Operación Cambio de fuente SOURCE Seleccione Reproducción con repetición LOCAL BSM ...

Page 46: ...ista o el avance rápido retroceso presionando el botón 2 3 durante un lapso diferente de tiempo Búsqueda de pista 0 5 segundos o menos Avance rápido retroceso Continúe presionando Nota Si no se puede insertar un disco completamente o la reproducción falla asegúrese de que el lado grabado se encuentre hacia abajo Presione el botón EJECT y verifique el disco para ver si hay daños antes de reinsertar...

Page 47: ...nidades principales tienen una función de Compresión y DBE En este caso refiérase a las secciones relevantes en el manual de operación de la unidad principal para los detalles Reproducción con repetición REPEAT La reproducción con repetición reproduce la misma pista repetidamente Nota Si se realiza la búsqueda de pista o avance rápido retroceso la reproducción con repetición se cancela automáticam...

Page 48: ...amente después que todas las pistas en un disco han sido exploradas 3 Al encontrar la pista deseada cancele la exploración con el botón Si el menú de funciones se cancela automáticamente seleccione el modo de exploración en el menú de funciones una vez más 2 Active la reproducción de exploración con el botón 5 1 Presione el botón FUNCTION y seleccione el modo de exploración T SCAN en el menú de fu...

Page 49: ...ad principal Visualización del título del disco Puede visualizar el título del disco que está siendo reproducido actualmente en la pantalla de visualización de la unidad principal Para cambiar la visualización del título del disco presione el botón DISPLAY Para retornar a la presentación normal repita la operación precedente Nota Cuando no se conecta a un reproductor de multi CD esta función no op...

Page 50: ...s extraído este producto no operará ya que el panel delantero contiene el receptor de señal y el botón OPEN CLOSE que son necesarios para la operación Extracción del panel delantero Expulse el panel delantero El indicador LED destellará mientras el panel delantero está siendo extraído Nota Tenga cuidado de no tirar del panel delantero fuertemente ni dejarlo caer ...

Page 51: ...panel delantero con la guía en el cuerpo principal y sujételo Precaución Cuando coloca el panel delantero evite presionar cualquiera de los botones Evite exponer el panel delantero a fuertes impactos Mantenga el panel delantero fuera de la luz del sol y de altas temperaturas 20 ENGLISH ESPAÑOL DEUTSCH FRANÇAIS ITALIANO NEDERLANDS ...

Page 52: ... de tiempo puede calentarse mucho resultando en posibles daños a la pantalla LCD Cuando no utilice este producto cierre la presentación visual y siempre que sea posible evite exponerla a la luz directa del sol La presentación visual debe ser utilizada dentro de la gama de temperaturas mostrada abajo Gama de temperaturas de funcionamiento 20 a 60 C Gama de temperaturas para guardar la pantalla 40 a...

Page 53: ...de quedar oscura durante un rato después de haber conectado la alimentación La pantalla LCD podrá verse con dificultad si está expuesta a la luz solar directa Mantenimiento de la presentación visual en buenas condiciones Cuando quite el polvo de la presentación visual o la limpie desconecte primero la alimentación del sistema y luego pase un paño suave y seco Cuando limpie la pantalla tenga cuidad...

Page 54: ...el disco o condiciones del disco como grietas o suciedad La suciedad o con densación en el lente dentro de este producto también puede impedir la reproducción Lea las precauciones con los discos CD R antes de usarlos Limpie los discos sucios o humedecidos desde el centro hacia afuera con un paño suave Cuando manipule los discos evite tocar la superficie grabada iridiscente Cuando no los use guarde...

Page 55: ...quese con su concesionario o centro de servicio PIONEER más cercano Mensaje Causa posible Acción recomendada ERROR 11 12 17 30 Disco sucio Limpie el disco ERROR 11 12 17 30 Disco rayado Cambie el disco ERROR 14 Disco sin grabar Verifique el disco ERROR 10 11 12 14 Problema eléctrico Active o desactive el encendido o 17 30 A0 o mecánico cambie a una fuente diferente Luego vuelva al reproductor de C...

Page 56: ... la batería Esto dañará el material aislante del conductor y causará un cortocircuito peligroso No acorte ningún conductor Si lo hiciera la protección del circuito podría fallar al funcionar cuando debería Nunca alimente energía a otros equipos cortando el aislamiento del conductor de alimentación provista de este producto y haciendo un empalme con el conductor La capacidad de corriente del conduc...

Page 57: ...al con suministro constante de electricidad independientemente de la posición del interruptor de encendido Negro masa A la carrocería del veículo parte metálica Anaranjado blanco Al terminal de interruptor de iluminación Este producto 26 ENGLISH ESPAÑOL DEUTSCH FRANÇAIS ITALIANO NEDERLANDS ...

Page 58: ...Verde Cable IP BUS suministrado con el sintonizador de TV Gris Unidad principal vendida separadamente Cable V SEL suministrado Cable IP BUS suministrado Cable de 20 patillas suministrado Este producto Sintonizador de TV Hide away vendida separadamente 3 m 6 m 50 cm 50 cm 20 cm 15 cm 15 cm Reproductor de Multi CD vendida separadamente ...

Page 59: ...por ejemplo cerca de la salida de un calefactor Si el ángulo de la instalación excede los 30 del lado horizontal este producto podría no brindar su óptimo funcionamiento Montaje trasero delantero DIN Este producto puede ser instalado apropiada mente ya sea desde Front montaje delantero DIN convencional o Rear instalación de montaje trasero DIN usando los orificios rosca dos en los lados del chasis...

Page 60: ...rco apunte el lado con ranura hacia abajo 2 Fijación de este producto a la ménsula de montaje de radio de fábrica Seleccione una posición en donde los orificios de la ménsula y los orificios roscados de este producto se alineen queden fijos y apriete los tornillos en 2 lugares sobre cada lado Utilice cualquiera de los tornillos de unión 4 3 mm tornillos de unión 5 6 mm o tornillos de superficie pl...

Page 61: ... 9 área de visualización efectiva 154 87 mm Pixels 336 960 1 440 234 Tipo Matriz activa TFT tipo transmisivo Sistema de color Compatible con NTSC PAL SECAM Gama de temperaturas de funcionamiento 20 a 60 C Gama de temperaturas para guardar la pantalla 40 a 85 C Ajuste de ángulo 60 110 Angulo de ajuste inicial 90 Reproductor de CD Sistema Sistema de audio de disco compacto Discos usables Disco compa...

Page 62: ......

Page 63: ......

Page 64: ...ustralia TEL 03 9586 6300 PIONEER ELECTRONICS OF CANADA INC 300 Allstate Parkway Markham Ontario L3R OP2 Canada TEL 905 479 4411 PIONEER ELECTRONICS DE MEXICO S A de C V San Lorenzo 1009 3er Piso Desp 302 Col Del Valle Mexico D F C P 03100 TEL 5 688 52 90 Published by Pioneer Corporation Copyright 2001 by Pioneer Corporation All rights reserved Publication de Pioneer Corporation Copyright 2001 Pio...

Reviews: