background image


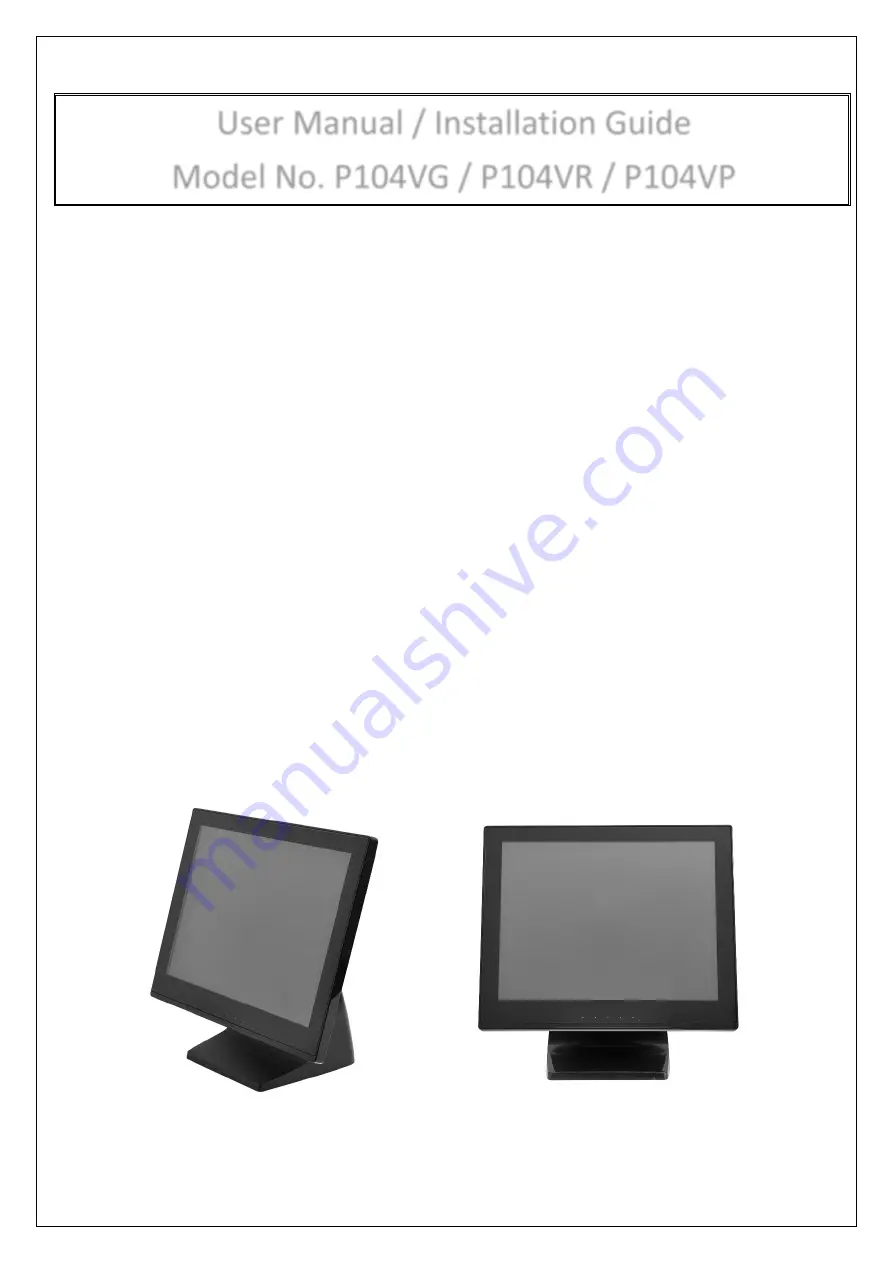
User Manual / Installation Guide 

Model No. P104VG / P104VR / P104VP


Warning!

    It will cause malfunction if the monitor is operating with unspecified power supply adaptor 

or incorrect power voltage.  Do not expose this unit in the rain or moisture environment to reduce the 
risk of fire or electric shock. 

PRECAUTIONS 


Do not use the monitor near water. 


Do not place the monitor on an unstable cart, stand, or table. If the monitor falls, it can injure a 
person and cause serious damage to the appliance. Use only a cart or stand recommended by the 
manufacturer or sold with the monitor. If you mount the monitor on a wall or shelf, use a mounting 
kit approved by the manufacturer and follows the kit instructions. 


The monitor should be operated with type of power adaptor indicated on the label. 
Normally it is packed with monitor, or using an adaptor approved by the manufacturer. 


Unplug the unit during a lightning storm or when it will not be used for long periods of time. This will 
protect the monitor from being damaged due to power surges. 


Never spill liquids on the monitor. 


Do not attempt to service the monitor yourself; opening or removing covers can damage to the 
monitor or panel. Please refer all servicing to qualified service personnel. 


For Wall mount adaptor, wall socket shall be installed near the equipment and shall be easily 
accessible. 


Summary of Contents for P104VG

Page 1: ...itor If you mount the monitor on a wall or shelf use a mounting kit approved by the manufacturer and follows the kit instructions The monitor should be operated with type of power adaptor indicated on...

Page 2: ...on Touch Key Control 4 OSD Lock Unlock 5 Structure of OSD settings 5 III For your safety 6 IV Support timing chart 6 V 5 Wires Resistive Touch Panel 7 VI Projected Capacitive Touch Panel 14 VII Mechan...

Page 3: ...uality Projected capacitive touch panel Resistive touch panel or cover lens Fully Glossy surface throughout monitor s appearance Rimless front bezel design spill dust proof Cable management down routi...

Page 4: ...power ON or OFF We recommend turning your system power on first then the LCD monitor Press Power key to turn on and press again for 2 3sec to power off monitor Auto Adjust AUTO a Pressing to execute A...

Page 5: ...htness Press UP key to increase brightness DOWN key to decrease brightness Contrast Press UP key to increase contrast DOWN key to decrease contrast Black levels Press UP key to increase background bri...

Page 6: ...Exit Press Exit to return to Main Menu Information Display Information Press Display information to display resolution and refresh rate Exit Press Exit to return to Main Men Exit Press Exit key will c...

Page 7: ...Touch panel Type 5 Wires Resistive Touch Touch Control Type USB Transmission 80 Touch Driver installation Please go to the EETI website to get Touch Driver https www eeti com drivers html 1 0 Download...

Page 8: ...8 2 0 Select the setup type don t tick the box if PS2 interface is not required Click Next 3 0 RS232 interface driver installed is default please click Next...

Page 9: ...9 4 0 You can select to do Touch screen calibration after system boot up or not Default setting is None 5 0 Select to use Multi Monitor system then press Next...

Page 10: ...10 6 0 Choose destination location default folder location shown as below Press Next 7 0 Figure shown below please press Next to complete installation...

Page 11: ...11 Calibration 1 0 Execute eGalaxTouch 2 0 Click Tools tab and click 4 Points Calibration...

Page 12: ...0 Four Calibration points will appear on screen sequentially please to press the center of circle on screen in 15 seconds one by one 4 0 After finish 4 points calibration the diagram will appear as fo...

Page 13: ...13 5 0 Click Tools tab and click Linearization 6 0 Nine Calibration points will appear on screen sequentially please to press the center of circle on screen one by one...

Page 14: ...Capacitive Touch Control Type USB Transmission 85 Touch Control Driver eGalax Touch driver Mouse emulation driver or supported by driver embedded in OS after windows 7 Touch Driver installation Pleas...

Page 15: ...15 VII Mechanical dimension...

Page 16: ...l interference when the equipment is operated in a commercial environment This equipment generates uses and can radiate radio frequency energy and if not installed and used in accordance with the inst...

Page 17: ...Typ W 9 W Standby power consumption W 1 W AC Power Supply Vac 100 240 Feature Key Control 5 keys Power Auto Up Down Menu OSD Language 8 countries English French German Italian Spanish Japanese Simple...

Reviews: