background image

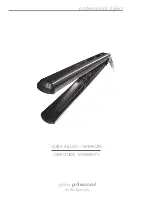
HP8651/00,HP8650/00

Summary of Contents for HP8650/00

Page 1: ...HP8651 00 HP8650 00 ...

Page 2: ... ...

Page 3: ... A B H G F I J K C D E 1 ...

Page 4: ... ...

Page 5: ...HP8651 00 HP8650 00 English 6 Deutsch 14 Español 23 Français 31 Italiano 40 Nederlands 48 Português 57 ...

Page 6: ...h HP8651 only G Bristle retraction knob HP8651 only H Thermo brush I Straightening comb HP8651 only J Lever K Polish brush Important Read this user manual carefully before you use the appliance and save it for future reference Warning Do not use this appliance near water Do not use this appliance near bathtubs showers basins or other vessels containing water Fig 2 When you use the appliance in a b...

Page 7: ...in Caution For additional protection we advise you to install a residual current device RCD in the electrical circuit that supplies the bathroom This RCD must have a rated residual operating current not higher than 30mA Ask your installer for advice The attachments become hot during use Prevent the hot surfaces of the appliance from coming into contact with your skin Never block the air inlet gril...

Page 8: ... is safe to use based on scientific evidence available today Preparing for use Hair Do not use the appliance on wet hair Dry your hair with a towel first The appliance is most effective on towel dry hair 1 Comb or brush the hair so that it is untangled and smooth 2 Use a comb to divide the hair into sections and put them aside with clips Do not put too much hair in one section Connecting and disco...

Page 9: ...the control slide or on the opposite side Fig 5 2 Put the plug in the wall socket 3 Set the control slide to the preferred setting to switch on the appliance Fig 6 4 When you have finished drying your hair switch off the appliance Styling with the polish brush Use the polish brush to give your hair volume and shine 1 Snap the polish brush onto the appliance Note There are two ways to connect the p...

Page 10: ...ack onto the head You can also use the thermo brush to create flicks at the hair ends There are 2 options Turn the brush inwards to create inward flicks Fig 9 Turn the brush outwards to create outward flicks Fig 10 7 When you have finished styling your hair switch off the appliance Styling with the retractable bristle brush HP8651 only Use the retractable bristle brush to create waves or curls We ...

Page 11: ...ally 8 to 10 seconds 7 As soon as the hair feels dry fix the curl with a cool airflow blue indication for long lasting results Fig 14 8 Switch off the appliance Turn the bristle retraction knob in the direction of the arrow to retract the bristles Then remove the brush from your hair Fig 15 Make sure you hold the brush away from the underlying hair when you remove it to preserve underlying curls 9...

Page 12: ...2 Let the appliance and the attachments cool down completely on a heat resistant surface 3 Remove the attachments from the appliance before you clean them 4 Remove hairs and dust from the attachments Then clean the attachments with a moist cloth or rinse them under the tap Note If you have used styling products on your hair before or during styling clean the attachments thoroughly with a moist clo...

Page 13: ...icial collection point for recycling By doing this you help to preserve the environment Fig 19 Guarantee service If you need service or information or if you have a problem please visit the Philips website at www philips com or contact the Philips Consumer Care Centre in your country you find its phone number in the worldwide guarantee leaflet If there is no Consumer Care Centre in your country go...

Page 14: ... einziehbaren Borstenreihen nur HP8651 G Drehknopf zum Einziehen der Borstenreihen nur HP8651 H Thermo Bürste I Haarglätteraufsatz nur HP8651 J Hebel K Glanzbürste Wichtig Lesen Sie diese Bedienungsanleitung vor dem Gebrauch des Geräts aufmerksam durch und bewahren Sie sie für eine spätereVerwendung auf Warnhinweis Verwenden Sie dieses Gerät niemals in der Nähe von Wasser Verwenden Sie dieses Gerä...

Page 15: ...llgegenstände in die Lufteinlassöffnung ein da dies zu Stromschlägen führen kann Lassen Sie das angeschlossene Gerät niemals unbeaufsichtigt Achtung Der Einbau einer Fehlerstromschutzeinrichtung in dem Stromkreis der das Badezimmer versorgt bietet zusätzlichen Schutz Dieses Gerät muss über einen Nennauslösestrom von maximal 30 mA verfügen Lassen Sie sich von Ihrem Elektroinstallateur beraten Die A...

Page 16: ...s Philips Gerät erfüllt sämtliche Normen bezüglich elektromagnetischer Felder EMF Nach aktuellen wissenschaftlichen Erkenntnissen ist das Gerät sicher im Gebrauch sofern es ordnungsgemäß und entsprechend den Anweisungen in dieser Bedienungsanleitung gehandhabt wird Für den Gebrauch vorbereiten Haare Wenden Sie das Gerät nicht bei nassem Haar an sondern trocknen Sie Ihr Haar zuerst mit einem Handtu...

Page 17: ...Starker warmer Luftstrom für einfaches Styling 6 Starker heißer Luftstrom für schnelles Styling Trocknen mit der Stylingdüse Verwenden Sie die Stylingdüse um Ihr Haar zu trocknen 1 Stecken Sie die Stylingdüse auf das Gerät Hinweis Es gibt zwei Möglichkeiten die Stylingdüse aufzustecken mit dem engen Luftauslass auf der Seite des Schiebeschalters oder auf der entgegengesetzten Seite Abb 5 2 Stecken...

Page 18: ...rück 7 Schalten Sie das Gerät aus sobald Sie mit dem Stylen der Haare fertig sind Stylen mit derThermo Bürste Mit derThermo Bürste geben Sie weichen Locken extra Halt und maximalesVolumen 1 Stecken Sie die Thermo Bürste auf das Gerät Abb 8 2 Stecken Sie den Stecker in die Steckdose 3 Zum Einschalten des Geräts stellen Sie den Schiebeschalter auf die gewünschte Einstellung Abb 6 4 Platzieren Sie di...

Page 19: ...ger als 8 Sekunden im Haar halten Hinweis Sie erhalten die besten Styling Ergebnisse wenn das Haar trocken ist bevor Sie die Borstenreihen zum Entfernen der Bürste einziehen 1 Stecken Sie die Bürste mit den einziehbaren Borstenreihen auf das Gerät Abb 11 2 Stecken Sie den Stecker in die Steckdose 3 Wenn sich die Borstenreihen eingezogen in der Bürste befinden drehen Sie den Knopf zum Einziehen der...

Page 20: ...en 9 Lassen Sie die Locken abkühlen bevor Sie Ihre Frisur mit Kamm Bürste oder den Fingern in die endgültige Form bringen Stylen mit dem Haarglätteraufsatz nur HP8651 Verwenden Sie den Haarglätteraufsatz um einen glatten Look zu kreieren 1 Stecken Sie den Haarglätteraufsatz auf das Gerät Abb 16 Hinweis Es gibt zwei Möglichkeiten den Haarglätteraufsatz aufzustecken mit dem Hebel auf derselben Seite...

Page 21: ...en 4 Entfernen Sie Haare und Staub von den Aufsätzen Reinigen Sie die Aufsätze dann mit einem feuchten Tuch oder spülen Sie sie unter fließendem Wasser ab Hinweis Wenn Sie vor oder während des Frisierens Styling Produkte benutzt haben sollten Sie anschließend die Aufsätze gründlich mit einem feuchten Tuch reinigen Hinweis Achten Sie darauf dass die Aufsätze trocken sind bevor Sie sie benutzen oder...

Page 22: ...ffiziellen Sammelstelle Auf diese Weise tragen Sie zum Umweltschutz bei Abb 19 Garantie und Kundendienst Benötigen Sie weitere Informationen oder treten Probleme auf besuchen Sie bitte die Philips Website www philips com oder setzen Sie sich mit einem Philips Service Center in Ihrem Land inVerbindung Telefonnummer siehe Garantieschrift Sollte es in Ihrem Land kein Service Center geben wenden Sie s...

Page 23: ... Cepillo de púas retráctiles sólo modelo HP8651 G Botón de retracción de púas sólo modelo HP8651 H Cepillo térmico I Peine alisador sólo modelo HP8651 J Palanca K Cepillo para brillo Importante Antes de usar el aparato lea atentamente este manual de usuario y consérvelo por si necesitara consultarlo en el futuro Advertencia No utilice este aparato cerca del agua ni cerca de bañeras duchas cubetas ...

Page 24: ...dicional aconsejamos que instale en el circuito que suministre electricidad al cuarto de baño un dispositivo de corriente residual RCD con una corriente residual de funcionamiento que no exceda los 30 mA Consulte a su electricista Los accesorios se calientan durante el uso Evite que las superficies calientes del aparato entren en contacto directo con su piel No bloquee nunca la rejilla de entrada ...

Page 25: ...s conocimientos científicos disponibles hoy en día Preparación para su uso Cabello No utilice el aparato sobre cabello mojado séquelo primero con una toalla El aparato es más eficaz si el cabello se ha secado previamente con una toalla 1 Peine o cepille el cabello para desenredarlo y dejarlo suave 2 Utilice un peine para dividir el pelo en mechones y apártelos con unas pinzas No ponga demasiado ca...

Page 26: ...estrecha de la salida de aire en la misma parte que el botón de control o en la parte contraria fig 5 2 Enchufe el aparato a la toma de corriente 3 Para encender el aparato deslice el botón de control a la posición deseada fig 6 4 Cuando termine de secar el cabello apague el aparato Moldeado con el cepillo para brillo Utilice el cepillo para brillo para darle al cabello volumen y brillo 1 Coloque ...

Page 27: ... púas del cepillo 6 Vaya retirando el cepillo de la cabeza a la vez que lo gira de forma que el cabello se eleve y caiga suavemente sobre la cabeza También puede utilizar el cepillo térmico para dar forma a las puntas del pelo Existen 2 opciones Gire el cepillo hacia dentro para dar forma hacia dentro fig 9 Gire el cepillo hacia afuera para dar forma hacia afuera fig 10 7 Cuando termine de moldear...

Page 28: ...epillo Asegúrese de que el mechón de pelo está en contacto con el cilindro del cepillo Nota Para darle a su cabello realce y volumen máximos enrolle el cabello en ángulos rectos respecto al cuero cabelludo 5 Para encender el aparato deslice el botón de control a la posición deseada fig 6 6 Mantenga el cepillo en posición tanto tiempo como sea necesario normalmente entre 8 y 10 segundos 7 Cuando si...

Page 29: ...ig 17 5 Presione la palanca contra el mango para cerrar el cepillo fig 18 6 Realice movimientos de cepillado desde la parte superior de la cabeza hacia abajo 7 Cuando termine de moldear el cabello apague el aparato Limpieza Nunca enjuague el aparato con agua No sumerja nunca el aparato en agua u otros líquidos ni lo enjuague bajo el grifo 1 Apague el aparato y desenchúfelo 2 Deje enfriar totalment...

Page 30: ...o colgándolo por la anilla Medio ambiente Al final de su vida útil no tire el aparato junto con la basura normal del hogar Llévelo a un punto de recogida oficial para su reciclado De esta manera ayudará a conservar el medio ambiente fig 19 Garantía y servicio Si necesita información o si tiene algún problema visite la página Web de Philips en www philips com o póngase en contacto con el Servicio d...

Page 31: ...ts rétractables HP8651 uniquement G Bouton de commande des picots HP8651 uniquement H Brosse thermique I Peigne lissant HP8651 uniquement J Manette K Brosse lissante Important Lisez attentivement ce mode d emploi avant d utiliser l appareil et conservez le pour un usage ultérieur Avertissement Tenez l appareil à l écart de l eau Ne l utilisez pas près d une baignoire d une douche d un lavabo ni de...

Page 32: ...électrique Ne laissez jamais l appareil branché sans surveillance Attention Pour plus de sécurité il est conseillé de brancher l appareil sur une prise de courant protégée par un disjoncteur différentiel de 30 mA dans la salle de bains Demandez conseil à votre électricien Les accessoires deviennent chauds pendant l utilisation Évitez tout contact entre les surfaces chaudes et votre peau Ne bloquez...

Page 33: ...écurité établies sur la base des connaissances scientifiques actuelles s il est manipulé correctement et conformément aux instructions de ce mode d emploi Avant l utilisation Cheveux N utilisez pas l appareil sur cheveux mouillés Séchez les d abord avec une serviette L appareil donne de meilleurs résultats si vos cheveux ont été préalablement séchés avec une serviette 1 Peignez ou brossez les chev...

Page 34: ...cheveux 1 Fixez le concentrateur sur l appareil Remarque Vous pouvez fixer le concentrateur d air de deux façons en laissant la petite sortie d air du même côté que le bouton coulissant ou du côté opposé fig 5 2 Branchez le cordon d alimentation sur la prise secteur 3 À l aide du bouton coulissant sélectionnez le réglage souhaité pour mettre l appareil en marche fig 6 4 Lorsque vous avez fini arrê...

Page 35: ... sur la prise secteur 3 À l aide du bouton coulissant sélectionnez le réglage souhaité pour mettre l appareil en marche fig 6 4 Placez la brosse dans vos cheveux 5 Déplacez l appareil dans le sens inverse de la pousse des cheveux tout en effleurant le cuir chevelu avec les picots de la brosse 6 Éloignez la brosse de votre tête en un mouvement rotatif vos cheveux seront ainsi soulevés et retomberon...

Page 36: ...rise secteur 3 Si les picots restent à l intérieur de la brosse tournez le bouton de commande des picots dans le sens de la flèche 1 pour faire sortir les picots 2 fig 12 4 Prenez une mèche et enroulez la autour de la brosse Assurez vous que l extrémité de la mèche est enroulée dans la direction souhaitée fig 13 N enroulez pas trop de cheveux autour de la brosse Plus la mèche est mince plus la bou...

Page 37: ...mise en forme lisse 1 Fixez le peigne lissant sur l appareil fig 16 Remarque Vous pouvez fixer le peigne lissant de deux façons en laissant la manette du même côté que le bouton coulissant ou du côté opposé Toutefois dans la mesure où la manette est assez longue et couvre en partie le bouton coulissant nous vous recommandons de brancher le peigne lissant de l autre côté 2 Branchez le cordon d alim...

Page 38: ... d un chiffon humide Remarque Assurez vous que les accessoires sont secs avant de les utiliser ou de les stocker 5 Nettoyez l appareil avec une petite brosse ou un chiffon sec Rangement N enroulez pas le cordon d alimentation autour de l appareil 1 Arrêtez l appareil et débranchez le 2 Laissez l appareil et les accessoires refroidir complètement sur une surface résistante à la chaleur 3 Placez l a...

Page 39: ...vous sur le site Web de Philips à l adresse www philips com ou contactez le Service Consommateurs Philips de votre pays vous trouverez le numéro de téléphone correspondant sur le dépliant de garantie internationale S il n existe pas de Service Consommateurs Philips dans votre pays renseignez vous auprès de votre revendeur Philips local Français 39 ...

Page 40: ...a setole retraibili solo HP8651 G Pomello per ritrarre le setole solo HP8651 H Spazzola termica I Pettine per lisciare solo HP8651 J Leva K Spazzola per capelli luminosi Importante Prima di utilizzare l apparecchio leggete attentamente il presente manuale e conservatelo per eventuali riferimenti futuri Avvertenza Non utilizzate l apparecchio vicino all acqua Non utilizzatelo vicino a vasche da bag...

Page 41: ...ciate mai incustodito l apparecchio mentre è collegato alla presa di corrente Attenzione Per una maggiore protezione vi consigliamo di installare sull impianto elettrico del bagno un dispositivo di corrente residua RCD non superiore a 30 mA Per ulteriori suggerimenti rivolgetevi all installatore di fiducia Gli accessori raggiungono temperature elevate durante l uso Evitate il contatto delle superf...

Page 42: ...tilizzato in modo appropriato seguendo le istruzioni contenute nel presente manuale utente l apparecchio consente un utilizzo sicuro come confermato dai risultati scientifici attualmente disponibili Predisposizione dell apparecchio Capelli Non utilizzate l apparecchio sui capelli bagnati Asciugateli prima con un asciugamano in questo modo l apparecchio sarà più efficace 1 Pettinate o spazzolate i ...

Page 43: ...ilizzate il concentratore per asciugare i capelli 1 Applicate il concentratore sull apparecchio facendolo scattare in posizione Nota Il concentratore può essere inserito in due modi con la griglia di uscita dell aria piccola sullo stesso lato del comando a scorrimento o sul lato opposto fig 5 2 Inserite la spina nella presa di corrente a muro 3 Impostate il comando a scorrimento sull intensità des...

Page 44: ...l apparecchio fig 8 2 Inserite la spina nella presa di corrente a muro 3 Impostate il comando a scorrimento sull intensità desiderata per accendere l apparecchio fig 6 4 Posizionate la spazzola nei capelli 5 Spazzolate i capelli procedendo in senso inverso rispetto alla crescita sfiorando il cuoio capelluto con i dentini della spazzola 6 Allontanate la spazzola dalla testa ruotandola leggermente I...

Page 45: ...spazzola ruotare il pomello nella direzione della freccia 1 per farle uscire 2 fig 12 4 Prendete una ciocca e avvolgetela attorno alla spazzola Controllate che l estremità della ciocca sia arrotolata nella direzione desiderata fig 13 Non avvolgete ciocche troppo grosse Più sottili saranno le ciocche e più fitti risulteranno i riccioli Non avvolgete ciascuna ciocca per più di due volte attorno alla...

Page 46: ...eva sullo stesso lato del comando a scorrimento o sul lato opposto Tuttavia poiché la leva è piuttosto lunga e in parte copre il comando è più comodo collegare il pettine per lisciare al contrario 2 Inserite la spina nella presa di corrente a muro 3 Impostate il comando a scorrimento sull intensità desiderata per accendere l apparecchio fig 6 4 Appoggiate il pettine per lisciare sui capelli fig 17...

Page 47: ...hio 1 Spegnete l apparecchio e staccate la spina 2 Lasciate raffreddare completamente l apparecchio e gli accessori su una superficie termoresistente 3 Riponete l apparecchio in un posto sicuro e asciutto Potete anche riporlo appendendolo all apposito gancio Tutela dell ambiente Per contribuire alla tutela dell ambiente non smaltite l apparecchio con normali i rifiuti domestici ma consegnatelo a u...

Page 48: ...telpennen alleen HP8651 G Knop voor intrekken van borstelpennen alleen HP8651 H Thermoborstel I Straightener kam alleen HP8651 J Hendel K Glansborstel Belangrijk Lees deze gebruiksaanwijzing zorgvuldig door voordat u het apparaat gaat gebruiken Bewaar de gebruiksaanwijzing om deze indien nodig te kunnen raadplegen Waarschuwing Gebruik dit apparaat niet in de buurt van water Gebruik dit apparaat ni...

Page 49: ... te voorkomen dat ze met het apparaat gaan spelen Steek geen metalen voorwerpen door het luchtinlaatrooster om een elektrische schok te voorkomen Laat het apparaat nooit onbeheerd achter als het op netspanning is aangesloten Let op Voor extra veiligheid adviseren we u een aardlekschakelaar te installeren in de elektrische groep die de badkamer van stroom voorziet Deze aardlekschakelaar dient een w...

Page 50: ...etische velden EMV Dit Philips apparaat voldoet aan alle richtlijnen met betrekking tot elektromagnetische velden EMV Mits het apparaat op de juiste wijze en volgens de instructies in deze gebruiksaanwijzing wordt gebruikt is het veilig te gebruiken volgens het nu beschikbare wetenschappelijke bewijs Klaarmaken voor gebruik Haar Gebruik het apparaat niet op nat haar droog uw haar eerst met een han...

Page 51: ...troom voor gemakkelijk stylen 6 sterke hete luchtstroom voor snel stylen Drogen met de concentrator Gebruik de concentrator om uw haar te drogen 1 Klik de concentrator op het apparaat vast Opmerking U kunt de concentrator op twee manieren bevestigen met de smalle luchtuitlaat aan dezelfde kant als de schuifknop of aan de andere kant fig 5 2 Steek de stekker in het stopcontact 3 Zet de schuifknop o...

Page 52: ...pparaat uit wanneer u klaar bent met het stylen van uw haar Stylen met de thermoborstel Gebruik de thermoborstel om het haar voller te maken en losse krullen volume te geven 1 Klik de thermoborstel op het apparaat fig 8 2 Steek de stekker in het stopcontact 3 Zet de schuifknop op de gewenste stand om het apparaat in te schakelen fig 6 4 Plaats de borstel in het haar 5 Beweeg de borstel tegen de ha...

Page 53: ...ng U bereikt de beste resultaten als uw haar droog is voordat u de borstelpennen intrekt om de borstel uit het haar te verwijderen 1 Klik de borstel met intrekbare borstelpennen op het apparaat vast fig 11 2 Steek de stekker in het stopcontact 3 Als de pennen ingetrokken zijn schuift u de knop voor het intrekken van de borstelpennen in de richting van de pijl 1 om de borstelpennen uit de borstel t...

Page 54: ...fkoelen voordat u het haar met een kam een borstel of uw vingers definitief in model brengt Stylen met de straightener kam alleen HP8651 Met de straightener kam maakt u uw haar steil 1 Klik de straightener kam op het apparaat fig 16 Opmerking U kunt de straightener kam op twee manieren bevestigen met de hendel aan dezelfde kant als de schuifknop of aan de andere kant Aangezien de hendel vrij lang ...

Page 55: ...rvolgens schoon met een vochtige doek of spoel ze af onder de kraan Opmerking Als u voor of tijdens het stylen stylingproducten hebt gebruikt maak dan na gebruik de hulpstukken goed schoon met een vochtige doek Opmerking Zorg ervoor dat de hulpstukken droog zijn voordat u deze gebruikt of opbergt 5 Maak het apparaat schoon met een kleine borstel of een droge doek Opbergen Wikkel het netsnoer niet ...

Page 56: ...rt u een bijdrage aan een schonere leefomgeving fig 19 Garantie service Als u service of informatie nodig hebt of als u een probleem hebt bezoek dan de Philips website www philips nl of neem contact op met het Philips Consumer Care Centre in uw land u vindt het telefoonnummer in het worldwide guarantee vouwblad Als er geen Consumer Care Centre in uw land is ga dan naar uw Philips dealer Nederlands...

Page 57: ...penas HP8651 G Botão de retracção das cerdas apenas HP8651 H Escova térmica I Pente alisador apenas HP8651 J Manípulo K Escova de modelação Importante Leia cuidadosamente este manual do utilizador antes de utilizar o aparelho e guarde o para consultas futuras Aviso Não utilize este aparelho perto de água Não utilize este aparelho perto de banheiras chuveiros lavatórios ou outros recipientes que co...

Page 58: ...igado à corrente Cuidado Para maior segurança aconselhamos a instalação de um dispositivo de corrente residual disjuntor no circuito eléctrico que abastece a casa de banho Este disjuntor deve ter uma corrente residual nominal não superior a 30 mA Aconselhe se com o seu electricista Os acessórios ficam quentes durante a utilização Evite que as superfícies quentes do aparelho entrem em contacto com ...

Page 59: ...m as instruções fornecidas neste manual do utilizador o aparelho pode ser utilizado em segurança com base em provas científicas disponíveis actualmente Preparar para a utilização Cabelo Não utilize o aparelho em cabelo molhado seque primeiro com uma toalha O aparelho é mais eficaz em cabelo seco com a toalha 1 Penteie ou escove o cabelo para o desembaraçar e amaciar 2 Utilize um pente para dividir...

Page 60: ...e o concentrador no aparelho Nota Há duas formas de colocar o concentrador com a pequena saída de ar no mesmo lado do comutador ou no lado oposto ao mesmo fig 5 2 Ligue a ficha à tomada eléctrica 3 Regule o comutador para posição pretendida para ligar o aparelho fig 6 4 Quando terminar de secar o cabelo desligue o aparelho Pentear com a escova de modelação Utilize a escova de modelação para dar vo...

Page 61: ...do crescimento do cabelo tocando o couro cabeludo com os dentes da escova 6 Afaste a escova da cabeça enquanto a enrola no cabelo O cabelo é levantado e cairá ligeiramente sobre a cabeça Pode ainda utilizar a escova térmica para criar palas nas pontas Existem 2 opções Rode a escova para dentro para criar palas interiores fig 9 Rode a escova para fora para criar palas exteriores fig 10 7 Quando ter...

Page 62: ...ção pretendida fig 13 Não enrole demasiado cabelo de uma só vez Quanto mais fina for a madeixa mais apertado será o caracol Não enrole cada madeixa de cabelo mais do que duas vezes na escova Certifique se que a madeixa de cabelo fica em contacto com a barra da escova Nota Para que o seu cabelo fique com um volume bonito enrole o cabelo nos ângulos correctos na direcção do couro cabeludo 5 Regule o...

Page 63: ...nte longo e cobre parcialmente o comutador é mais conveniente que coloque o pente alisador no lado contrário 2 Ligue a ficha à tomada eléctrica 3 Regule o comutador para posição pretendida para ligar o aparelho fig 6 4 Coloque o pente alisador no cabelo fig 17 5 Prima o manípulo na direcção da pega para fechar a escova fig 18 6 Efectue movimentos de escovagem de cima para baixo 7 Quando terminar d...

Page 64: ...feçam sobre uma superfície resistente ao calor 3 Guarde o aparelho num local seco e seguro Também pode guardar o aparelho pendurando o pela argola adequada Meio ambiente Não deite fora o aparelho junto com o lixo doméstico normal no final da sua vida útil entregue o num ponto de recolha oficial para reciclagem Ao fazê lo ajuda a preservar o ambiente fig 19 Garantia e assistência Se necessitar de a...

Page 65: ...65 ...

Page 66: ...66 2 3 1 2 4 5 6 7 8 9 10 11 2 1 12 13 14 15 16 17 18 19 ...

Page 67: ...67 ...

Page 68: ...www philips com u 4222 002 7367 1 ...

Reviews: