Philips FW350C, User Manual
The Philips FW350C is a sleek and powerful stereo system offering high-quality audio and a range of features to enhance your music experience. Designed for ultimate convenience, find detailed specifications and a user manual available for free download on our website, ensuring you make the most of this exceptional product.
Share
Download


Reviews:
No comments
Related manuals for FW350C

HCC-300
Brand: Aaron Pages: 2

AP-3
Brand: Aaron Pages: 3

Lectern
Brand: Da-Lite Pages: 8

AVR-1612
Brand: D+M Group Pages: 18

T04
Brand: MagicRadar Pages: 98

MIG-200
Brand: S7 Pages: 14
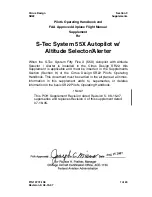
System 55X
Brand: S-TEC Pages: 24

WL100
Brand: WaterLogic Pages: 69

Meeting Ultra
Brand: KanDao Pages: 265

LEF-3L
Brand: Aiphone Pages: 2

ATM6500BT
Brand: Ltc Audio Pages: 24

W24G4
Brand: Bard Pages: 54

PUK U4
Brand: Lampert Pages: 22

CI-RL3-MIB-4
Brand: r.LiNK Pages: 19

ATC40J9AN
Brand: Hyundai Pages: 135

RCx-1000
Brand: Serene Pages: 48

SY14Q5184CUQ-A
Brand: Sylvania Pages: 26

RLCDF
Brand: GE Security Pages: 26


