Philips 32PHA4509, User Manual
The Philips 32PHA4509 is a top-notch television that offers exceptional picture quality and user-friendly features. For a hassle-free setup, a Quick Start Manual is available for free download on our website. Discover the full potential of your TV by easily accessing the manual at manualshive.com.
Share
Download


Reviews:
No comments
Related manuals for 32PHA4509

V423
Brand: NEC Pages: 4

26MF337B - Hook Up Guide
Brand: Magnavox Pages: 3

15MF400T/37 Series
Brand: Magnavox Pages: 92

15MF227B - Hook Up Guide
Brand: Magnavox Pages: 2

50ME313V
Brand: Magnavox Pages: 13
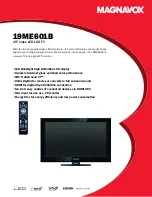
19ME601B
Brand: Magnavox Pages: 2

19ME601B
Brand: Magnavox Pages: 2

37MF231D - Hook Up Guide
Brand: Magnavox Pages: 2

15MF227B - Hook Up Guide
Brand: Magnavox Pages: 43

LHD32D33EU
Brand: Hisense Pages: 42

46MF440B/F7
Brand: Magnavox Pages: 8

DTFT 27-1
Brand: Dual Pages: 140

TC-1998LCD
Brand: Transonic Pages: 17

aspect ratio
Brand: Westinghouse Pages: 1

LE-24S600F
Brand: PANGOO Pages: 31

ELEFW264
Brand: Element Pages: 27

43WSU6002
Brand: Salora Pages: 33

Viera TH-65EX600A
Brand: Panasonic Pages: 24


