background image

Parle Innovation 2022

eyeVue Quick Start Guide

Getting to know your new eyeVuer

Summary of Contents for eyeVue

Page 1: ...Parle Innovation 2022 eyeVue Quick Start Guide Getting to know your new eyeVuer...

Page 2: ...After Unpacking Take a look around Viewing Window Touchpad Area Eye Lens Adjuster Knob Tripod Interface...

Page 3: ...Take a look around then charge up your eyeVuer Phone Release Bars Red While Charging Green when Fully Charged Indicator Light Pushbutton Charging Port Standard Micro USB Charging Cord Included Charge...

Page 4: ...shbutton Until Indicator Light Flashes Red for 2 Seconds then Goes Dark Remove Charging Cable from Charging Port when Charged Turn it o ff learn how to do it now Make Sure that Indicator Light is not...

Page 5: ...Get Your eyeVuer Ready Attach Neckstrap Rotate Knob Clockwise to Move Lenses Together Counterclockwise to Move Lenses Apart Start with Lenses Together Adjust Later if Needed...

Page 6: ...From Test Flight After you ve gotten the link Click Install...

Page 7: ...First Time User Permissions Permissions required by Apple for you to use the app Click OK Click OK Click Allow Access Click Skip Signup for Now...

Page 8: ...More First Time Use Permissions Click OK Click Got it...

Page 9: ...Using the app with the eyeVuer The red Bluetooth icon indicates that there is no eyeVuer connected Do not dismiss this dialog box yet...

Page 10: ...Turn On the eyeVuer Connect the eyeVuer to the app Now select Try pairing again Give the button a short press The indicator light will start blinking blue after fl ashing white then red...

Page 11: ...Using the app with the eyeVuer The Bluetooth icon turns blue showing that you re paired to your eyeVuer The battery icon shows that your eyeVuer is fully charged Press the eyeVuer button...

Page 12: ...Using the app with the eyeVuer Dialog box instructs you to insert your phone into the eyeVuer Camera image appears in background...

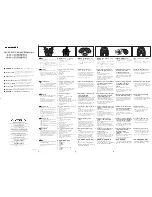
Page 13: ...Using the app with the eyeVuer Squeeze the phone release bars together then insert your phone...

Page 14: ...Using the app with the eyeVuer Control the app with your fi ngers on the touchpad Look in here and adjust lens separation if needed Remove the phone and touch its screen to return to setup...

Page 15: ...Main screen Finger touches show up as icons whose location maps to the fi nger location on the touchpad Zoom in and out Start and stop video capture Take photos Camera image fi lls the view Swipe you...

Page 16: ...Using the app with the eyeVuer Main screen Finger touches operate the controls with the touch location matching the cursor position...

Page 17: ...Using the app with the eyeVuer Main screen ENJOY Buttons trigger actions when you lift your fi nger...

Reviews: