Panasonic WX-CH2050A, Operating Instructions Manual
The Panasonic WX-CH2050A Operating Instructions Manual is available for free download on manualshive.com. This comprehensive manual provides step-by-step instructions to effortlessly operate and maximize your WX-CH2050A product. Get the most out of your Panasonic WX-CH2050A with this user-friendly manual, downloadable and accessible at no cost.
Share
Download


Reviews:
No comments
Related manuals for WX-CH2050A

G5
Brand: 3M Pages: 2

Tblue2
Brand: CANNICE Pages: 12

Iblue 6
Brand: CANNICE Pages: 10

Pro 9460
Brand: Jabra Pages: 2
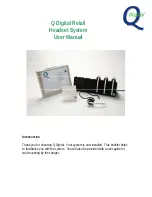
Q-RB6
Brand: Q Digital Pages: 7

AIRBASS Y1
Brand: Boult Audio Pages: 5

H111
Brand: Logitech Pages: 11

SMBT-4055
Brand: Bone Pages: 4

M05
Brand: ausdom Pages: 46

HS-2R - Personal Radio
Brand: Nokia Pages: 10

HS-37W
Brand: Nokia Pages: 14

HS-55W
Brand: Nokia Pages: 16

HS-53W
Brand: Nokia Pages: 16

HS-54W - Headset - Over-the-ear
Brand: Nokia Pages: 17

DAB
Brand: Nokia Pages: 7

BH-940
Brand: Nokia Pages: 17

BH-905I
Brand: Nokia Pages: 19

BH-221
Brand: Nokia Pages: 12


