background image

HD3D Sound 

ViVA

TM

TQBC2488-1

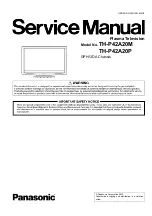
Operating Instructions

54” Class 1080p Plasma HDTV

(54.1 inches measured diagonally)

Model No.

TC-P54Z1

English

Please read these instructions before operating your set and retain them for future reference.

The images shown in this manual are for illustrative purposes only.

Quick Start Guide

(See page 8-24)

  For assistance (U.S.A./Puerto Rico), please call:


1-877-95-VIERA (958-4372)

  or visit us at www.panasonic.com/contactinfo 

  For assistance (Canada), please call:

 1-866-330-0014

  or visit us at www.vieraconcierge.ca

Customer’s Record

The model number and serial number of this product can be found on its back cover. You should note this serial 

number in the space provided below and retain this book, plus your purchase receipt, as a permanent record of your 

purchase to aid in identification in the event of theft or loss, and for Warranty Service purposes.

Model 

Number 

     Serial 

Number 


Web Site: http://panasonic.net/

©

 Panasonic Corporation 2009

Printed in Japan

PBS0109F0

Summary of Contents for Viera TC-P54Z1

Page 1: ...ons before operating your set and retain them for future reference The images shown in this manual are for illustrative purposes only Quick Start Guide See page 8 24 For assistance U S A Puerto Rico p...

Page 2: ...the HDMI logo and High Definition Multimedia Interface are trademarks or registered trademarks of HDMI Licensing LLC Manufactured under license from Dolby Laboratories Dolby and the double D symbol ar...

Page 3: ...ded AV Connections 62 Ratings List for Lock 63 Technical Information 64 Care and Cleaning 68 Specifications 69 FAQ 70 Limited Warranty for U S A and Puerto Rico only 72 Customer Services Directory for...

Page 4: ...qualified service personnel The lightning flash with arrowhead within a triangle is intended to tell the user that parts inside the product are a risk of electric shock to persons The exclamation poi...

Page 5: ...lties in communication If Problems Occur During Use If a problem occurs such as no picture or no sound or if smoke or an abnormal odor is detected from the Plasma TV unplug the power supply cord immed...

Page 6: ...se only shielded interface cables when connecting to computer or peripheral devices Any changes or modifications not expressly approved by Panasonic Corp of North America could void the user s authori...

Page 7: ...us children WALL MOUNTING IF YOU DECIDE TO WALL MOUNT YOUR FLAT PANEL DISPLAY ALWAYS Use a mount that has been recommended by the display manufacturer and or listed by an independent laboratory such a...

Page 8: ...ry types such as alkaline and manganese batteries Do not use rechargeable Ni Cd batteries Do not burn or break batteries Do not disassemble or modify the remote control Optional Accessory Note In orde...

Page 9: ...n screws firmly tightening torque 1 8 2 0 N m A Hole for the base installation Base Frame Base Set up Attach the pedestal to TV Slide the pedestal frame posts into the brackets on the back of the TV F...

Page 10: ...injury may result Attaching the Speaker to TV Fix the Mounting bracket securely to the back of the Display unit with Assembly screws Insert the speaker mounting screws temporarily in the screw outerm...

Page 11: ...ion Connect Display Unit to Tuner Box HDMI AV OUT HDMI AV OUT Display Unit Tuner Box HDMI Cable Wireless connection Connect Wireless Unit Receiver to Display Unit Exclusive cable for Wireless Receiver...

Page 12: ...d when the Display unit and the Tuner box are turned on Connect Wireless Unit Transmitter to Tuner Box Exclusive cable for Wireless Transmitter Hole for Cable clamper ferrite core Cable Binding for Wi...

Page 13: ...k door etc Wireless Unit Transmitter is not facing the Wireless Unit Receiver Wireless Unit Transmitter is placed significantly far from the front of Wireless Unit Receiver direction Especially in a h...

Page 14: ...tch colors of plugs and terminals Insert firmly Insert firmly Reference of connection To attach hole Insert To bundle To remove To loosen Keep pushing both sides until they snap Snaps Set hooks knob K...

Page 15: ...l Television System Committee Conventional broadcasting ATSC Advanced Television Systems Committee Digital TV Standards include digital high definition television HDTV standard definition television S...

Page 16: ...r resolution signal 480p 720p 1080i 1080p connection can be made with the use of a Component Video or HDMI cable p 18 VCR Connection can be made with the use of an RF cable and Composite Video S Video...

Page 17: ...DVD Recorder or VCR Satellite Receiver TV VHF UHF Antenna You can enjoy high definition programming by subscribing to high definition satellite service Connection can be done with the use of HDMI or...

Page 18: ...he HDMI connection is required for a 1080p signal For VIERA LinkTM connections please refer to p 45 B To use COMPONENT terminals L R Y PB PR COMPONENT VIDEO OUT AUDIO OUT white red green blue red whit...

Page 19: ...For Tuner Box connection AV terminal For Display Unit connection DC terminal For Tuner Box connection DC terminal For Display Unit connection Off Power off Red Power on and no communication Green Pow...

Page 20: ...er p 26 Operates the Favorite channel list function p 26 Numeric keypad to select any channel p 25 or press to enter alphanumeric input in menus p 24 32 36 38 48 50 52 54 56 59 60 Use for digital chan...

Page 21: ...played every time the TV is turned on VIERA CAST V I E R A T O O L S V I E R A L i n k Remote control registration Press the OK button and the 1 button simultaneously for at least 3 seconds Registro d...

Page 22: ...cting the mode for store demonstration Yes No If you select Yes the picture mode will regularly reset to Vivid and a Picture Refresh message will be displayed on the screen select ok Select No and ret...

Page 23: ...channels Scans digital and analog channels Analog only Scans Analog channels only Digital only Scans Digital channels only Confirm registered channels program Cancel Apply Caption Favorite Add Yes Yes...

Page 24: ...Time zone DST set select item Year Select the year Month Select the month Day Select the day Hour Adjust the hour Minute Adjust the minute Time zone Select your time zone EST CST MST PST AKST HST NST...

Page 25: ...he signal reception between cable TV and antenna p 22 57 The channel number and volume level remain the same even after the TV is turned off Listen with SAP Secondary Audio Program Select Audio Mode f...

Page 26: ...th the cursor or use number buttons see below Set Favorite Feature 1 Display the SUB MENU SUB MENU 2 Select Set favorite All Setup SUB MENU Edit CH caption Signal meter Set favorite Channel surf mode...

Page 27: ...eturn to the previous screen Display VIERA TOOLS Select the item select next Displayed THX setting menu P 66 Select Picture mode setting THX Standard Vivid Stadio ref Game Custom Start VIERA CAST p 34...

Page 28: ...yed manually Manual operation Play SD card automatically is Off Display SD card Using VIERA TOOLS p 27 or Menu Picture Audio VIERA Link SD card Closed caption Setup Select the item SD card Photo viewe...

Page 29: ...at playback VIERA Link p 40 48 Recorder TV VIERA Link control Speaker output Record now Stop recording Select change On Movie settings Picture Audio VIERA Link Repeat Select change Repeat Turn the Mov...

Page 30: ...10 Pana0011 Pana0012 select view Thumbnail view To Slideshow Selected picture information is displayed Total number of images Note Depending on the JPEG format Information contents may not be displaye...

Page 31: ...RETURN Name Pana0001 Date 03 04 2009 Size 1029 1200 Photo viewer All photos 03 04 2009 Total 32 Pana0001 Pana0002 Pana0003 Pana0004 Pana0011 Pana0012 Pana0013 Pana0014 Pana0055 Pana0056 Pana0057 Pana0...

Page 32: ...The terminal and label of the connected equipment are displayed To label each of the inputs please refer to p 59 Note The input label will be displayed on Input select screen if Input label is set on...

Page 33: ...ed caption Setup select next Select VIERA Link settings Setup 2 2 VIERA CAST setting About VIERA Link settings Network setting select next Select VIERA Link On Yes Yes TV No No VIERA Link settings VIE...

Page 34: ...ct view This screen is an example It varies according to the usage conditions Depending on the usage conditions it may take a while to read all the data Other settings To use VIERA Link function 1 Dis...

Page 35: ...is far from the TV and or you have more TVs in the house you may want to use a wireless network Connecting to the Internet A Basic connection If you are not using the network for connecting anything e...

Page 36: ...37 Select Network Camera in VIERA Link Using VIERA TOOLS p 27 Network Camera TV VIERA Link control Speaker output Record now Stop recording select ok There is also an option to start with sensor dete...

Page 37: ...camera to registration mode For this operation please refer to the operating manual for the Network camera Search condition also depends on Network setting p 50 Remove camera information Yes to delete...

Page 38: ...can also listen to PC sound with the audio cable connected To connect PC p 62 Display the Input select menu Input select TV 1 2 3 4 5 6 7 8 Component 1 Component 2 HDMI 1 HDMI 2 HDMI 3 Video 1 Video 2...

Page 39: ...rtially or is blurred H position Adjusts the horizontal position V position Adjusts the vertical position Clock phase Alleviates the problem if the whole picture appears to flicker or is blurred First...

Page 40: ...SD card Closed caption Closed caption Menu list Various menus allow you to make settings for the picture sound and other functions so that you can enjoy watching TV best suited for you Press to exit f...

Page 41: ...cts between 95 Size 1 or 100 Size 2 for the scanning area with High definition signal Size 1 Size 2 Select Size 1 if noise is generated on the edges of the screen Size 1 Selected item for HD size Scan...

Page 42: ...atically About Reset to defaults How to Use Menu Functions Menu list Sub menu list Various menus allow you to make settings for the picture sound and other functions so that you can enjoy watching TV...

Page 43: ...with reminder Yes no reminder Auto power stand by No Selects the default speakers p 46 TV Theater Default speakers TV Sets Network setting p 50 Network setting Sets VIERA CAST setting p 52 VIERA CAST...

Page 44: ...e have developed and added As such its operation with other manufacturers equipment that supports HDMI CEC cannot be guaranteed Please refer to the individual manuals for other manufacturers equipment...

Page 45: ...he TV program through the theater system Connecting this unit to a DVD recorder DIGA and AV amp When using a VIERA Link audio video amplifier and a compatible DVD recorder DIGA use a daisy chain conne...

Page 46: ...t Select On default is On change Select settings On Yes Yes TV No No VIERA Link settings VIERA Link Power on link Power off link Default speakers Stand by power save Auto power stand by select Set On...

Page 47: ...in use TV is the default setting To set the Home Theater system as default speakers change the default speakers setting from TV to Theater Sound will be output from the Home Theater whenever the TV i...

Page 48: ...exit from a menu screen Press to return to the previous screen Display VIERA Link menu Select the item Recorder TV VIERA Link control Speaker output Record now Stop recording select set or next Select...

Page 49: ...tems that can be connected is three for recorders and a total of three for Home theater Player Camcorder LUMIX Note There is a limit to the number of HDMI connectors Operate the equipment with the TV...

Page 50: ...A CAST setting Network Cameras list ECO energy saving select Select the item and adjust Network setting 2 2 MAC address 12 34 56 78 80 ab LAN speed setting Automatic LAN speed Software update Network...

Page 51: ...set to Automatic When DNS automatic acquisition in DHCP can be used Network setting 1 2 Connection test Succeeded IP setting mode Automatic Default gateway 192 168 0 254 DNS setting mode OK Primary DN...

Page 52: ...aption Setup select set or next Select VIERA CAST setting Setup 2 2 Advanced setup About Reset to defaults VIERA Link settings Network setting VIERA CAST setting Network Cameras list ECO energy saving...

Page 53: ...ing is only required if specified by the provider Select Proxy address and Press OK Proxy port This number is specified by the provider together with the proxy address Select Proxy port and Press OK E...

Page 54: ...our 4 digit password A 4 digit code must be entered to view a blocked program or change rating settings RETURN Password Enter password If it is your first time entering the password enter the password...

Page 55: ...ish ratings C F L R Canadian French ratings Select the rating to be locked select Example of MPAA U S movie ratings NR No rating G General Audience All ages admitted PG Parental Guidance Suggested PG...

Page 56: ...setup Input labels Anti image retention Remote control registration Reset to defaults Language All Channel surf mode next select Select the function Cable ANT Cable setup ANT in Auto program Manual pr...

Page 57: ...nel select Press OK to tune to the channel Select Apply program Cancel Apply Caption Favorite Add Yes el select Apply ok Select Edit Manual program Edit Cancel Apply Caption Favorite Add 2 Yes 3 Yes 4...

Page 58: ...t the setting Primary Second Service 3 Service 4 Service 5 Service 6 The settings in Analog or Digital depend on the broadcaster To make more in depth display settings in digital programs Select Digit...

Page 59: ...umeric select set Video 1 VCR Label Terminal example Terminals Component 1 2 HDMI 1 4 Video 1 2 PC Label BLANK SKIP VCR DVD CABLE SATELLITE DVR GAME AUX RECEIVER COMPUTER Blu ray CAMERA DVD REC HOME T...

Page 60: ...t Timer Sleep Timer 1 Timer 2 Timer 3 Timer 4 Timer 5 select next Turns Off automatically Sleep Turns On Off automatically 5 timers can be set Timer 1 Timer 5 Set the timer To set Sleep Off Timer Set...

Page 61: ...o Setup selecting No Number of registered remote controls Registered remote controls 5 Remote control registration Maximum 5 of 5 remotes registered NOTE If you wish to register another remote control...

Page 62: ...DMI DVI Conversion cable see HDMI 1 HDMI 2 or HDMI 3 connection on this page Audio cable or To watch digital video image DVD Player Set Top Box DVD Player or Set Top Box HDMI compatible machines only...

Page 63: ...gue with sexual content CANADIAN ENGLISH RATINGS C E L R E Exempt Exempt programming includes news sports documentaries and other information programming talk shows music videos and variety programmin...

Page 64: ...choose the aspect depending on the format of the received signal and your preference p 26 e g in case of 4 3 image FULL JUST FULL JUST Enlarges the 4 3 image horizontally to the screen s side edges R...

Page 65: ...Exchangeable Image File Format Note Format the card with the recording equipment The picture may not appear correctly on this TV depending on the recording equipment used Display may take some time w...

Page 66: ...med All signals are reformatted before being displayed on the screen If the connected device has an aspect adjustment function set the aspect ratio to 16 9 These HDMI connectors are type A These HDMI...

Page 67: ...sides to reduce noise Aspect Ratio FULL JUST H FILL ZOOM Size 1 Size 2 The width will be increased on both sides to reduce noise See pages 40 41 for more information Input signal that can be displaye...

Page 68: ...he coating may peel off Furthermore do not leave it for long periods in contact with articles made from rubber or PVC Pedestal Cleaning Wipe the surfaces with a soft dry cloth If the unit is particula...

Page 69: ...unction PC D SUB 15PIN R G B 0 7 V p p 75 HD VD 1 0 5 0 V p p high impedance RS232C Serial D sub 9pin for external control LAN for VIERA CAST IPTV RJ45 10BASE T 100BASE TX Card slot SD CARD slot 1 DIG...

Page 70: ...es not work Are the batteries installed correctly p 8 Are the batteries new Pictures from external equipment are distorted when the unit is connected via HDMI Is the HDMI cable connected properly p 45...

Page 71: ...imes a few pixels may be bright or dark These pixels do not indicate a defective panel and will have no impact on the performance of the TV Check nearby electrical products car or motorcycle ignition...

Page 72: ...Warranty ALSO DOES NOT COVER damages which occurred in shipment or failures which are caused by products not supplied by the warrantor or failures which result from accidents misuse abuse neglect bug...

Page 73: ...ntact us directly at 1 877 95 VIERA 958 4372 Monday Friday 9 am 9 pm Saturday Sunday 10 am 7 pm EST For hearing or speech impaired TTY users TTY 1 877 833 8855 Accessory Purchases United States and Pu...

Page 74: ...ons before operating your set and retain them for future reference The images shown in this manual are for illustrative purposes only Quick Start Guide See page 8 24 For assistance U S A Puerto Rico p...

Page 75: ...WARRANTIES OF MERCHANTABILITY AND FITNESS FOR A PARTICULAR PURPOSE IN NO EVENT WILL PANASONIC CANADA INC BE LIABLE FOR ANY SPECIAL INDIRECT OR CONSEQUENTIAL DAMAGES In certain instances some jurisdic...

Page 76: ...75 FAQs etc Limited Warranty for Canada Note...

Page 77: ...ial number in the space provided below and retain this book plus your purchase receipt as a permanent record of your purchase to aid in identification in the event of theft or loss and for Warranty Se...

Reviews: