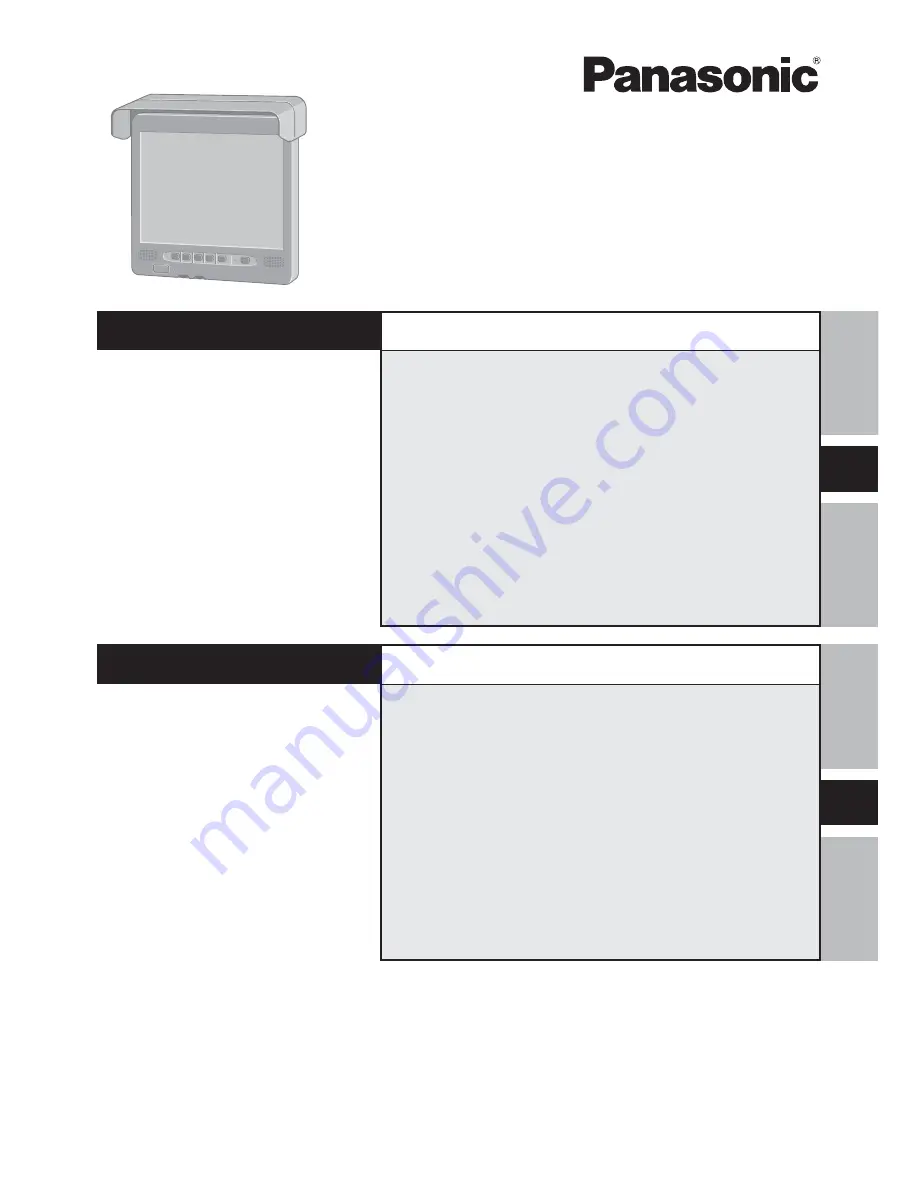
background image

LCD Monitor

CF-VDL02BM

ENGLISH

OPERATING INSTRUCTIONS

Introduction ...................................... 4
Names and Functions of Parts ....... 5
Mounting the LCD Monitor .............. 6
Starting Up/Shutting Down ............. 8
Touchscreen .................................... 9
Adjusting the LCD Monitor ........... 13
Troubleshooting ............................ 17
Specifications ................................ 19

E

FRANÇAIS

INSTRUCTIONS D’UTILISATION

F

Introduction ................................. 22
Noms et fonctions des pièces ... 23
Montage du Moniteur LCD ......... 24
Mise en marche/Arrêt ................. 26
Écran tactile ................................ 27
Réglage du Moniteur LCD .......... 31
Dépannage .................................. 36
Spécifications ............................. 38

Summary of Contents for Toughbook CF-VDL02BM

Page 1: ...r 6 Starting Up Shutting Down 8 Touchscreen 9 Adjusting the LCD Monitor 13 Troubleshooting 17 Specifications 19 E FRANÇAIS INSTRUCTIONS D UTILISATION F Introduction 22 Noms et fonctions des pièces 23 Montage du Moniteur LCD 24 Mise en marche Arrêt 26 Écran tactile 27 Réglage du Moniteur LCD 31 Dépannage 36 Spécifications 38 ...

Page 2: ...level that prevents you from hearing sounds outside and around the car may cause an acci dent CAUTION Warning A LCD monitor may be installed in a motor vehicle and visible to the driver only if used to support vehicle related functions such as vehicle information system control rear or side observation and navigation If used for entertainment purpose such as television recep tion or video play it ...

Page 3: ...driver s vision If the LCD monitor has been installed for the rear seat passengers they must be careful to prevent injury by hitting their heads on the LCD monitor in case of an accident Do not expose the LCD monitor to direct sunlight or excessive heat Be sure not to install the LCD monitor in a location at which it is exposed to water hot air such as near heater duct or where it may stepped on D...

Page 4: ...the computer s Reference Manual An optional keyboard Model no CF VKBL01 CF VKBL02 is required to use the Function Buttons of the LCD Monitor This manual explains the procedure for default settings The procedure may differ according to the settings Illustration in this manual Windows XP Information for Microsoft Windows XP Professional users Windows 2000 Information for Microsoft Windows 2000 Profe...

Page 5: ...ture Red The backlight goes OFF automatically due to an increase in the internal temperature Temperature LED Indicator Power Switch LED Indicator Speaker Green power on Orange power on but no VGA Sig nal or the cable is not connected Brightness Volume up down Speaker Volume up down Do not have anyone except an authorized repairperson push this button OSD buttons page13 DC IN 15 6 V Serial Port SER...

Page 6: ...bles in cluded Mounting the LCD Monitor Function Key Port Fn KEY SERIAL I F Sound Port LINE IN DC IN Jack Serial Port 1 2 3 Display Port RGB IN DC IN Jack Keyboard commercially available product Car Adaptor commercially available prod uct Car Adaptor LCD Monitor Rear View Top View Model no CF VKBL01 CF VKBL02 Example of connection DC IN 15 6 V Keyboard Mouse Port Serial Port 1 RGB Serial Sound cab...

Page 7: ...e sight of the driver and to prevent the moni tor from being hit by direct sunlight Do not expose the computer to direct sunlight or excessive heat 4 Attach the cover of the LCD Monitor Attach the four screws 5 Mount the Sun Shade Attach the two screws included 6 Mount the LCD Monitor CAUTION Use these M4 screw holes to mount the LCD Monitor ...

Page 8: ...ructions of the computer 3 Select your application You are able to start working on your computer Shutting Down power off your computer This procedure is for shutting down the computer without using the standby or hibernation function Reference Manual of the computer NOTE Some computers will shut down automatically when the LCD Monitor is turned off according to power switch settings You can modif...

Page 9: ...TE Moving the cursor Clicking Double clicking Dragging Cursor Touch and hold the object i e file or icon move the finger or stylus on the surface dragging the object to the desired loca tion then release the finger or stylus Two quick taps One tap The touchscreen feature cannot be used with models which do not have a serial port For some models you first need to install the touchscreen driver Foll...

Page 10: ...w contact with substances that could dirty the touchscreen such as oil The cursor may not work properly in such cases When the touchscreen becomes dirty Use a dry soft cloth such as a gauze to clean the dirty areas Do not use benzene thinner or disinfectant type alcohol The touchscreen function can not be used when using the full screen in Command Prompt When the operation of panning is performed ...

Page 11: ...t using the Setup Utility Calibration Define the calibration setup Use when the cursor can not be pointed correctly with the finger or stylus Needed if the alignment of the touchscreen with the visual image change or adjust the display resolution Only for CF M34 series models other than the CF M34C Before you run the calibra tion you need to set the de vice at Calibration Settings For as following...

Page 12: ...important to note that when the double click speed for Mouse is changed the double click time for Windows is also changed 1 Windows XP in start Control Panel Printers and Other Hardware Mouse Windows 2000 in Start Settings Control Panel Mouse Only for CF M34 series models other than the CF M34C You can use the touchscreen without changing the settings when the LCD Monitor is connected to Serial Po...

Page 13: ...menu NOTE ICON DESCRIPTION Adjust brightness Adjust contrast Set RGB color Move input image capture window Adjust clock and phase Automatically optimize the image quality Miscellaneous settings Display RGB input signal information FUNCTION Brightness Contrast Color Position Image Auto Config Miscellaneous Information The OSD window may not be displayed properly when pressing In this case press aga...

Page 14: ...wer is turned on again the operation will be canceled Contrast 2 Select the icon by pressing or then press Brightness 32 Contrast 90 Adjusting the LCD Monitor The Color menu is used to adjust the brightness of Red Green Blue or all color channels Select the item by pressing or then press Auto Balance Select the color is adjusted automatically To save the adjusted value select Color Temperature the...

Page 15: ... A confirmation box is displayed The default selection is Yes Press to adjust the position automatically If you want to cancel select No and press To save the adjusted value select H Position or V Position then press Position Image Position H Position V Position Auto Center The image menu allows the adjustment of ADC clock and phase in Analog input mode Select the item by pressing or then press Ph...

Page 16: ...ess or automatic configuration occurs for the defined period the OSD menu is closed There are four OSD time out values available Select the item by pressing or then press OSD Position The sub menu is displayed Select the item by pressing or then press The sub menu is displayed Adjust the OSD Position by pressing or then press To cancel press and then turn off the power to the LCD Monitor When the ...

Page 17: ...press any key like Ctrl Set the power saving mode to disable Windows XP Set Turn off monitor System standby and System hi bernates in start Control Panel Performance and Maintenance Power Options to Never Windows 2000 Set Turn off monitor System Standby and System hibernates in Start Settings Control Panel Power Options to Never If an image is displayed for a prolonged period of time an afterimage...

Page 18: ... supported has been selected Set the display mode to 640 480 60 Hz 800 600 60 Hz or 1024 768 60 Hz Check the cable connection to the LCD Monitor Select on the OSD main menu and perform fine adjustments page 15 Select from the OSD main menu then select Init NVRam then press Select Yes then press Turn off the power to the LCD Monitor and then turn the power back on again page 16 Unable to input by t...

Page 19: ...ive Matrix LCD 247 2 mm 185 7 mm 1024 768 dots 262 144 simulated 16 777 216 Colors 0 24 mm 0 24 mm 1200 cd m2 640 480 60 Hz 800 600 60 Hz 1024 768 60 Hz Resistive Dsub 15 pin female Dsub 9 pin male Miniature jack 3 5 DIA F1 F5 Emergency F11 Stereo Speaker built in DC 15 6 V 3 85 A 1 60 W 280 mm 270 mm 30 mm 11 0 10 6 1 2 except Sun Shade Approx 2 5 kg 5 5 lb except Sun Shade 5 C to 35 C 41 F to 95...

Page 20: ... accident ATTENTION Pour L utilisation Dans Un Véhicule Motorisé Avertissement Le Moniteur LCD peut être installé dans un véhicule motorisé et dans le champ de vision du conducteur uniquement en tant que dispositif d aide aux fonctions du véhicule comme par exemple pour fournir des informations sur le véhicule comme dispositif de contrôle de système pour l observation à l arrière ou sur les côtés ...

Page 21: ...e gêne pas la vision du conducteur Si le Moniteur LCD a été installé pour les passagers arrière recommander à ceux ci d éviter de se cogner la tête sur le moniteur en cas d accident Ne pas exposer le moniteur à la lumière directe du soleil ou à une chaleur excessive Ne pas installer le moniteur à une position exposée à l eau à de l air chaud tel qu une canalisation de chauffage ou à un endroit où ...

Page 22: ... no de modèle CF VKBL01 CF VKBL02 est nécessaire pour utiliser les touches de fonction du Moniteur LCD Ce instructions d utilisation explique la procédure en fonction des réglages d usine La procédure peut être différente suivant les réglages effectués Illustration dans ce manuel Windows XP Information pour les utilisateurs de Microsoft Windows XPProfessionnel Windows 2000 Information pour les uti...

Page 23: ...ance en raison d une augmentation de la température interne Rouge Arrêt automatique du rétroéclairage en raison d une augmentation de la température interne Niveau de brillance Boutons de fonction Haut parleur Ces boutons ont la même fonction que F1 à F5 sur le clavier Haut parleur Commutateur d alimentation Boutons OSD Dessous page31 SERIAL I F Seul un réparateur agréé doit avoir accès à ce bouto...

Page 24: ...LCD Exemple de raccordement 1 2 3 LINE IN 1 Câble RGB série audio 2 Câble PS 2 3 Câble de fonction RGB IN ou no de modèle CF VKBL01 CF VKBL02 DC IN 15 6 V Vue arrière Port de touche de fonction Port série Moniteur LCD produit disponible dans le commerce Adaptateur de voiture produitdisponible danslecommerce Duplicateur de port et Ordinateur Port d écran Port audio Vue de dessus Ordinateur Port de ...

Page 25: ...u conducteur et pour protéger l appareil contre les rayons directs du soleil Ne pas exposer le moniteur aux rayons directs du soleil ni à une chaleur excessive 4 Fixez le couvercle du Moniteur LCD Fixez les quatre vis 5 Montez le pare soleil Fixez les deux vis fourni 6 Montez le Moniteur LCD Montez le Moniteur LCD à travers ces trous pour vis M4 ATTENTION ...

Page 26: ... maintenant commencer à travailler sur votre ordinateur Arrêt mise hors tension de l ordinateur Cette procédure consiste à arrêter l ordinateur sans utiliser la fonction de suspension ou de veille Reference Manual de l ordinateur Certains ordinateurs s éteignent automatiquement lorsque le Moniteur LCD est éteint conformément aux réglages de la fonction de gestion de l alimentation Les menus suivan...

Page 27: ...cement Curseur Touchez l objet c à d un fichier ou une icône sans retirer le doigt ou le stylo et déplacez le sur la surface ceci faisant glisser l objet jusqu à l emplacement voulu puis retirez le doigt ou le stylo Deux tapotements rapides Tapotement simple REMARQUE La fonction d écran tactile n est pas disponible avec les modèles sans port série Avec certains modèles il faudra d abord installer ...

Page 28: ...le contact de toute substance salissante telle que de l huile sur l écran tactile Le curseur risque alors de ne pas fonctionner correctement Quand l écran tactile est sale Nettoyer les parties souillées au moyen d un chiffon doux sec tel que de la gaze Ne pas utiliser de benzène de diluant ou d alcool du type désinfectant La fonction d écran tactile est inutilisable avec le plein écran sous Invite...

Page 29: ...ié au m o y e n d e l e S e t u p U t i l i t y Advanced Configure les paramètres évolués Settings Configure les paramètres généraux de protocole Calibration Définit la configuration d étalonnage A utiliser si vous n arrivez pas à pointer correctement sur le curseur avec le doigt ou le stylo Ceci est nécessaire si l alignement de l écran tactile avec l image visuelle change ou pour régler la résol...

Page 30: ...ouble cliquage est modifiée pour Souris cela entraîne la modification du temps de double cliquage pour Windows 1 Windows XP Dans démarrer Panneau de configuration Imprimantes et autres périphériques Souris Windows 2000 Dans Démarrer Paramètres Panneau de configuration Souris Uniquement pour les modèles de la série CF M34 autres que le modèle CF M34C Lorsque le Moniteur LCD est raccordé au port sér...

Page 31: ...t lorsquel onappuiesur Danscecas attendreenviron10secondes et appuyer à nouveau sur REMARQUE Brightness 1 Exit 2 Select ICONE DESCRIPTION Règle la brillance Règle le contraste Spécifie les couleurs RGB RVB Déplace la fenêtre de cap ture des images d entrée Règle l horloge et la phase Optimise automatiquement la qualité de l image Réglages divers Affiche les informations de signal d entrée RGB RVB ...

Page 32: ...t 2 Sélectionnez l icône en appuyant sur ou puis appuyez sur Brightness 32 Contrast 90 Brightness Le menu Couleur sert à régler la brillance des canaux Rouge Vert Bleu ou des canaux toutes couleurs Sélectionnez l option en appuyant sur ou puis appuyez sur Auto Balance Sélectionnez la couleur est réglée automatiquement Pour sauvegarder la valeur réglée sélectionnez Color Temperature puis appuyez su...

Page 33: ... sur Pour annuler appuyez sur puis éteignez le Moniteur LCD À la remise sous tension l opération sera annulée Auto Center Une boîte de confirmation s affiche La sélection par défaut est Yes Appuyez sur pour que la position soit réglée automatiquement Pour annuler sélectionnez No puis appuyez sur Pour sauvegarder la valeur réglée sélectionnez H Position ou V Position puis appuyez sur LemenuImageper...

Page 34: ...Appuyez sur pour valider l option du menu Pour annuler sélectionnez No puis appuyez sur Ce réglage s active en éteignant puis rallumant le Moniteur LCD Miscellaneous Clock Le réglage d horloge sert à régler le nombre de signaux d horloges à échantillonnage ADC par ligne échantillons par ligne Un curseur et la valeur en cours s affichent Réglez en appuyant sur ou puis appuyez sur Pour annuler appuy...

Page 35: ...d inactivité autorisé de l OSD Si durant la période définie aucune action active pression de touche ou configuration automatique ne se produit le menu OSD se ferme Il existe quatre valeurs de délai OSD Sélectionnez l option en appuyant sur ou puis appuyez sur OSD Position Le sous menu s affiche Sélectionnez l option en appuyant sur ou puis appuyez sur Le sous menu s affiche Réglez OSD Position en ...

Page 36: ...rte quelle touche comme Ctrl Désactivez le mode d économie d énergie Windows XP Réglez Extinction du moniteur Mise en veille et Mise en veille prolongée sur démarrer Panneau de con figuration Performances et maintenance Options d alimentation sur Jamais Windows 2000 Réglez Extinction du moniteur Mise en veille et Mise en veille prolongée sur Démarrer Paramètres Panneau de configuration Options d a...

Page 37: ...p Utility Assurez vous que le réglage de la ressource dans UPDD 1 Settings Hardware et que le réglage du port série dans le Setup Utility sont identiques 1 Windows XP démarrer Tous les programmes UPDD Windows 2000 Démarrer Programmes UPDD Le mode non supporté a été sélectionné Réglez le mode d affichage sur 640 480 60 Hz 800 600 60 Hz ou 1024 768 60 Hz Vérifiez la connexion de câble allant au Moni...

Page 38: ...nal RGB RVB analogique Écran LCD couleur à matrice active TFT de 12 1 pouces 247 2 mm 185 7 mm 1024 768 points 262 144 16 777 216 simulé couleurs 0 24 mm 0 24 mm 1200 cd m2 640 480 60 Hz 800 600 60 Hz 1024 768 60 Hz Résistif Femelle 15 broches D Mâle 9 broches D Jack miniature 3 5 DIA F1 à F5 Urgence F11 Haut parleur stéréo intégré C C 15 6 V 3 85 A 1 60 W 280 mm 270 mm 30 mm Sauf pare soleil 2 5 ...

Page 39: ...39 Memo ...

Page 40: ...FJ0505 0 DFQX5547ZA 2005 Matsushita Electric Industrial Co Ltd All Rights Reserved Printed in Japan ...

Reviews: