background image

Operating Instructions

Functional Manual

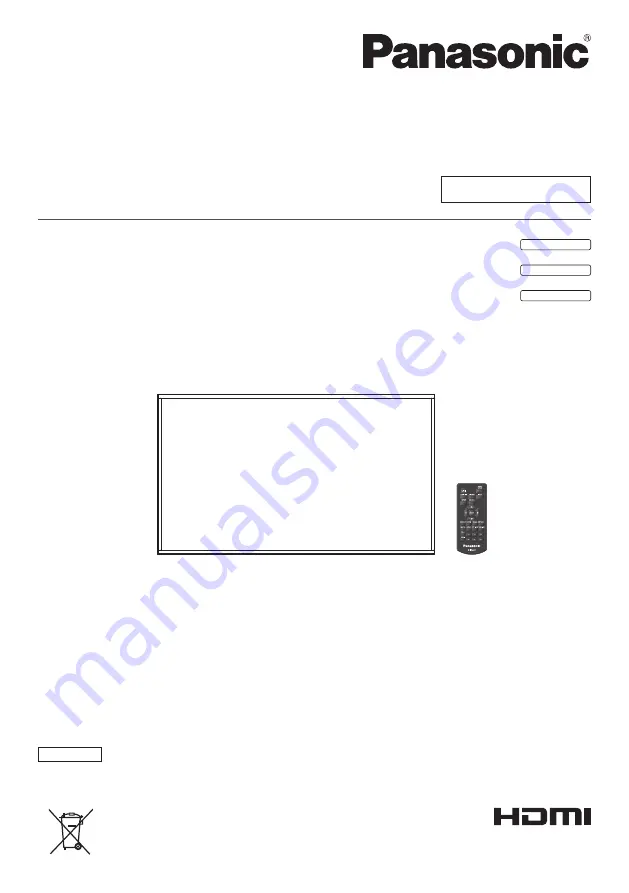
FULL HD LCD Display For business use

Model No.

TH-65EF1U

65-inch model

TH-65EF1E

65-inch model

TH-65EF1W

65-inch model

English

Please read these instructions before operating your set 

and retain them for future reference.

*

  This manual is common to all the models regardless of suffixes of the 

model number.

U : for US, Canada and Mexico
E : for EU and CIS
W : for South East Asia and Middle East Asia

DPQX1168ZA

EU

Summary of Contents for TH-65EF1E

Page 1: ...65 inch model TH 65EF1W 65 inch model English Please read these instructions before operating your set and retain them for future reference This manual is common to all the models regardless of suffixes of the model number U for US Canada and Mexico E for EU and CIS W for South East Asia and Middle East Asia DPQX1168ZA EU ...

Page 2: ...s and may be different from the actual ones Important Safety Instructions 4 FCC STATEMENT 5 Important Safety Notice 6 Safety Precautions 8 Precautions for use 11 Accessories 13 Accessories Supply 13 Remote Control Batteries 14 Kensington security 14 Connections 15 AC cord connection and fixing 15 Cable fixing 15 Video equipment connection 16 Before connecting 17 HDMI 1 and HDMI 2 terminals connect...

Page 3: ...ample of network connection 64 Command control 64 Control Command via LAN 65 PJLink protocol 68 Early Warning Software 69 Multi Monitoring Control Software 69 Video Wall Manager 69 Connecting with LAN 70 Computer operation 70 Using Web Browser Control 70 Before Using Web Browser Control 70 Access from Web Browser 71 Operating with Web Browser 72 Using Web Browser Control 76 USB media player 78 Fun...

Page 4: ...t block any ventilation openings Install in accordance with the manufacturer s instructions 8 Do not install near any heat sources such as radiators heat registers stoves or other apparatus including amplifiers that produce heat 9 Do not defeat the safety purpose of the polarized or grounding type plug A polarized plug has two blades with one wider than the other A grounding type plug has two blad...

Page 5: ...xpense FCC CAUTION To assure continued compliance follow the attached installation instructions and use only the provided power supply cord Any changes or modifications not expressly approved by Panasonic Corp of North America could void the user s authority to operate this device Declaration of Verification Model No TH 65EF1U Responsible Party Panasonic Corporation of North America Two Riverfront...

Page 6: ... of Crestron Electronics Inc Crestron Connected is the trademark of Crestron Electronics Inc Even if no special notation has been made of company or product trademarks these trademarks have been fully respected Important Safety Notice WARNING 1 To prevent damage which may result in fire or shock hazard do not expose this appliance to dripping or splashing Do not place containers with water flower ...

Page 7: ...d three pin mains plug for your safety and convenience A 10 amp fuse is fitted in this plug Shall the fuse need to be replaced please ensure that the replacement fuse has a rating of 10 amps and that it is approved by ASTA or BSI to BS1362 Check for the ASTA mark or the BSI mark on the body of the fuse If the plug contains a removable fuse cover you must ensure that it is refitted when the fuse is...

Page 8: ...ling the Display vertically When installing the Display vertically be sure that the Power Indicator comes to the downside Heat is generated and it may cause fire or damage to the Display Power indicator Cautions for Wall Installation The installation should be performed by an installation professional Installing the Display incorrectly may lead to an accident that results in death or serious injur...

Page 9: ...g from the wall outlet Picture noise may occur if you connect disconnect the cables connected to the input terminals you are currently not watching or if you turn the power of the video equipment on off but it is not a malfunction To prevent the spread of fire keep candles or other open flames away from this product at all times CAUTION If problems or malfunction occur stop using immediately If pr...

Page 10: ...ved The outer cover is attached to the battery for safety It must not be removed Doing so may cause short circuits Mishandling the batteries may cause the batteries to short circuit resulting in fire injury or damage to surrounding properties Remove the batteries from the remote control transmitter when not using for a long period of time The battery may leak heat ignite or burst resulting in fire...

Page 11: ...rong force to the liquid crystal panel will cause unevenness of the screen display resulting in malfunction Depending on the temperature or humidity conditions uneven brightness may be observed This is not a malfunction This unevenness will disappear while applying current continuously If not consult the distributor Request Regarding Security When using this product take safety measures against th...

Page 12: ...et becomes dirty wipe it with a soft dry cloth If the cabinet is particularly dirty soak the cloth in water to which a small amount of neutral detergent has been added and then wring the cloth dry Use this cloth to wipe the cabinet and then wipe it dry with a dry cloth Do not allow any detergent to come into direct contact with the surface of the Display If water droplets get inside the unit opera...

Page 13: ...x 2 m TH 65EF1U 1JP155AF1U TH 65EF1E 2JP155AF1W 3JP155AF1W TH 65EF1W 1JP155AF1W 2JP155AF1W 3JP155AF1W Attention Store small parts in an appropriate manner and keep them away from young children The part numbers of accessories are subject to change without notice The actual part number may differ from the ones shown above In case you lost accessories please purchase them from your dealer Available ...

Page 14: ...environment friendly manner Observe the following precaution 1 Batteries shall always be replaced as a pair Always use new batteries when replacing the old set 2 Do not combine a used battery with a new one 3 Do not mix battery types example Zinc Carbon with Alkaline 4 Do not attempt to charge short circuit disassemble heat or burn used batteries 5 Battery replacement is necessary when remote cont...

Page 15: ...lug at the socket outlet first The supplied AC cord is for this unit exclusive use Do not use this for other purposes Cable fixing Note 3 clampers are supplied with this unit Fix the cables at 3 locations using the holes for clampers as shown below If you need more clampers purchase them from your dealer Available from the customer service 1 Attach the clamper Keep pushing both side snaps and pull...

Page 16: ...5 SERIAL IN SERIAL Input Terminal Control the Display by connecting to PC see page 21 6 LAN LAN Terminal Control the Display by connecting to Network see page 64 7 USB USB Terminal Connect the USB memory to use USB media player Also this can be used to supply power of up to 5V 1A to an external device when the picture is displayed see page 23 8 IR IN IR OUT Infrared Signal Input Output Terminal Us...

Page 17: ...onnecting terminal of the connecting device in a straight manner Acquire any cable necessary to connect the external device to the system that is neither supplied with the device nor available as an option If the outer shape of the plug of a connection cable is large it may come in contact with the periphery such as a back cover or the plug of an adjacent connection cable Use a connection cable wi...

Page 18: ...M D S Clock SCL SDA Ground 5V DC Hot Plug Detect DVI D IN terminal connection Note Video equipment and cables shown are not supplied with this unit Use the DVI D cable complying with the DVI standard Image deterioration may occur depending on the length or the quality of the cable DVI D IN terminal is for Single Link only Shared with PC IN DVI D video cable Within 5 m commercially available Stereo...

Page 19: ...al PC input signals that are described in Preset Signals see page 89 adjustment values such as for the standard picture positions and sizes have already been stored in this unit Computer signals which can be input are those with a horizontal scanning frequency of 30 to 110 kHz and vertical scanning frequency of 48 to 120 Hz The display resolution is a maximum of 1 440 1 080 dots when the aspect mo...

Page 20: ...ut Terminal Mini D sub 15P 1 6 7 8 3 9 4 5 10 15 14 13 12 11 2 Pin No Signal Name R PR CR G Y B PB CB NC not connected GND Ground GND Ground GND Ground GND Ground 5 V DC GND Ground NC not connected SDA HD SYNC VD SCL VIDEO terminal connection Note Video equipment connection cables and conversion plugs are not supplied with this unit Yellow White Red 4 pole mini plug conversion cable commercially a...

Page 21: ...rcially available PC Note Use the RS 232C straight cable to connect the computer to the Display Pin assignments and signal names for SERIAL Terminal 6 7 8 9 1 3 4 5 2 Pin No Signal Name NC not connected RXD TXD Non use GND Ground Non use RTS Shorted in this set CTS NC not connected These signal names are those of computer specifications Communication parameters Signal level RS 232C compliant Synch...

Page 22: ...ing the next command When sending a command which does not require parameter a colon is not needed If an incorrect command is sent by mistake this unit will send an ER401 command back to the computer In Standby condition power OFF with remote control the unit responds to PON command only Consult your local Panasonic dealer for detail instructions on command usage For more details visit the followi...

Page 23: ... OUT terminal of the unit be sure to set Output select in the Sound menu to AUDIO OUT see page 37 USB terminal connection Connect the USB memory commercially available to use USB media player see page 78 Also power is supplied when a separately sold stick PC etc are connected Note A stick PC and connection cables are not supplied with this unit Stick PC USB cable commercially available HDMI extens...

Page 24: ...ect connection to this unit is not possible due to the size of a stick PC etc use a commercially sold extension cable Depending on the type of a USB memory device it may come in contact with the periphery such as a back cover and cannot be attached Use a commercially sold extension cable or use a small type of a USB memory device connectable to this unit Depending on the USB memory the access lamp...

Page 25: ... About Power management function see page 47 When the power of the unit is OFF Main Power On Off button OFF No light Note Even if the display unit is turned off with the power indicator off some of the circuits are in power on status When the power indicator is orange power consumption during standby is generally larger than that of when the power indicator is red MENU ENTER INPUT 8 8 1 External I...

Page 26: ...ition size of the screen see page 35 11 INPUT Switches input to display on the screen see page 28 12PICTURE see page 38 13SOUND see page 37 14RECALL Displays the current setting status of Input mode Aspect mode etc see page 29 15RETURN Used to return to the previous menu see page 33 16FUNCTION Displays Function button guide see page 55 17OFF TIMER Switches to stand by after a fixed period see page...

Page 27: ... The power plug shown at left may therefore not be the type fitted to your set When disconnecting the AC cord be absolutely sure to disconnect the AC cord plug at the socket outlet first The settings may not be saved if the power plug is disconnected immediately after changing settings with on screen menu Disconnect the power plug after a enough period of time Or disconnect the power plug after tu...

Page 28: ...tivity power off in the Setup menu is set to Enable a warning message is displayed every time the power is turned ON see page 50 Power management Information Last turn off due to Power management When Power management is functioned an information message is displayed every time the power is turned ON see page 47 These message displays can be set with the following menu Options menu Power on messag...

Page 29: ...n extended period To prevent such a problem using the screensaver and wobbling is recommended see page 46 50 RECALL It is possible to check the setting status of input label picture mode etc Press RECALL Current setting status will be displayed 10 00 1 2 3 4 5 PC 16 9 Memory name MEMORY2 Off timer 90 min 1 Input label 2 Aspect mode see page 31 3 Profile name see page 42 4 Off timer remaining time ...

Page 30: ... as MUTE OFF TIMER The Display can be preset to switch to stand by after a fixed period 30 min 60 min 90 min The setting switches each time OFF TIMER is pressed 0 min 30 min 60 min 90 min 0 min Cancel When three minutes remain the remaining time will flash Red After that it switches to stand by To see the Off timer remaining time press RECALL The Off timer is cancelled if a power interruption occu...

Page 31: ...ginal aspect ratio The left and right edges of the pictures are masked by side panels Aspect mode Description Zoom1 Letterbox pictures with a 16 9 aspect ratio are enlarged vertically to fill the screen The top and bottom edges of the pictures are cut off Zoom2 Letterbox pictures with a 16 9 aspect ratio are enlarged vertically and horizontally to fill the screen The top and bottom edges as well a...

Page 32: ...de again 4 Exit the digital zoom mode Press RETURN to exit the mode The screen returns to the previous state just before entering the digital zoom mode and the digital zoom operation guide display disappears Press any of the following buttons to exit the mode Then the operation of the pressed button is performed Remote Control AUTO SETUP POSITION PICTURE INPUT SETUP SOUND DEFAULT RECALL MUTE ASPEC...

Page 33: ...ture mode Normal 2 2 6500K Backlight Contrast Brightness Colour Hue Sharpness Gamma Colour temperature Dynamic contrast Colour enhancement Memory save Memory load Memory edit Off To display the submenu press ENTER 3 Set Press to set MENU ENTER INPUT Press to set 4 Exit from the menu Press Press RETURN to return to the previous screen Alternatively press the button selected in step 1 to exit from t...

Page 34: ...page 38 42 50 50 50 50 50 50 5 Picture Default Default Picture mode Normal 2 2 6500K Backlight Contrast Brightness Colour Hue Sharpness Gamma Colour temperature Dynamic contrast Colour enhancement Memory save Memory load Memory edit Off Setup menu see page 43 56 1 2 Setup Screensaver Signal Input label Power management settings Wobbling No activity power off OSD language Off Disable English UK Ima...

Page 35: ...C While displaying the picture of the corresponding signal select Auto setup and press ENTER Using Remote Control Press AUTO SETUP When Auto Setup does not work Invalid is displayed Auto mode When the PC auto setting is set to On in the Options menu see page 60 automatic position adjustment starts under the following conditions When the display power is turned ON When the input signal is switched ...

Page 36: ...f this happens adjust so that any such noise is minimized Over scan Turn image over scan On Off Applicable input signal 525i 525p 625i 625p 750 60p 750 50p Component Video RGB DVI D HDMI On Off Note When Off is set H size and V size cannot be adjusted 1 1 pixel mode Adjusts the display size when 1125i or 1125p signal is input Off On Applicable input signal 1125 50i 60i 24PsF 24p 25p 30p 50p 60p No...

Page 37: ...efault Output select Select the audio output SPEAKERS Internal speakers AUDIO OUT AUDIO OUT terminal output When AUDIO OUT is selected the other menus are greyed out and cannot be selected Audio volume setting is memorized separately for each output Sound mode Select for best audio Normal Emits the original sound Dynamic Accentuates sharp sound Clear Attenuates human voice In ENGLISH US OSD langua...

Page 38: ...e picture source or environment where this unit is used Normal For viewing in standard evening lighting environments Dynamic For viewing in brighter environments Cinema For use in viewing tone focused pictures with brightness reduced The settings are memorised separately for each input terminal In ENGLISH US OSD language Picture mode and Normal are displayed as PICTURE MENU and STANDARD Backlight ...

Page 39: ...re USER1 R gain G gain B gain R bias G bias B bias R gain Adjusts the white balance for light red areas 0 255 G gain Adjusts the white balance for light green areas 0 255 B gain Adjusts the white balance for light blue areas 0 255 R bias Adjusts the white balance for dark red areas 127 128 G bias Adjusts the white balance for dark green areas 127 128 B bias Adjusts the white balance for dark blue ...

Page 40: ...hancement Memory save Memory load Memory edit Off Dynamic contrast Gamma 2 2 Memory save see page 41 Memory load see page 41 Memory edit see page 42 1 2 3 MEMORY1 MEMORY2 MEMORY3 4 MEMORY4 5 MEMORY5 6 MEMORY6 Overview of Picture Profiles Original picture Adjust picture see page 38 39 Custom picture Example Save the picture adjustment values in the MEMORY1 profile Memory save Original picture Examp...

Page 41: ...9 a a A b c d e f g h i j k l m n o p q r s t u v w x y z _ Ok Cancel All delete Delete 6 When you finished entering the profile name select Ok with and press ENTER MY MEMORY1 0 1 2 3 4 5 6 7 8 9 a b c d e f g h i j k l m n o p q r s t u v w x y z _ a A Ok Cancel All delete Delete To cancel saving the profile select Cancel Loading profiles Load profiles and apply the picture adjustment values to t...

Page 42: ...l profiles select All delete 4 Select Ok with and press ENTER Memory delete Delete the MEMORY1 data Ok Cancel Renaming profiles 1 In the Picture menu select Memory edit with and press ENTER Memory save Memory load Memory edit 2 Select Memory name change with and press ENTER Memory edit Memory delete Memory name change 3 Select the profile to rename with and press ENTER 1 2 3 MEMORY1 MEMORY2 MEMORY...

Page 43: ...l Examples of Signal submenu screen When HDMI DVI is selected 60 00 Hz 74 18 MHz 1125 1080 60i 33 72 kHz Signal Cinema reality YUV RGB in select Noise reduction Signal range MPEG noise reduction V freq H freq Dot clock freq Signal format Off YUV Auto Full 0 255 Off When PC is selected 60 00 Hz 74 18 MHz 1125 1080 60i 33 72 kHz 0 Signal Component RGB in select Sync Cinema reality XGA mode V freq H ...

Page 44: ...gnal which is input from the Y connector HV sync Uses a synchronized signal on the Video HD VD signal which is input from the HD VD connector Cinema reality Faithfully reproduces videos shot with cinema films Set this to Off normally Note In ENGLISH US OSD language Cinema reality is displayed as 3 2 PULLDOWN If Cinema reality is set to On videos including movies shot at 24 frames per second are re...

Page 45: ...VIDEO input Set this to On normally Note Depending on the signalling system this setting may be less effective or may not be effective at all Colour system Sets the colour system according to the signal method at VIDEO input Set this to Auto normally This automatically detects the input signal format Auto PAL SECAM NTSC NTSC 4 43 PAL M PAL N Set this to Auto when viewing PAL 60 videos When images ...

Page 46: ... down to change the time by 15 minutes In ENGLISH US OSD language Operating time is displayed as SAVER DURATION Periodic time Deactivated Operating time Screensaver Start Mode Interval Periodic time Operating time 0 00 0 00 SUNDAY 2017 01 01 10 00 Note It is not possible to set the duration of Operating time longer than that of Periodic time To set start and finish time of Screensaver Select Time ...

Page 47: ...onsumption reduction Individual setting is not available No signal power off Enable HDMI1 power management On HDMI2 power management On DVI D power management On PC power management On Power save On Power management mode Custom The menu of the power consumption reduction is individually set This setting is enabled when Power management mode is set to Custom No signal power off When this is set to ...

Page 48: ... turned on the power indicator lights up green Note This function may not operate depending on the video output devices PC power management DPMS function When this function is set to On it operates under the following conditions to turn the power on or off automatically When no pictures HD VD sync signals are detected for 60 seconds or so at PC input Power is turned off the power indicator lights ...

Page 49: ...sted when setting the no signal image Images displayed for the startup image and no signal image may slightly differ from images confirmed on the computer Startup image settings No signal image settings Operate No signal image settings in the same way as Startup image settings Startup image settings submenu screen Startup image settings Display setting User image On Image select Clear user image R...

Page 50: ...ear user image is greyed out and cannot be selected When Image select is set to User image performing Clear user image will change the setting of Image select to Default image Wobbling Automatically shifts the display image therefore unnoticeable to the eye to prevent image retention of sharper contour of image Setting this to On moves the screen position at certain intervals and displays the imag...

Page 51: ...ed When On is set the display aspect is 16 9 Horizontal scale Set the horizontal scale in the multi display 1 5 Vertical scale Set the vertical scale in the multi display 1 5 Example Horizontal scale 5 and Vertical scale 5 is set in the multi display Bezel H adjustment Bezel V adjustment Adjust the area of image hidden in the joint horizontally and vertically respectively 0 100 Display example Set...

Page 52: ...d every day when Everyday is set 4 Set the power On Off 5 Set the time Pressing once changes time 1 minute Pressing continuously changes time by 15 minutes 6 Set the input Date and time Set date and time shows no programme is set Date and time submenu screen Date and time Set SUNDAY 10 00 2017 01 01 Year 2017 Month Day Hour Minute 1 1 10 0 Set date and time Select Year Month Day Hour Minute Set th...

Page 53: ...nfigured Select LAN setup with and press ENTER 192 168 0 8 255 255 255 0 192 168 0 1 1024 LAN setup Save DHCP Off IP address Subnet mask Gateway Port DHCP IP address Subnet mask Gateway Press to set On Off of DHCP and press ENTER When Off is selected IP address and other settings can be set manually DHCP DHCP client function On Obtains an IP address automatically when a DHCP server exists in the n...

Page 54: ...n to connect to a system developed by Crestron Electronics Inc which manages and controls multiple system devices connected to the network For details of Crestron Connected refer to the Crestron Electronics Inc web site Provided only in English http www crestron com For the download of RoomView Express refer to the Crestron Electronics Inc web site Provided only in English http www crestron com ge...

Page 55: ...n be selected with single touch operation HDMI1 HDMI2 DVI D PC VIDEO USB Memory load Memory can be loaded with single touch operation Memory load see page 41 MEMORY1 to MEMORY6 MEMORY1 to MEMORY6 load functions are already assigned to 1 to 6 respectively These settings cannot be changed Shortcut Signal Screensaver Set up timer Power management settings Network settings Pressing the numeric button ...

Page 56: ...k Cancel Display orientation Sets the on screen display orientation in the portrait setting Landscape On screen display angle is for horizontal installation Portrait The on screen display rotates anticlockwise by 90 degrees for easy view in the portrait setting Power indicator 18 00 Note In the portrait setting the power indicator shall come to the downside OSD position Sets the display position o...

Page 57: ...message Power management POWER button lock Off On On Off Off Note POWER button lock function is only for TH 65EF1U 4 Select the item to set with For Input search and Information timing the submenu screen will be displayed when you press ENTER see page 58 61 5 Set with 6 Press SETUP to exit from Options menu Unit 1 Press MENU Unit for several times and display the Setup menu 2 Select OSD language w...

Page 58: ...nal is interrupted even for a very short period 1 10 Sets the delay time sec Switches the input when the set time has elapsed after detecting no signal is present However if the detection period during which no signal is present is shorter than the set delay time the input is not switched Note With the USB input the unit determines no signal is present when the USB memory is not connected to the U...

Page 59: ...l which had been set before the power of the unit was turned off On Sets your preferred volume Outputs with the set volume when Initial VOL level in On state is selected on the menu To adjust sound volume level Press VOL VOL Note When Maximum VOL level is On the volume cannot be set to the level higher than the level set for Maximum VOL level Maximum VOL level Adjusts the maximum volume Off The so...

Page 60: ...l mode of the automatic position adjustment in the Position menu Off Automatic position adjustment starts when AUTO SETUP is pressed on the remote control or automatic position adjustment is executed from the Position menu On Other than remote control or menu operation automatic position adjustment starts When the display power is turned ON When the input signal is switched Off timer function Enab...

Page 61: ...Information timing Set up the informing manner for no signal During RS 232C controls Warning or error message sent from the display automatically During LAN controls Acquire the warning or error message from the display 1 Select the item with Select the set point with Information timing No signal warning No signal warning timing No signal error timing No signal error On 5min On 10min No signal war...

Page 62: ...in the power cord Clock display Sets to display hide the clock Off Hides the clock On Displays the clock Note The clock is displayed at the lower left of the screen when RECALL button is pressed Display duration is approx 5 seconds When current date and time is not set the clock is not displayed even when Clock display is On see page 52 Power on message No activity power off Sets to show hide No a...

Page 63: ...en both main unit buttons and remote control buttons are disabled due to the Button lock Controller user level and Controller ID function settings set all the values Off so that all the buttons are enabled again Press Unit together with RETURN and hold for more than 5 seconds Shipping is displayed and the lock is released when it disappears Shipping YES NO Settings for Button lock Controller user ...

Page 64: ...ble OS Windows Mac OS Compatible Web Browser Internet Explorer 7 0 8 0 9 0 10 0 11 0 Windows Safari 4 x 5 x 6 x Mac OS Example of network connection Note To use the network function set each item in Network settings and make sure to set Network control to On see page 53 When it is set to On power indicator lights orange under the condition of power Off with remote control stand by state LAN Termin...

Page 65: ...yte 8 bytes 1 byte Mode 1 Protect mode 3 Hash the following data with the MD5 algorithm and generate a 32 byte hash value zzzzzzzzyyyyy zzzzzzzz 8 byte random number obtained in step 2 yyyyy Password of the WEB control administrator privileges user Default user name and password are as follows User name admin1 Password panasonic Command transmission method Transmit in the following command format ...

Page 66: ...symbol STX 0x02 Control command ASCII character string ETX 0x03 CR 0x0d 1 byte Undefined 1 byte 1 byte Error response Error message Last terminal symbol ERR1 Undefined control command CR 0x0d ERR2 Out of parameter range ERR3 Busy status or reception invalid period ERR4 Timeout or reception invalid period ERR5 Wrong data length 4 bytes 1 byte 2 When LAN control protocol is set to Protocol 2 Communi...

Page 67: ... byte 1 byte Undefined 1 byte Error response Error message Last terminal symbol ERR1 Undefined control command CR 0x0d ERR2 Out of parameter range ERR3 Busy status or reception invalid period ERR4 Timeout or reception invalid period ERR5 Wrong data length ERRA Mismatching of password 4 bytes 1 byte When the WEB control administrator privileges password has not been set Non protect mode Connection ...

Page 68: ... unit s Network function is compatible with PJLink Class 1 The following operations can be performed from a computer when PJLink protocol is used Setting the Display Querying the Display status Supported commands The commands to control the unit with PJLink protocol are as follows Command Control POWR Power control 0 Standby 1 Power On POWR Power status query 0 Standby 1 Power On INPT Input switch...

Page 69: ...on JBMIA below http pjlink jbmia or jp english index html Early Warning Software This unit supports Early Warning Software which monitors the statuses of devices projectors or displays connected to an intranet reports failures of devices and gives advance warning by detecting a predicted abnormality The maximum number of devices that can be registered to monitor differs according to the type of li...

Page 70: ...etwork control to On see page 53 Computer Setup Disable the proxy server settings and enable JavaScript The setting procedure differs depending on the software version Please refer to description in HELP etc of the software Windows Windows 7 is used as an example Disable proxy server settings 1 Display Internet Properties window Click Start Control Panel Network and Internet Internet Options If th...

Page 71: ...r the user name and password when the Authentication screen is displayed 4 Click OK After logged in the TOP screen of the Web Browser Control is displayed Note The password used here is the same password used for command control and the PJLink security authentication Default user name and password are as follows User name user1 user rights admin1 administrator rights Password panasonic Change pass...

Page 72: ...age displays the Display statuses established for the items shown below Displays the type of Display Displays the firmware version of the Display main unit Network status page Click Status then Network Status to display the Status information page Displays the current configuration information of the network Displays the configuration details of wired LAN Basic control page To move from another pa...

Page 73: ...put field New password input field re enter for confirmation Button for executing password change User mode A user can change password only 1 2 3 4 Current password input field New password input field New password input field re enter for confirmation Button for executing password change Note Up to 16 alphanumeric characters can be used for a password When changing the administrator account both ...

Page 74: ...ct the connection Adjust clock page Click Detailed set up then Adjust clock to display the Adjust clock page New date field New time field Button to update time and date settings Note Date and time is displayed as when they are not set When Network control is set to On and it is in standby mode date and time display will be blank and they cannot be set If the time becomes incorrect immediately aft...

Page 75: ...control Setting update button Browser Remote Control It is possible to operate the display with the operation buttons displayed on the WEB browser Click Browser Remote Control The Browser Remote Control screen is displayed Browser Remote Control The Browser Remote Control can be operated in the same way as the supplied remote control For allocation function of each button see page 26 To finish the...

Page 76: ...trol screen remote control and external control command If the Back or Forward functions on the WEB browser is used the screen display may be abnormal In this case the subsequent operations are not guaranteed Update the WEB browser Using Web Browser Control Crestron Connected Crestron Connected operation screen You can monitor or control the Display using Crestron Connected If Adobe Flash Player i...

Page 77: ...isplays the value in the current setting Exit Returns to the operation page Note When you monitor or control the Display using Crestron Connected set Crestron Connected to On in the Network settings menu Info page Click Info on the operation page Display Name Displays the name of the Display Mac Address Displays the MAC address Resolution Displays the resolution of the Display Power Status Display...

Page 78: ... content still motion pictures played back on a USB media player and the playback list can be delivered Still pictures that can be delivered are only jpg files For details refer to the manual of Multi Monitoring Control Software The multi display mode is not available with USB input Single Media Player Files are played by a single unit USB memory Multi Media Player Connecting more than one unit us...

Page 79: ...only bmp Windows Bitmap Maximum number of pixels 4096 4096 1 bit 4 bits 8 bits 24 bits Following formats are not supported Run length encoding bit field top down transparent data Motion pictures Extension Codec Video Audio avi MPEG4 AVC H 264 MPEG 4 Visual MPEG 1 2 Audio Layer 3 MP3 Linear PCM mkv MPEG4 AVC H 264 MPEG 4 Visual MPEG 1 2 Audio Layer 3 Linear PCM AAC HE AAC asf wmv MPEG4 AVC H 264 MP...

Page 80: ...ls Scenario The play order and time can be specified for a play file Save under the name one byte alphabetical characters scenario dat immediately below root in USB memory Save files as UTF 8N format 1 to 999 lines can be specified for Scenario File list It is a list of play files Save under the name one byte alphabetical characters filelist dat immediately below root in USB memory Save files as U...

Page 81: ...ay time of the file Single Media Player Type 2 Files will be played in the order they were listed in a scenario Scenario and file list Scenario Enter File name Play time File list Unnecessary Setting example USB memory contents scenario dat Introduction jpg Contents_Video1 wmv Contents_Video2 wmv Contents_Video3 wmv scenario dat scenario Introduction jpg 10 Contents_Video1 wmv 10 Contents_Video2 w...

Page 82: ...GroupID G01 PHOTO_001 L_Introduction jpg VIDEO_001 L_Contents_Video1 wmv VIDEO_002 L_Contents_Video2 wmv VIDEO_003 L_Contents_Video3 wmv Child side USB memory contents filelist dat R_Introduction jpg R_Contents_Video1 wmv R_Contents_Video2 wmv R_Contents_Video3 wmv filelist dat file list GroupID G01 PHOTO_001 R_Introduction jpg VIDEO_001 R_Contents_Video1 wmv VIDEO_002 R_Contents_Video2 wmv VIDEO_...

Page 83: ...d the detail of the error are displayed as shown below 1 No USB memory is inserted Supplementary note The USB memory contents check does not determine whether or not a play file is playable If a file cannot be played while Media Player is active an error message will be displayed When performing the synchronized playback on the Multi Media Player check in the menu USB media player settings Scenari...

Page 84: ...ple of setting up LAN connection and IP address Subnet mask in the previous section 2 Insert USB memory for Media Player into each Display 3 Executes USB memory contents check on each Display 4 Change INPUT for Child to USB 5 Change INPUT for Parent to USB Ending Change INPUT for Parent to other than USB Resume Play function After Media Player ends the file to be played back next time varies depen...

Page 85: ...oning menu can also be displayed using the main unit buttons Operate in the same way as described in Options Adjustments Unit see page 57 Copying the display data to the USB memory 1 Insert the USB memory device to the USB terminal of the display of data copy source After the Select Copy Type screen is displayed go to the step 5 USB memory USB terminal Note If the USB memory containing the data fo...

Page 86: ...s 4 Select USB data cloning with and press ENTER 5 Select USB Memory Display with and press ENTER Select Copy Type Display USB Memory USB Memory Display 6 Select YES with and press ENTER Data copy to the display starts Do you copy the data Data from USB Memory YES NO When data copy starts a message to show the data is being copied is displayed The following message is displayed after data copy has...

Page 87: ... the remote control at the Display you want to control press ID SET 0 ID set Display ID Controller ID 4 Press one of 0 9 Sets the tens digit 5 Press one of 0 9 Sets the units digit The steps from 3 to 5 need to be done within 5 seconds Adjustable ID number range is 0 100 Example To set the ID to 1 After step 3 press 0 and then 1 To set the ID to 12 After step 3 press 1 and then 2 To set the ID to ...

Page 88: ... e f g h i j k l m n o p q r s t u v w x y z _ Ok Cancel All delete Delete Switches the keyboard to the upper case alphabet Each time ENTER is pressed the keyboard is switched in the order of lower case upper case and symbols 3 Select M with and press ENTER M Repeat this process to enter the next character 4 Select Space key with and press ENTER MY 0 1 2 3 4 5 6 7 8 9 a a A b c d e f g h i j k l m...

Page 89: ...on Dot Scanning frequency Dot clock frequency MHz Format 3 Horizontal kHz Vertical Hz 640 400 640 400 31 47 70 09 25 18 R Y D H 640 400 37 86 85 08 31 50 R Y D H 640 480 640 480 31 47 59 94 25 18 R Y D H 640 480 35 00 66 67 30 24 R Y D H 640 480 37 86 72 81 31 50 R Y D H 640 480 37 50 75 00 31 50 R Y D H 640 480 43 27 85 01 36 00 R Y D H 800 600 800 600 35 16 56 25 36 00 R Y D H 800 600 37 88 60 3...

Page 90: ... 99 59 95 118 25 D H 1 600 900 55 92 60 00 119 00 D H 1 680 1 050 1 680 1 050 65 29 59 95 146 25 R Y D H 1 600 1 200 1 600 1 200 4 75 00 60 00 162 00 R Y D H 1 920 1 080 1 920 1 080 5 66 59 59 93 138 50 R Y D H 1 920 1 080 67 50 60 00 148 50 R Y D H 1 920 1 200 1 920 1 200 4 74 04 59 95 154 00 R Y D H 1 When 1 125 1 035 60i signal is input it is displayed as 1 125 1 080 60i signal 2 Pixel Repetiti...

Page 91: ...ng data to the factory settings Settings and set values of Picture Sound Setup Position and Options menus User image registered in Setup Image settings Remote control 1 Press SETUP to display the Setup menu 2 Select OSD language with and press ENTER for more than 3 seconds The following screen will be displayed Options Display software information Shipping USB data cloning Software licenses 3 Sele...

Page 92: ... power on see page 27 Power automatically turns off unexpectedly Check the settings of No signal power off HDMI1 power management HDMI2 power management DVI D power management PC power management and No activity power off Any of them may be set to On Enable see page 47 Power indicator is blinking in red There is possibility of malfunction Please contact an Authorized Service Centre No remote contr...

Page 93: ...en when the temperature of parts of the front top and rear panels has risen these temperature rises will not pose any problems in terms of performance or quality There is no picture displayed or sound output sometimes When HDMI or DVI signals are input to the Display using a selector or distributor sound or images may not be output in the normal fashion depending on the selector or distributor use...

Page 94: ...quid crystal panel the edges may appear to flicker in the fast moving parts of the images This is normal and not indicative of malfunctioning There may be red spots blue spots green spots and black spots on the screen This is a characteristic of liquid crystal panels and is not a problem The liquid crystal panel is built with very high precision technology giving you fine picture details Occasiona...

Page 95: ...midity 20 80 no condensation Connection terminals HDMI 1 HDMI 2 TYPE A Connector 2 2 Audio signal Linear PCM sampling frequencies 48 kHz 44 1 kHz 32 kHz DVI D IN DVI D 24 Pin 1 Compliance with DVI Revision 1 0 Content Protection Compatible with HDCP 1 1 VIDEO Audio Video 4 pole mini jack M3 1 see page 20 Video 1 0 Vp p 75 Ω Audio 0 5 Vrms PC IN Mini D sub 15 Pin Compatible with DDC2B 1 Y G 1 0 Vp ...

Page 96: ... range Approx 7 m 22 9 ft when operated directly in front of remote control sensor Mass Approx 63 2 22 oz including batteries Dimensions W H D 44 mm 105 mm 20 5 mm 1 74 4 14 0 81 1 Environmental temperature to use this unit at high altitudes 1 400 m 4 593 ft and higher and below 2 800 m 9 186 ft above sea level 0 C to 35 C 32 F to 95 F 2 VIERA LINK is not supported Note Design and specifications a...

Page 97: ... to any third party who contacts us at the contact information provided below for a charge no more than our cost of physically performing source code distribution a complete machine readable copy of the corresponding source code covered under GPL V2 0 LGPL V2 1 or the other licenses with the obligation to do so as well as the respective copyright notice thereof Contact Information oss cd request g...

Page 98: ...P0217TS0 PB Disposal of Old Equipment and Batteries Only for European Union and countries with recycling systems These symbols on the products packaging and or accompanying documents mean that used electrical and electronic products and batteries must not be mixed with general household waste For proper treatment recovery and recycling of old products and used batteries please take them to applica...

Reviews: