background image

TQBC2173

Please read these instructions before operating your set
and retain them for future reference.

Model No.

Operating Instructions 

Progressive Wide Hospitality Plasma Display

English

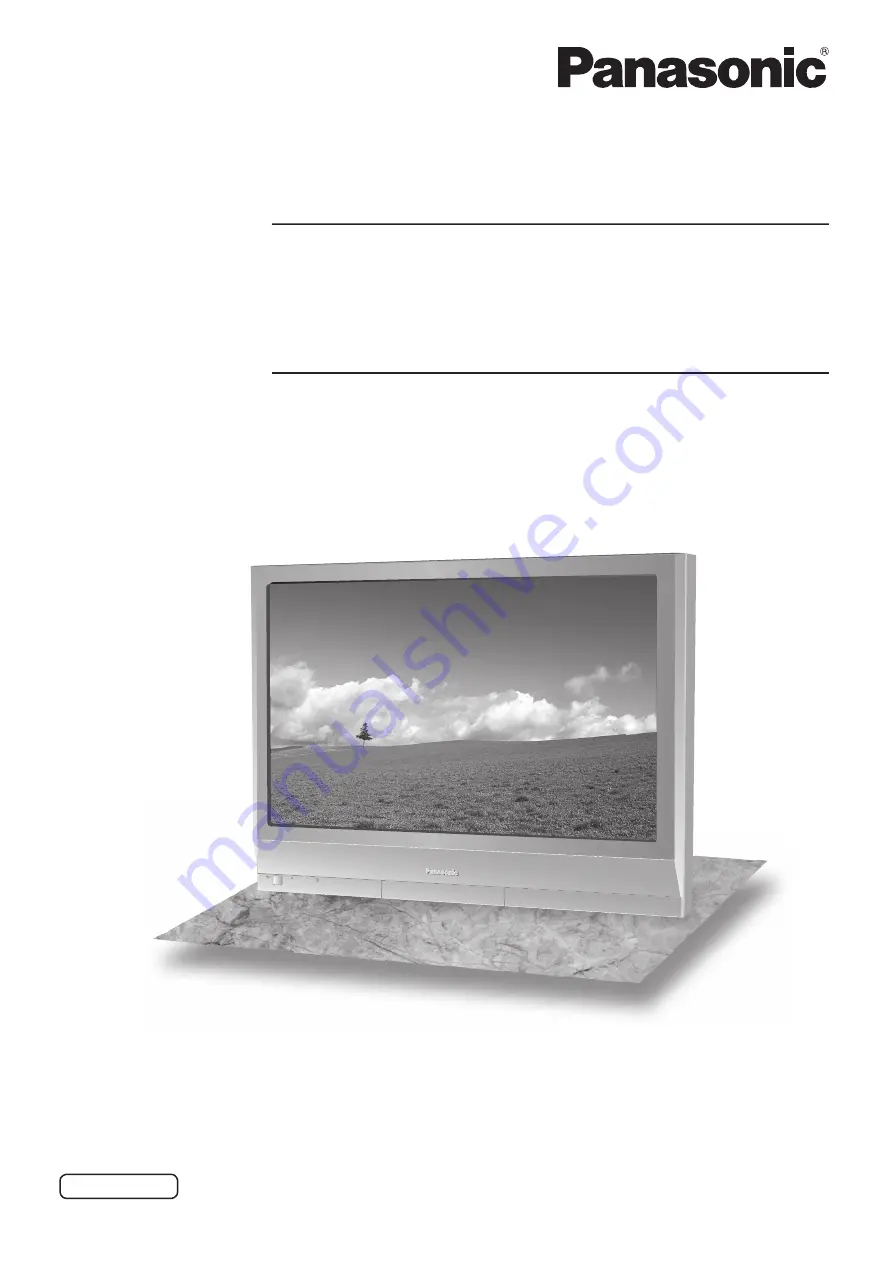
The illustration shown is an image.

TH-42PG10M

TH-42PG10A

Model No.

High De

fi

 nition Hospitality Plasma Display

TH-37PR10M

TH-42PR10M

TH-37PR10A

TH-42PR10A

Summary of Contents for TH-37PR10A

Page 1: ... retain them for future reference Model No Operating Instructions Progressive Wide Hospitality Plasma Display English The illustration shown is an image TH 42PG10M TH 42PG10A Model No High Definition Hospitality Plasma Display TH 37PR10M TH 42PR10M TH 37PR10A TH 42PR10A ...

Page 2: ...ing the input signal 13 Selecting the On Screen Menu Language 13 Basic Controls 14 On Screen Menu Displays 16 ASPECT Controls 18 Adjusting Pos Size 19 MULTI PIP 20 Advanced PIP 21 Picture Adjustments 22 Advanced settings 23 Sound Adjustment 25 Mute 25 Digital Zoom 26 PRESENT TIME Setup Set up TIMER 27 PRESENT TIME Setup 27 Set up TIMER 28 Screensaver For preventing image retention 29 Setup of Scre...

Page 3: ...aked flame sources such as lighted candles should be placed on above the set 2 To prevent electric shock do not remove cover No user serviceable parts inside Refer servicing to qualified service personnel 3 Do not remove the earthing pin on the power plug This apparatus is equipped with a three pin earthing type power plug This plug will only fit an earthing type power outlet This is a safety feat...

Page 4: ...m young children Discard unneeded small parts and other objects including packaging materials and plastic bags sheets to prevent them from being played with by young children creating the potential risk of suffocation Do not place the Plasma Display on sloped or unstable surfaces The Plasma Display may fall off or tip over Do not place any objects on top of the Plasma Display If water is spills on...

Page 5: ...shocks Do not do anything that may damage the power cable When disconnecting the power cable pull on the plug body not the cable Do not damage the cable make any modifications to it place heavy objects on top of it heat it place it near any hot objects twist it bend it excessively or pull it To do so may cause fire and electric shock If the power cable is damaged have it repaired at your local Pan...

Page 6: ...Cleaning and maintenance The front of the display panel has been specially treated Wipe the panel surface gently using only a cleaning cloth or a soft lint free cloth If the surface is particularly dirty wipe with a soft lint free cloth which has been soaked in pure water or water in which neutral detergent has been diluted 100 times and then wipe it evenly with a dry cloth of the same type until ...

Page 7: ...fe Precaution on battery use Incorrect installation can cause battery leakage and corrosion that will damage the remote control transmitter Disposal of batteries should be in an environment friendly manner Observe the following precaution 1 Batteries shall always be replaced as a pair Always use new batteries when replacing the old set 2 Do not combine a used battery with a new one 3 Do not mix ba...

Page 8: ...12 AC cord fixing From EXTERNAL monitor terminal on Computer see page 9 From SERIAL Terminal on Computer see page 10 Note At factory shipment Terminal board is installed in SLOT 1 only COMPONENT RGBINandAudio IN Terminals equivabent to BNCComponentVideoTerminal Board TY 42TM6A see page 11 Optional Terminal Board Insert Slot covered Optional Terminal Board Insert Slot covered Note Make sure that th...

Page 9: ...anges to the computer at the time of connection Some PC models cannot be connected to the set There is no need to use an adapter for computers with DOS V compatible Mini D sub 15P terminal The computer shown in the illustration is for example purposes only Additional equipment and cables shown are not supplied with this set Do not set the horizontal and vertical scanning frequencies for PC signals...

Page 10: ...es If multiple commands are transmitted be sure to wait for the response for the first command to come from this unit before sending the next command If an incorrect command is sent by mistake this unit will send an ER401 command back to the computer SL1A SL1B SL2A and SL2B of Command IMS are available only when a dual input terminal board is attached COMPUTER RS 232C Straight cable D sub 9p Start...

Page 11: ...UT DVD Y PB PR OUT PR PB Y L R Note Additional equipment cables and adapter plugs shown are not supplied with this set DVD PLAYER Digital TV Set Top Box DTV STB AV COMPONENT connection This unit has terminal board equivalent to BNC Component Video Terminal Board TY 42TM6A as standard equipment ...

Page 12: ...ma Display is turned on setting condition is an example Press the button on the remote control to turn the Plasma Display off Power Indicator Red standby Press the button on the remote control to turn the Plasma Display on Power Indicator Green Turn the power to the Plasma Display off by pressing the switch on the unit when the Plasma Display is on or in standby mode Note During operation of the p...

Page 13: ...t to match the signals from the source connected to the component RGB input terminals see page 33 In 2 screen display the same input mode cannot be selected for the main picture and sub picture Select the input signals to be connected by installing the optional Terminal Boards Press to select the input signal to be played back from the equipment which has been connected to the Plasma Display Input...

Page 14: ...is displayed press to move the cursor up press to move the cursor down see page 16 Enter Aspect button see page 16 18 POS SIZE button see page 19 PICTURE button see page 22 Sound mute On Off see page 25 N button see page 19 22 23 24 25 POSITION buttons INPUT button INPUT1 INPUT2 INPUT3 and PC selection Press to select INPUT1 INPUT2 INPUT3 and PC input SLOTS sequentially see page 13 When a dual inp...

Page 15: ...to adjust the aspect see page 18 SURROUND button The surround setting switches on and off each time the SURROUND button is pressed The benefits of surround sound are enormous You can be completely enveloped in sound just as if you were at a concert hall or cinema Note The surround settings are memorized separately for each Sound Mode Normal Dynamic Clear Press to access Digital Zoom OFF TIMER butt...

Page 16: ...e Off Power management Off Auto power off Off OSD Language English UK Component RGB in select RGB Input label Power save Setup 2 2 Setup Screensaver MULTI DISPLAY Setup Set up TIMER PRESENT TIME Setup MENU ENTER INPUT VOL MENU ENTER INPUT VOL 1 2 To Pos Size adjust menu see page 19 During RGB PC input signal During AV S Video Component and Digital input signal To Advanced settings see page 22 23 P...

Page 17: ... Side panel Wobbling Peak limit Finish Time Start Time White bar scroll Time Designation 6 15 12 30 High Off Off PRESENT TIME 15 00 Screensaver Start Function Mode Side panel Wobbling Peak limit Operating Time Periodic Time White bar scroll Interval 12 00 3 00 High Off Off PRESENT TIME 15 00 MENU ENTER INPUT VOL 2 Press to access each adjust screen Press the R button to return to previous menu scr...

Page 18: ... size to change unexpectedly When viewing such programs it is recommended that theASPECT be set to 4 3 If adjusting the Picture V Pos V Size in Panasonic Auto with 16 9 mode the adjustment is not memorized When exiting the mode the screen will return to a former adjustment Panasonic Auto can not be selected while BNC Dual Video Terminal Board TY FB9BD is installed For an elongated image Image is e...

Page 19: ... picture position will shift up or down This picture position movement cannot be controlled by the Picture Pos Size function If adjusting the Picture V Pos V Size in Panasonic Auto with 16 9 mode the adjustment is not memorized When exiting the mode the screen will return to a former adjustment During RGB PC input signal During AV S Video Component and Digital input signal H Pos Adjust the horizon...

Page 20: ...ress to move the sub picture Each time the location of the sub picture will be moved Notes This button is effective only in the picture in picture The sub picture may be hidden by the on screen display depending on its position Press to change input signal Notes If INPUT lock in Options menu is set to other than Off MULTI PIP function isn t available Sound output is from the picture which is selec...

Page 21: ...ure and sub picture are processed by different circuits resulting in a slight difference in the clarity of the pictures There may also be a difference in the picture quality of the sub picture depending on the type of signals displayed on the main picture and depending on the 2 picture display mode Due to the small dimensions of the sub pictures these sub pictures cannot be shown in detail Compute...

Page 22: ...thing else adjust using the items in the Picture menu see next page Colour Management On Enables vivid colour adjustment automatically Press to display the Picture menu Press to select the menu to adjust Select the desired level by looking at the picture behind the menu Note Menu that cannot be adjusted is grayout Adjustable menu changes depending on signal input and menu setting Normal Cool Warm ...

Page 23: ...n is pressed at any time or the ACTION button is pressed during Normalise then all adjustment values are returned to the factory settings Helpful Hint Normalise Normalisation Advanced settings Item Effect Details Black extension Less More Adjusts the dark shades of the image in gradation Input level Less More Adjustment of parts which are extremely bright and hard to see This cannot be adjusted wh...

Page 24: ...reas W B Low G Less More Adjusts the white balance for dark green areas W B Low B Less More Adjusts the white balance for dark blue areas Notes Carry out W B adjustment as follows 1 Adjust the white balance of the bright sections using the W B High R W B High G and W B High B settings 2 Adjust the white balance of the dark sections using the W B Low R W B Low G and W B Low B settings 3 Repeat step...

Page 25: ...d Adjusts normal sounds Treble Adjusts high pitch sounds Balance Adjusts left and right volumes Surround Select On or Off Musical note is displayed on right side of the audio output screen label Selects PIP frame sound Selects main picture sound When PIP frame sound is chosen When main picture sound is chosen Attenuates human voice While the Sound menu is displayed if either the N button on the re...

Page 26: ...d for the enlarged display Each time this is pressed the magnification factor changes This is shown in the image being displayed Return to normal display quit Digital Zoom Press to exit from the Digital Zoom The cursor will move Notes When power goes OFF including Off Timer operation Digital Zoom terminates The Digital Zoom function cannot be selected while in the following operation state Multi v...

Page 27: ...cessary Then set POWER ON Time POWER OFF Time Press to display the Setup menu Press to select Set up TIMER or PRESENT TIME Setup Press to display the Set up TIMER screen or PRESENT TIME Setup screen 1 2 Display the PRESENT TIME Setup screen To setup PRESENT TIME follow the procedure described below PRESENT TIME Setup 1 2 Press to select PRESENT TIME Press to setup PRESENT TIME button Forward butto...

Page 28: ... changes POWER ON Time POWER OFF Time by 15 minutes Press to select POWER ON Function POWER OFF Function Press to select On Press twice to exit from Setup Note Timer function will not work unless PRESENT TIME is set 1 2 3 Display the PRESENT TIME Setup screen To setup DAY and PRESENT TIME follow the procedure described below 1 2 Press to select DAY or PRESENT TIME Press to setup DAY or PRESENT TIM...

Page 29: ...ould be used Reversal Scroll selection 2 3 1 4 Press to display the Setup menu Press to select Screensaver Press to display Screensaver screen Press to select Function Press to select the desired function White bar scroll Image Reversal White bar scroll The white bar will scroll from left to right Image Reversal Negative image will be displayed on the screen Mode selection Start setting 5 When the...

Page 30: ...e White bar scroll Off 6 15 12 30 High Off Off PRESENT TIME 99 99 Screensaver For preventing image retention Setup of Screensaver Time After selecting Time Designation or Interval the relevant Time Setup will become available for selection and the Operating Time may be set Time cannot be set when Mode is On or Off Press to select Start Time Finish Time When Time Designation is selected Press to se...

Page 31: ...remain on the side panels either side of the display field To reduce the risk of such an image retention illuminate the side panels Display the Screensaver screen Refer to the previous page operation guide steps 1 and 2 Notes To reduce the occurrence of image retention set the Side panel to High The side panels may flash alternate black white depending on the picture being shown on the screen Usin...

Page 32: ...e is no signal When this is set to On the power supply of the unit goes Off 10 minutes after the input signals stop This function is effective for input signals except input from PC Mini D sub terminal Press to select Input label Press to change the Input label Customizing the Input labels This function can change the label of the Input signal to be displayed Select the input signal which you woul...

Page 33: ...match the signals from the source connected to the Component RGB input terminals Y PB PR signals Component R G B HD VD signals RGB 1 2 Press to display the Setup menu Press to select the Component RGB in select Press to select the desired input signal Component RGB Press to exit from adjust mode 3D Y C Filter For NTSC AV images Select Signal from the Setup menu duringAV S Video input signal Signal...

Page 34: ... occur set the system to match the format of the input signal Cinema reality P NR Press to select Cinema reality or P NR Press to set On Off Press to exit from adjust mode Cinema reality When on the display attempts to reproduce a more natural interpretation of sources such as movie pictures which are recorded at 24 frames per second If the picture is not stable turn the setting to off Note When O...

Page 35: ...ng is valid only for RGB input signal Auto The H and V sync or synchronized signal are automatically selected If both input it is selected the H and V sync on G Uses a synchronized signal on the Video G signal which is input from the G connector VBS Uses a synchronized signal of Composite Sync input which is input from the HD connector Displays the H Horizontal V Vertical frequencies This display ...

Page 36: ...isable Disables the Off timer function Note When Disable is set the Off timer is cancelled Onscreen display On Off On Displays all the following on screen Power on display Input signal switch display No signal display Mute and the remaining time of off timer after was pressed Off Hides all the items above from view Initial INPUT Off PC INPUT1 INPUT2 INPUT3 Adjusts the input signal when the unit is...

Page 37: ...adjusted signal is displayed see page 13 Signal can be displayed when the Terminal board is installed Input switch can be used when this is set to Off In two screen display mode if anything other than Off is set the value will be fixed as the value input in the single screen display mode When a dual input terminal board is attached A or B is displayed depending on the selected input signal Ex INPU...

Page 38: ... button on the remote control User3 Locks all the buttons on remote control ID select Sets panel ID number when panel is used in Remote ID or Serial ID Set value range 0 100 Standard value 0 Remote ID Off On Off Disables ID remote control functions You can use normal remote control operations On Enable ID remote control functions Serial ID Off On Sets the panel ID Control Off Disables external con...

Page 39: ... above from view Initial INPUT Off PC INPUT1 INPUT2 INPUT3 Adjusts the input signal when the unit is turned on Notes Only the adjusted signal is displayed see page 13 Signal can be displayed when the Terminal board is installed This menu is available only when INPUT lock is Off When a dual input terminal board is attached A or B is displayed depending on the selected input signal Ex INPUT1A INPUT1...

Page 40: ... Only the adjusted signal is displayed see page 13 Signal can be displayed when the Terminal board is installed Input switch can be used when this is set to Off In two screen display mode if anything other than Off is set the value will be fixed as the value input in the single screen display mode When a dual input terminal board is attached A or B is displayed depending on the selected input sign...

Page 41: ...ID Control Off Disables external control by the ID On Enables the external control by the ID Display size Off On Adjusts the image display size on screen Off Sets the normal image display size on screen On Sets the image display size approximately 95 of the normal image display Off On Notes This setting is valid only when the input signals are as follows NTSC PAL SECAM M NTSC PAL60 PAL M PAL N BNC...

Page 42: ...On Note This mode is unavailable Rotate Off On Off Does not rotate the image On Rotates the image 180 degrees Serial Slot Select Slot1 Slot2 Slot3 Selects the slot which communicates serial Note The setting of an external command can be set only from the fixed serial terminal see page 10 Normalization When both main unit buttons and remote control are disabled due to the Button lock Remocon User l...

Page 43: ...Program number You can set 7 day timer programming by setting time and command Note Before setting Weekly Command Timer set PRESENT TIME Setup see page 27 Press to select Function Press to select On Note When Function is set to On Set up TIMER see page 28 is unavailable and Interval Time Designation in Mode of Screensaver see page 29 cannot be selected 1 Press to select a day Press to select a pro...

Page 44: ...ss to select a command number 6 Press to select Time Command Press to set each item Time Set the time to execute a command program Pressing or button once changes Time 1 minute Pressing or button continuously changes Time by 15 minutes Command Select a command to execute at the set time This unit has 64 commands to set see page 48 Notes Command is performed in order of execution time regardless of...

Page 45: ...nu Press to select OSD Language Press and hold till the SHIPPING menu is displayed Press to select YES Press to confirm from the unit 1 Press the MENU button till the Setup menu is displayed 2 Press the Volume Up or Down button to select OSD Language 3 Press and hold the ENTER button till the SHIPPING menu is displayed 4 Press the Volume Up or Down button to select YES 5 Press the ENTER button and...

Page 46: ... indicative of malfunctioning This Plasma Display uses special image processing Hence a slight time lag may occur between image and audio depending on the type of input signal However this is not a malfunction Plasma Display panel Symptoms Checks The screen darkens slightly whenbrightpictureswithminimal movements are shown The screen will darken slightly when photos still images of a computer or o...

Page 47: ...600 56 Hz 35 16 56 25 36 0 21 800 600 60 Hz 37 88 60 32 40 0 22 800 600 72 Hz 48 08 72 19 50 0 23 800 600 75 Hz 46 88 75 00 49 5 24 800 600 85 Hz 53 67 85 06 56 25 25 1 024 768 60 Hz 48 36 60 00 65 0 26 1 024 768 70 Hz 56 48 70 07 75 0 27 1 024 768 75 Hz 60 02 75 03 78 75 28 1 024 768 85 Hz 68 68 85 00 94 5 29 1 152 864 75 Hz 67 50 75 00 108 0 30 1 280 960 60 Hz 60 00 60 00 108 0 31 1 280 960 85 H...

Page 48: ...he location of the sub picture lower left 33 DWA PIN2 The location of the sub picture upper left 34 DWA PIN3 The location of the sub picture upper right 35 DWA PIP Dual Picture mode Picture in Picture 36 DWA POP Dual Picture mode Picture out Picture 37 DWA SWP Swap main picture and sub picture when PIP mode 38 DWA TWN Dual Picture mode Picture and Picture 39 IMS PC1 Input select PC1 Main Picture w...

Page 49: ...quency 15 110 kHz Vertical scanning frequency 48 120 Hz VGA SVGA XGA SXGA UXGA compressed Horizontal scanning frequency 15 110 kHz Vertical scanning frequency 48 120 Hz Connection terminals COMPONENT RGB IN Y G BNC with sync 1 0 Vp p 75 Ω PB B BNC PR R BNC 0 7 Vp p 75 Ω AUDIO IN RCA PIN JACK 2 0 5 Vrms high impedance PC IN HIGH DENSITY MINI D SUB 15PIN Y or G with sync 1 0 Vp p 75 Ω Y or G without...

Page 50: ...50 Memo ...

Page 51: ...51 Memo ...

Page 52: ...omer s Record The model number and serial number of this product can be found on its rear panel You should note this serial number in the space provided below and retain this book plus your purchase receipt as a permanent record of your purchase to aid in identification in the event of theft or loss and for Warranty Service purposes Model Number Serial Number ...

Reviews: