background image

Operating Instructions

Digital Progressive Plasma Television

Model No.

Please read these instructions before operating your set and retain them for future reference.

English

TQB0E0168-3

1

2

3

4

5

6

7

8

9

0

OK

C

IDTV

N

MODE

TH-37PE50B
TH-42PE50B
TH-37PE40B
TH-42PE40B

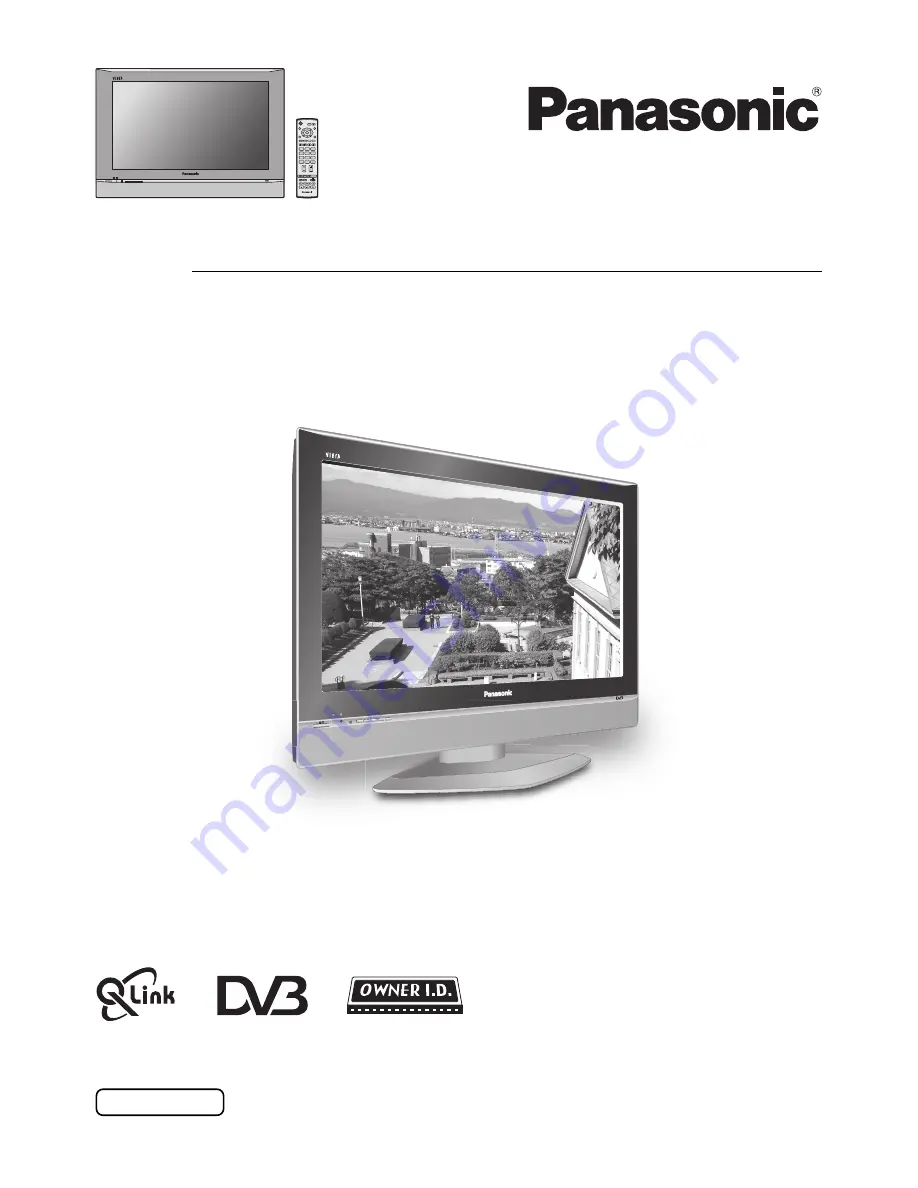
The image shown is for illustration only.
Pedestal stand shown above is optional extra.

(U.K. Standard)

Summary of Contents for TH-37PE40B

Page 1: ... these instructions before operating your set and retain them for future reference English TQB0E0168 3 1 2 3 4 5 6 7 8 9 0 OK C IDTV N MODE TH 37PE50B TH 42PE50B TH 37PE40B TH 42PE40B The image shown is for illustration only Pedestal stand shown above is optional extra U K Standard ...

Page 2: ...nu 14 Setup menu 15 Tuning menu overview 16 Tuning menu Programme edit 17 Adding deleting a programme channel 17 Moving a programme channel 17 Renaming a programme channel 18 Locking a programme channel 18 Copying programme information to a recording device 18 Tuning menu Auto setup 19 Tuning menu Manual tuning 20 Manual tuning via front panel 20 Owner ID 21 Shipping condition 22 DVB Setup Menu ov...

Page 3: ...e that the replacement fuse has a rating of 5 amps and that it is approved by ASTA or BSI to BS1362 Check for the ASTA mark ASA or the BSI mark on the body of the fuse If the plug contains a removable fuse cover you must ensure that it is refitted when the fuse is replaced If you lose the fuse cover the plug must not be used until a replacement cover is obtained A replacement fuse cover can be pur...

Page 4: ...ep video equipment away from this product Keep unneeded small parts and other objects out of the reach of small children These objects can be accidentally swallowed Also be careful about packaging materials and plastic sheets When using the Plasma TV The Plasma TV is designed to operate on 220 240 V AC 50 60 Hz Do not cover the ventilation holes Doing so may cause the Plasma TV to overheat which c...

Page 5: ... power cord plug the resultant humidity can damage the insulation which could result in fire Pull the power cord plug out from the wall outlet and wipe the mains lead with a dry cloth This Plasma TV radiates infrared rays therefore it may affect other infrared communication equipment Install your infrared sensor in a place away from direct or reflected light from your Plasma TV Maintenance The fro...

Page 6: ...eplace the cover 1 2 3 Make sure that the batteries are fitted the correct way round Do not mix old batteries with new batteries Remove old exhausted batteries immediately Do not mix different battery types i e Alkaline and Manganese or use rechargeable Ni Cad batteries Mains Lead K2CT3DH00018 Batteries for the Remote Control Transmitter 2 R6 UM3 size Clamper TMME206 2 Pan European Guarantee Card ...

Page 7: ... drawing the knob Attach the bands Insert the spigot on the two bands into the pedestal Connect cables Example of connection cable routing Band Band Fastening band Fastening Loosening To tighten Pull off Keep the knob pressed Mains Lead Clamp Binding strap For using the TY ST42PA50W Note Refer to the operating instruction book of the pedestal ...

Page 8: ... Scart terminal for any DVD Recorder Always use a fully wired Scart cable Use the TV s AV1 or AV3 Scart terminal for Satellite Receiver Always use a fully wired Scart cable RF Connection Connect the RF cable to the Aerial In terminal of the VCR DVD Recorder and an RF cable from the VCR DVD Recorder Aerial Out terminal to the TV Aerial terminal Notes If using a Q Link VCR DVD Recorder then the AV1 ...

Page 9: ... correctly check the following The Scart cable is connected to the TV s Scart terminal AV2 or AV3 and correctly setup in the menu The Scart cable is connected to the recording device s compatible Q Link NEXTVIEWLINK or similar technology Scart terminal The Scart cable is a fully wired type For further information on Q Link and connecting equipment see page 34 42 45 Power Indicator Standby Red On N...

Page 10: ...tations can be listed by category press the Yellow button to show a category The chosen category name is shown on screen For example if you select Free TV and press the OK button only free to air stations will be listed you can view any of these now If you select Pay TV and press the OK button only subscription stations will be listed you will need to contact the service provider to find out how t...

Page 11: ...cting programme positions to quickly change programme Coloured buttons used for the selection navigation and operation of various functions Teletext button see page 38 40 STTL button Text F P button Analogue mode Subtitle On Off DVB mode see page 33 39 Direct channel access Available in Analogue mode During normal TV viewing or when in the Tuning Programme edit or Manual tuning menus press and the...

Page 12: ...and select menus The left and right cursor buttons are used to access menus adjust levels or to select from a range of options The OK button is used with a number of features to store settings after adjustments have been made or options have been set The EXIT button is used to exit the menu system and return to the normal viewing screen An On Screen Help box is displayed whenever a menu is display...

Page 13: ...Changes to any settings in a viewing mode will affect all signal sources RF AV1 AV2 AV3 and Component Changes will be stored automatically By analysing and processing the incoming picture all three modes feature automatic enhancement Increase or decrease the levels of these options according to your personal preference With an NTSC signal source connected to the TV the picture hue can be adjusted ...

Page 14: ...n be adjusted to suit your listening position Not available in DVB mode Select On to provide stereo sound reproduction Select Off for FM Mono sound output If Nicam Mono is being transmitted select either FM Mono Off Nicam Mono I M1 or Nicam Mono II M2 The options depend upon the signal being transmitted If reception deteriorates it is advisable to switch to FM Mono Off Sound quality can be improve...

Page 15: ...image to remain on the side panels either side of the display field To prevent the appearance of such an after image illuminate the side panels By reducing the brighness of picture power consumption can be lowered MENU EXIT Set to TV to view picture from TV tuner Set to AV to view input from an external equipment connected to a Scart socket e g satellite receiver Note The external equipment must b...

Page 16: ...g or deleting a programme position See page 17 18 Allows you to automatically retune the TV Useful if you move house and wish to retune your TV to the local stations See page 19 Allows individual programme positions to be tuned manually See page 20 MENU 1 2 3 4 5 6 7 8 9 0 IDTV N MODE OK C EXIT OK Main menu Picture menu Setup menu Sound menu Access Q Link AV2 out Off timer Tuning Menu Owner ID Shi...

Page 17: ...ed or added Press the Green button to add a programme channel to the programme position or the Red button to delete one Press the same button again to confirm your decision Adding deleting a programme channel Moving a programme channel Move the cursor to the programme to be moved Press the Yellow button Choose the new position for the programme channel Press the Yellow button again to confirm your...

Page 18: ...programme position is locked Direct Channel Access using the C and numeric buttons on the remote control is not available OK Programme edit Prog Chan Name Lock 1 2 3 4 5 CH44 CH51 CH41 CH47 CH37 ABC XYZ FTP 123 456 Off Off Off Off Off Copying programme information to a recording device You can copy programme information to a compatible recording device connected to AV2 AV3 See page 42 for connecti...

Page 19: ... will be sent to the device via Q Link See page 34 Once this operation is completed the TV will display the programme now stored on programme position 1 Notes If you proceed with the next step analogue tuning data will be erased all stations and their programme positions stored in your TV s memory will be wiped out so the new settings can be stored If you exit the procedure after this point and be...

Page 20: ...ons Press the F button until Tuning mode is reached Press the or button to access Tuning mode Press the TV AV button to move between Change programme and Search Press the or button to change programme position or start search When the desired station is found press the STR button to store The programme position will flash Repeat above procedure to tune additional programme positions Press the F bu...

Page 21: ...as entered above you will be taken automatically to the NAME line If not move to the NAME line Change character Select character position Repeat above until NAME HOUSE NUMBER and POSTCODE are entered Press the OK button to store the details Press again when you are asked Are you sure Owner ID If you wish to check the personal details already entered into the TV except your PIN number press the F b...

Page 22: ...une itself to your new local stations Note Owner ID information will not be affected by this function This can be done either through the Shipping condition menu or through the Auto setup menu The Shipping condition menu will reset all data except Owner ID information clearing all DVB and Analogue tuning information and resetting all control levels back to factory settings You may need to adjust y...

Page 23: ... and display them as a list in the TV Guide or Information banner See page 26 You may wish to lock a DVB programme channel to prevent access to it See page 27 Provides access to many other DVB Tuning features See page 28 Provides access to various specialized DVB options See page 29 Multi audio which will only appear when a DVB programme is selected allows you to select an alternative sound track ...

Page 24: ...s field If you wish to record subtitles if available select Auto Press the OK button to store Press the EXIT button to leave the DVB Timer Programming screen Two minutes before the recording is due to start a reminder will appear on screen Notes Six seconds before the recording is due to start the DVB system will tune to the correct station If you were already watching another DVB station you will...

Page 25: ...be output to the external recording device Timer programming menu DVB mode Daily and Weekly Timer Programmes Encrypted Programmes Daily SU SA The recording device will record at the same time every day Daily MO SA The recording device will record at the same time each day from Monday to Saturday Daily MO FR The recording device will record at the same time each day from Monday to Friday Weekly SA ...

Page 26: ... Press the Blue button to add all the channels to the profile list Press the OK button to store your Profile list Edit the Profile list When the profile list is highlighted Press the Red button to edit the profile name Press the Green button to move the channel Press the Yellow button to delete the channel Press the Blue button to delete the all channels Press the MENU button to return to the DVB ...

Page 27: ...o lock Press again to unlock Press the Yellow button to lock all channels Press the Blue button to unlock all channels The PIN number is required when you wish to watch a locked channel If the unit is turned off it will be necessary to input the PIN number again to access any locked channels Change the PIN number In Child Lock menu Move to Change PIN Access Change PIN Create a 4 digit new password...

Page 28: ...provide the best picture When viewing analogue pictures interference such as signal reflection from nearby buildings or mountains causes ghosting but still provides a viewable picture For the DVB system interference such as this can disrupt the flow of data causing the picture to appear to be made up of large blocks or to freeze intermittently If the picture disappears completely this could mean t...

Page 29: ... Setup DVB mode Common Interface Module Preferred Subtitles System Update Display Timeout The Common Interface Module menu provides access to functions contained on a Common Interface Module inserted into the CI slot located at the rear of the TV See page 30 This option allows you to select the language in which subtitles should appear if available when the STTL button is pressed This menu allows ...

Page 30: ...r with the viewing card When using this design of card first insert the card reader firmly into the CI slot on the TV Secondly insert the viewing card into the reader If no module is inserted the message No Module Inserted will be displayed If you have inserted a module check that it is fully inserted The features that now appear on screen are dependent on the contents of the selected Common Inter...

Page 31: ... exit without download Please do not switch off the TV or press any buttons while this download is in progress The TV will reset after the software download is complete Set to On to search for new software and update automatically in Standby mode This does not work when the unit off If there is a new version software being broadcast the TV will download this automatically Auto Update Search in Sta...

Page 32: ...IY SOS Coronation Street Sex And The City 15 To1 The Bill Hollday Program Pepsi Char Pop Idol 20 00 21 00 Time 19 30 20 00 Coronation Steet We open in the Battersdy s Prog type Category All Services 20 30 21 00 21 30 All Types Page up Page down Category All Services Exit Info Change display mode Select Programme Select channel Timer Programming Category Prog type 24 Hr DVB TV Guide Portrait Wed 12...

Page 33: ... down cursor button to step through the banner information for all channels Press the OK button to view a channel Now and Next can also be used in this mode While the banner appears Press the button to display an extended banner showing any information available on the current selected programme Press the button while in extended banner mode to return to normal banner view To clear the banner from...

Page 34: ...hing to another DVB programme will spoil your intended recording Stop the recording manually Additionally when using a Q Link device the following main features are possible The following features are only available from the device connected to the Scart terminal selected using Q Link See page 15 TV Recording device Auto Power On If you insert pre recorded media into the recording device and press...

Page 35: ...ok will contain adjustment details The widescreen aspect ratios of different films and programmes can vary If these are wider than a standard 16 9 aspect picture then a black band may be visible at the top and bottom of the screen WIDE will appear in the top left corner of the screen and picture aspect changes accordingly in any aspect modes if a widescreen identification signal WSS is detected or...

Page 36: ...ith no aspect distortions Zoom1 Zoom2 Zoom2 will display 16 9 anamorphic letterbox pictures as a full screen display with no aspect distortions Zoom3 will display 21 9 letterbox pictures as a full screen display with no aspect distortions 16 9 will display the picture at its maximum size but with sligth stretching Zoom3 16 9 16 9 14 9 14 9 4 3 4 3 Zoom1 Zoom1 Zoom2 Zoom2 Zoom3 Zoom3 Press the HOLD...

Page 37: ...hether controls operate the DVD equipment or VCR Play Press to playback the tape or DVD Stop Press to stop the tape or DVD Skip Fast Forward Cue VCR Press to fast forward the tape In Play mode press to view the picture rapidly forward Cue When fast forwarding the tape the picture noise may occur DVD Press to skip to the next track or title Press and hold to search forward Skip Rewind Review VCR Pr...

Page 38: ...de Press the TEXT button repeatedly to switch the mode Each time you press the button Page Selection Pages can be selected in two ways a Press the Up Down cursor buttons to increase or decrease the page number by one b By entering the page number using 0 9 on the remote control Full Top Bottom Press the MENU button to display special functions followed by the Green button Press the Green button ag...

Page 39: ... the page so that you may select it as more sub pages are picked up the display at the top of the page changes so that you are always offered the most recently transmitted selection of sub pages In Teletext operation use the following procedure to access sub pages If the sub page you want to look at is not yet available press the MENU button to display special functions followed by the Yellow butt...

Page 40: ...ou switch to a DVB teletext service the images you see can contain graphics and text laid out and controlled in a manner decided by the broadcaster In all cases it is possible to navigate the pages using buttons on the remote control but because the commands available must apply to all manufacturers of DVB equipment some on screen commands may not correspond exactly to the remote control buttons F...

Page 41: ...art terminal Yellow button AV3 Video S Video Scart terminal Blue button Component terminals The on screen selector keys will disappear after a few seconds If you want to select an input when the keys are not shown press any one of the coloured buttons and the keys will reappear Notes You can also select an AV source using the TV AV button on the front panel of the TV Press the TV AV button repeate...

Page 42: ...inal wiring and applicable component signals information see page 45 AV1 VCR SET TOP BOX DVD PLAYER DVD RECORDER CAMCORDER GAME CONSOLE COMPUTER RGB DVD PLAYER How to connect the Audio Output terminals How to connect the AV1 2 3 Scart terminals How to connect the Component Input terminals This terminal accepts progressive or non progressive signals format as well as high definition 750 720 50p 750...

Page 43: ...etely normal See label on the base of this equipment for ratings and other information Sleep Feature If the set is not switched off when the TV station stops transmitting it will automatically go to standby mode after 30 minutes This function will not operate when this TV is in AV mode Symptoms Some parts of the screen do not light up After images appear CAUTION Check The plasma TV panel is manufa...

Page 44: ...erference Picture freezes intermittently I have a good aerial system but still cannot receive DVB stations Checks Check that DVB transmissions are available from the transmitter you are currently using If not try directing the aerial at another local transmitter Check analogue transmissions If picture quality is poor you will need to improve or change your aerial system to receive DVB channels Con...

Page 45: ...endent on AV2 S VHS VIDEO switching 21 19 17 15 13 11 9 7 5 3 1 20 18 16 14 12 10 8 6 4 2 Socket Earth CVBS out video CVBS earth Audio out L Audio out R CVBS in video Earth Status RGB Earth Q Link data Status CVBS Audio in L Audio earth Audio in R AV3 Scart terminal RGB VIDEO S VIDEO Q Link AV3 Pins 15 and 20 are dependent on AV3 S VHS VIDEO switching Red in S C in Red earth Green in Green earth B...

Page 46: ...80 dots 12 cm 6 cm 2 pcs 6 Ω 16 W 8 W 8 W 10 THD PAL I UHF E21 68 PAL 525 60 Playback of NTSC tape from some PAL Video recorders VCR or NTSC disc playback from DVD player and recorder DVB Digital terrestrial services via UHF aerial input M NTSC Playback from M NTSC Video recorders VCR NTSC AV input only Playback from NTSC Video recorders VCR UHF Temperature 0 C 40 C Humidity 20 80 RH non condensin...

Page 47: ...ng public holidays Or go on line through our Internet Accessory ordering application at www panasonic co uk Most major credit and debit cards accepted All enquiries transactions and distribution facilities are provided directly by Panasonic UK Ltd It couldn t be simpler Also available through our Internet is direct shopping for a wide range of finished products take a browse on our website for fur...

Page 48: ...s that used electrical and electronic products should not be mixed with general household waste For proper treatment recovery and recycling please take these products to designated collection points where they will be accepted on a free of charge basis Alternatively in some countries you may be able to return your products to your local retailer upon the purchase of an equivalent new product Dispo...

Reviews: