


Operating Instructions
DVD Stereo System
Model No.
SC-PM91D
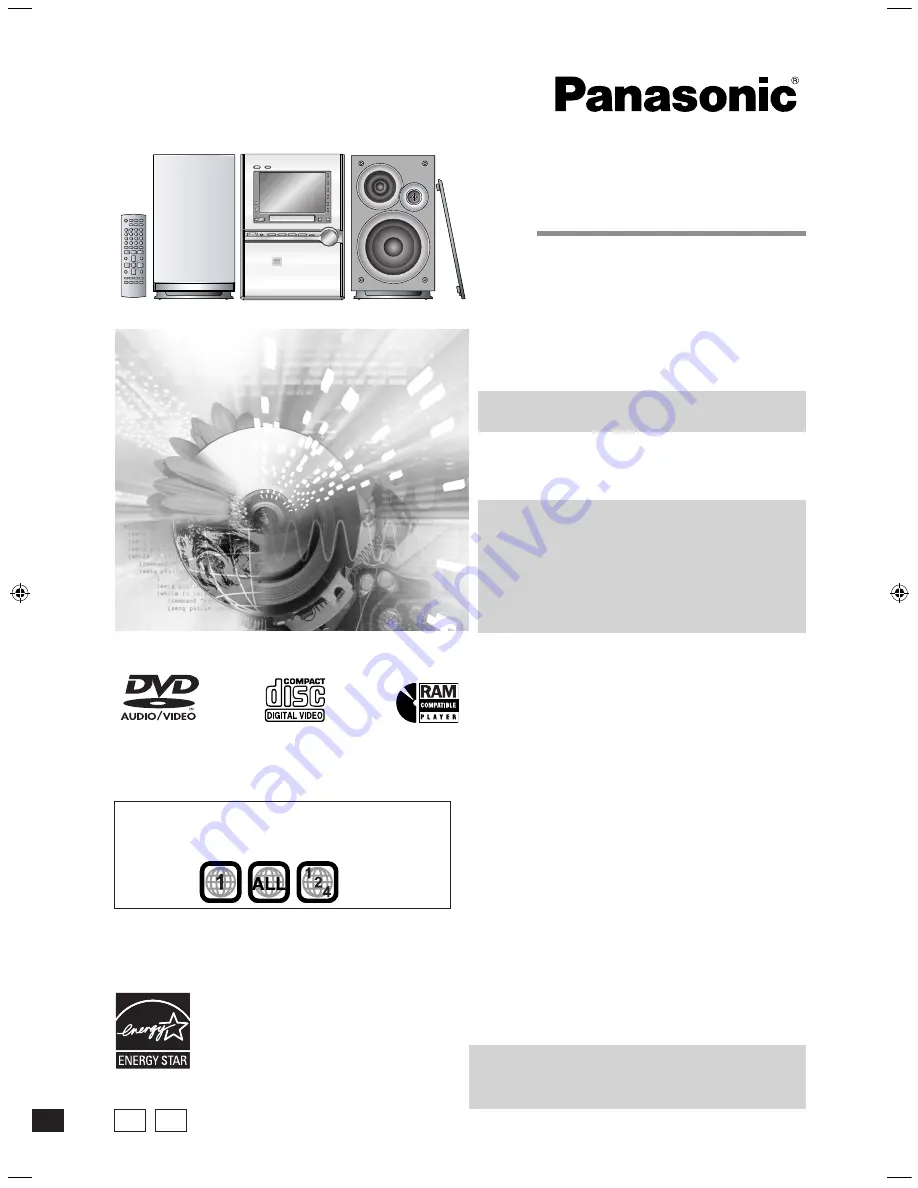
Region number
The player plays DVD-Video marked with labels containing the
region number “
1
” or
“ALL”
.
Example:
As an ENERGY STAR
®
Partner
1
,
Panasonic has determined that this
product meets the ENERGY STAR
®
guidelines for energy efficiency.
1
For Canada only:
The word “Participant” is used in
place of the word “Partner”.
Operations in these instructions are described mainly
for the remote control, but you can do the operations
on the main unit if the controls are the same.
P PC
RQT7932-3P
IMPORTANT SAFETY INSTRUCTIONS .................................. 2
Accessories ............................................................................. 3
Disc information ...................................................................... 4
Tray/disc handling procedure ................................................ 5
Control guide: main unit ....................................................... 10
Control guide: remote control .............................................. 11
Discs — Basic play ................................................................ 12
Discs — Convenient functions ............................................. 14
Discs — Using navigation menus ........................................ 16
Discs — Using On-screen menus ........................................ 18
Discs — Changing the player’s settings ............................. 21
The radio ................................................................................ 23
Cassette tapes — Play and Recording ................................ 24
Sound field and sound quality ............................................. 26
Convenient functions
Auto-off function/Dimming the display/Muting the volume/
The sleep timer ..................................................................... 27
The play/record timer ............................................................ 28
Using other equipment
Home Theater — Enjoying more powerful sound ................. 29
Using an external unit ........................................................... 29
Operating a television ........................................................... 29
Enjoying more powerful bass/Changing the remote control
code/Other antenna connections .......................................... 30
Glossary ................................................................................. 31
Troubleshooting guide .......................................................... 32
Product Service ..................................................................... 34
Listening caution ................................................................... 34
Maintenance ........................................................................... 34
When moving the unit ........................................................... 34
Limited Warranty (ONLY FOR U.S.A.) .................................. 35
Specifications ......................................................... Back cover
Table of contents
Dear customer
Thank you for purchasing this product. For optimum performance
and safety, please read these instructions carefully before
connecting, operating or adjusting this product. Please keep this
manual for future reference.
Simple setup
STEP 1
Positioning and connecting the speakers ......... 6
STEP 2
Television .............................................................. 7
STEP 3
Connecting the antennas and AC power supply
cord ........................................................................ 8
STEP 4
The remote control ............................................... 8
STEP 5
QUICK SETUP ....................................................... 9
STEP 6
Setting the time ..................................................... 9
DEMO function ...................................................................... 9
SCPM91D-Pbook.indb 1
3/17/2005 11:55:07 AM


