background image

ORDER NO. MKS9512M303

B3

Video Cassette Recorder

PV-4601 A

PV-4601 B

PV-4601-K

PV-4651

PV-4651-K

SPECIFICATIONS

1

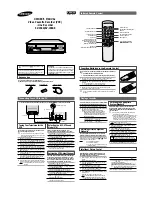
Содержание PV-4601 A

Страница 1: ...ORDER NO MKS9512M303 B3 Video Cassette Recorder PV 4601 A PV 4601 B PV 4601 K PV 4651 PV 4651 K SPECIFICATIONS 1 ...

Страница 2: ...ack Phono type 8 dBV 600Ω Ω Ω Ω unbalanced AUDIO OUT Jack Phono type 8 dBV 1 kΩ Ω Ω Ω unbalanced o o o o Frequency Response Normal Mono SP 100 Hz 8 kHz LP 100 Hz 6 kHz SLP 100 Hz 5 kHz Hi Fi Stereo SP LP SLP 20 Hz 20 kHz o o o o o o o Signal to Noise Ratio Normal Mono SP more than 42 dB LP SLP more than 40 dB Hi Fi Stereo SP LP SLP more than 60 dB o o o o o Wow and Flutter Normal Mono SP Less than...

Страница 3: ...dth 1 2 12 7 mm high density tape o o Operating Condition 41 A1F 5 A1C 104 A1F 40 A1C Temperature 10 75 Humidity o o Dimension 14 3 16 360 mm W X 3 1 2 89 mm H X 11 1 4 285 mm D o o Weight Approx 7 9 lbs 3 6 kg Approx 8 2 lbs 3 7 kg o o 1 Use The Marks A B shown in the chart bellow to distinguish the different moddels included in this Service Manual MODEL MARK PV 4601 A A PV 4601 B B PV 4601 K C P...

Страница 4: ...nal design without permission of manufacturer 1 SAFETY PRECAUTIONS 1 1 GENERAL GUIDELINES 1 When servicing observe the original lead dress If a short circuit is found replace all parts which have been overheated or damaged by the short circuit 2 After servicing see to it that all the protective devices such as insulation barriers insulation papers shields are properly installed 3 After servicing m...

Страница 5: ...ch exposed metallic part on the set and a good earth ground such as a water pipe as shown in Figure 1 3 Use an AC voltmeter with 1000 ohms volt or more sensitivity to measure the potential across the resistor 4 Check each exposed metallic part and measure the voltage at each point 5 Reverse the AC plug in the AC outlet and repeat each of the above measurements 6 The potential at any point should n...

Страница 6: ...generate electrical charge sufficient to damage ES devices 5 Do not use freon propelled chemicals These can generate electrical charges sufficient to damage ES devices 6 Do not remove a replacement ES device from its protective package until immediately before you are ready to install it Most replacement ES devices are packaged with leads electrically shorted together by conductive foam aluminum f...

Страница 7: ...a Simplified Self Diagnostic System facilitates finding the cause of the fault A 4 digit fault code will be displayed in F I P The Simplified Fault finding data is memorized for approximately 12 hours This data is cleared after it is displayed and then the Power button is pressed back on 1 With power turned off press FF button on VCR for over 3 seconds as shown in Fig 1 1 Fig 1 1 2 Fault code 4 di...

Страница 8: ... detected at beginning of tape 2 Supply Photo Sensor detected at end of tape 3 Light detected at both sensors 4 Present Mechanism Position Code Mechanism Position is indicated Refer to Fig 1 4 1 2 3 4 5 6 7 8 9 A Lock Code VCR is not in shut off condition 0 Reel lock 1 Cylinder lock 2 Exceeds loading unloading time Mechanism Lock 3 Exceeds Cassette loading unloading time Cassette Lock 8 ...

Страница 9: ...ction 1 4 Tape Unloading direction 2 4 Fig 1 4 3 While pressing down FF button on VCR with power turned off press any operation button on either VCR or remote to detect that a key has been pressed 1st digit changes to 0 only when key is detected 9 ...

Страница 10: ...ss y 2 Remove Screw S 4 and Screw S 5 in Fig D4 Page 2 2 3 Remove 2 Screws S 6 2 Screws S 7 2 Screws S 8 Screw S 9 Screw S 10 Screw S 11 2 Screws S 12 and the Chassis Plate in Fig D7 Page 2 3 4 Remove the VCR Chassis Unit Refer to Note Item 5 and How to remove the VCR Chassis Unit from the frame Page 1 11 5 Remove 2 Screws S 13 in Fig D8 Page 2 3 6 Open the Mechanism Chassis and Cassette Up Ass y ...

Страница 11: ...upply AssÕy is tightened the Beats in the picture will be eliminated So place a short ground jumper wire between the Power Supply AssÕy and the Main C B A while operating in the Service Position 1 2 When servicing in Service Position 1 do not use a T160 tape It may cause a Tape Jam 3 If misloading of the cassette tape is encountered in this position press the 11 ...

Страница 12: ...to the slot of the Main C B A as shown in Fig 2 2 Fig 2 2 5 When lifting up the VCR Chassis Unit do not pull up on the Top Plate of the Cassette Up Ass y 6 Model D E When raising or opening the mechanism place something insulated between the Hi Fi Audio Video Head Amp Ass y and Audio Jack Service Position 2 Service position 2 is used to check the Mechanism and Electronic Circuits 12 ...

Страница 13: ...inet Parts Section remove the Top Cover and Front Panel Ass y 2 Remove Screw S 5 in Fig D4 Page 2 2 3 Remove 2 Screws S 6 2 Screws S 7 2 Screws S 8 Screw S 9 Screw S 10 Screw S 11 and the Chassis Plate in Fig D7 Page 2 3 4 Remove 2 Screws S 13 in Fig D8 Page 2 3 5 Raise the Mechanism Chassis and secure it using the Chassis Plate which was used to secure the Mechanism Chassis on the frame as shown ...

Страница 14: ...Fig 2 3 14 ...

Страница 15: ... 2 4 Service Mode In order to inhibit detection of the Supply and Takeup Photo Transistors Reel Sensor and Cylinder Lock press VCR TV button and CH down button together on VCR for over 5 seconds in power off condition The power comes on and the unit goes into service mode Mechanism movement can be confirmed without a cassette in this mode To release from this mode press POWER button off or disconn...

Страница 16: ...sor is OK if there is Scan pulse output TP6301 A check Terminal for judgment of the IC6301 microprocessor The microprocessor is OK if there is pulse output 3 2 6 Easy check of Power Supply Ass y Hi Fi Audio C B A UHF VHF Tuner TV Demodulator Unit Power Supply Ass y Hi Fi Audio C B A UHF VHF Tuner TV Demodulator Unit can be checked easily through holes in the bottom of the frame after removing the ...

Страница 17: ...ature prohibits all operations except for timer recording and tape eject This is useful to prevent misoperation and protect your VCR To set the VCR Lock Feature Press STOP EJECT button on VCR for 7 seconds during Stop or Power OFF mode 17 ...

Страница 18: ...rting a Tape will initiate the Auto Tracking function from the Neutral position 3 2 9 Easy Signal Check Points Points with marks V1 AV1 CT1 etc on Main C B A can be used for checking Video and Audio Signal V1 to V11 to check Video Signal AV1 to AV4 to check Audio Signal CT1 to CT7 to check Control Signal Also power lines are marked with voltage indications 5V 12V 14V 37V 30V on Main C B A for easy...

Страница 19: ... Auto tracking function connect to 5V TP6009 TP6009 5V TP6010 AIP CTL signal TP6011 IC6001 judgment TP6204 Cylinder PG FG TP6205 Head SW TP6207 PB control pulse TP6301 IC6301 judgment 3 2 11 Method for Manual Loading Unloading of VCR Turn the Loading Pulley of the Motor Block Ass y shown in Fig 6 counterclockwise for loading or clockwise for unloading as viewed from the Front Side Note DO NOT appl...

Страница 20: ...scribed in the Disassembly of Cabinet Parts Section remove the Top Cover and Front Panel Ass y 2 Cut the wire to open Jumper J6004 on the System Control Section of the Main C B A from the component side Refer to Fig 7 1 Note It is unnecessary to cut both wires J6004 and J6005 20 ...

Страница 21: ...g Arms are returned to the fully unloaded position disconnect the DC Power Supply Unit to stop the unloading operation Note Be careful not to let the DC power supply Unit GND contact chassis GND This may damage the Loading Motor Drive IC IC 6003 Be sure to connect DC to side a of J6004 If DC is applied to side b of J6004 the Loading Motor Drive IC IC6003 may be damaged 21 ...

Страница 22: ...terclockwise as shown in Fig 7 3 Fig 7 3 6 Then eject the Tape using the DC Power Supply again 7 After completion of the procedure resolder the jumper wire J6004 that was opened B Manual Method 1 In the order described in the Disassembly of Cabinet Parts Section remove the 22 ...

Страница 23: ...rews S 8 2 Screws S 14 and 2 Screws S 15 as in Fig D7 and Fig D9 Page 2 3 8 Remove the cassette from the Cassette Up Ass y 9 Adjust the Mechanical Position into the Eject position by rotating the Loading Pulley 10 Remove the Pressure Roller Bracket from shaft and reinstall the Pressure Roller Arm and spring to the bracket as in Fig J3 11 Reinstall the Pressure Roller Arm Unit and Cut Washer in ori...

Страница 24: ...crew S 4 and Screw S 5 in Fig D4 Page 2 2 3 Remove 2 Screws S 6 2 Screws S 7 2 Screws S 8 Screw S 9 Screw S 10 Screw S 11 2 Screws S 12 and the Chassis Plate in Fig D7 Page 2 3 4 While gently lifting the Side Plate L C of Cassette Up Ass y bent locking tab A and B then outward until clear 5 Lift the Side Plate R D until even with the Side Plate L Then lift entire VCR Chassis Unit out from the fram...

Страница 25: ...dling of the Main C B A when Servicing DO NOT pull the Main C B A in the direction indicated by the arrow DO NOT pull upward while holding the UHF VHF Tuner TV Demodulator Unit because you may crack the Main C B A 25 ...

Страница 26: ...e 2 2 3 Remove 2 Screws S 6 2 Screws S 7 2 Screws S 8 Screw S 9 Screw S 10 Screw S 11 and the Chassis Plate in Fig D7 Page 2 3 4 Remove 2 Screws S 13 in Fig D8 Page 2 3 a Removal Remove the Mechanism Chassis as follows 1 Lift up the Side Plate R while holding the Main C B A to disconnect the right rear mechanism connector 2 Lift up the Side Plate L while holding the Main C B A to disconnect the le...

Страница 27: ...Fig 11 1 1 27 ...

Страница 28: ...Parts Section remove the Top Cover and Front Panel Ass y 2 Remove 2 Screws S 7 and 2 Screws S 8 in Fig D7 Page 2 3 3 Remove 2 Screws S 14 2 Screws S 15 in Fig D9 Page 2 3 3 3 6 When installing the Cassette Up Ass y When installing the Cassette Up Ass y onto the Mechanism Chassis make sure that the Cassette Up Ass y and the mechanism are in the Eject position See HOW TO INSTALL CASSETTE UP ASS Y ON...

Страница 29: ... Type P2505 P1541Unit A C Head A P3504 FE Head Unit FE Head Unit B To identify Pin 1 of the Flat Cable a different Color Identification Line is used To locate Pin 1 on the Trap Connector find the pin 1 indicator on the C B A Fig 12 1 29 ...

Страница 30: ...rely to avoid damage of the individual wires See Fig 12 3 Installation Adjust the position of the Flat Cable so that the Identification Line on the Flat Cable aligns with Pin 1 of the Trap Connector and align the individual wire with its individual Trap Connector Hole Then insert the Flat Cable wire into the Trap Connector 30 ...

Страница 31: ...f the individual wires See Fig 12 4 Installation Adjust the position of the Flat Cable so that the Identification Line on the Flat Cable aligns with Pin 1 of the Trap Connector and align the individual wire with its individual Trap Connector Hole Then insert the Flat Cable wire into the Trap Connector and close the Trap Connector 31 ...

Страница 32: ...the connection to ensure that individual wires are not bent or touching another wire 3 3 8 Service of Capstan Motor Drive C B A When servicing avoid touching IC2502 on the Capstan Motor Drive C B A because it is HOT during normal operation 32 ...

Страница 33: ...t and Right 4 Clear the First Locking Tab Left and Right by pressing the a portion of the Set Lever L and R 5 Turn the Loading Pulley counterclockwise Front View until the top of Set Lever R is locked by the Second Locking Tab Right 6 Clear the Second Locking Tab Right by pressing the a portion of the Set Lever R 7 Turn the Loading Pulley counterclockwise Front View until the top of Set Lever L an...

Страница 34: ...thod for loading with no tape Method 2 Refer to Fig 14 1 and 14 2 1 In the order described in the Disassembly of Cabinet Parts Section remove the Top Cover 2 Place a jumper between TP6001 on the System Control Section of the Main C B A and GND 34 ...

Страница 35: ... Black Screws on the Chassis Black Screws are used on the Mechanism Chassis to identify screws that require adjustment 3 3 11 Variable Voltage Isolation Transformer Because a Hot Chassis Ground is present in the Switched Mode Power Supply Circuit an Isolation Transformer must be used Also in order to have the ability to increase the input voltage slowly when troubleshooting this type of Power Supp...

Страница 36: ...dering time Do not apply heat for more than 4 seconds D Preheating Leadless capacitor must be preheated before installation 266 F to 302 F 130 C To 150 C for about two minutes Note 1 Leadless components must not be reused after removal 2 Excessive mechanical stress and rubbing of the component electrode must be avoided 2 Removing the leadless component Grasp the leadless component body with tweeze...

Страница 37: ...component A Presolder the contact points on the circuit board Fig 15 2 B Press the part downward with tweezers and solder both electrodes as shown below Fig 15 3 Note Do not glue the replacement leadless component to the circuit board 37 ...

Страница 38: ...t below to distinguish the different models included in this Service Manual MODEL MARK PV 4601 A A PV 4601 B B PV 4601 K C PV 4651 D PV 4651 K E NOT USED Z Note Refer to Item 6 of Shematic and C B A Diagram Notes Page 3 1 for mark Z How to distinguish Model PV 4601 A from PV 4601 B Please note the Model No Label located on the rear side of the VCR Model No PV 4601 A Japan products Refer to mark A ...

Страница 39: ...rt indicates the disassembly steps of the cabinet parts and the P C Boards in order to gain access to the item s to be serviced When reassembling perform the step s in the reverse order Cautions Disconnect AC Plug before disassembly Note When removing the Front Panel Ass y work with care so as not to break the locking tabs on the panel 39 ...

Страница 40: ...Fig D1 40 ...

Страница 41: ...A D8 2 S 13 P3501 P2501 8 Cassette Up Ass y D9 2 S 14 2 S 15 4 9 Mechanism D9 5 A B C D How to read chart shown above A Order of steps in Procedure When reassembling perform the step s in the reverse order These numbers are also used as the identification location No of parts in Figures B Part to be removed or installed C Fig No showing Procedure or Part Location D Identification of part to be rem...

Страница 42: ...Fig D2 42 ...

Страница 43: ...Fig D3 43 ...

Страница 44: ...Fig D4 44 ...

Страница 45: ...Fig D5 45 ...

Страница 46: ...Fig D7 46 ...

Страница 47: ...Fig D8 47 ...

Страница 48: ...ply Ass y 2 To remove the Front Panel Ass y A Release Locking Tabs L 4 in sequence as follows 1 Left Side 2 2 Top Left 3 2 Top Right 4 Right Side 5 Use screwdriver for 2 Bottom B Work carefully so as not to break the Tabs To reinstall the Front Panel Ass y A Make sure as well as all locking tabs are aligned properly B Press the Front Panel straight in Note If the Front Panel Ass y is pressed in at...

Страница 49: ...ion Please refer to HOW TO INSTALL CASSETTE UP ASS Y ONTO MECHANISM CHASSIS Page 2 23 5 When reinstalling the Mechanism Chassis to the Main C B A refer to Removal Installation of Mechanism Chassis to the Main C B A Page 1 11 and 1 12 4 1 2 PROCEDURE FOR CLEANING UPPER CYLINDER UNIT 1 Position the Video Head to permit access for cleaning Hold the Upper Cylinder to keep it from turning while cleanin...

Страница 50: ...l if fingerprints are present after cleaning the Video Heads 4 1 3 ADJUSTMENT PROCEDURES 4 1 3 1 REPLACEMENT OF UPPER CYLINDER UNIT 1 REMOVAL OF UPPER CYLINDER UNIT Work with extreme care when removing or replacing the Upper Cylinder Unit Do not touch Video Heads during servicing 1 Remove 2 Screws with Washers A and gently lift the Upper Cylinder Unit from the shaft refer to Fig M2 1 or Fig M2 2 5...

Страница 51: ...Fig M2 1 Fig M2 2 51 ...

Страница 52: ...ith a soft cloth dampened with Ethanol in Fig M3 Fig 3 3 REPLACEMENT OF UPPER CYLINDER UNIT 1 Install the Upper Cylinder Unit carefully so that the hole in the Upper Cylinder Unit is properly matched to align the hole on the Upper Cylinder to the center of the indentation on the D D Cylinder For details on the installation position refer to Fig M4 1 or Fig M4 2 52 ...

Страница 53: ...Fig M4 1 53 ...

Страница 54: ... M2 2 3 Clean the Upper Cylinder with a deerskin swab Head Cleaning Stick saturated with Ethanol Note Upon completion of replacement perform TAPE INTERCHANGEABILITY ADJUSTMENT FINAL ADJUSTMENT Page 2 9 especially HORIZONTAL POSITION ADJUSTMENT OF A C HEAD Page 2 11 54 ...

Страница 55: ...ate Unit 5 Remove 3 Screws B 6 Place the Mechanism Chassis and Cassette Up Ass y in a normal position 7 Remove 2 Screws C and then lift the Cylinder Unit and Head Amp Ass y slowly from top side Note Since there is very little clearance between the Cylinder Unit and the chassis remove the Cylinder Unit gently and carefully 8 Unsolder P3502 and P3503 on the Head Amp Ass y and then remove the Head Am...

Страница 56: ...ed Note 1 Reinstall the Cylinder Unit so that the 2 projections on the Cylinder Base of chassis meet the 2 holes on the lower surface of the Cylinder Then while twisting the D D Cylinder as shown in Fig M5 2 fix it with 3 screws Correct Cylinder position is necessary for tape transportation alignment 56 ...

Страница 57: ...ALLATION POSITION 4 1 3 3 CONFIRMATION OF EARTH PLATE UNIT INSTALLATION POSITION Purpose To optimize the position of the Earth Plate Unit Symptom of Misadjustment May cause Cylinder rotating buzz Remove the Mechanism Unit Place it upside down Check to see if the Earth Plate Unit is properly set in a position just less than 1mm but not more than 1mm as measured from the center of the plate to the c...

Страница 58: ...ipment Required 2mm Hex Wrench Purchase Locally 1 Remove the Cassette Up Ass y 2 Set the Service Mode 3 Turn ON the Power Switch and press the Play Button to complete the loading operation sequence 4 As soon as loading is completed insert the Hex Wrench 2mm into the Tension Band Fastener and adjust it only counterclockwise as indicated by the arrow so that the outside edge of the Tension Post line...

Страница 59: ... tension Symptom of Misadjustment 1 If the tape tension is less than the specified value the tape cannot come into proper contact with the Video Heads resulting in poor picture playback 2 If the tape tension is too high the tape will soon be damaged A Measurement Procedure Equipment Required Back Tension Meter Made in U S A Purchase Locally 59 ...

Страница 60: ...he reading 4 If the reading is out of specification do the adjustment procedure Fig M8 Note 1 Be sure that the three probes of the meter are all in solid contact with the tape but out of contact with any other parts while measuring 2 It is recommended that measurements be taken three times because the tension meter is very sensitive to external vibrations B Adjustment Procedure 1 Remove the Casset...

Страница 61: ...ease tension 3 Reinstall the Cassette Up Ass y and verify tension with the meter once again 4 Reinstall the Top Cover Note If the specified tension is not obtained even if the Tension Spring is re positioned replace the Tension Spring and the Tension Band clean the Reel Table or make sure there is no dust between the Tension Band and the Reel Table Fig M9 4 1 3 6 HEIGHT ADJUSTMENT OF REEL TABLES P...

Страница 62: ...ight Fixture VFKS0009 Specification 0 0 1mm 1 Remove the Cassette Up Ass y 2 Place the Post Adjustment Plate over the reels and put the fixture on it Set the fixture to zero 0 and ensure that the foot of the fixture touches the cut out portion of the plate Fig M10 1 3 Then measure the top portion of the Reel Table and compare the difference against the result of the measurement taken in the above ...

Страница 63: ... ADJUSTMENT Equipment Required Lock Screw Wrench VFKS0032 Post Adjustment Plate VFKS0010 Reel Table Height Fixture VFKS0009 Post Adjustment Screwdriver VFK0329 1 HEIGHT ADJUSTMENT OF P2 AND P3 Purpose To properly align the position of the tape with the Cylinder Lead so that the tape runs with stability Symptom of Misadjustment 1 Since the Envelope Waveform Signal cannot be tracked properly the Pla...

Страница 64: ...Fig M11 1 2 First lower all posts to match the height condition as shown in Fig M11 2 The upper edge of the lower tape guide on each post should be below the bottom of the foot Fig M11 2 64 ...

Страница 65: ...1 3 b For adjustment of P2 and P3 use a Post Adjustment Screwdriver Fig M11 3 2 HEIGHT ADJUSTMENT OF P5 ARM UNIT Purpose To properly align the Phase and Speed Controls during the CUE REVIEW Modes and perform the CUE REVIEW operations without any small additional noise in the picture Symptom of Misadjustment 1 Noticeable noise appears in the picture 2 The tape will eventually be damaged Equipment R...

Страница 66: ...te Reinstall the Cassette Up Ass y and the cabinet parts Note Upon completion of the above procedure play back the tape and confirm that the tape runs properly without curling between the lower and upper limits of the P5 Post Also confirm that the tape is running smoothly If adjustment is required slightly turn the 5 5mm Nut until the curling smooths out 4 1 3 8 TAPE INTERCHANGEABILITY ADJUSTMENT ...

Страница 67: ...stment Screwdriver for P2 P3 2 CONFIRMATION OF A C HEAD HEIGHT The height of the A C Head replacement part assembly has already been adjusted at the factory Purpose To be sure the tape runs properly along the Control Head Symptom of Misadjustment If the control signal is not properly picked up Servo Operation cannot be achieved A Blue screen will be seen in Playback This confirmation is required w...

Страница 68: ... Turn clockwise to lower the head and counterclockwise to raise it When turning Screws A B and C they must each be turned the same amount Fig M13 3 CONFIRMATION OF TILT OF A C HEAD Purpose To confirm that the tape runs smoothly In particular confirm that the tape properly picks up the Audio Signal at the upper part of the head and the Control Signal at the lower part of the head 68 ...

Страница 69: ...is apparent at the lower edge of P4 Then turn Black Screw B counterclockwise until the curling smooths out Fig M14 4 AZIMUTH ADJUSTMENT OF A C HEAD Purpose To adjust the position and height of the A C Head so that it meets the tape tracks properly Symptom of Misadjustment If the position of the A C Head is not properly adjusted the Audio S N Ratio is poor 1 Connect the oscilloscope to the audio ou...

Страница 70: ...ortion of the alignment tape VFMS0001H6 and confirm that the RF envelope appears as in Fig M17 1 3 If adjustment is required loosen the Black Screw with 2 Washers D and tighten the Screw lightly Set the H Position ADJ Screwdriver into the Hole E shown in Fig M16 Then slowly turn the fixture either clockwise or counterclockwise so that the envelope is at maximum 4 Before finding the center of the m...

Страница 71: ... output poorly much noise will appear in the picture Then the tracking will lose precision and the playback picture will be distorted by any slight variation of the tracking control circuit Place a jumper between TP6003 and 5V TP6009 on the System Control Section of the Main C B A to defeat Auto Tracking 1 Eject the tape and insert it again to access the Neutral Tracking position Connect the oscil...

Страница 72: ...CONFIRMATION OF TAPE TRAVEL Page 2 9 Fig M17 1 3 When the scope display is as shown in Fig M17 2 adjust the height of P2 so that the waveform looks like the one shown in Fig M17 4 Fig M17 2 4 When the scope display is as shown in Fig M17 3 adjust the height of P3 so that the waveform looks like the one shown in Fig M17 4 72 ...

Страница 73: ...the Horizontal Position of the A C Head by pushing the Tracking Control Up or Down Buttons alternately using the Infrared Remote Control Unit to check the symmetry of the envelope If required perform HORIZONTAL POSITION ADJUSTMENT OF A C HEAD Page 2 11 4 1 3 9 ADJUSTMENT OF FG HEAD GAP Purpose To properly pick up the FG Signal Symptom of Misadjustment If the FG Signal is not properly picked up Ser...

Страница 74: ...3 Slightly loosen 2 Black Screws A and set the Screwdriver 1 or 2 Phillips Driver into the Hole B shown in Fig M18 Turn the screwdriver counterclockwise until the FG Head touches the rotor Then turn it slightly clockwise to the clearance as specified 4 Tighten 2 Black Screws A shown in Fig M18 5 Reinstall the Main C B A 74 ...

Страница 75: ...al particles Confirmation 1 Supply a Video Signal to the Video Input Jack on the rear side of the deck 2 Insert a cassette tape and place the unit in SLP recording mode 3 Connect the oscilloscope to Pin 15 of P2502 on the Capstan Motor Drive C B A Confirm that the signal level is greater than 10mVp p 4 1 3 10 REPLACEMENT OF CAPSTAN ROTOR OR STATOR UNIT 75 ...

Страница 76: ...Fig M18 2 In the order described in the Disassembly and Assembly Procedures of Mechanism section remove the Motor Block Ass y 3 Carefully pull out the Capstan Rotor Unit Be careful not to lose the 2 Oil Seals shown in Fig M19 76 ...

Страница 77: ...Fig M19 77 ...

Страница 78: ...e new Capstan Rotor Unit loosen the Thrust Adjust Screw completely 8 Install the new Capstan Rotor carefully inserting the Oil Seals as shown in Fig M19 Cautions Note 1 The replacement Capstan Rotor Unit is available only as a complete unit with a spring loaded Capstan Pulley 2 Hold the new Capstan Rotor Unit firmly when installing it so the rotor will not be pulled toward the stator too quickly d...

Страница 79: ...tan Rotor just starts turning 11 At the point where the Capstan Rotor starts turning tighten the Thrust Adjust Screw another 180 degrees clockwise 12 Upon completion of the above procedure confirm that the Oil Seals are positioned as shown in Fig M21 and make sure that the oil seal does not contact the Pressure Roller or P5 Arm Unit Then wipe off the Capstan Shaft to remove oil grease and dust Not...

Страница 80: ...oller Arm Unit T J1 J3 C 1 1 8 10 2 Second Cam Gear T J1 C 2 1 8 3 1 Pinch Lift Cam T J1 J4 L 1 1 4 P5 Arm Unit T J1 J5 N 1 W 1 P 1 1 11 5 1 2 3 4 P5 Sector Gear T J1 J5 1 6 A C Head Unit T J1 J6 S 1 S 2 2 W 2 W 3 W 4 P1541 2 7 Brake Ass y T J1 J7 2 P 2 P 3 2 L 2 2 L 3 3 12 8 Tension Arm Unit T J1 J8 P 4 L 4 4 9 Takeup Reel Table Unit T J1 L 5 5 10 Supply Reel Table Unit T J1 L 6 5 11 Motor Block ...

Страница 81: ... S 7 2 S 8 Unsolder Head Amp Ass y 7 24 11 Capstan Rotor Unit B J2 J17 6 25 11 24 Capstan Stator Unit B J2 J17 3 S 9 2 S 10 Unsolder 6 26 Loading Post Base T Unit T J1 2 S 11 Post Stopper Slide to rear to remove 27 Loading Post Base S Unit T J1 2 S 12 Post Stopper Slide to rear to remove Note Refer to Exploded Views for Lubrication Information How to read chart shown above A Order of steps in Proc...

Страница 82: ...e 2 16 4 See POSITION ADJUSTMENT OF TENSION POST PRELIMINARY Page 2 6 5 See HEIGHT ADJUSTMENT OF REEL TABLES Page 2 7 6 See REPLACEMENT OF CAPSTAN ROTOR OR STATOR UNIT Page 2 12 7 See REPLACEMENT OF CYLINDER UNIT Page 2 5 8 This cut washer is not reusable If removed install a new one A 1 Remove Brake Ass y Motor Block Ass y and Clutch Unit B While holding down the Lift Gear slide the Secondary Rod...

Страница 83: ...as to be out of the path of the Cassette Up Ass y screw Capstan Holder Unit Guide Rib Guide C 1 Spring Pressure Roller Arm Pressure Roller Bracket 1 Fig J3 Fig J4 83 ...

Страница 84: ...Fig J5 84 ...

Страница 85: ...Fig J6 85 ...

Страница 86: ...Main Brake Spring Soft Brake Springs Hook Positions Bottom View Setting Condition Pins of Brake Ass y P 2 P 3 L 3 L 2 P 2 L 3 7 Note 12 Spring Fig J7 Fig J8 86 ...

Страница 87: ...Fig J9 87 ...

Страница 88: ...Fig J10 88 ...

Страница 89: ...Fig J11 89 ...

Страница 90: ...Fig J12 90 ...

Страница 91: ...Fig J13 91 ...

Страница 92: ...Fig J15 92 ...

Страница 93: ...93 ...

Страница 94: ...he individual gears and levers that make up the tape loading unloading mechanism Since information about the state of the mechanism is provided to the System Control Circuit only through the Mode Select Switch it is essential that the correct relationship between individual gears and levers be maintained 94 ...

Страница 95: ...procedure assumes that all previous procedures have been completed Important Note If any one of these alignments is not performed properly even if off by only one tooth the unit will unload or stop and it may result in damage to the mechanical or electrical parts Alignment points in Eject Position 95 ...

Страница 96: ...96 ...

Страница 97: ...IT AND LOADING ARM S UNIT 1 Place the P2 and P3 posts to the unloading position 2 Install the Loading Arm T Unit and the Loading Arm S Unit so that the hole on the Loading arm T Unit is aligned with the hole on the Loading Arm S Unit 97 ...

Страница 98: ...2 MAIN ROD AND LOADING ARM T UNIT 1 Install the Main Rod so that the rib on the Main Rod aligns with the shaft of the Loading Arm T Unit Make sure that the shafts of the Brake Ass y are positioned as shown in Fig A3 98 ...

Страница 99: ...or Block Ass y in the direction shown by arrow in Fig A5 so that the holes on the Geneva Gear and Cam Gear are aligned with holes on the Motor Bracket as shown in Fig A4 A5 Alternate method First align the hole of the Cam Gear with the hole of the Geneva Gear as shown in Fig A5 Then carefully install the Cam Gear and the Geneva Gear together onto the Motor 99 ...

Страница 100: ...ligned with the holes on the Geneva Gear and Motor Bracket ALIGNMENT 4 MODE SELECT SWITCH AND CAM GEAR 1 Install the Mode Select Switch so that the indentation on the Mode Select Switch aligns with the indentation on the Cam Gear Refer to Fig A4 Fig A4 100 ...

Страница 101: ... AND LINK GEAR 1 Install the Motor Block Ass y 2 Confirm that the last tooth of Geneva Gear aligns with the triangle mark on chassis 3 Install the Pinch Lift Cam so that the through hole on the Pinch Lift Cam is aligned with the hole on the Link Gear as shown in Fig A6 If not perform alignment 3 and 4 ALIGNMENT 7 SECOND CAM GEAR AND PINCH LIFT CAM 1 Install the Second Cam Gear so that the hole on ...

Страница 102: ...with the holes on the Pinch Lift Cam as shown in Fig A6 102 ...

Страница 103: ...103 ...

Страница 104: ...assette Door Opener K3 L 4 7 1 2 3 4 5 Cassette Guide Ass y K4 2 L 5 2 8 1 2 3 4 5 7 Cassette Holder Unit K4 9 2 4 Cassette Opener K4 Slide Rack Ass y 1 List of Abbreviations S 1 Screw S 1 2 L 1 2 Locking Clips L 1 Reference Notes in chart 1 Alignment is necessary Refer to Alignment Procedure Page 2 22 and 2 23 Important Note 2 As an ESD countermeasure make sure the spring is in contact with the c...

Страница 105: ...Fig K1 105 ...

Страница 106: ...Fig K2 106 ...

Страница 107: ...Fig K3 107 ...

Страница 108: ... CASSETTE UP ASS Y The following procedures describe how to align the individual gears and levers of Cassette Up Ass y All alignments are to be performed with the Cassette Up Ass y in the Eject position Alignment points in Eject position 108 ...

Страница 109: ...Fig B1 109 ...

Страница 110: ...Fig B2 Fig B2 ALIGNMENT 2 MAIN SHAFT UNIT AND RACK Ass y 1 Install the Main Shaft Unit so that the projection on the Main Shaft Unit is aligned with the groove on the Rack Ass y as shown in Fig B3 ALIGNMENT 3 WIPER ARM R UNIT AND MAIN SHAFT UNIT 1 Position the pin of Cassette Holder Unit to the far left of the Side Plate R Ass y slot 2 Install the Wiper Arm R Unit so that the mark on the Wiper Arm...

Страница 111: ...GNMENT 4 WIPER ARM L UNIT AND MAIN SHAFT GEAR L 1 Install the Main Shaft Gear L and Wiper Arm L Unit so that mark on the Wiper Arm L Unit is aligned with the holes on the Main Shaft Gear L as shown in Fig B4 111 ...

Страница 112: ... into chassis holes See Fig J1 J2 and the sensors fit into the Sensor Covers Note Be sure to maintain the Eject position of Cassette Up Ass y during installation To do this hold the Cassette Holder Unit plate and the Cassette Guide Ass y plate so there is no movement when installing 3 Install the 4 Red Screws as shown in Fig D9 Page 2 3 4 Confirm loading operation manually and then confirm proper ...

Страница 113: ...ace Oscilloscope Voltage Range 0 001 to 50V Div Frequency Range DC to 50MHz Probes 10 1 1 1 2 Color TV Receiver or Monitor 3 Plastic Tip Driver and Non Metal Driver 4 Isolation Transformer Variable 5 VHS Alignment Tape VFMS0001H6 6 AC Millivolt Meter Voltage Range 0 to 1 Vrms 7 MTS SAP Signal Generator TV Multi Channel Sound Modulator U S A 113 ...

Страница 114: ...Fig E1 4 3 2 HOW TO READ THE ADJUSTMENT PROCEDURES 114 ...

Страница 115: ...Fig E2 115 ...

Страница 116: ...is Ground is present in the Switched Mode Power Supply Circuit an Isolation Transformer must be used Also in order to have the ability to increase the input voltage slowly when troubleshooting this type of Power Supply Circuit a variable Isolation Transformer is required 116 ...

Страница 117: ...urpose Determine the Head Switching Point during Playback Symptom of Misadjustment May cause Head Switching Noise and or Vertical Jitter in the picture TP ADJ MODE INPUT TP3001 TP6205 R6201 SP PLAYBACK TAPE M EQ SPEC ALIGNMENT TAPE VFMS0001H6 COLOR BARS OSCILLOSCOPE T 6 1H 0 38 0 06msec Note TP3001 TP6205 Video Signal Process Section on the Main C B A R6201 Servo Section on the Main C B A 117 ...

Страница 118: ...TION Model D E INPUT LEVEL ADJUSTMENT TP ADJ MODE INPUT Pin 4 of U9001 R7007 STOP ANTENNA INPUT TERMINAL MONO 300Hz 5Hz 100 Modulating TAPE M EQ SPEC AC MILLIVOLT METER MTS SAP SIGNAL GENERATOR 150 5mVrms or 424 15mVp p Note 118 ...

Страница 119: ...t Pin 4 of U9001 is 150 5mVrms Note If 100 Modulation in the MTS SAP signal generator is not available use the Alternate SPEC multiplying the SPEC 150 5mVrms by the Modulation Example If the Modulation is 30 the SPEC should be 45 1 5 mVrms 150 5mVrms x 0 3 45 1 5mVrms 4 4 LOCATION OF TEST POINTS AND ADJUSTMENT POINTS 5 SCHEMATIC DIAGRAMS 5 1 Schematic and C B A Diagram Notes 5 2 Capstan Motor Driv...

Страница 120: ...dio Schematic Diagram B 5 7 UHF VHF Tuner TV Demodulator Schematic Diagram A C 5 8 UHF VHF Tuner TV Demodulator Schematic Diagram D E 5 9 UHF VHF Tuner TV Demodulator Schematic Diagram B 5 10 Hi Fi Audio Schematic Diagram 5 11 Head Amp Schematic Diagram 5 12 Hi Fi Audio Video Head Amp Schematic Diagram 120 ...

Страница 121: ...PS01042G2 B 6 3 Capstain Motor Drive C B A VEPS02221C1 A C D E VEPS02221D1 B 6 4 Capstain Motor Drive C B A VEPS02232B1 B 6 5 Main Power Supply Signal Process Audio System Control Servo Operation C B A VEPS6001GA12 A VEPS6001GA1 C VEPS6001HA1 D E 6 6 Main Power Supply Signal Process Audio System Control Servo Operation C B A VEPS6002GA12 B 121 ...

Страница 122: ...8 Head Amp C B A 6 9 Hi Fi Audio Video Head Amp C B A 6 10 Signal Waveform 6 11 Voltage Chart 7 EXPLODED VIEWS TRANSPORT SECTION MOVING MECHANISM SECTION CASSETTE UP MECHANISM SECTION CHASSIS FRAME AND CASING PARTS SECTION 122 ...

Страница 123: ...ly ORIGINAL REPLACEMENT PARTS which are listed with their part numbers in the parts list section of the Service Manual Note 1 Be sure to make your orders of replacement parts according to this list 2 Section and grid No of parts shown in Exploded Views are indicated in the Remarks column Screws and washers remarks show section No only EX 1 D 2 indicates Exploded Views section 1 grid D 2 MECHANISM ...

Страница 124: ...69 LOADING MOTOR BELT 2 G 4 10 VDVS0070 CAPSTAN BELT 2 C 1 11 CYLINDER UNIT VEGS0387 A B C 1 H 3 VEGS0389 D E 1 H 3 12 VEHS0548 A C HEAD UNIT 1 G 4 13 UPPER CYLINDER UNIT VEHS0554 A B C 1 H 2 VEHS0555 D E 1 H 2 14 VEMS0295 CAPSTAN STATOR UNIT 2 E 1 15 VEMS0296 LOADING MOTOR UNIT 2 F 4 16 CASSETTE DOOR UNIT VYPS6434 A B C 4 B 2 VYPS6437 D E 4 B 2 17 REAR PANEL VGPS2924 A C 4 G 3 VGPS3976 B 4 G 3 VG...

Страница 125: ... PACKING CASE VPGS3685 A 5 A 2 VPGS3686 B 5 A 2 VPGS3753 C 5 A 2 VPGS3688 D 5 A 2 VPGS3754 E 5 A 2 58 VPNS0557 LEFT CUSHION FRONT 5 E 2 59 VPNS0558 LEFT CUSHION REAR 5 F 3 62 VPNS0538 RIGHT CUSHION FRONT 5 D 5 63 VPNS0539 RIGHT CUSHION REAR 5 E 6 64 FAN BAG VQFS3205 A B 5 G 4 VQFS3243 C 5 G 4 VQFS3208 D 5 G 4 VQFS3253 E 5 G 4 66 INFRARED REMOTE CONTROL UNIT VSQS1418 A B 5 H 1 VSQS1331 C 5 H 1 VSQS...

Страница 126: ...QLS4061 C E 4 A 2 112 VMXS0511 DUST SEAL 1 D 4 124 VJAS0183 VHF CONNECTING CABLE 5 G 5 SCREWS WASHERS Ref No Part No Part Name Remarks 401 VHDS0475 SCREW 3X8 1 403 VHDS0482 TAPPING SCREW 2 6X5 2 404 VHDS0472 SCREW 3X10 4 405 VHDS0474 SCREW 3X10 4 406 SCREW 3X12 VHDS0319 D E 4 408 VHDS0402 SCREW 2 6X10 2 409 VHDS0236 LOCK SCREW 1 410 VHDS0481 SCREW WITH WASHER 1 411 VMXS0664 CUT WASHER 1 413 VHDS02...

Страница 127: ...NE SERVICE FIXFURES TOOLS Ref No Part No Part Name Remarks VFMS0001H6 VHS ALIGNMENT TAPE VFKS0009 REEL TABLE HEIGHT FIXFURE VFKS0010 POST ADJUSTMENT PLATE VFKS0081 GREASE VFK0329 POST ADJUSTMENT SCREWDRIVER MOR265 MOLYTONE GREASE VFK27 HEAD CLEANING STICK VFKS0082 H POSITION ADJ SCREWDRIVER ITEM MUMBERS OF PARTS NOT SUPPLIED Item No Drawing No Item No Drawing No Item No Drawing No Item No Drawing ...

Страница 128: ...iconductor devices are electrostatically sensitive and therefore require the special handling techniques described under the ELECTROSTATICALLY SENSITIVE ES DEVICES Section of this service manual Note 1 Be sure to make your orders of replacement parts according to this list 2 IMPORTANT SAFETY NOTICE Components identified by the sign have special characteristics important for safety When replacing a...

Страница 129: ...for Part Names Descriptions MGF CHIP METAL GLAZE FILM CHIP C CHIP CERAMIC CHIP COMPLX CMP COMPLEX COMPONENT W FLMPRF WIREWOUND FLAMEPROOF 13 The parts with are 0 OHM resistor When replacing a wire can be substituted for a 0 OHM resistor 14 Parts different in shape or size may be used However only interchangeable parts will be supplied as service replacement parts Model D E Hi Fi Audio C B A replac...

Страница 130: ...MARK MODEL MARK MODEL MARK PV 46 1 A A PV 4601 B C PV 4601 K C PV 4651 D PV 4651 K E 8 2 1 PRINTED CIRCUIT BOARD ASSEMBLY Ref No Part No Part Name Remarks E1 VEPS6001GA12 MAIN C B A ÛE S D RTL A E1 VEPS6002GA12 MAIN C B A ÛE S D RTL B E1 VEPS6001GA1 MAIN C B A ÛE S D RTL C E1 VEPS6001HA1 MAIN C B A ÛE S D RTL D E E2 VEPS4003A1 Hi Fi AUDIO C B A NR ÛÛ D E E3 VEPS1002B2 POWER SUPPLY C B A Û RTL A B ...

Страница 131: ...NUFACTURING PART NUMBER IS TMP47c216ff911 HOWEVER TOORDER THE PART USE SERVICE ORDER PART NUMBER T47C216FF911 TRANSISTORS Ref No Part No Part Name Remarks Q1051 2SD1581 T OR 2SD2159 T A C 2SC3852 OR 2SD1776 P Q OR 2SD2375 P Q D E Q1052 2SD601 R CHIP Q3001 2SB709 R CHIP Q3101 UN2212 CHIP Q4001 2SB709A R CHIP Q4002 2SD601A R CHIP Q4003 2SD601A R CHIP Q4101 2SD601 R CHIP Q4208 2SB709 R CHIP DE Q4601 ...

Страница 132: ... ERJ6GEYJ103V MGF CHIP 1 10W 10K R3016 ERJ6GEYJ121V MGF CHIP 1 10W 120 R3017 ERJ6GEYJ182V MGF CHIP 1 10W 1 8K R3024 ERJ6GEYJ561V MGF CHIP 1 10W 560 R3025 ERJ6GEYJ155V MGF CHIP 1 10W 1 5M R3026 ERJ6GEYJ474V MGF CHIP 1 10W 470K R3027 ERJ6GEYJ681V MGF CHIP 1 10W 680 R3028 ERJ6GEYJ272V MGF CHIP 1 10W 2 7K R3029 ERJ6GEYJ151V MGF CHIP 1 10W 150 R3030 ERJ6GEYJ103V MGF CHIP 1 10W 10K R3031 ERJ6GEYJ103V MG...

Страница 133: ...CHIP 1 10W 0 R4018 ERJ6GEYJ562V MGF CHIP 1 10W 5 6K A C R4021 ERJ6GEYJ682V MGF CHIP 1 10W 6 8K D E R4022 ERJ6GEYJ473V MGF CHIP 1 10W 47K R4026 ERJ8GEYJ100Z MGF CHIP 1 8W 10 D E R4029 ERDS2TJ2R7 2 7 R4030 ERJ6GEYJ561V MGF CHIP 1 10W 560 R4101 ERJ6GEYJ394V MGF CHIP 1 10W 390K R4102 ERJ6GEYG473V MGF CHIP 2 1 10W 47K R4103 ERJ6GEYJ153V MGF CHIP 1 10W 15K R4242 ERJ6GEYJ473V MGF CHIP 1 10W 47K D E R4601...

Страница 134: ...R6004 ERJ6GEYJ333V MGF CHIP 1 10W 33K 134 ...

Страница 135: ...91 390 R6038 ERDS2TJ560 56 R6040 ERJ6GEYJ223V MGF CHIP 1 10W 22K R6041 ERJ6GEYJ223V MGF CHIP 1 10W 22K R6042 ERJ6GEYJ223V MGF CHIP 1 10W 22K R6043 ERJ6GEYJ223V MGF CHIP 1 10W 22K R6051 ERJ6GEYJ103V MGF CHIP 1 10W 10K R6052 ERJ6GEYJ103V MGF CHIP 1 10W 10K R6055 ERJ6GEYJ223V MGF CHIP 1 10W 22K R6056 ERJ6GEYJ223V MGF CHIP 1 10W 22K R6058 ERJ6GEYJ223V MGF CHIP 1 10W 22K R6059 ERJ6GEYJ182V MGF CHIP 1 1...

Страница 136: ...R6085 ERJ6GEYJ223V MGF CHIP 1 10W 22K 136 ...

Страница 137: ...3V MGF CHIP 1 10W 82K R6209 ERJ6GEYJ224V MGF CHIP 1 10W 220K A C ERJ6GEYJ184V MGF CHIP 1 10W 180K D E R6210 ERJ6GEYJ475V MGF CHIP 1 10W 4 7M R6211 ERJ6GEYJ221V MGF CHIP 1 10W 220 R6212 ERJ6GEYJ332V MGF CHIP 1 10W 3 3K R6213 ERJ6GEYJ473V MGF CHIP 1 10W 47K R6214 ERJ6GEYJ394V MGF CHIP 1 10W 390K R6215 ERJ6GEYJ154V MGF CHIP 1 10W 150K R6216 ERJ6GEYJ222V MGF CHIP 1 10W 2 2K R6218 ERJ6GEYJ184V MGF CHIP...

Страница 138: ...ECTROLYTIC 50V 1 C3015 ECEA1EKA4R7 ELECTROLYTIC 25V 4 7 C3016 ECEA1HKAR22 ELECTROLYTIC 50V 0 22 C3017 ECEA1HKAR47 ELECTROLYTIC 50V 0 47 C3018 ECEA0JKA221 ELECTROLYTIC 6 3V 220 C3019 ECEA1HKA2R2 ELECTROLYTIC 50V 2 2 C3020 ECEA1CKA100 ELECTROLYTIC 16V 10 C3021 ECEA1HKA2R2 ELECTROLYTIC 50V 2 2 C3022 ECEA1HKAR22 ELECTROLYTIC 50V 0 22 C3023 ECUV1H680JCN C CHIP 5 50V 68P C3024 ECUV1E104ZFN C CHIP 80 25V...

Страница 139: ...103ZFN C CHIP 80 50V 0 01 C3304 ECUV1H103ZFN C CHIP 80 50V 0 01 C3305 ECUV1H181JCN C CHIP 5 50V 180P C3306 ECEA1HKA010 ELECTROLYTIC 50V 1 C3307 ECUV1H180GCN C CHIP 50V 18P C3308 ECUV1H220JCN C CHIP 5 50V 22P C3310 ECUV1H103ZFN C CHIP 80 50V 0 01 C3311 ECEA0JKA470 ELECTROLYTIC 6 3V 47 C3312 ECUV1H150JCN C CHIP 5 50V 15P C4001 ECUV1E104KBN C CHIP 25V 0 1 C4002 ECEA1HKS010 ELECTROLYTIC 50V 1 C4003 EC...

Страница 140: ...C4601 ECEA1CKA100 ELECTROLYTIC 16V 10 140 ...

Страница 141: ...4R7 ELECTROLYTIC 25V 4 7 C6211 ECUV1H272KBN C CHIP 50V 0 0027 C6212 ECUV1E104KBN C CHIP 25V 0 1 C6213 ECUV1H151KN C CHIP 50V 150P C6214 ECUV1H272KBN C CHIP 50V 0 0027 C6217 ECUV1E104ZFN C CHIP 80 25V 0 1 C6218 ECEA1CKA100 ELECTROLYTIC 16V 10 C6221 ECEA0JKA220 ELECTROLYTIC 6 3V 22 C6222 ECUV1H272KBN C CHIP 50V 0 0027 C6223 ECUV1H103ZFN C CHIP 80 50V 0 01 C6224 ECEA0JKA101 ELECTROLYTIC 6 3V 100 C622...

Страница 142: ... L7002 ELESN101KA 100 CRYSTAL OSCILLATOR Ref No Part No Part Name Remarks X3001 VSXS0195 X6001 VSXS0191 X6301 EF0EC7164T4 PIN HEADERS Ref No Part No Part Name Remarks P1051 VJPS0645 9P P3001 VJPS0642 22P P6201 VJPS0642 22P SWITCHES Ref No Part No Part Name Remarks SW6001 VSHS0051 SAFETY TAB SWITCH SW6301 EVQ21309K PUSH SWITCH SW6302 EVQ21309K PUSH SWITCH SW6303 EVQ21309K PUSH SWITCH SW6304 EVQ2130...

Страница 143: ...LY Ref No Part No Part Name Remarks E2 VEPS4003A1 Hi Fi AUDIO C B A NR ÛÛ D E MISCELLANEOUS Ref No Part No Part Name Remarks DP6301 E22 VEKS5381 DISPLAY TUBE UNIT JK3001 E11 VJHS0328 A V JACK A C E11 VJHS0329 VIDEO JACK D E E19 VEKS5442 INFRARED RECEIVER UNIT E18 VCRS0206 HIC MTS SAP AUDIO PROCESS D E E12 VEQS0591 UHF VHF TUNER TV DEMODULATOR UNIT NR A C E12 VEQS0592 UHF VHF TUNER TV DEMODULATOR U...

Страница 144: ... IC7051 MM1021XS IC MOS LOGIC SYNC DETECTOR E S D MARK THE MANUFACTURING PART NUMBER IS TMP47c216ff911 HOWEVER TOORDER THE PART USE SERVICE ORDER PART NUMBER T47C216FF911 TRANSISTORS Ref No Part No Part Name Remarks Q1051 2SD1581 T OR 2SD2159 T Q1052 2SC945A TP AKEI Q3001 2SA733 TP AKEI Q3101 UN2212 CHIP Q4001 2SB709A R CHIP Q4002 2SD601A R CHIP Q4003 2SD601A R CHIP Q4101 2SC945A TP AKEI Q6001 2SD...

Страница 145: ...5M R3026 ERJ6GEYJ474V MGF CHIP 1 10W 470K R3027 ERJ6GEYJ681V MGF CHIP 1 10W 680 R3028 ERJ6GEYJ272V MGF CHIP 1 10W 2 7K R3029 ERJ6GEYJ151V MGF CHIP 1 10W 150 R3030 ERJ6GEYJ103V MGF CHIP 1 10W 10K R3031 ERJ6GEYJ103V MGF CHIP 1 10W 10K R3032 ERJ6GEYJ122V MGF CHIP 1 10W 1 2K R3033 ERJ6GEYG472V MGF CHIP 2 1 10W 4 7K R3035 ERJ6GEYJ562V MGF CHIP 1 10W 5 6K R3037 ERJ6GEYJ750V MGF CHIP 1 10W 75 R3038 ERJ6G...

Страница 146: ...15 ERJ6GEYJ562V MGF CHIP 1 10W 5 6K R6019 ERJ6GEYJ223V MGF CHIP 1 10W 22K R6023 ERJ6GEYJ563V MGF CHIP 1 10W 56K R6024 ERJ6GEYJ563V MGF CHIP 1 10W 56K R6025 ERJ6GEYJ101V MGF CHIP 1 10W 100 R6026 ERJ6GEYJ101V MGF CHIP 1 10W 100 R6029 ERJ6GEYJ103V MGF CHIP 1 10W 10K R6030 ERJ6GEYJ103V MGF CHIP 1 10W 10K R6031 ERJ6GEYJ332V MGF CHIP 1 10W 3 3K R6032 ERJ6GEYJ103V MGF CHIP 1 10W 10K R6033 ERJ6GEYJ103V MG...

Страница 147: ...R6065 ERJ6GEYJ223V MGF CHIP 1 10W 22K 147 ...

Страница 148: ...YJ475V MGF CHIP 1 10W 4 7M R6211 ERJ6GEYJ221V MGF CHIP 1 10W 220 R6212 ERJ6GEYJ332V MGF CHIP 1 10W 3 3K R6213 ERJ6GEYJ473V MGF CHIP 1 10W 47K R6214 ERJ6GEYJ394V MGF CHIP 1 10W 390K R6215 ERJ6GEYJ154V MGF CHIP 1 10W 150K R6216 ERJ6GEYJ222V MGF CHIP 1 10W 2 2K R6218 ERJ6GEYJ184V MGF CHIP 1 10W 180K R6219 ERJ6GEYJ394V MGF CHIP 1 10W 390K R6220 ERJ6GEYJ472V MGF CHIP 1 10W 4 7K R6221 ERJ6GEYJ221V MGF C...

Страница 149: ... 4 7 C3016 ECEA1HUR22 ELECTROLYTIC 50V 0 22 C3017 ECEA1HUR47 ELECTROLYTIC 50V 0 47 C3018 ECEA0JKA221 ELECTROLYTIC 6 3V 220 C3019 ECEA1HU2R2 ELECTROLYTIC 50V 2 2 C3020 ECEA1CKA100 ELECTROLYTIC 16V 10 C3021 ECEA1HU2R2 ELECTROLYTIC 50V 2 2 C3022 ECEA1HKAR22 ELECTROLYTIC 50V 0 22 C3023 ECUV1H680JCN C CHIP 5 50V 68P C3024 ECUV1E104ZFN C CHIP 80 25V 0 1 C3025 ECUV1E104ZFN C CHIP 80 25V 0 1 C3026 ECUV1H8...

Страница 150: ...UV1H220JCN C CHIP 5 50V 22P C3309 ECUV1H090CCN C CHIP 0 25P 50V 9P C3310 ECUV1H103ZFN C CHIP 80 50V 0 01 C3311 ECEA0JU470 ELECTROLYTIC 6 3V 47 C3312 ECUV1H150JCN C CHIP 5 50V 15P C4001 ECUV1E104KBN C CHIP 25V 0 1 C4002 ECEA1HKS010 ELECTROLYTIC 50V 1 C4003 ECUV1H392KBN C CHIP 50V 0 0039 C4004 ECUV1H103KBN C CHIP 50V 0 01 C4005 ECEA0JKS220 ELECTROLYTIC 6 3V 22 C4006 ECUV1H102KBN C CHIP 50V 0 001 C40...

Страница 151: ...80 25V 0 1 C6218 ECEA1CKA100 ELECTROLYTIC 16V 10 C6221 ECEA0JKA220 ELECTROLYTIC 6 3V 22 C6222 ECUV1H272KBN C CHIP 50V 0 0027 C6223 ECUV1H103ZFN C CHIP 80 50V 0 01 C6224 ECEA0JKA101 ELECTROLYTIC 6 3V 100 C6225 ECUV1E104ZFN C CHIP 80 25V 0 1 C6227 ECUV1H472KBN C CHIP 50V 0 0047 C6228 ECUV1E104ZFN C CHIP 80 25V 0 1 C6305 ECEA0JKA470 ELECTROLYTIC 6 3V 47 C6306 ECEA0JU470 ELECTROLYTIC 6 3V 47 C6307 ECU...

Страница 152: ...164T4 X7051 CSB503E5 PIN HEADERS Ref No Part No Part Name Remarks P1051 VJPS0645 9P P3001 VJPS0642 22P P6201 VJPS0642 22P SWITCHES Ref No Part No Part Name Remarks SW6001 VSHS0051 SAFETY TAB SWITCH SW6301 EVQ21309K PUSH SWITCH SW6302 EVQ21309K PUSH SWITCH SW6303 EVQ21309K PUSH SWITCH SW6304 EVQ21309K PUSH SWITCH SW6306 EVQ21309K PUSH SWITCH SW6307 EVQ21309K PUSH SWITCH SW6308 EVQ21309K PUSH SWITCH...

Страница 153: ...IT JK3001 E11 VJHS0328 A V JACK E12 ENG56414G UHF VHF TUNER TV DEMODULATOR UNIT NR E19 VEKS5442 INFRARED RECEIVER UNIT 17 VGPS3976 REAR PANEL 8 2 4 Hi Fi AUDIO C B A NR D E Ref No Part No Part Name Remarks Hi Fi AUDIO C B A NR ÛÛ D E TRANSISTORS Q4204 2SD1992A Q Q4205 2SB1321A Q DIODES Ref No Part No Part Name Remarks D4202 MA165 RESISTORS 153 ...

Страница 154: ...V MGF CHIP 1 10W 12K R4228 ERJ6GEYJ152V MGF CHIP 1 10W 1 5K R4229 ERJ6GEYJ152V MGF CHIP 1 10W 1 5K R4232 ERJ6GEYG224V MGF CHIP 2 1 10W 220K R4233 ERJ6GEYJ153V MGF CHIP 1 10W 15K R4234 ERJ6GEYG682V MGF CHIP 2 1 10W 6 8K R4235 ERJ6GEYJ103V MGF CHIP 1 10W 10K R4237 ERJ6GEYG224V MGF CHIP 2 1 10W 220K R4238 ERJ6GEYJ474V MGF CHIP 1 10W 470K R4239 ERJ6GEYG102V MGF CHIP 2 1 10W 1K R4240 ERJ6GEYG332V MGF C...

Страница 155: ... 4 7 C4222 ECEA0JKA470 ELECTROLYTIC 6 3V 47 C4223 ECEA1HKA3R3 ELECTROLYTIC 50V 3 3 C4224 ECUV1E104ZFN C CHIP 80 25V 0 1 C4225 ECEA0JKA220 ELECTROLYTIC 6 3V 22 C4226 ECEA1HKA3R3 ELECTROLYTIC 50V 3 3 C4227 ECUV1E104ZFN C CHIP 80 25V 0 1 C4228 ECUV1H561JCN C CHIP 5 50V 560P C4229 ECUV1E104ZFN C CHIP 80 25V 0 1 C4230 ECEA0JKA470 ELECTROLYTIC 6 3V 47 C4231 ECUV1E223KBN C CHIP 25V 0 022 C4232 ECUV1H561J...

Страница 156: ... Q1001 2SC4533LP KT OR 2SC5130LF608 Q1002 2SD1458 Q1003 2SD636 Q Q1004 2SB641 Q Q1005 2SB641 R DIODES Ref No Part No Part Name Remarks D1001 S1WBA40 OR S1WBA60 D1002 EG01 OR EG01LFH1A OR ERA18 04 OR RMPG06J6203 OR SFR104S D1003 ERA18 04 D1005 MA188 D1006 ERB32 01L3 OR RU2YXLFC1 A B C ERC30 01L3 OR RU3YXLFC1 D E D1007 MA188 OR 1SS244T 77 A B C EG01 OR ERA18 04 OR SFR104S D E D1008 D2S4M OR EK13 OR ...

Страница 157: ...3 VRESE2TJ334 1 2W 330K R1004 ERG2SJM333H METAL OXIDE 2W 33K OR ERG2SJS333H METAL OXIDE 2W 33K OR ERG2SJ333H METAL OXIDE 2W 33K R1005 ERG1SJM560P METAL OXIDE 1W 56 OR ERG1SJS560P METAL OXIDE 1W 56 OR ERG1SJ560P METAL OXIDE 1W 56 R1006 ERDS2TJ222 2 2K R1007 ERDS2TJ101 100 R1008 ERDS2TJ392 3 9K R1010 ERD25FJ100P 10 OR ERD25FPJ100P 10 OR VRESF4FJ100P 10 R1011 ERD25FJ100P 10 OR ERD25FPJ100P 10 OR VRES...

Страница 158: ...200V 82 OR VCESR2D820XE ELECTROLYTIC 200V 82 A B C ECEA2DU121YE ELECTROLYTIC 200V 120 D E C1005 ECEA2DG4R7 ELECTROLYTIC 200V 4 7 C1006 ECKW2H221KB5 CERAMIC 500V 220P C1007 VCYSBRC104MX CERAMIC 20 16V 0 1 C1009 VCFSA1H103JT POLYESTER 5 50V 0 01 C1010 VCYSARH102KB CERAMIC 50V 0 001 C1011 ECEA1HU4R7B ELECTROLYTIC 50V 4 7 OR VCESP1H4R7B ELECTROLYTIC 50V 4 7 OR VCESQ1H4R7B ELECTROLYTIC 50V 4 7 OR VCESR...

Страница 159: ...R VCESU0J102E ELECTROLYTIC 6 3V 1000 D E C1018 VCYSBRC104MX CERAMIC 20 16V 0 1 C1019 ECEA0JEE101 ELECTROLYTIC 6 3V 100 C1021 ECEA1HKG010 ELECTROLYTIC 50V 1 C1023 ECKW1H103ZF5 CERAMIC 80 50V 0 01 C1025 ECKDNS101MB CERAMIC 20 125V 100P OR ECKDRS101MB CERAMIC 20 125V 100P OR VCKSEJD101KW CERAMIC 125V 100P OR VCKSHJD101MW CERAMIC 20 125V 100P OR VCKSHXD101MW CERAMIC 20 125V 100P C1027 ECKDRS103ZV CERA...

Страница 160: ...rt No Part Name Remarks E13 VJAS0154 AC CORD OR VJAS0154 F AC CORD E15 VJSS0164 FUSE HOLDER E14 VSCS2035 SHIELD CASE TOP E16 VSCS2504 SHIELD CASE BODY 8 2 6 CAPSTAN MOTOR DRIVE C B A Ref No Part No Part Name Remarks CAPSTAN MOTOR DRIVE C B A Û INTEGRATED CIRCUITS IC2501 AN3826NK IC BIPOLAR LINEAR CAP DRIVE IC2502 PUA3228 IC BIPOLAR LINEAR POWER DRIVE RESISTORS Ref No Part No Part Name Remarks R250...

Страница 161: ...8 22P P2505 VJWS6BN095LE FLAT CABLE 6P 8 2 7 HEAD AMP C B A A B C Ref No Part No Part Name Remarks HEAD AMP C B A Û A B C INTEGRATED CIRCUITS IC2601 AN3813K IC BIPOLAR LINEAR CYL DRIVE IC3501 AN3361SB IC BIPOLAR LINEAR HEAD AMP RESISTORS Ref No Part No Part Name Remarks R2601 ERJ6GEYJ471V MGF CHIP 1 10W 470 R2602 ERJ6GEYJ471V MGF CHIP 1 10W 470 R2603 ERJ6GEYJ471V MGF CHIP 1 10W 470 R2604 ERDS2TJ1R...

Страница 162: ... 1 C3511 ECUV1E104ZFN C CHIP 80 25V 0 1 C3512 ECUV1E104ZFN C CHIP 80 25V 0 1 C3513 ECUV1E104ZFN C CHIP 80 25V 0 1 C3519 ECUV1E104ZFN C CHIP 80 25V 0 1 C3520 ECUV1E104ZFN C CHIP 80 25V 0 1 C3524 ECUV1E104ZFN C CHIP 80 25V 0 1 C3525 ECUV1E104ZFN C CHIP 80 25V 0 1 C3528 ECUV1E104ZFN C CHIP 80 25V 0 1 C3529 ECUV1H103ZFN C CHIP 80 50V 0 01 C3532 ECUV1E104ZFN C CHIP 80 25V 0 1 C3533 ECUV1H103ZFN C CHIP ...

Страница 163: ... 8K R4418 ERJ6GEYG100V MGF CHIP 2 1 10W 10 R4419 ERJ6GEYJ102V MGF CHIP 1 10W 1K R4421 ERJ6GEYJ391V MGF CHIP 1 10W 390 CAPACITORS Ref No Part No Part Name Remarks C2601 ECUV1E104ZFN C CHIP 80 25V 0 1 C2602 ECUV1E104ZFN C CHIP 80 25V 0 1 C2603 ECUV1E104ZFN C CHIP 80 25V 0 1 C2604 ECUV1E104KBN C CHIP 25V 0 1 C2605 ECUV1E104KBN C CHIP 25V 0 1 C2606 ECUV1E104KBN C CHIP 25V 0 1 C2607 ECUV1E104KBN C CHIP...

Страница 164: ... CHIP 50V 0 01 C4411 ECUV1H103KBN C CHIP 50V 0 01 C4412 ECUV1E104ZFN C CHIP 80 25V 0 1 C4413 ECUV1H101JCN C CHIP 5 50V 100P C4414 ECUV1H101JCN C CHIP 5 50V 100P C4415 ECUV1H471JCN C CHIP 5 50V 470P C4416 ECUV1E473KBN C CHIP 25V 0 047 C4417 ECUV1E104ZFN C CHIP 80 25V 0 1 C4418 ECUV1H103ZFN C CHIP 80 50V 0 01 COILS Ref No Part No Part Name Remarks L3501 ELESN101KA 100 L4401 ELESN101KA 100 PIN HEADER...

Страница 165: ...28 A V JACK E11 VJHS0329 VIDEO JACK E12 VEQS0591 UHF VHF TUNER TV DEMODULATOR UNIT NR E12 VEQS0592 UHF VHF TUNER TV DEMODULATOR UNIT NR E12 ENG56414G UHF VHF TUNER TV DEMODULATOR UNIT NR E13 VJAS0154 AC CORD E13 VJAS0154 F AC CORD E14 VSCS2035 SHIELD CASE TOP E15 VJSS0164 FUSE HOLDER E16 VSCS2504 SHIELD CASE BODY E17 VJHS0262 AUDIO JACK E18 VCRS0206 HIC MTS SAP AUDIO PROCESS E19 VEKS5442 INFRARED ...

Страница 166: ...Power Supply Stage 9 4 Video Normal Audio Block Diagram 9 5 Waveform and Checking Procedure of Video Stage 9 6 Hi Fi Audio MTS SAP Block Diagrams 9 7 System Control Block Diagrams 9 8 Servo Block Diagrams 9 9 Waveform of System Control and Servo Stage 9 10 Timing Chart 166 ...

Страница 167: ...9 11 Operation Block Diagrams 1 167 ...

Страница 168: ...1 10 FROM IC6001 37 VIDEO DELAY REC H 1 5V PIN 24 P4202 11 PIN 11 FROM IC6001 52 INPUT SELECT 1 P4201 3 PIN 3 FROM IC6001 53 INPUT SELECT 2 BUFFER P3503 1 P3503 2 P3503 3 18 20 L R TP4403 TP4401 PRE AMP PRE AMP SWITCH CONTROL REC AGC LPF AGC DET REC AMP 23 24 15 TP4402 TP4404 Hi Fi AUDIO HEAD L CH Hi Fi AUDIO HEAD R CH PIN 36 P4204 36 PIN 38 P4204 38 D4201 PB ON REC ON REC ON L CH R CH R CH L CH a...

Страница 169: ...ting CHECK POINT IF NO 1 POWER ON CONFIRM ALL KEY OPERATION MAKE A REC MODE MAKE A P B MODE OPERATION PROBLEM PICTURE PROBLEM TV MONITOR POWER OPERATION SCAN PULSE SYSTEM CONTROL TIMER SERVO RF CONVERTER TUNER DEMODU MTS SAP VIDEO NORMAL Hi Fi AUDIO 2 3 4 AUDIO R L IN REAR JACK AUDIO R L OUT VIDEO IN REAR JACK VIDEO OUT 1 2 3 4 5 6 7 TO RF FROM TUNER FRONT AUDIO VIDEO JACK VIDEO IN FRONT JACK AUDI...

Страница 170: ...9 SCAN 2 PIN 20 DATA 1 PIN 10 DATA 2 PIN 11 DATA 3 PIN 12 REW REV PLAY REC STOP EJECT CH DOWN CH UP TV VCR POWER GRID 1G GRID 4G 1 SEGMENT g 4 SEGMENT j OUT IN GRID SEGMENT FROM IC6001 15 PANEL RESET L FROM IC6001 16 SERIAL CLOCK FROM IC6001 18 SERIAL DATA 0 TO IC6001 17 SERIAL DATA 1 36 37 SEGMENT a SEGMENT b 41 SEGMENT c 44 SEGMENT f PANEL CONTROL CS L 22 FROM IC6001 14 PANEL CONTROL CS L 13 14 ...

Страница 171: ...IRCUIT C1012 C1013 D1015 OVERVOLTAGE PROTECTOR C1014 SMOOTHING CIRCUIT PR1001 C1016 C1017 SMOOTHING CIRCUIT C1019 SMOOTHING CIRCUIT OUTPUT VOLTAGE DETECTOR UNSW 37V UNSW 14V UNSW 30V UNSW 5V SYS CTL UNSW 5V VIDEO VPP VPP POWER DOWN L SWITCHING CONTROL 10 7 8 9 11 12 13 14 P1051 4 P1001 4 E P1051 5 P1001 5 P1051 2 P1001 2 P1051 6 P1001 6 P1051 7 P1001 7 P1051 9 P1001 9 P1051 8 P1001 8 P1051 3 P1001...

Страница 172: ...AD AMP CIRCUIT HEAD AMP SW TO HEAD AMP CIRCUIT HEAD SW PULSE FROM HEAD AMP CIRCUIT ENVELOPE DET TO VIDEO CIRCUIT ROTARY SW FROM VIDEO CIRCUIT ENVELOPE VOLTAGE TO VIDEO CIRCUIT V LOCK PULSE PG SHIFTER HEAD SWITCH POSITION R6201 5V D6006 R6091 D R6208 R6216 R6211 R6210 R6212 NEGATIVE PB CTL SLICER POSITIVE PB CTL SLICER SELECT SCHMIT COUNT DOWN PG SELECT CAPSTAN SPEED COMPARATOR CYLINDER SPEED COMPA...

Страница 173: ...A CASSETTE FOR SERVICE TO HEAD AMP AUDIO CIRCUIT IR RECEIVER 5V 92 KEY DATA 4 91 KEY DATA 5 90 KEY DATA 6 89 KEY DATA 7 2 SCAN 3 SENSOR LED ON H 1 SCAN 2 100SCAN 1 D6018 D6017 D6016 D6015 D6014 D6013 D6012 D6011 D6010 D6009 D6008 D6007 29 AUDIO DEFEAT H 7 8 LP SLP H SLP H 4 34 33 OSC 2 OSC 1 OSC X6001 14MHz RESET FROM P1051 3 POWER DOWN L R6078 R6079 R6080 R6081 5V Å 6 I O MATRIX CHART D6007 D6008...

Страница 174: ...POS ACTION POSITION TIME ms TIMING CHART 2 CASSETTE IN STOP S TAB ON 2 6S 1 2 3 2 2 2 3 2 4 H L M 350 LOADING FWD H PIN 10 LOADING REV H PIN 9 CAPSTAN R H S M F L PIN 42 3S NOTE 1 PIN NO WITH BRACKET INDICATES PIN NO OF IC6001 2 IT SHOWS MAXIMUM TIME MODE BY MODE OPERATION 2 CASSETTE IN STOP WITH SAFETY TAB 2 1 The Loading Motor starts rotation in a forward direction 2 2 The Idler Gear swings over...

Страница 175: ... L NOTE 1 PIN NO WITH BRACKET INDICATES PIN NO OF IC6001 2 IT SHOWS MAXIMUM TIME MODE BY MODE OPERATION 5 REVIEW 5A PLAY TO REVIEW 5A 1 The Loading Motor starts rotation in a reverse direction 5A 2 The Loading Motor stops At this position the Pressure Roller and the Tension Arm are released 5A 3 The Idler Gear swings over to Supply Reel 5A 4 Proper tape tension is maintained 5A 5 The Loading Motor...

Страница 176: ...E BY MODE OPERATION 9 STOP TO EJECT 9 1 Unloads the mechanism to the Eject position 1 9 2 The Idler Gear swings over to Supply Reel 9 3 The Capstan Motor rotates in reverse direction to takeup a tape slack 9 4 When the Mode Switch reaches position 1 the Cylinder stops 9 5 T Photo Tr signal goes LOW at position 1 If T Photo Tr signal does not become LOW within 4 seconds at position 1 the mechanism ...

Страница 177: ...VIDEO IN1 REAR JACK FROM IC6001 53 INPUT SELECT 2 PIN 7 P4201 7 P4203 26 Å1 AUDIO OUT REAR JACK TP4001 AUDIO IN1 REAR JACK P4203 28 5 3 9 4 J4003 PIN 26 J4002 FROM IC4201 52 RF AUDIO TO IC4201 54 NORMAL AUDIO TUNER AUDIO FROM IC4201 62 NORMAL AUDIO 5V PIN 28 REC ON SLP ON PB AMP SP LP ON 63 62 60 59 61 58 57 P6201 22 P2501 22 P6201 21 P2501 21 P1541 2 P1541 1 P2503 2 P2503 1 P6201 19 P2501 19 P620...

Страница 178: ......

Страница 179: ...1 UOSC2 UOSC3 UOSC4GND URF2 URF1 VRF2 VRF1 U VSW MIX OUT2 MIX OUT1 IFAMP OUT IFAMP IN VIDEO SIGNAL AUDIO SIGNAL AFC DET VCO SIF AMP FM DET VIF AMP VIDEO DEMODU AMP INTERNAL VOLTAGE STABILIZER SINGLE REFERENCE QSS MIXER SIF AGC TUNER AND VIF AGF SAW FILTER VCO UNLESS OTHERWISE SPECIFIED WATTAGE OF RESISTORS ARE 1 8W AND 1 16W IC1 C17 C30 C23 C24 C11 C19 C18 C8 R14 R15 R16 C31 R11 C25 C32 C21 R10 R8...

Страница 180: ... R4224 R4225 R4226 R4227 R4236 L CH R CH VEE GND BPF BPF ADJ ADJ REGULATOR REGULATOR UNLESS OTHERWISE SPECIFIED DIODES IS MA165 AND WATTAGE OF RESISTORS IS 1 10W Z 0 Z Z 1 4W AUDIO 38 Z P1 0 0 0 5 7 9 8 5 1 23 0 5 5 5 0 4 9 0 0 0 0 0 0 0000000000 0 0 0000000000 4 8 5 1 5 1 5 2 5 1 5 7 2 6 2 62 6 2 6 2 7 2 6 2 6 5 0 5 0 0 1 0 3 4 6 4 6 0 7 0 7 WF41 2 7 4 5 0 0 0 0 0 0 3 9 5 1 2 0 0 91 0 4 8 0 1 2 7...

Страница 181: ... HEAD VIDEO SP R HEAD VIDEO LP SLP R HEAD VIDEO LP SLP L HEAD P3001 P3001 P3001 P3001 P3001 P3001 P3001 P3001 UNSW 14V GND HE VH HE MAIN COIL 1 8 7 MAIN COIL 2 6 5 4 3 2 1 MAIN COIL 3 TO D D CYLINDER PIN PIN PIN PIN PIN PIN PIN PIN 1 2 3 4 5 6 7 8 CYLINDER MOTOR DRIVE VIDEO LP SLP L R HEAD VIDEO SP L R HEAD VIDEO SP L HEAD VIDEO SP R HEAD VIDEO LP SLP VIDEO LP SLP L HEAD R HEAD 2 3 4 5 6 UPPER CYL...

Страница 182: ...OR DRIVE C B A P2501 1 2 3 4 5 6 7 8 9 10 11 12 13 14 15 16 17 18 19 20 21 22 1 2 3 4 5 6 7 8 9 10 11 12 13 14 15 16 17 18 19 20 21 22 C B A D E INFRARED RECEIVER UNIT 1 2 3 1 2 3 VEKS5442 C B A UNIT NUMBER CHART MAIN C B A A C D E B MODEL NUMBER MARK VEPS6001GA12 VEPS6001GA1 VEPS6001HA1 VEPS6002GA12 C B A NUMBER POWER SUPPLY C B A A B C D E B MODEL NUMBER MARK VEPS1002B2 VEPS1002D2 VEPS01046G2 C ...

Страница 183: ...E H CONTROL HEAD GND AUDIO MUTE H CONTROL HEAD 30 31 32 F1 1 4W 33 60 34 EDS CLOCK DATA 35 36 37 38 39 40 41 42 43 22 43 44 46 47 48 49 45 POWER SUPPLY 41 1 52 43 82 N3 MTS SIGNAL L 44 SERIAL DATA 1 45 46 47 88 21 12V POWER ON L 5 1 0 1 2 3 26 AUDIO ERASE HEAD DATA SLICER CS L CH FREQUENCY LOCK L SENSOR LED ON H SCAN 3 1 4W MODE SW POSITION C MODE SW POSITION B MODE SW POSITION A 4 5 MODE SW POSIT...

Страница 184: ...1 12 21 22 23 24 25 26 27 TO Hi Fi AUDIO P4202 P4202 P4202 P4202 P4202 P4202 P4202 P4202 P4202 P4202 28 29 13 14 15 16 17 18 19 20 TO Hi Fi AUDIO 68 A C 21 77 2 0 15 9 78 75 N7 M5 D E N5 B1 30 N5 P4203 P4203 P4203 P4203 P4203 P4203 P4203 P4203 P4203 P4203 WF29 Z 1 8W AUDIO 5V GND NORMAL AUDIO P4201 P4201 50 51 1 8 N7 3 6 2 6 64 62 71 2 4 2 8 2 8 0 2 N4 N5 L5 90 TO Hi Fi AUDIO P4204 P4204 P4204 P42...

Страница 185: ...91S 7 A3 1 N7 80 H10 8 SCAN1 5 1 Z Z 7 Z N6 2 6 12 SW1 N6 0 1 102 5 1 53 81 H7 29 PG SHIFTER 1 LP SLP H SERIAL DATA 1 SCAN2 0 1 PANEL RESET L H ROLL ACCELERATION 0 1 OSD CS L 0 1 LOADING MOTOR FORWARD H LOADING MOTOR REVERSE H VIDEO EE H CONTROL HEAD GND AUDIO MUTE H CONTROL HEAD 30 31 32 13 2 1 4W 33 60 34 EDS CLOCK DATA 35 36 37 38 39 40 41 42 43 22 43 44 46 47 48 49 45 POWER SUPPLY 41 Z 52 43 8...

Страница 186: ...TA 50 I1 CYLINDER SERVO 2 7 3 6 3 7 5 1 4 0 3 1 2 4 2 8 2 7 2 3 WF3 3 4 2 6 2 6 2 6 2 6 2 6 2 6 WF11 5 1 5 1 1 3 0 1 1 5 4 5 2 2 3 3 5 1 2 7 2 6 2 7 2 0 2 0 2 9 1 4 2 2 5 1 0 1 2 3 2 6 2 6 4 6 2 6 2 6 2 6 2 6 5 1 0 2 1 5 0 1 4 9 1 4W 1 4W 2 6 2 6 1 7 5 1 3 6 0 2 3 1 3 1 2 3 2 3 0 5 0 2 8 2 8 1 8 5 0 5 1 5 1 2 7 1 8 Z 2 2 0 5 1 18 7 5 1 5 1 4 4 0 0 13 6 19 1 0 8 13 6 0 18 6 0 8 TP3302 2 8 2 5 5 1 5...

Страница 187: ...EED VCR TV COUNTER RESET POWER REW FF ADD DLT R TUNE SAP Hi Fi VCR CH TRACKING MENU VCR TV REWIND SEARCH SLOW ZERO SEARCH 1 MINUTE SKIP PLAY POWER PROGRAM RAPID TUNE VCR CHANNEL UP DOWN TRACKING UP DOWN PAUSE RECORD TIME STOP FAST FORWARD SEARCH COUNTER RESET DISPLAY NUMBERED KEYS POWER Multi Function Display RECORD TIME REMOTE SENSOR SELECT SET WHEEL CLEAR ADD DELETE SAP Hi Fi SPEED FAST FORWARD ...

Страница 188: ... a line input Timer Indicator This indicator lights when the VCR is set for a Timer Recording or if a length is set for normal recording It flashes when a Timer Recording has been set but a tape has not been inserted into the VCR Hi Fi Indicator When Hi Fi audio is monitored or played back this indicator appears IN FROM ANT VHF UHF OUT TO TV VIDEO 1 AUDIO 1 3 CH 4 L OUT R IN Audio Output Connector...

Страница 189: ... the VCR CH3 or CH4 3 Push VCR CH for Spanish on screen displays Push VCR CH for English on screen displays SELECT LANGUAGE PUSH VCR CH ENGL ISH PULSE VCR CH ESPAÑOL APP VCR TV FRANÇAI S Turn TV on and VCR on CH TRACK POWER VCR CH ACKING or VCR TV or Push VCR TV for French on screen displays You can also set by using the same buttons on the VCR POWER VCR CH Up Down VCR TV 8 6 7 4 3 3 1 6 SET CLOCK...

Страница 190: ...GNETOSCOPE REGLAGE HORLOGE REGLAGE CANAL LANGUAGE IDIOMA FRANCA I S MENU SELECT ROTATE WHEEL SET PUSH WHEEL END PUSH MENU KEY SET UP VCR SET CLOCK SET UP CHANNEL ID IOMA LANGUE ENGL I SH ADD DELETE 3 2 1 CLEAR MENU 100 key NUMBERED keys CHANNEL AUTO SET CONNECT ANTENNA CABLE LOCAL PBS CH THEN AND IF YOU USE A CABLE BOX TUNE I T TO YOUR PLEASE PUSH CH UP KEY SET UP CHANNEL SELECT ROTATE WHEEL SET P...

Страница 191: ... or if you push REC and PLAY PLAY FF REW or REC on the VCR without a cassette inserted CHECK CASSETTE RECORD TAB If you push REC on the remote control or REC and PLAY on the VCR and a cassette is inserted with no record tab TURN VCR OFF FOR TIMER RECORDING After a Timer Program has been set PLEASE SET CLOCK BEFORE PROGRAMMING If you attempt to set or review a Timer Recording and the Clock is not s...

Страница 192: ...tect the tape and video head Slow Motion Playback Push SLOW to start and PLAY or SLOW to release the Slow mode Still Freeze Frame Picture Push PAUSE to freeze and release the picture To reduce picture noise Place the VCR in Slow motion mode Use TRACKING to clear up the picture then Push PAUSE Frame by Frame Advance While in Still mode hold down the SLOW button to advance the still picture one fram...

Страница 193: ...nd set to the VCR channel CH3 or CH4 Or push PLAY and REC TIME on VCR Push PAUSE to pause a recording in progress After the VCR has been in pause mode for 5 minutes it will stop automatically to protect the tape and video head Push REC TIME to start recording 1 PAUSE Multi Function Display Or push CH on the VCR To record from an outside source push VCR CH to select LINE 5 STOP Or push STOP on the ...

Страница 194: ...Channels at the VCR Turn TV on Use VCR CH Up Down buttons to select channels for viewing or recording To resume TV control channel selection push VCR TV to turn VCR indicator off or simply turn VCR off VCR If indicator doesn t light push VCR TV to turn it on Multi Function Display Watching Another TV Program Rapid Tune Push R TUNE to display the last channel you were watching When selecting channe...

Страница 195: ...e VCR will go into FF or REW mode and stop at the last point the Time Counter was set to 0 00 00 Zero Search MENU SELECT ROTATE WHEEL SET PUSH WHEEL END PUSH MENU KEY SET UP VCR SET CLOCK SET UP CHANNEL ID IOMA LANGUE ENGL I SH Our Vacation STOP 12 00AM CH08 0 00 00 SLP STOP 12 00AM CH08 0 00 30 SLP 1 2 3 4 DISPLAY COUNTER RESET ZERO 1MIN SET UP VCR SELECT ROTATE WHEEL SET PUSH WHEEL END PUSH MENU...

Страница 196: ...ng VCR Insert a pre recorded tape into the Playing Source VCR Push PAUSE on both VCRs at the same time to begin copying Copying Your Tapes Dubbing CH3 or 4 TV for Monitoring Recording Editing VCR Playing Source VCR Edit Out Unwanted Parts of the original recording by using the PAUSE button on the Recording unit while copying is in progress 7 Audio In R Video In Audio In L Video Out Audio Out R Aud...

Страница 197: ...nute the recording will not be performed or continue If PROGRAM IS INCOMPLETE appears on screen in step 4 check all entries and make necessary corrections Your VCR can be set up to do a recording while you are away or otherwise occupied Up to 8 programs can be placed in memory You can choose to record one time daily or weekly PUSH WHEEL TO END PUSH PROG KEY BY ROTATING WHEEL SELECT START DATE 7 FR...

Страница 198: ...he normal TV screen 1 Replace Program Contents Recording is not in progress 2 3 4 2 3 4 STOP ZERO 1MIN SLOW PAUSE REC TIME PLAY PROG CLEAR MENU DISPLAY 1 2 3 5 4 6 7 9 8 0 100 PUSH TO SET ROTATE TO SELECT SPEED VCR TV COUNTER RESET POWER REW FF ADD DLT R TUNE SAP Hi Fi VCR CH TRACKING CLEAR PROG Multi Function display STOP POWER STOP WHEEL 2 PUSH WHEEL TO END PUSH PROG KEY BY ROTATING WHEEL SELECT...

Страница 199: ... TIMER Multi Function Display at the same time Push REC TIME and FF to exit this mode and 5 To set the next program repeat steps 2 3 and 4 before continuing with step 5 When the program is completed Push SET FF repeatedly to move to a particular item for setting or correction Push FF to enter the program mode and If the clock is not set pushing these buttons will display the SET CLOCK screen In th...

Страница 200: ...lock is set 4 Push MENU twice to exit this screen Push MENU to display the menu Rotate and push the WHEEL to select SET UP VCR MENU MENU 1 MENU SELECT ROTATE WHEEL SET PUSH WHEEL END PUSH MENU KEY SET UP VCR SET CLOCK SET UP CHANNEL ID IOMA LANGUE ENGL I SH 1 Check list before you begin All connections are made VCR is Plugged in TV is turned on and set to the VCR channel CH3 or CH4 STOP ZERO 1MIN ...

Страница 201: ...ion Sound Stereo broadcast is being received STOP 12 00AM CH08 0 00 00 SLP STEREO MONO SAP MTS Stereo and SAP broadcast Multi channel Television Sound Stereo main language and Second Audio Program second language broadcasts are being received simultaneously Select the STEREO or SAP audio mode as desired STOP 12 00AM CH08 0 00 00 SLP STEREO SAP MONO Receivable Broadcast Types DISPLAY The following ...

Страница 202: ...o Select Audio Mode From Menu Push MENU to display the menu Rotate and push the Wheel to select SET UP VCR from menu Rotate the Wheel to select SET AUDIO MODE Push the Wheel to set the desired audio for listening or recording 1 SET UP VCR SELECT ROTATE WHEEL SET PUSH WHEEL END PUSH MENU KEY REPEAT PLAY ON BEEPER ON INPUT SELECT TUNER SET AUDIO MODE For recording set to STEREO SAP or MONO For playb...

Страница 203: ...IFICATIONS WILLNOTBESATISFIED DURINGSERVICING PLEASEREPLACEASAUNIT 1 SINCETHEUHF VHFTUNER TVDEMODULATORUNIT HASALREADYBEENPRE ADJUSTEDATTHEFACTORY DONOTTRYTOADJUSTTHEUHF VHFTUNER TVDEMODULATORUNIT THEUHF VHFTUNER TVDEMODULATORUNITREPLACEMENTPART ISAVAILABLEONLYASACOMPLETEASSEMBLYUNIT 2 1 2 3 4 5 6 7 8 9 10 11 12 13 14 15 16 17 18 A B C D E F G H I J K L M N O P 1 2 3 4 5 Q 1 2 3 4 5 1 2 3 4CH VIDE...

Страница 204: ......

Страница 205: ......

Отзывы: