background image

Models No.

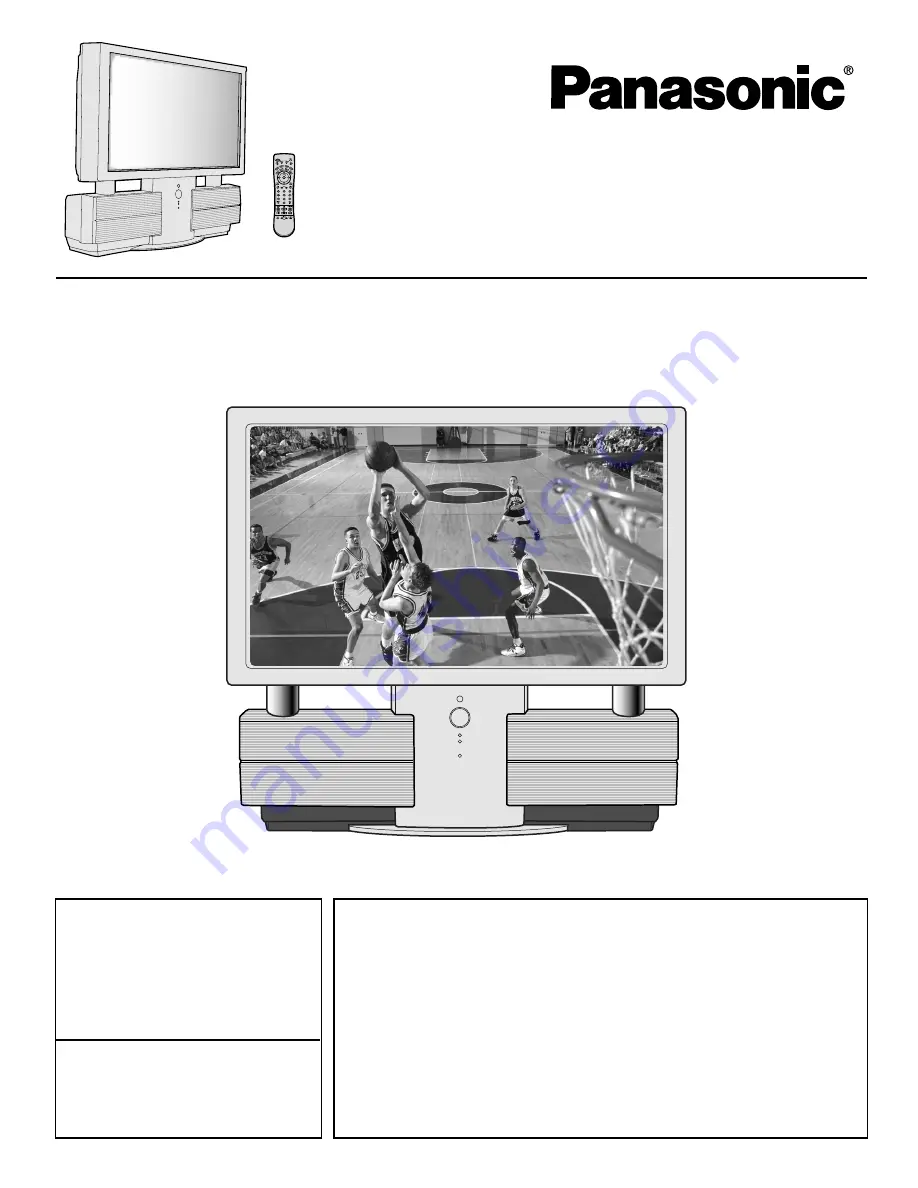
   PT-40LC12/PT-45LC12

For assistance, please call :
1-888-VIEW PTV(843-9788)

or send e-mail to :
[email protected]
or visit us at www.panasonic.com

For assistance, please call :
787-750-4300

or visit us at www.panasonic.com

LSQT0583A

Multi-Media Projection Display

Operating Instructions

(USA)

(Puerto Rico)

Three Important Reasons to Register Your Product Immediately!

1 Protect Your New Investment...

Register your new projection display for insurance purposes in case
your new projection display is stolen.

2 Product safety notification...

Registering your product can help us to contact you in the unlikely
event a safety notification is required under the Consumer Product
Safety Act.

3 Improved Product Development...

Help us continue to design products that meet your needs.

Register online at

 www.panasonic.com/register

Summary of Contents for PT45LC12 - MULTI-MEDIA DISPLAY

Page 1: ... Rico Three Important Reasons to Register Your Product Immediately 1 Protect Your New Investment Register your new projection display for insurance purposes in case your new projection display is stolen 2 Product safety notification Registering your product can help us to contact you in the unlikely event a safety notification is required under the Consumer Product Safety Act 3 Improved Product De...

Page 2: ...an unstable cart stand or table The projection display may fall causing serious injury to a child or adult and serious damage to the appliance Use only with a cart or stand recommended by the manufacturer or sold with the projection display 7A An appliance and cart combination shall be moved with care Quick stops excessive force and uneven surfaces may cause the appliance and cart combination to o...

Page 3: ...ng the operating instructions Adjust only those controls that are covered by the operating instructions as improper adjustment of other controls may result in damage and will often require extensive work by a qualified technician to restore the projection display to normal operation e If the projection display has been dropped or the cabinet has been damaged f When the projection display exhibits ...

Page 4: ...provide reasonable protection against harmful interference in a residential installation This equipment generates uses and can radiate radio frequency energy and if not installed and used in accordance with the instructions may cause harmful interference to radio communications However there is no guarantee that interference will not occur in a particular installation If this equipment does cause ...

Page 5: ...e PC Input Terminals 18 Analog RGB signals that can be input 19 Power ON OFF 20 Initial Setup 20 Turning the Power ON and OFF 21 Flow Chart of Main menu 22 Tuning channels 24 Automatic channel setting 24 Manual channel setting 26 Projection display operation 28 TV Status display 29 Using the number keys 29 Using projection display Channel up down buttons to select input mode 29 Auto shut off 29 In...

Page 6: ...video cables should utilize 75 Ω coaxial shielded cables Cables are available from your dealer or electronic supply house Before you purchase any cables be sure you know what type of output and input connectors your various components require Also determine the length of cable you ll need Safety Precaution Please take safety precautions to prevent the unit from falling over The unit may fall over ...

Page 7: ... to reset the remote control infrared codes We recommend that you record the code on page 62 prior to setting up the remote Helpful Hint For frequent remote control users replace old batteries with Alkaline batteries for longer life 1 Batteries should always be replaced as a pair Always use new batteries when replacing the old set 2 Do not mix battery types example Zinc Carbon with Alkaline 3 Do n...

Page 8: ...c Mode Selection for Remote Control VCR Mode Selection for Remote Control TV Mode Selection for Remote Control Digital TV Mode Selection for Remote Control Aux Mode Selection for Remote Control Receiver Amplifier Mode Selection for Remote Control Cable TV Mode Selection for Remote Control Digital Broadcasting Satellite for Remote Control R TUNE button Press to view previous channel or video mode B...

Page 9: ... down Returns to normal viewing from the MENU screen Previous before item in MENU Location of Controls SAP button Changes the audio mode P 35 Display menu Press the ACTION button to display Menu screen Note This section describes TV mode only For other modes see pages 61 67 2 1 H C C B A L A M R O N O E R E T S P A S O N O M When the Menu screen is displayed PP 22 23 Moves cursor to the left durin...

Page 10: ...icator lights up when there is an abnormal temperature in the unit P 68 Remote Control Sensor POWER button POWER indicator P 21 Lamp unit P 60 Speaker cover Press the mark on the center of the front cover to open Volume up down buttons P 28 Channel up down buttons P 29 PC Input terminal P 18 Input 3 terminals P 15 Location of Controls Phones jack Connect an earphone headphones not supplied to the ...

Page 11: ...AR Component signal input terminals P 16 AV out terminals P 17 Input 1 terminals P 15 Input 2 terminals P 15 Location of Controls VHF UHF terminal PP 12 14 Vent Note Make sure the vent is not clogged This could cause damage ...

Page 12: ... with fingers only Overtightening may damage terminals WARNING Turn off the power supply for all components before making any connections If the cables necessary for connecting a component to the system are not included with the component or available as an option you may need to fashion a cable to suit the component concerned Read the instruction manual for each system component carefully before ...

Page 13: ...required for proper reception Check with your local Cable company for its compatibility require ments For reception of cable channels 01 125 connect the cable supplied by your local cable company Antenna Mode must be set to CABLE P 24 Installation CABLE BOX INPUT OUTPUT TERMINAL ON THE BACK OF THE CABLE BOX In from cable Connect the cable from the antenna or cable system to the VHF UHF terminal on...

Page 14: ...l to CH3 or CH4 This does not apply when signal is input from VIDEO INPUT Installation Connecting the Antenna Cable to the RF in Terminal VCR Connect the cable from the Output terminal on the back of the Cable Box or antenna cable system to the Antenna input terminal on the back of the VCR CABLE BOX TO VCR OUTPUT S VIDEO VIDEO L AUDIO R TO VCR INPUT OUTPUT OUTPUT INPUT VCR TERMINAL ON THE BACK OF ...

Page 15: ...nals Input 3 is located on the front of the unit Select the desired VIDEO input position by pressing the TV VIDEO button P 33 When connecting video cables priority is given to the S Video cable when the S Video input terminal and the video input terminal are connected at the same time S VHS VCR Audio OUT Video OUT S Video OUT R L S VIDEO AUDIO VHS VCR VIDEO AUDIO Audio OUT Video OUT R L Similar co...

Page 16: ... button P 33 Component video signals that can be input are 480i 480p 720p and 1080i Installation Audio OUT PB Y PR DVD Y PB PR OUT L R DVD Player COMPONENT VIDEO AUDIO Because each Y PB and PR signal is input independently the Component signal allows for more accurate color reproduction The Component signal output terminal indication will differ according to the output device Y PB Cb PR Cr Please ...

Page 17: ... to the same video recorder as this could cause incorrect operation Even if TV is in Split or PIP mode OUT terminals only output the main picture and sound signals A sub picture including channel search etc will not be output VIDEO OUT terminals will not output Y PB PR or RGB signals The S Video OUT terminal outputs the same signal that is input from the S Video IN terminal Recording Equipment VHS...

Page 18: ... an RGB signal with a vertical scanning frequency of 62 Hz is input To obtain the optimum picture quality with the projection display a vertical scanning frequency of 60 Hz is recommended Do not set the horizontal and vertical scanning frequencies for PC signals which are above or below the specified frequency range Select the desired RGB input position by pressing the TV VIDEO button P 33 Install...

Page 19: ...o of dots H x V Horizontal frequency kHz Vertical frequency Hz VGA400 70 Hz 640 X 400 31 47 70 08 VGA400 70Hz VGA480 60 Hz 640 X 480 31 47 59 94 VGA 60Hz Macintosh 13 640 X 480 35 00 66 67 MAC 13 VESA400 85 Hz 640 X 400 37 86 85 08 VESA 85Hz VESA480 72 Hz 640 X 480 37 86 72 81 VGA 72Hz VESA480 75 Hz 640 X 480 37 50 75 00 VGA 75Hz VESA480 85 Hz 640 X 480 43 27 85 01 VGA 85Hz SVGA 56 Hz 800 X 600 35...

Page 20: ...DSS Receiver or VCR Turn on Cable Box Turn off DSS Receiver or VCR Case 1 Case 2 When setup is complete the lowest channel picture appears If setup is incomplete the following screen appears Check connection of Antenna Cable to the RF in Terminal then try Automatic Channel Setting again PP 24 25 Note When the unit is turned on for the first time Automatic Channel Setting is performed Initial Setup...

Page 21: ...s accidentally turned off during use after power is turned back on it may take a short period before the lamp automatically comes on After the unit is turned on maximum picture brightness will be achieved in 5 10 minutes This is normal Power OFF Standby mode Power OFF Now cooling Power ON Power ON Preparing to light lamp Red Red blink Green Green blink Press the POWER button on the projection disp...

Page 22: ... RECALL T S U J D A P U T E S E R U T C I P O I D U A E Z I S N O I T I S O P N O I T A M R O F N I PA G E S E L E C T E N D RECALL P U T E S H S I L G N E E G A U G N A L L E N N A H C K C O L N O I T P A C O E D I V Use the buttons to select an item Select MENU desired by pushing Left button or Right button Use the ACTION button to set or go to next menu screen Pressing the ACTION button display...

Page 23: ... G N I W E I V E R U T C I P TO PICTURE ADJUST menu PP 44 45 PA G E S E L E C T E N D RECALL T S U J D A P U T E S E R U T C I P O I D U A E Z I S N O I T I S O P N O I T A M R O F N I PA G E S E L E C T E N D RECALL P U T E S H S I L G N E E G A U G N A L L E N N A H C K C O L N O I T P A C O E D I V TO LANGUAGE selection screen P 57 TO CHANNEL menu PP 24 27 52 53 S E L E C T E X I T RECALL L E N...

Page 24: ... L E C T E N D RECALL P U T E S H S I L G N E E G A U G N A L L E N N A H C K C O L N O I T P A C O E D I V S E L E C T E X I T RECALL L E N N A H C P U T E S E L B A C A N N E T N A T E S O T U A T E S L A U N A M N O I T P A C L E N N A H C F F O Y A L P S I D L A N G I S K A E W S E L E C T E X I T RECALL L E N N A H C P U T E S E L B A C A N N E T N A T E S O T U A T E S L A U N A M N O I T P ...

Page 25: ...sing the MANUAL SET feature Tuning channels 4 Case 1 Case 2 When setup is complete the lowest channel picture appears If setup is incomplete the screen at right appears Check connection of Antenna Cable to the RF in Terminal then try Automatic Channel Setting again Press to exit menu 5 N I A G A Y E K N O I T C A S S E R P A N N E T N A K C E H C E S A E L P N E H T N O I T C E N N O C E L B A C D...

Page 26: ... I T RECALL L E N N A H C P U T E S E L B A C A N N E T N A T E S O T U A T E S L A U N A M N O I T P A C L E N N A H C F F O Y A L P S I D L A N G I S K A E W S E L E C T E X I T RECALL L E N N A H C P U T E S E L B A C A N N E T N A T E S O T U A T E S L A U N A M N O I T P A C L E N N A H C F F O Y A L P S I D L A N G I S K A E W Manual channel setting Continued on the next page PA G E S E L E ...

Page 27: ... add channels to memory Press to select channel Press to delete channels from memory Press to exit menu Note Some channels with very weak signals may be locked into memory It desired these channels can be deleted manually using the MANUAL SET feature 5 6 Tuning channels D E L E T E E X I T RECALL T E S L A U N A M L E N N A H C A E S O O H C 1 0 L E N N A H C R E T N E N W O D P U H C G N I S U To...

Page 28: ...jection display on Press to operate the projection display with the remote control 1 2 3 4 Notes The channel number and volume level are stored even after the projection display is turned off Power consumption can be reduced if the volume level is lowered Or Remote Control Sensor POWER button POWER indicator Volume up down buttons Channel up down buttons CH03 26 125 or 69 CABLE CH01 CH02 CH125 TV ...

Page 29: ... Example 2 To select channel 12 press the 1 key then 2 Channel 12 appears momentarily Example 3 To select channel 8 press the 8 key Channel 8 appears momentarily FREEZE Invalid operation notice feature If an invalid operation is attempted the mark shown right is displayed 125 or 69 CABLE CH01 CH125 LINE 1 LINE 2 LINE 3 RGB COMPONENT 2 COMPONENT 1 TV Projection display Channel up down buttons can a...

Page 30: ...ver if the mode selected does not match the aspect ratio of the input signal the original picture quality may be affected If using this Projection display in places such as cafes or hotels with the aim of displaying programs for a commercial purpose or for public presentation please note that by using the aspect ratio 16 9 selection function to change the aspect ratio you may be infringing on the ...

Page 31: ...ode will display a 4 3 picture at maxi mum size but with aspect correction applied to the center of the screen so that elongation is only apparent at the left and right edges of the screen The size of the picture will depend on the original signal FULL will display the picture at its maximum size but with sight elongation TRUE NORMAL 3 4 ZOOM 16 9 FULL 16 9 JUST 9 16 TRUE 3 4 You can reduce the im...

Page 32: ...r down is displayed in single screen Sound from the left screen is output from the speakers on the projection display set Channel search displays each channel in order as a paused image Channels are displayed from the left top to the right bottom in order When it reaches the right bottom the next channel is displayed at the left top overwriting the previously displayed channel Notes To end channel...

Page 33: ...tions A video camera uses the Input 3 terminal on the front of the projection display Video camera To S video output or video output To audio output LINE 1 Signal of source connected to INPUT 1 is displayed LINE 2 Signal of source connected to INPUT 2 is displayed LINE 3 Signal of source connected to INPUT 3 is displayed COMPONENT 1 Signal of source connected to COMPONENT VIDEO INPUT 1 is displaye...

Page 34: ...ction can be switched between a frozen still picture and a moving picture each time the FREEZE button on the remote control unit is pressed Press FREEZE button again to resume motion Mute Freeze SAP Sound mute Useful when answering the phone or receiving unexpected visitors Freezing pictures E Z E E R F E T U M Note The audio output from AV OUT is not muted Note The video output from AV OUT is not...

Page 35: ...udio mode If stereo broadcast is weak and the display flickers select MONO audio mode for possibly better results SAP broadcast Secondary Audio Program sub language Select SAP audio mode for the sub language MONO broadcast Normal monaural sound broadcast Receivable Broadcast Types 2 1 H C O E R E T S P A S O N O M 2 1 H C P A S O N O M O E R E T S 2 1 H C P A S O N O M O E R E T S 2 1 H C P A S O ...

Page 36: ... With the Left screen as with a single screen you can change the input change channels and adjust the volume The right and left screens cannot display the same picture at the same time A split screen which includes an RGB signal from a PC is fixed as SPLIT SCREEN NORMAL PC input Split screen Splitting the screen Press to split The previously selected screen appears on the left Returning to one scr...

Page 37: ...o the left Then press the TV VIDEO button to directly change the input Finally press SWAP button again to change the screen back to the right 125 or 69 CABLE CH01 CH125 LINE 1 LINE 2 LINE 3 RGB COMPONENT 2 COMPONENT 1 TV Press to select the desired channel PIP buttons can also be used to select an outside input for the right side of the screen No input mode is displayed for terminals with no equip...

Page 38: ...y set In PIP mode the Main screen signal is output from the rear monitor output terminal Because Main and PIP screens are processed by individual circuits image quality may vary slightly PIP mode returns to single screen when the projection display is turned off The Main and PIP screens cannot display the same picture at the same time An RGB signal cannot be displayed on a PIP screen or a Main scr...

Page 39: ...annel Example During Main screen NORMAL Example During Main screen NORMAL Selecting the screen size for PIP screen You can choose PIP screen size of 3 magnifications Press repeatedly to select PIP screen size Note PIP buttons can also be used to select an outside input for the PIP screen Initial size CH03 2 1 CH03 1 2 3 Initial position Note The last size chosen is saved and will not be erased eve...

Page 40: ...S E L E C T A D J U S T E X I T RECALL N O I T I S O P H N O I T I S O P V K N I R H S H T D I W H L A M R O N N O I T I S O P S E L E C T E X I T RECALL N O I T I S O P H N O I T I S O P V N E D I W H T D I W H L A M R O N A D J U S T N O I T I S O P S E L E C T A D J U S T E X I T RECALL N O I T I S O P H N O I T I S O P V E Z I S H E S A H P L A M R O N N O I T I S O P S E L E C T A D J U S T E...

Page 41: ...ned off The signals output from the monitor output terminal on the back of the projection display is not affected when the screen size and position is adjusted Adjusting screen position and size Adjustment item Button Adjustment Details Note H Position V Position V SIZE Press button Press button Press button Press button The image moves up The image moves down The image moves to the right The imag...

Page 42: ... U T E S H S I L G N E E G A U G N A L L E N N A H C K C O L N O I T P A C O E D I V PA G E S E L E C T E N D RECALL T S U J D A P U T E S E R U T C I P O I D U A E Z I S N O I T I S O P N O I T A M R O F N I Press to set each item You can hear deeper 3D audio using just the units two front speakers Surround sound effect is not available for normal mono broadcasts You can turn off the unit speaker...

Page 43: ... RECALL S S A B E L B E R T E C N A L A B T S U J D A O I D U A L A M R O N NORMAL is displayed at default S E L E C T E X I T RECALL O I D U A E B B U N E M O I D U A T S U J D A O I D U A N O R E K A E P S F F O D N U O R R U S Note If the AUDIO MENU is set to AUTO or if BBE is ON BASS and TREBLE cannot be adjusted Press this button to turn the BBE sound feature On or Off BBE sound technology en...

Page 44: ...N E E G A U G N A L L E N N A H C K C O L N O I T P A C O E D I V PA G E S E L E C T E N D RECALL T S U J D A P U T E S E R U T C I P O I D U A E Z I S N O I T I S O P N O I T A M R O F N I Press to set each item Press to exit menu S E L E C T E X I T RECALL L A M R O N U N E M E R U T C I P T S U J D A E R U T C I P E R U T C I P L A M R O N E D O M G N I W E I V NORMAL CINEMA Factory setting Whe...

Page 45: ...olor becomes paler Flesh tones become greenish Flesh tones become reddish The screen becomes brighter The screen becomes darker The red component becomes stronger The red component becomes weaker The green component becomes stronger The green component becomes weaker The blue component becomes stronger The blue component becomes weaker Press to exit menu 4 COLOR TINT BRIGHTNESS PICTURE RGB only RG...

Page 46: ...less the secret code is entered If you forget your secret code refer to Reset User s Memory Functions on page 49 Changing your secret code You will need your current code Press to clear current code Repeat step 2 to enter new code Press to display LOCK menu for rating screen and go to page 47 US MOVIES Ratings or page 48 US TV PROGRAMS Ratings PA G E S E L E C T E N D RECALL T S U J D A P U T E S ...

Page 47: ...et Press to select CHANGE SETTINGS Press to display the CHANGE SETTINGS screen S E L E C T E X I T RECALL D E K C O L N U G G P 3 1 G P R 7 1 C N X S E Y S M A R G O R P R N W E I V G N I T A R O N S N I A T N O C 4 Press to select VIEW NR PROGRAMS Press to set YES or NO S E L E C T E X I T RECALL D E K C O L N U G G P 3 1 G P R 7 1 C N X S E Y S M A R G O R P R N W E I V E C N A D I U G L A T N E...

Page 48: ...S or NO Press to select ratings to be blocked P 49 Press to set 5 Press to exit menu Lock Feature S E L E C T E X I T RECALL D E K C O L N U Y V T V F D L S V D L S V D L S V 7 Y V T G V T G P V T 4 1 V T A M V T S E Y S M A R G O R P R N W E I V G N I T A R O N S N I A T N O C S E L E C T E X I T RECALL D E K C O L N U Y V T V F D L S V D L S V D L S V 7 Y V T G V T G P V T 4 1 V T A M V T S E Y ...

Page 49: ...NED Some material may be inappropriate for children under 13 RESTRICTED Children under 17 must be accompanied by a parent or adult OVER AGE 17 ONLY No one 17 and under admitted ADULTS ONLY CH08 D E D E E C X E G N I T A R M A R G O R P Y V T G N I T A R E D O C 9 0 R E T N E CH03 CH08 G N I T A R M A R G O R P D E D E E C X E Y V T G N I T A R E D O C 9 0 R E T N E CH03 D E D E E C X E G N I T A R...

Page 50: ...o try different settings 1 2 Press the ACTION button to display the MENU screen and select SET UP Press to select CAPTION Press to display the CAPTION screen PA G E S E L E C T E N D RECALL T S U J D A P U T E S E R U T C I P O I D U A E Z I S N O I T I S O P N O I T A M R O F N I PA G E S E L E C T E N D RECALL P U T E S H S I L G N E E G A U G N A L L E N N A H C K C O L N O I T P A C O E D I V ...

Page 51: ...To deactivate press the MUTE button again Note This feature functions when the Closed Caption Mode is in the OFF position The program being viewed must be broadcast with Closed Caption Notes The setting for CC ON MUTE is valid only when the CC MODE is OFF CC MODE set to ON will override CC ON MUTE Closed Caption is not displayed if the input signal is COMPONENT VIDEO INPUT of 480P or more or from ...

Page 52: ... Press to display the CHANNEL CAP TION screen Press to select CHANNEL CAPTION Press to exit menu 5 S E L E C T E X I T RECALL L E N N A H C P U T E S E L B A C A N N E T N A T E S O T U A T E S L A U N A M N O I T P A C L E N N A H C F F O Y A L P S I D L A N G I S K A E W S E L E C T E X I T RECALL N O I T P A C L E N N A H C 4 1 C B A S B C X O F C B N S B P N N C S E L E C T E X I T RECALL N O ...

Page 53: ... C T E X I T RECALL L E N N A H C P U T E S E L B A C A N N E T N A T E S O T U A T E S L A U N A M N O I T P A C L E N N A H C F F O Y A L P S I D L A N G I S K A E W Note If unit is connected to equipment which has blue back feature selecting ON will have no effect on the other equipment When ON is selected the picture is displayed even when a broadcast signal is weak or non existent PA G E S E ...

Page 54: ...S E L E C T E N D RECALL P U T E S H S I L G N E E G A U G N A L L E N N A H C K C O L N O I T P A C O E D I V S E L E C T E X I T RECALL O E D I V F F O R N O E D I V A G V B G R F F O 1 D I V T D S X I R T A M R O L O C P 0 8 4 Press to set ON or OFF Press to select VIDEO NR Press to exit menu 3 In the event of weak signal conditions the Video NR circuitry reduces noise in the luminance channel ...

Page 55: ... I S O P N O I T A M R O F N I PA G E S E L E C T E N D RECALL P U T E S H S I L G N E E G A U G N A L L E N N A H C K C O L N O I T P A C O E D I V Settingwhen480psignals sequentialscan areinputthroughCOMPONENTVIDEOINPUT Adjust 480p signals to achieve a natural color from digital equipment connected to COMPONENT VIDEO INPUT Y PB Cb PR Cr input terminals 1 2 Press the ACTION button to display the ...

Page 56: ...N O I T A M R O F N I PA G E S E L E C T E N D RECALL P U T E S H S I L G N E E G A U G N A L L E N N A H C K C O L N O I T P A C O E D I V S E L E C T E X I T RECALL O E D I V F F O R N O E D I V A G V B G R F F O 1 D I V T D S X I R T A M R O L O C P 0 8 4 Press to set VGA or 480P Press to select RGB Press to exit menu 3 RGB Input Feature Set the signal to be input to the Projection display s fr...

Page 57: ... is set to English as the factory setting To select one of 3 different languages for on screen displays follow the instructions below ENGLISH SPANISH FRENCH Information E X I T RECALL L A N G I S T U P N I i 0 8 4 PA G E S E L E C T E N D RECALL P U T E S H S I L G N E E G A U G N A L L E N N A H C K C O L N O I T P A C O E D I V PA G E S E L E C T E N D RECALL T S U J D A P U T E S E R U T C I P ...

Page 58: ... your vacuum cleaner Replace the Speaker cover If the dust cannot be removed by cleaning it is time to replace the air filter 4 5 S I H T T A D E D N E M M O C E R S I E M I T E H T N R U T T S R I F F F O T I N U G N I N A E L C R E T L I F R I A E H T E V O M E R R E V O C R E K A E P S T H G I R E H T W O L L O F D N A S N O I T C U R T S N I R E T L I F R I A E H T G N I N A E L C T C U D O R ...

Page 59: ...Replace filter when it remains clogged dirty or damage even after cleaning S I H T T A D E D N E M M O C E R S I E M I T E H T N R U T T S R I F F F O T I N U G N I N A E L C R E T L I F R I A E H T E V O M E R R E V O C R E K A E P S T H G I R E H T W O L L O F D N A S N O I T C U R T S N I D E N R U T E B L L I W T I N U E T U N I M 1 R E T F A F F O When a dirty or clogged air filter is detecte...

Page 60: ...l the cooling fan stops The lamp cooling fan will continue to operate for about 1 minute after turning off the power Do not unplug the power cord from the outlet until the fan has stopped Avoid interrupting the power line by using circuit breakers or switchable power strips E X I T RECALL T E S E R E B O T S D E E N P M A L E H T P M A L E H T D N A D E C A L P E R E B O T S D E E N R E T E M R U ...

Page 61: ... your remote is set for this code Then press the Remote Control POWER button to test the component If the procedure was successful the component will turn on Notes Due to changes in infra red commands used by manufacturers some brands have several codes If your unit does not respond to the first code please try the next one If an incorrect number is entered or there is an incomplete entry after 30...

Page 62: ...s until the proper device code is found And the target device responds Once the code has been found press the ACTION button to lock it in Notes The step and set mode will start from the current device not the beginning of the library except for the first time The step and set mode works in the reverse direction using the button Infrared Remote Codes for Specific Components Helpful Hint Write down ...

Page 63: ...9 311 339 305 313 320 326 323 325 306 305 306 329 324 345 301 324 343 310 311 339 345 303 319 320 325 326 343 305 307 308 309 313 320 326 334 324 333 345 306 334 300 323 345 323 324 339 310 311 334 339 306 310 311 339 300 305 306 307 308 309 323 324 331 310 311 339 306 309 324 338 340 341 347 348 300 345 338 340 341 347 348 304 347 310 311 334 339 323 324 306 321 328 335 Maker ORION PANASONIC J C ...

Page 64: ... 132 132 115 132 112 118 140 141 142 145 134 105 132 137 105 111 112 113 101 105 105 110 105 132 101 105 144 135 104 125 132 122 132 106 129 130 100 117 100 Maker Set Up No Maker Set Up No DENON FERGUSON JVC MITSUBISHI NORDMENDE PANASONIC PHILIPS PIONEER RCA 100 101 109 105 101 100 103 102 101 SABA SAMSUNG SHARP SONY TECHNICS THOMSON TOSHIBA YAMAHA ZENITH 101 110 108 104 100 101 103 100 107 Maker ...

Page 65: ...PIONEER RCA SANSUI SHARP SONY TEAC TECHNICS YAMAHA 222 204 226 227 228 205 210 231 219 220 210 211 215 216 218 201 202 120 125 126 134 135 136 104 113 115 123 129 132 133 100 108 127 124 116 106 109 114 OPTIMUS PANASONIC PHILIPS PIONEER QUASAR RCA SANSUI SHARP SONY SOUNDESIGN TEAC TECHNICS VICTOR YAMAHA 103 127 130 131 118 119 121 123 105 107 118 119 121 103 105 127 130 131 103 111 139 134 137 122...

Page 66: ...or remote control TV CBL VCR AUX DBS RCVR DTV DVD CD TV CBL RCVR DBS DVD DTV Channel Up Down Navigation Up Down Navigation Up Down Next Previous Track Volume Navigation Left Right TV DTV CBL DBS DVD TV Menu DTV Menu Enter DBS Menu Select DVD DTV DBS DVD Menu Menu On Off Menu On Off DBS DVD Page Up Down Skip TV CBL VCR DBS DTV AUX Cassette Deck Previous Channel Previous STB Channel Deck A B TV VCR ...

Page 67: ... Search Fast Forward Skip Search Fast Forward Surround TV VCR AUX Cassette Deck CD DVD Freeze Pause Pause Still TV VCR DVD CD AUX Cassette Deck PIP Swap SPLIT swap Stop Stop Stop Stop TV DTV VCR AUX Cassette Deck DBS Channel Search Info EPG Record Record Record VCR DBS TV VCR switch TV DBS switch TV VCR DVD DBS CD RCVR PIP Channel Up Down Channel Up Down Slow Channel Up Down Repeat Random Center C...

Page 68: ...ome parts of the screen are always lit while others do not light up Some parts of the screen do not light up This is a characteristic of the LCD panel and not a malfunction The projection display set makes a high whistling sound when the power is ON This is the sound of the internal starting UP This is not a malfunction During ZOOM modes the image is cut off at the top and bottom Has the screen po...

Page 69: ...CA Pin Jack S VIDEO Y 1 Vp p 75 Ω C 0 286 Vp p 75 Ω Mini DIN 4pin AUDIO L R 0 5 Vrms RCA Pin Jack x 2 COMPONENT Y 1 0 Vp p with sync 75 Ω Pin Jack VIDEO INPUT 1 2 PB PR 0 35 Vp p 75 Ω Pin Jack x 2 AUDIO L R 0 5 Vrms RCA Pin Jack x 2 Output signals AV OUT VIDEO 1 0 Vp p 75 Ω RCA Pin Jack S VIDEO Y 1 Vp p 75 Ω C 0 286 Vp p 75 Ω Mini DIN 4pin AUDIO L R 0 5 Vrms RCA Pin Jack x 2 Dimensions W x H x D W...

Page 70: ...ure screen Please wipe with a soft cloth from time to time If you use a chemically treated cloth please be careful to follow the instructions that come with the cloth Web Site http www panasonic com You can purchase parts accessories or locate your nearest servicenter by visiting our Web Site For Product Information Operating Assistance Literature Request Dealer Locations and all Customer Service ...

Page 71: ...re that the product or parts of the product be removed for shop diagnosis and or repair and then returned Limited Warranty Limits And Exclusions This warranty ONLY COVERS failures due to defects in materials or workmanship and DOES NOT COVER normal wear and tear or cosmetic damage The warranty also does not cover damages which occurred in shipment or failures which are caused by products not suppl...

Page 72: ...10 29 Component signal input terminals 11 F Freezing pictures 34 Function buttons 8 I ID 1 55 Input 1 terminals 11 Input 2 terminals 11 Input 3 terminals 10 L LAMP indicator 10 Left screen 36 Light button 9 M Main picture 36 38 Main screen 38 Mode Selection buttons 8 MUTE button 8 N Number keys 8 P PC Input terminal 10 Phones jack 10 PIP screen 38 POWER button 8 21 POWER button POWER indicator 10 ...

Reviews: