background image

E

NGLISH

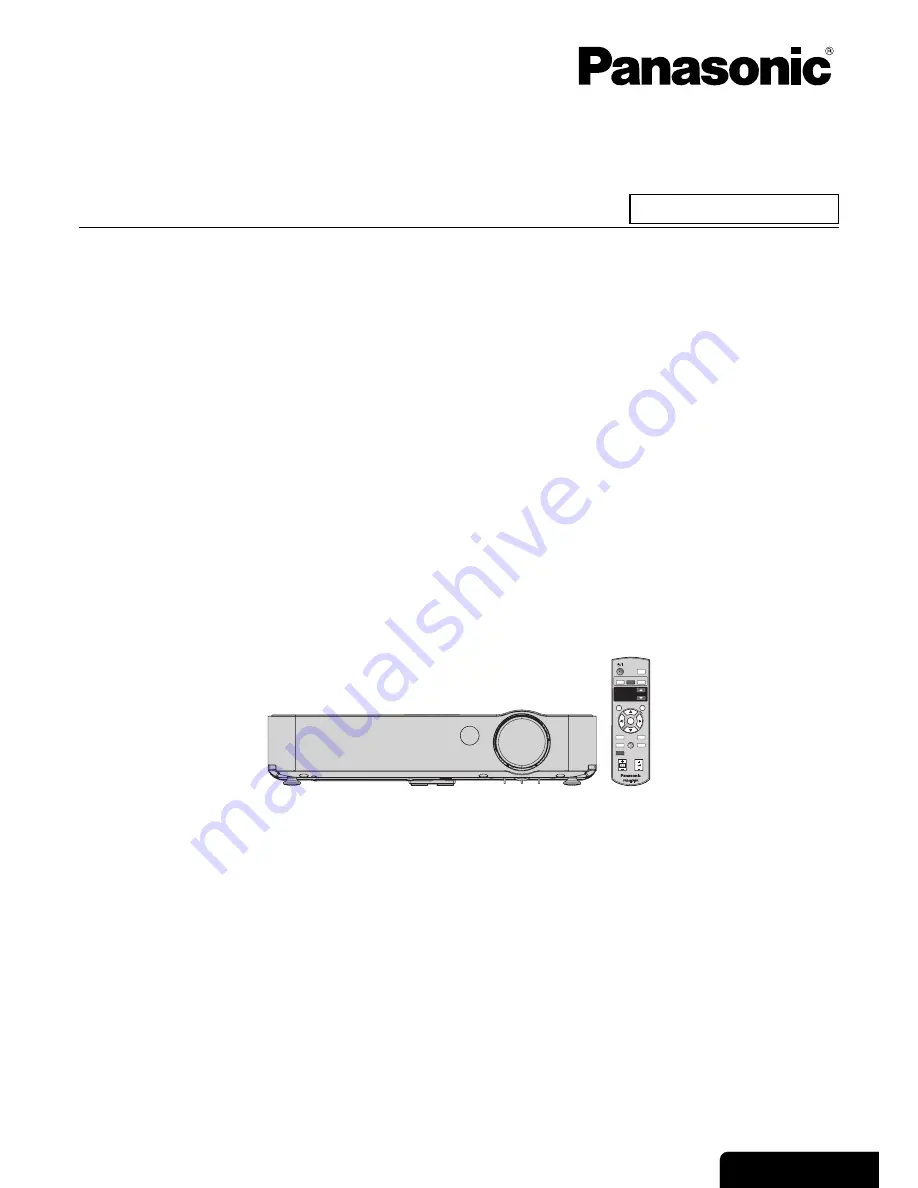
Operating Instructions

LCD Projector 

Model No.

PT-LB51NTE
PT-LB51E

Before operating this product, please read the instructions carefully and save this manual for future use.

TQBJ0229-4

Commercial Use

AUTO

SETUP

INPUT

SELECT

COMPUTER WIRELESS

VIDEO

WIRELESS

PRESENTATION

PAGE

MENU

ENTER

FREEZE

SHUTTER

COMPUTER

SEARCH

DEFAULT

INDEX-WINDOW

MULTI-LIVE

DIGITAL ZOOM

VOLUME

RETURN

Summary of Contents for PT-LB51E

Page 1: ...g this product please read the instructions carefully and save this manual for future use TQBJ0229 4 Commercial Use AUTO SETUP INPUT SELECT COMPUTER WIRELESS VIDEO WIRELESS PRESENTATION PAGE MENU ENTER FREEZE SHUTTER COMPUTER SEARCH DEFAULT INDEX WINDOW MULTI LIVE DIGITAL ZOOM VOLUME RETURN ...

Page 2: ...ed period of time 2 To prevent electric shock do not remove cover No user serviceable parts inside Refer servicing to qualified service personnel 3 Do not remove the earthing pin on the mains plug This apparatus is equipped with a three prong earthing type mains plug This plug will only fit an earthing type mains socket This is a safety feature If you are unable to insert the plug into the mains s...

Page 3: ...appropriate waste handling For more information about collection and recycling of old products and batteries please contact your local municipality your waste disposal service or the point of sale where you purchased the items Penalties may be applicable for incorrect disposal of this waste in accordance with national legislation For business users in the European Union If you wish to discard elec...

Page 4: ... Testing Centre Winsbergring 15 22525 Hamburg F R Germany Ce produit est conçu pour l utilisation dans les pays suivants Autriche Belgique Bulgarie République Tchéquie Chypre Danemark Estonie Finlande France Allemagne Grèce Hongrie Islande Irlande Italie Lettonie Lituanie Luxembourg Malte Pays Bas Norvège Pologne Portugal Roumanie Slovénie Slovaquie Espagne Suède Suisse et Royaume Uni Les clients ...

Page 5: ...ENGLISH 5 Important Infomation ...

Page 6: ...ojector 22 Switching off the projector 23 Projecting an image 24 Selecting the input signal 24 Positioning the image 24 Remote control operation 25 Operating range 25 Setting up the image position automatically 25 Switching the input signal 26 Capturing an image 27 Stopping the projection temporary 27 Resetting to the factory default settings 27 Projecting an image in INDEX WINDOW mode 27 Enlargin...

Page 7: ...OMPUTER2 SELECT 36 LAMP POWER 36 LAMP RUNTIME 37 POWER OFF TIMER 37 DIRECT POWER ON 37 CONTROL PANEL 37 AUTO SETUP 37 SIGNAL SEARCH 37 INSTALLATION 37 HIGHLAND 38 RGB YPBPR 38 VOLUME 38 DETAILED SETUP 38 SECURITY menu 39 INPUT PASSWORD 39 PASSWORD CHANGE 39 TEXT DISPLAY 39 TEXT CHANGE 39 WIRELESS menu PT LB51NTE only 40 Items in WIRELESS menu 40 TEMP and LAMP Indicators 41 Managing the indicated p...

Page 8: ...the mains socket If the plug is not inserted correctly electric shocks or overheating could result Do not use plugs which are damaged or mains sockets which are coming loose from the wall Do not place the projector on top of surfaces which are unstable If the projector is placed on top of a surface which is sloped or unstable it may fall down or tip over and injury or damage could result Do not pl...

Page 9: ... Do not cover the air inlet port or the air outlet port Doing so may cause the projector to overheat which can cause fire or damage to the projector Do not place the projector in narrow badly ventilated places such as closets or bookshelves Do not place the projector on cloth or papers as these materials could be drawn into the air inlet port Do not set up the projector in humid or dusty places or...

Page 10: ...r at least once a year If dust is left to build up inside the projector without being cleaned out it can result in fire or problems with operation It is a good idea to clean the inside of the projector before the season for humid weather arrives Ask your nearest Authorised Service Centre to clean the projector when required Please discuss with the Authorised Service Centre regarding cleaning costs...

Page 11: ... pressure mercury lamp and that is characterised as follows The brightness of the lamp depends on the duration of use The lamp may explode or shorten the lamp life by shocks or chipping damage The lamp may explode only occasionally after using the projector The lamp may explode if using the projector after the instructed lamp replacement timing The lamp life is depends on individual lamp character...

Page 12: ...ge 21 PAGE buttons is only for PT LB51NTE See CD ROM contents Display the MAIN MENU page 29 Navigate through the menus with FGIH and activate the menu item with ENTER page 29 Reset some of the settings to the factory default settings page 27 Turn off the projection temporarily page 26 Display the frozen image while the display of subsequent images continues page 27 MULTI LIVE button is only for PT...

Page 13: ...mote control Avoid contact with liquids or moisture Use manganese batteries or alkaline batteries with the Remote control Do not attempt to modify or disassemble the Remote control Contact an Authorised Service Centre for repairs Do not keep pressing the Remote control buttons as this may shorten battery life See Remote control operation on page 25 ...

Page 14: ...These buttons are used to unlock the front adjustable legs Press to adjust the angle of tilt of the projector Control panel Security lock This can be used to connect a commercially available theft prevention cable manufactured by Kensington This security lock is compatible with the Microsaver Security System from Kensington Luminance Sensor page 33 This sensor detects the luminance when the DAYLIG...

Page 15: ...IN Connect a S VIDEO signal cable VIDEO IN Connect an RCA composite video cable COMPUTER AUDIO IN Connect audio cables for inputting audio signals corresponding to COMPUTER1 IN and COMPUTER2 IN 1 OUT SERIAL See Serial terminal on page 47 Air exhaust port VARIABLE AUDIO OUT Connect an audio cables for outputting audio signals to the connected equipment J Connector Panel Air exhaust port Speaker Air...

Page 16: ... 1 37 m 4 5 1 83 m 6 2 8 m 9 2 3 3 m 10 9 0 19 m 7 15 32 100 2 54 m 1 52 m 4 11 2 03 m 6 7 3 1 m 10 2 3 6 m 11 9 0 21 m 8 1 4 120 3 05 m 1 83 m 6 2 44 m 8 3 7 m 12 1 4 4 m 14 5 0 25 m 9 13 16 150 3 81 m 2 29 m 7 6 3 05 m 10 4 6 m 15 1 5 5 m 18 0 32 m 12 19 32 200 5 08 m 3 05 m 10 4 06 m 13 3 6 2 m 20 4 7 3 m 23 11 0 42 m 16 17 32 250 6 35 m 3 81 m 12 6 5 08 m 16 8 7 7 m 25 3 9 2 m 30 2 0 53 m 20 2...

Page 17: ...on a desk floor and projecting from rear INSTALLATION FRONT DESK INSTALLATION REAR DESK J Mounting in the ceiling and projecting from front J Mounting in the ceiling and projecting from rear INSTALLATION FRONT CEILING INSTALLATION REAR CEILING NOTE A translucent screen is required for rear projection When mounting the projector in the ceiling the optional ceiling mount bracket ET PKB50 is required...

Page 18: ...and insert the appropriate plugs If the signal cables are disconnected or if the power supply for the computer or video deck is turned off while DIGITAL ZOOM or INDEX WINDOW is being used these functions will be cancelled See Enlarging the centred area on page 28 See Projecting an image in INDEX WINDOW mode on page 27 Before connection to the projector Connecting with computers NOTE When COMPUTER2...

Page 19: ...ables use with a commercial BNC RCA adaptor DVD player Audio system To S VIDEO output Video player To video output or audio output DVD player with component video connectors D sub15 pin male BNCx5 male adapter cable Red connect to PR signal connector Blue connect to PB signal connector Green connect to Y signal connector Audio system To audio output BNC RCA adapter ...

Page 20: ...will operate by the internal power supply to cool down the lamp When this function is used it may take more time for the lamp to turn back on again compared to when the lamp cools down with the Mains lead connected Do not put the projector in a bag while the POWER button on the projector is illuminated J Direct power on function If you activate the DIRECT POWER ON you can start the projection only...

Page 21: ...g ready to project Lit The projector is ready to project ORANGE Lit The POWER is switched off and the projector is cooling the lamp Flashing The POWER is switched on again when cooling the lamp and recovering to projection mode Recovery may take a while NOTE If the projector is switched on again while the internal cooling fan is still operating by the internal power supply it may take a while to s...

Page 22: ...le The STARTUP LOGO is displayed on the screen See STARTUP LOGO on page 36 Switching on the projector NOTE Some small rattling or tinkling sound may be heard when starting up but this is normal and does not affect the performance of the projector If you disconnected the Mains lead while on projecting mode the projection will start with connecting the Mains lead See DIRECT POWER ON on page 37 2 POW...

Page 23: ...the lamp then illuminates RED 3 Once the POWER indicator is lit red unplug the Mains lead from the projector If you are in a hurry you can also use the direct power off function while unplugging the Mains lead from the projector page 20 Switching off the projector NOTE Press the POWER twice or for a long duration to switch the power off You can disconnect the Mains lead instead of following this p...

Page 24: ...ch as the position of the image will be corrected automatically See Setting up the image position automatically on page 25 3 Adjusting the size Turn the Zoom ring to adjust the size of the projected image 4 Adjusting the focus Turn the Focus ring to adjust the focus of the projected image Selecting the input signal NOTE SIGNAL SEARCH is ON as default and the signal from the connected devices is de...

Page 25: ...ESS VIDEO WIRELESS PRESENTATION PAGE MENU ENTER FREEZE SHUTTER COMPUTER SEARCH DEFAULT INDEX WINDOW MULTI LIVE DIGITAL ZOOM VOLUME RETURN NOTE Do not let strong light shine onto the signal receptor The Remote control may malfunction under strong light such as fluorescent If there are any obstacles between the Remote control and the Remote control signal receptor the Remote control may not operate ...

Page 26: ...sed for short periods of time such as during breaks in meetings or when carrying out preparation The projector uses less power in SHUTTER mode than it does in normal projection mode Switching the input signal NOTE Only when the COMPUTER2 SELECT is set to INPUT you can switch between COMPUTER1 and COMPUTER2 COMPUTER1 COMPUTER2 VIDEO S VIDEO COMPUTER1 WIRELESS S VIDEO VIDEO COMPUTER2 NOTE See List o...

Page 27: ...e Press F G to switch and cycle through in 3 size Q Capturing a new image While in INDEX WINDOW mode press ENTER to capture a new image and the frozen image window will be updated in a while Resetting to the factory default settings NOTE Some menu items are not available to reset by pressing the DEFAULT button Adjust each menu items manually Projecting an image in INDEX WINDOW mode Projected image...

Page 28: ...t You can control the volume of the built in speakers and output sound Press to control the volume Enlarging the centred area NOTE When the COMPUTER signal is projected the enlargement range will be changed to 1x to 3x When the FRAME LOCK in POSITION menu is set to ON the enlargement range is 1x to 2x See FRAME LOCK on page 35 When the input signal is changed while the DIGITAL ZOOM is activated th...

Page 29: ... item is called up and the other menu items disappear from the screen Called up item will be disappear after 5 seconds and return to the menu mode If there is a lower level the next level will be displayed 3 Press I H to adjust or set the selected item For items using a bar scale the current settings are displayed on the left of the bar scale You can cycle through the options of an item by pressin...

Page 30: ...e 32 SHARPNESS Default 0 page 32 COLOR TEMPERATURE LOW STANDARD page 32 HIGH DAYLIGHT VIEW AUTO OFF page 33 AI ON OFF page 33 DETAILED SETUP 2 2 S VIDEO VIDEO COMPUTER signals only WHITE BALANCE WHITE BALANCE RED page 33 RGB signals only WHITE BALANCE GREEN Default 0 WHITE BALANCE BLUE TV SYSTEM AUTO NTSC S VIDEO VIDEO signals only NTSC 4 43 PAL PAL M PAL N SECAM STILL MODE OFF S VIDEO VIDEO ON NO...

Page 31: ...TROL PANEL VALID INVALID page 37 AUTO SETUP AUTO BUTTON page 37 SIGNAL SEARCH ON OFF page 37 INSTALLATION FRONT DESK REAR DESK page 37 FRONT CEILING REAR CEILING HIGHLAND OFF ON page 38 RGB YPBPR AUTO RGB page 38 YPBPR VOLUME Default 20 page 38 DETAILED SETUP INDEX WINDOW page 38 SHUTTER OSD DESIGN TYPE1 TYPE2 TYPE3 SXGA MODE SXGA SXGA XGA MODE XGA WXGA BLACKBOARD ON OFF BACK COLOR BLUE BLACK SECU...

Page 32: ...de is stabilised When FUNCTION BUTTON is set to PICTURE MODE see FUNCTION BUTTON on page 36 the PICTURE MODE operation can also be carried out by pressing the FUNCTION button at the front of the projector CONTRAST BRIGHTNESS Remote control Control panel See Navigating through the MENU on page 29 See Main menu and Sub menu on page 30 Higher Lower Brighter Darker COLOR TINT SHARPNESS COLOR TEMPERATU...

Page 33: ...switches automatically You can switch the setting manually to match the video data Press I H to cycle through the options Q STILL MODE You can reduce the vertical flicker when projecting a still image OFF Deactive ON Active Q NOISE REDUCTION You can switch the automatic noise reduction system on off Press I H to select the required setting ON Automatic noise reduction OFF No noise reduction DAYLIG...

Page 34: ...Press I H to cycle through the options REALTIME KEYSTONE KEYSTONE Image Operation NOTE You can correct the distortion 30 degrees from the plane For a better quality image installing the projector with a minimum of distortion is recommended The distortion of the Main menu screen is not correctable The result of the keystone correction will affect the aspect ratio and the size of the image You can c...

Page 35: ... and then press the ENTER button NOTE If you project an image with an unmatched aspect ratio the image may distort or some portions may be cropped Select an aspect ratio which preserves the intention of the image creator The order of ASPECT types is defined not only by the input method but also by the input signals List of compatible signals on page 46 If you project a copyrighted image enlarged o...

Page 36: ...t is recommended that you set the LAMP POWER to ECO MODE STANDARD Normal mode ECO MODE ECO mode INPUT GUIDE Options Function OFF The input signal information will not be displayed SIMPLE Only the name of the input signal will be displayed DETAILED The input signal information will be displayed in detail NOTE If INPUT GUIDE is set to DETAILED the guide screen for computer connection will be display...

Page 37: ... SEARCH DOT CLOCK and CLOCK PHASE BUTTON Only when the AUTO SETUP button is pressed the projected image position will be adjusted for DOT CLOCK and CLOCK PHASE See Remote control on page 12 You can turn off the auto signal detecting system ON Detect the input signal from the terminals and project the image OFF Deactive When installing the projector select the projection method according to the pro...

Page 38: ...WINDOW mode on page 27 for details J SHUTTER This functions in the same way as the SHUTTER button on the remote control unit Refer to Stopping the projection temporary on page 26 for details J OSD DESIGN You can change the background colour of the menu Press I H to select the required option J SXGA MODE COMPUTER SXGA signals only You can switch the setting between SXGA and the larger setting SXGA ...

Page 39: ...text such as company name or URL information to display regularly at the bottom of the projected image while projecting OFF Deactive ON Active You can enter your original text up to 22 characters for TEXT DISPLAY 1 Use F G I H to specify the location of the required character 2 Press ENTER The selected character will be displayed in the TEXT CHANGE box 3 Repeat until finish your original text If y...

Page 40: ...CONTROL To control the projector with a personal computer by means of the wireless network set the WEBCONTROL to ON LIVE MODE CUT IN Set to ON to allow users to connect to the network in LIVE mode while another user is already connected in LIVE mode STATUS The wireless settings will be displayed INITIALIZE Wireless settings can be returned to the factory default settings NOTE See more detailed ins...

Page 41: ...ion or Lamp unit is damaged Cause Lamp unit will run out soon and needs to be replaced The POWER is switched on again before the Lamp unit is cooled enough LAMP circuit failure abnormal function Lamp unit is damaged Remedy See Replacing the Lamp unit on page 43 Let the Lamp unit cool down and turn on the POWER Contact an Authorised Service Centre See Replacing the Lamp unit on page 43 Indicator Il...

Page 42: ...h after the power is turned off The air filter should be cleaned every 100 hours of use Use a vacuum cleaner to clean off any accumulated dust J Before replacing the Air filter Disconnect the mains plug from the mains socket J Replacement procedure 1 Gently turn the projector upside down 2 Remove the Air filter cover 3 Replace the Air filter and then install the Air filter cover Cleaning the proje...

Page 43: ...ploding after this time J Replacement procedure 1 Disconnect the Mains lead from the projector See Mains lead on page 20 and check that the area around the Lamp unit has cooled down Replacing the Lamp unit NOTE Prior to replacing the lamp unit allow it to cool down to prevent the risk of burns damage and other hazards Do not attempt replacement with an unauthorised lamp unit Indication On screen L...

Page 44: ...ected onto the screen 8 Press the MENU button to display the menu screen and then press the F or G button to select the OPTION menu 9 Press the ENTER button and then press the F or G button to select LAMP RUNTIME 10 Press and hold the ENTER button for approximately 3 seconds The LAMP RUNTIME screen will be displayed 11 Press the POWER button to turn off the power 12 Disconnect the Mains lead after...

Page 45: ...me adjustment may be at the lowest possible setting 18 15 28 The control buttons of the projector do not operate CONTROL PANEL in OPTION menu is invalidated If you have a loss of the Remote control while the CONTROL PANEL is invalidated press and hold the MENU button for 2 seconds with pressing the ENTER button 37 The Remote control does not operate The batteries may be weak The batteries may not ...

Page 46: ...6 31 3 50 0 27 0 A OK 1 080 60i 1 920 x 1 080i 33 8 60 0 74 3 A 1 080 50i 1 920 x 1 080i 28 1 50 0 74 3 A 720 60p 1 280 x 720 45 0 60 0 74 3 A VGA400 640 x 400 31 5 70 1 25 2 A OK COMPUTER1 IN COMPUTER2 IN COMPUTER signals 640 x 400 37 9 85 1 31 5 A OK VGA480 640 x 480 31 5 59 9 25 2 A OK 640 x 480 35 0 66 7 30 2 A OK 640 x 480 37 9 72 8 31 5 A OK 640 x 480 37 5 75 0 31 5 A OK 640 x 480 43 3 85 0 ...

Page 47: ... commands check that a response has been received from the projector for one command before sending the next command When a command which does not require parameters to be sent the colon is not required If an incorrect command is sent from the personal computer the ER401 command will be sent from the projector to the personal computer Serial terminal Pin No Signal name Contents A B F Connected int...

Page 48: ...ht away in order to protect the lamp AVL Volume Parameter 000 063 Adjustment value 0 63 IIS INPUT Parameter VID VIDEO RG1 COMPUTER1 SVD S VIDEO RG2 COMPUTER2 NWP WIRELESS PT LB51NTE only Q S Lamp condition query Call back 0 Standby 1 Lamp ON control active 2 Lamp ON 3 Lamp OFF control active OSH SHUTTER Turning off the projection temporarily Send the command to switch between ON and OFF Do not sen...

Page 49: ... has no signals while the INPUT GUIDE is set to DETAILED the computer connection guidance will be displayed Computer connection guidance Manufacturer Key command Manufacturer Key command Manufacturer Key command Panasonic NEC TOSHIBA SHARP HP IBM SONY Apple FUJITSU EPSON DELL Other NOTE The computer connection guidance will disappear after 5 minutes Please refer the instructions which provided wit...

Page 50: ...0 Contrast raito 400 1 Operating environment Temperature 0 C 40 C 32 F 104 F When the HIGHLAND page 38 is set to ON 0 C 35 C 32 F 95 F Humidity 20 80 no condensation Scanning frequency 2 for RGB signal 2 See List of compatible signals on page 46 for available signals Horizontal scanning frequency 15 kHz 91 kHz Vertical scanning frequency 50 Hz 85 Hz Dot clock frequency Less than 100 MHz COMPONENT ...

Page 51: ...0 5V rms M3 jack Stereo MINI VARIABLE AUDIO OUT Single line 0 5V rms M3 jack Stereo MINI Monitor output stereo compatible 0 V rms 2 0 V rms variable SERIAL DIN 8 pin RS 232C compatible Wireless LAN PT LB51NTE only Compatible IEEE802 11b IEEE802 11g Wireless LAN standard protocol Wireless channel IEEE802 11b IEEE802 11g 1 13 channels Distance 30 m 98 5 Depends on the usage environment Cabinet Mould...

Page 52: ...Appendix Technical Information ENGLISH 52 Dimensions Units mm inch ...

Page 53: ...s Corporation S VGA is a registered trademark of the Video Electronics Standards Association The font used in the on screen displays is a Ricoh bitmap font which is manufactured and sold by Ricoh Company Ltd All other trademarks are the property of the various trademark owners Trademark acknowledgements ...

Page 54: ...ntrol 28 Remote control button 12 Dimensions 52 Direct power off 20 DIRECT POWER ON Function 20 Menu 37 DOT CLOCK 34 E ENTER Control panel button 14 Remote control button 12 F Focus ring 14 24 FRAME LOCK 35 FREEZE Remote control 26 Remote control button 12 Front adjustable legs 15 17 24 Front leg adjusters 14 17 24 FUNCTION BUTTON 36 H Hand strap 13 HIGHLAND 38 I INDEX WINDOW Remote control 27 Rem...

Page 55: ...rmat 47 Cable specifications 48 Communication settings 47 Connection 47 Control commands 48 Pin assignments 47 SHARPNESS 32 SHUTTER Remote control 26 Remote control button 12 SIGNAL SEARCH 37 Speaker 15 Specifications 50 STARTUP LOGO 36 STILL MODE 33 Sub menu 30 S VIDEO IN 15 SXGA MODE 38 T Technical Information 46 TEMP Indicator 14 Indicator status 41 TEXT CHANGE 39 TEXT DISPLAY 39 Throw distance...

Page 56: ...Printed in Japan S0607 5108F ...

Reviews: