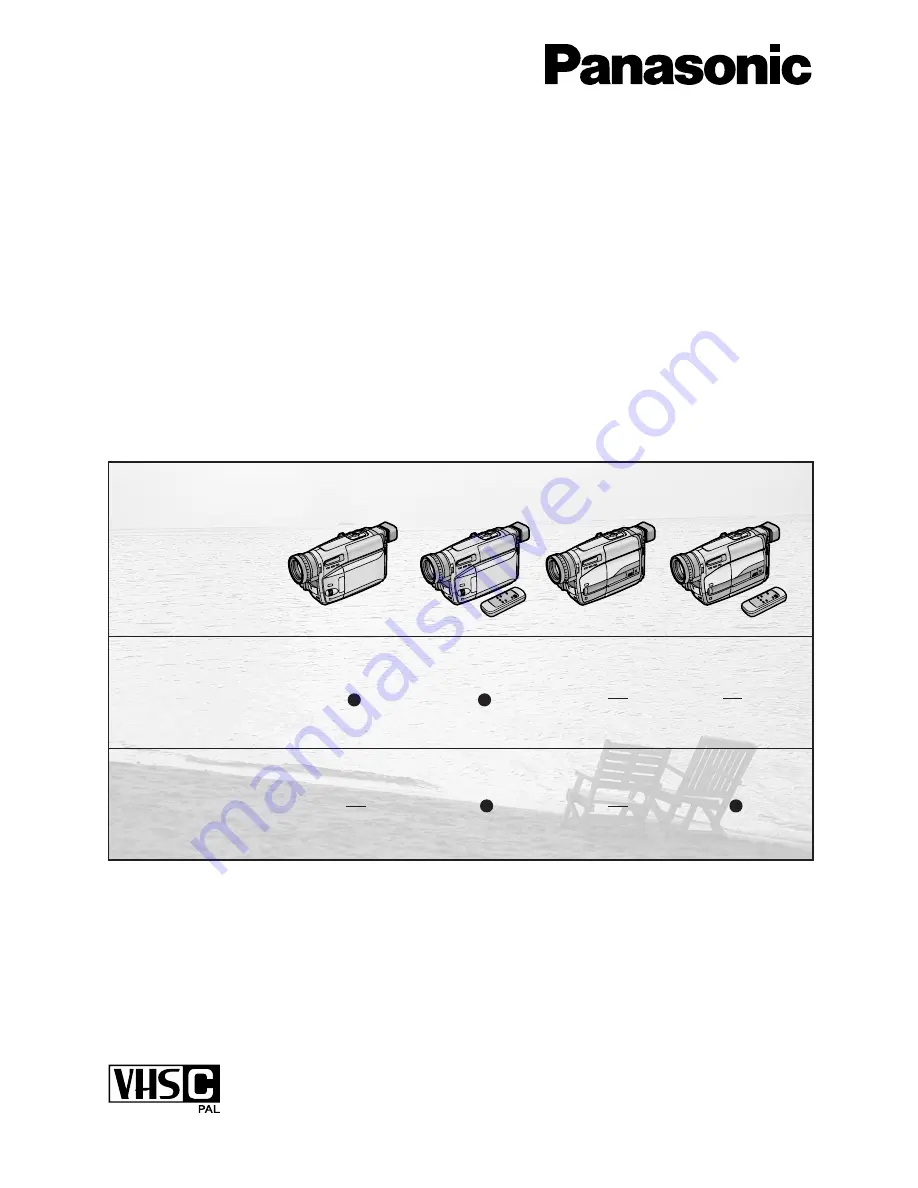
background image

VHS-C Movie Camera

VQT9065

Before use, please read these instructions completely.

NV-VZ9EN/EU

NV-VZ10EN/
ENH/ENC/A

NV-RZ9EN/
ENC/EU

LCD Monitor

Remote Contoller

NV-RZ10EN/A

ЖКИ видеомонитор

Устройство дистанционного 
управления

Model No.

NV-VZ9EN/EU
NV-VZ10EN/ENH/ENC/A
NV-RZ9EN/ENC/EU
NV-RZ10EN/A

Operating Instructions

Инструкция по эксплуатации

Перед использованием прочитайте, пожалуйста, эту

инструкцию полностью.

 !"

sepJ`

 !

 !"#$%&'()*+

qOGA«  «œU—≈

d« ¨Â«b²Ýô« q³

d ¡Uł

—ù« Ác¼ …¡«

ÆqUJUÐ  «œUý

d*« WU

 W«

LCD

 !"#$


bF s rJ« ÕUH

Summary of Contents for NV-RZ10EN/A

Page 1: ...tructions completely NV VZ9EN EU NV VZ10EN ENH ENC A NV RZ9EN ENC EU LCD Monitor Remote Contoller NV RZ10EN A Model No NV VZ9EN EU NV VZ10EN ENH ENC A NV RZ9EN ENC EU NV RZ10EN A Operating Instruction...

Page 2: ...of the user These Operating Instructions apply to models NV VZ9 NV VZ10 NV RZ9 and NV RZ10 However all illustrations show the model NV VZ10 Please note that the actual controls and components menu it...

Page 3: ...KKKKKKKKKKKKKKKKKKKKKKKKKKKK OM KKKKKKKKKKKKKKKKKKKKKKKKKKKKKKKKKKKKKKKKKKKKKKKKKKKKK OS KKKKKKKKKKKKKKKKKKKKKKKKKKKKKKKKKKKKKKKKKKKKKKKKKKKKKKKKKKKKKKKKKKKK OU KKKKKKKKKKKKKKKKKKKKKKKKKKKKKKKKKKKKKKK...

Page 4: ...L KKKKKKKKKKKKKKKKKKKKKKKKKKKKKKKKKKKKKKKKKKKKKKKKKKKKKKKKKKKKKKKKKKKKKKKKKK TM KKKKKKKKKKKKKKKKKKKKKKKKKKKKKKKKKKKKKKKKKKKKKKKKKK TO KKKKKKKKKKKKKKKKKKKKKKKKKKKKKKKKKKKKKKKKKKKKKKKKKKKKKKK TO Nxbccb...

Page 5: ...KKKKKKKKKKKKKKKKKKKKKKKKKKKKKKKKKKKKKKKKKKKKKKKKKKKKKKKK NMO 0 KKKKKKKKKKKKKKKKKKKK NMQ KKKKKKKKKKKKKKKKKKKKKKKKKKK NMU KKKKKKKKK NNO KKKKKKKKKKKKKKKKKKKKKKKKKKK NNQ KKKKKKKKKKKKKKKKKKKKKKKKKKKKKKKKKK...

Page 6: ...C Mains Lead depends on Movie Camera Model 3 Battery l 20 126 To supply power to the Movie Camera 4 Cassette Adaptor and Battery l 62 5 Shoulder Strap l 16 6 Remote Controller and Batteries for Remote...

Page 7: ...l 64 14 Multi Function Dial 34 MF TRACKING l 28 64 94 15 Menu Button MENU l 28 16 Auto Exposure Selector Button PROG AE l 52 90 94 96 17 Digital Image Store Button STORE l 112 Digital Image Superimpos...

Page 8: ...tton LOCK l 40 28 DC Input Socket DC IN l 18 29 Finder l 44 68 Due to limitations in LCD production technology there may be some tiny bright or dark spots on the Finder screen the whole screen may hav...

Page 9: ...r l 60 NV VZ9 VZ10 only 42 Eyepiece Corrector Lever l 44 43 Shoulder Strap Holders Pull one end of the Shoulder Strap through the Shoulder Strap Holder 1 Fold the end of the Shoulder Strap back pull i...

Page 10: ...ns Lead to the AC Adaptor and to an AC mains socket The AC Mains Lead s outlet plug cannot be pushed fully into the AC Adaptor socket A gap will remain as shown above A Australia and New Zealand B Hon...

Page 11: ...it locks with a click Removing the Battery from the Movie Camera Hold the Battery firmly to prevent it from dropping and pull it off while sliding the 2BATTERY EJECT Lever 4 in the direction of the a...

Page 12: ...ion of continuous recording performed at an ambient temperature of 25oC and 60 relative humidity In actual recording however the use of the zoom and other functions increases the power consumption and...

Page 13: ...off use the zoom and other functions all of which consume power Therefore the actual available recording time from the Battery is approximately 30 50 shorter than listed l 22 When the Ambient Tempera...

Page 14: ...ent is securely closed before closing the LCD Monitor Opening the LCD Monitor automatically turns the Finder off However when you turn the LCD Monitor so that is faces forward the Finder turns on agai...

Page 15: ...s the SET Button to set the selected item to the desired mode Exiting the Menu Press the MENU Button again The method for making settings on the DATE TIME SETUP Sub Menu l 48 and LCD EVF SETUP Sub Men...

Page 16: ...al Zoom D ZOOM l 80 3 Returning to the Main Menu RETURN If you set RETURN to YES the menu changes back to the Main Menu 3 CAMERA SETUP PRESS MENU TO EXIT M SENSOR OFF ON D ZOOM 45 100 250 RETURN YES 1...

Page 17: ...Indication COLOUR l 108 Returning to the Main Menu RETURN 7 8 9 TITLE SETUP PRESS MENU TO EXIT DATE TITLE SIZE YELLOW COLOUR DATE TIME TITLE LANGUAGE TITLE FOR TITLE NORMAL LARGE HAPPY BIRTHDAY RETURN...

Page 18: ...54 D Voice Zoom VOICE ZOOM l 58 E Demonstration Mode DEMO MODE l 138 F Returning to the Main Menu RETURN 4 5 A 6 PRESS MENU TO RETURN LCD EVF SETUP LCD BRIGHTNESS LCD COLOUR EVF BRIGHTNESS DISPLAY SET...

Page 19: ...2 LCD EVF SETUP NV VZ9 VZ10 EVF SETUP NV RZ9 RZ10 DISPLAY SETUP Sub Menu 1 All items on the DISPLAY SETUP Sub Menu are the same as those on the DISPLAY SETUP Sub Menu of the CAMERA FUNCTIONS Main Menu...

Page 20: ...ss of the picture in the Finder 1 Press the SET Button to select the item that you want to adjust 2 Turn the 34 Dial to increase or decrease the vertical bars of the Bar Indication The Bar Indication...

Page 21: ...e Cassette Compartment by pressing the LOCK Button If the AC Adaptor or Battery is used to supply power it is possible to insert or eject the cassette without turning on the Movie Camera If a cassette...

Page 22: ...ing the Remaining Tape Time During recording and playback the Remaining Tape Time Indication 3 is automatically displayed so you always know how much time you have left on the cassette However to ensu...

Page 23: ...mage internal parts of the unit 2 If sunlight or other strong light enters the Finder sparkling noise occurs on the Finder screen 3 If you block off the light this phenomenon disappears after a few mi...

Page 24: ...ication flashes In this case replace it with a new CR2025 battery The life of the battery is about 3 years To make it easier to remove the button type battery use a pointed object The internal clock w...

Page 25: ...the SET Button to select HOUR 07 Turn the 34 Dial to set to 14 08 Press the SET Button to select MIN 09 Turn the 34 Dial to set to 30 10 Press the MENU Button to finish the date and time setting The...

Page 26: ...e menu The selected Date Time Title Indication appears 4 Press the Recording Start Stop Button to start recording Deleting the Date Time Title Indication 5 During recording or when the Movie Camera is...

Page 27: ...CAMERA OFF VCR Switch to CAMERA Turn the switch while pressing the button 1 The CAMERA Lamp 2 lights 2 Press the PROG AE Button repeatedly until the AUTO Indication 3 appears The initial setting is AU...

Page 28: ...you leave the Movie Camera in the Recording Pause Mode for more than 6 minutes it automatically switches off to protect the tape and to conserve battery power To resume recording from this condition s...

Page 29: ...Search Function This function makes it easy to search for a point in a previously recorded scene or cassette from which you want to start recording a new scene In addition it ensures smooth scene to...

Page 30: ...ovie Camera s lens To activate the Voice Zoom Function set VOICE ZOOM on the OTHER FUNCTIONS Sub Menu of the CAMERA FUNCTIONS Main Menu to ON l 28 The V ZOOM Indication 1 appears The Voice Zoom Functi...

Page 31: ...4 Press the Button Adjusting the Sound Volume NV VZ9 VZ10 only Push the jVOLi Lever 4 toward i to increase the volume or push it toward j to decrease the volume The VOLUME Indication appears and the n...

Page 32: ...sh the Battery Compartment Cover upward and remove it 2 Insert the supplied battery and then re attach the Battery Compartment Cover 3 Slide the Open Lever in the direction of the arrow 4 Insert the r...

Page 33: ...matically With certain cassettes however the tracking adjustment may not be precise In this case adjust the tracking manually Press the FOCUS SET Button briefly during playback The TRACK Indication 2...

Page 34: ...ayback Resuming Normal Playback Press the Button again In the Cue Review and Still Playback Modes horizontal noise bars 1 appear in the picture or the picture may become black and white or distorted T...

Page 35: ...onnect the AC Adaptor or remove the Battery Cleaning the Finder If dust has entered the Finder Push the Buttons on both sides of the Finder and remove it in the direction of the arrow Remove dust with...

Page 36: ...rding Start Stop Button to start recording 3 Approximately 3 4 seconds later release the FADE Button Fading Out 2 Fading out lets you make the picture and sound disappear gradually at the end of a rec...

Page 37: ...hen set it to CAMERA again the indication of the selected digital effect flashes for a few seconds to inform you of the selected setting If you have set EFFECT2 on the DIGITAL EFFECT Sub Menu to B W o...

Page 38: ...It enlarges the subject beyond the optical zooming range 3 Super Image Stabilizer and Digital Zoom Mode D ZOOM This combination mode allows recording in the extreme tele range and prevents shaky pictu...

Page 39: ...white 5 Digital Fade 1 Mode D FADE1 l 82 The picture fades in starting at the centre and extending toward the edges and fades out in reverse direction 6 Digital Fade 2 Mode D FADE2 l 82 The picture fa...

Page 40: ...o select SIS or SISrD ZOOM The and or Lamp lights 3 Press the MENU Button to exit the menu The and or D ZOOM Indication appear Cancelling the Super Image Stabilizer Function Set EFFECT1 on the DIGITAL...

Page 41: ...e MENU Button to exit the menu The D ZOOM and or Indication appear 7 Push the W T Zoom Lever toward T or W to zoom in or out as desired When using the Digital Zoom Function the picture quality is some...

Page 42: ...g 5 Approximately 3 4 seconds later release the FADE Button Fading Out 6 During recording keep the FADE Button pressed 7 After the picture has completely disappeared press the Recording Start Stop But...

Page 43: ...1 second after the Movie Camera s Motion Sensor has detected movement in the picture recording automatically starts Approximately 10 seconds after movement in the picture has stopped recording automat...

Page 44: ...sible to manually start recording by pressing the Recording Start Stop Button or to activate the Recording Check or Camera Search Function When you use the AC Adaptor to power the Movie Camera the Mot...

Page 45: ...manually adjusted white balance setting It is not possible to use any of the Programme AE Modes when the 0 Lux Night View Mode is activated When using the 0 Lux Night View Function the subject should...

Page 46: ...the W B Button In the following cases the 1 Indication flashes During manual adjustment of the white balance If the surroundings are dark and the white balance cannot be adjusted the 1 Indication keep...

Page 47: ...alance adjustment and therefore natural colours in the recorded pictures when using the Full Auto Mode For light sources outside this range adjust the white balance manually l 90 Also additional light...

Page 48: ...urn the MF Dial to adjust the focus The MF Indication 3 appears MF means Manual Focus 4 Push the W T Zoom Lever toward W to zoom out as desired Cancelling the Manual Focus Mode Press the FOCUS Button...

Page 49: ...cenes 2 Portrait Mode 7 To make subjects stand out sharply from the background 3 Low Light Mode 4 To record dark scenes more brightly 4 Spotlight Mode To record subjects under spotlights party theatre...

Page 50: ...may contain vertical streaks of light When the scene is not sufficiently lit the 5 Indication flashes When using this mode for recording indoors the playback picture may flicker Portrait Mode When usi...

Page 51: ...5 Playback Button 1 l 60 6 Fast forward Cue Button 5 To start cue playback l 66 To fast forward the tape To activate the Camera Search Function l 56 7 Recording Start Stop Button START STOP l 52 Condi...

Page 52: ...r When the batteries are exhausted purchase two new AAA UM 4 or R03 type batteries and insert them in the same way as explained above Do not mix old batteries with new batteries Do not mix different b...

Page 53: ...the Remote Controller you can also take part in the action that you are recording and check the picture from the front on the LCD Monitor Remote Controller NV VZ10 only 1 Slide the 3OPEN Lever to the...

Page 54: ...Indication In addition to these four indications the Counter Indication and the Programme AE Mode Indications can also appear in the Finder When you want to confirm other indications return the LCD M...

Page 55: ...FAMILY _ PARTY _ THE END _ CONGRATULATIONS _ MERRY CHRISTMAS _ HAPPY MEMORIES _ HAPPY NEW YEAR _ HOLIDAY _ 4 Turn the 34 Dial to select COLOUR 3 5 Press the SET Button to select the desired colour You...

Page 56: ...Time Title Indication remains displayed when you exit the TITLE SETUP Sub Menu after having change the language of the title l 108 the type of Date Time Title Indication l 50 the title itself l 108 t...

Page 57: ...When you want to capture a small title use the Macro Close up Function l 58 Aim the Movie Camera so that the title is in the centre of the screen to ensure that the title does not get clipped at the e...

Page 58: ...rding Start Stop Button to stop recording The title stored in the digital image memory may be automatically cancelled when you store a new title The title stored in the digital image memory may be aut...

Page 59: ...ape time that has elapsed from that point After displaying the DISPLAY SETUP Sub Menu l 28 1 Turn the 34 Dial to select DISPLAY 2 Press the SET Button to select ALL 3 Turn the 34 Dial to select C RESE...

Page 60: ...e VCR Mode and then back to the Camera Mode ALL is automatically selected for the Tape Counter Indication 4 OFF No Counter Indication In this mode only the Operation Mode Indications and Warning Alarm...

Page 61: ...ding is finished Set the CAMERA OFF VCR Switch to VCR 5 Press the 5 or 6 Button The tape automatically stops approximately at the position at which you reset the counter to zero During High Speed Rewi...

Page 62: ...era 5 Start recording on the VCR 6 After reaching the end of the original recording Stop recording on the VCR 7 Stop playback on the Movie Camera As the picture quality on the dubbed cassette is sligh...

Page 63: ...cause noise to adversely affect the picture and sound Do not use with the cassette compartment facing down Do not aim the Lens or Finder directly at the sun the lens collects light and the resulting...

Page 64: ...ttery temporarily out of operation Do not throw the Battery into a fire This could cause it to explode Precautions for Storing the Battery Avoid the following places as they could shorten the service...

Page 65: ...y wait about 1 more hour To Prevent Condensation from Forming When bringing the Movie Camera from a very cold to a warm place keep it in a tightly closed plastic bag or something similar for 1 to 2 ho...

Page 66: ...n the front of the Movie Camera with the colour stored in memory and selects the setting for the most similar tint Be careful not to cover the White Balance Sensor l 12 with your hand etc Manual White...

Page 67: ...tab of the inserted cassette is broken out Insert a cassette with an intact tab 5 Button type Battery l 46 The button type battery is exhausted or is not inserted 6 End of the Tape When the tape has...

Page 68: ...changing from the VCR to the Camera Mode The recording of index signals makes it possible to use the VHS Index Search or Intro Scan Function during playback on a VCR equipped with these functions Refe...

Page 69: ...nt Mode l 64 W Colour Indication for Digital Image l 112 X Super Image Stabilizer Mode l 78 Y Digital Zoom Mode l 80 Z Mosaic Mode l 74 Stretch Mode l 74 Negative Mode l 76 Solarisation Mode l 76 Sepi...

Page 70: ...xiting the menu Pressing a button or displaying a menu temporarily suspends the Demonstration Mode However if you leave the Movie Camera in this condition without activating any function for more than...

Page 71: ...3 Battery Pack Lithium Ion 14 Battery Pack Lithium Ion 15 Car Battery Charger 16 Filter Kit 17 Tele Conversion Lens 18 Wide Conversion Lens 19 Tripod 10 Cassette Adaptor 11 IR Video DC Light Halogen I...

Page 72: ...24 inch Electronic Finder Standard Illumination 1 400 lx Operating Temperature 0oC 40oC Operating Humidity 10 80 Weight NV VZ9 VZ10 Approx 850 g without Battery NV RZ9 RZ10 Approx 740 g without Batte...

Page 73: ...ntil the Condensation Indication disappears approximately 2 3 hours l 128 Cassette P1 The Remaining Tape Time Indication is not correct S1 Is the tape length of the inserted cassette correctly selecte...

Page 74: ...128 S2 3 The tracking is not adjusted correctly Adjust the tracking correctly l 64 P3 The playback picture is not in colour S3 The colour adjustment on the TV is not made properly Adjust the colour co...

Reviews: