background image

© Panasonic Corporation 2014 Unauthorized copy-
ing and distribution is a violation of law.

Order Number GORR1409001CE

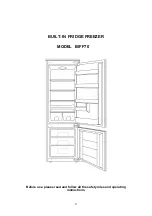
REFRIGERATOR-FREEZER

Model No.

NR-BD31EX1

Model No.

NR-BD31ES1

Model No.

NR-BD31EW1

Product-Color   X:Stainless

S:Inox-look
W:White

Destination  E(Europe Continental) 

TABLE OF CONTENTS

PAGE

PAGE

1 Safety Precautions

-----------------------------------------------

2

2 Specifications

-----------------------------------------------------

5

3 Technical Descriptions

-----------------------------------------

7

4 Location of Controls and Components

------------------

10

5 Installation Instructions

---------------------------------------

11

6 Operating Instructions

-----------------------------------------

13

7 Service Mode

-----------------------------------------------------

14

8 Troubleshooting Guide

----------------------------------------

19

9 Disassembly and Assembly Instructions

---------------

23

10 Schematic Diagram

---------------------------------------------

30

11 Exploded View and Replacement Parts List

-----------

31

Summary of Contents for NR-BD31ES1

Page 1: ...ainless S Inox look W White Destination E Europe Continental TABLE OF CONTENTS PAGE PAGE 1 Safety Precautions 2 2 Specifications 5 3 Technical Descriptions 7 4 Location of Controls and Components 10 5 Installation Instructions 11 6 Operating Instructions 13 7 Service Mode 14 8 Troubleshooting Guide 19 9 Disassembly and Assembly Instructions 23 10 Schematic Diagram 30 11 Exploded View and Replaceme...

Page 2: ...2 1 Safety Precautions ...

Page 3: ...3 ...

Page 4: ...4 ...

Page 5: ...C B57020 M2502 EPCOS Freezer compartment sensor FCC B57020 M2502 EPCOS Ambient temperature sensor ATC N A Defrost temperature sensor DFC B57020 M2502 EPCOS Compressor Model Jiaxipera NE1111Y Rotation speed 2940 rpm Curled resistance cord at 25 C Main wiring 27 88 Auxiliary wiring 22 65 Overlord relay Model B40 105 Operating temperature without power 105 5 C Return temperature 61 9 C Operating curr...

Page 6: ...6 Name Plate ...

Page 7: ...p and starts flashing the new temperature setting After 3 seconds the new setting is saved and the flashing stops Function of intense freezing incorporated by pressing A repeatedly to light up the symbol C After 50 hours the function is auto matically terminated and the setting returns to the last selected setting that was before activating the intense freezing Feature intense freezing can also pr...

Page 8: ...erformance monitoring apparatus in a given time cycle adapted to the opera tion of the apparatus so that the temperature of the food despite the opening of doors and loading new food does not rise above the optimum temperature for cooling Adaptive cooling is only permitted when setting 16 C The function of the adaptive cooling appa ratus provides intensive cooling space before the expected intensi...

Page 9: ...h the stored pattern If the current 24 hour segment no records for adaptive control is the basis for adaptive control using recorded pattern of the last 24 hour segment This is a situation when you connect the appliance to the network voltage or when they return from leave when in this segment of last week was not recorded opening the door 3 4 Super Cool Mode Logic board Intensive freezing functio...

Page 10: ...10 4 Location of Controls and Components 4 1 Control Panel 4 2 Components ...

Page 11: ...11 5 Installation Instructions ...

Page 12: ...12 ...

Page 13: ...13 6 Operating Instructions 6 1 Setting the temperature ...

Page 14: ...s arbitrarily switched The machine runs again in response to the previous settings when the service mode is canceled 7 1 1 How to start Service mode starts when the temperature setting button is twice pressed for 5 seconds After the first 5 seconds press last temperature setting LED indicator flashes once After the second 5 seconds press all temperature setting LED indicators starts blinking with ...

Page 15: ... indicator circularly moves from left to right in response to a short press of temperature setting button Each LED indicator represents the state of input or output I O for each service mode LED indicator is ON if I O is ON LED indicator is blinking if I O is OFF State of selected I O is changed by pressing the temperature setting button for 3 seconds In case of the magnetic door sensor failure in...

Page 16: ...6 7 1 4 Error Display in Normal Operation Mode In case of refrigerator compartment temperature sensor failure all LED indicators blink once and then they are off for 5 seconds It repeats after 5 seconds ...

Page 17: ...17 7 2 Measuring points 7 3 Value of Temperature sensors ...

Page 18: ...nejne for 5 seconds after which the rate again In the event of failure of the cooling space sensor is installed timing algorithm which raises and delete request for cooling of the cooling space to activate or deactivate the compressor 15 minutes ON 30 minutes OFF then the fan is not operating Function intense freezing SF is in the case of cancellation of the sensor of the cooling space is blocked ...

Page 19: ...19 8 Troubleshooting Guide 8 1 Not cooling at all Both PC FC Compressor does not operate ...

Page 20: ...20 8 2 PC FC is not cooling Compressor operates ...

Page 21: ...21 8 3 Cooling system trouble ...

Page 22: ...22 8 4 Temperature sensor trouble ...

Page 23: ...e LED Cover to the left 3 Remove LED Lamp Assy and disconnect the connector 4 LED Lamp Assy 9 2 Main PCB 1 Main PCB is installed in the upper side of the refrigerator 2 Slide both of Head Panel Cover Sides to remove 3 Unscrew the two screws fixing the Head Panel Cover Center and remove it 4 Disconnect the 4 connectors 5 Main PCB Assy ...

Page 24: ...24 9 3 Fan Assy 1 Unhook two hooks above the Fan Assy Cover by insert ing the screwdriver and remove it 2 Unscrew the Fan Assy 3 Disconnect the connectors 4 Fan Assy ...

Page 25: ...he sensor cover is hooked at two position as shown in the photo 3 Cut off the damages sensor at the base of sensor head 4 Strip off approx 25mm of additional cable insulation and 5mm of basic insulation of the conductor 5 First crimp the enclosed end splices on conductor of the new sensor Place the enclosed thermo shrinkable bushing Crimp end splices on conductors of cut cable ...

Page 26: ...26 6 Use hair dryer and heat the bushings so that they tightly wrap the conductors and prevent moisture from breaking through the joint 7 Place the sensor into its seat and replace the sensor cover ...

Page 27: ...r 2 Unscrew the screws fixing the Upper Hinge 3 Replace the Door Bushing and the Door Plug PC 4 Remove the Door PC 5 Remove the Hinge Cover VC 6 Unscrew the screws fixing the Middle Hinge and remove the Middle Hinge 7 Remove the Door FC 8 Remove the Middle Hinge Plugs and the Screw Cap then unscrew the screw ...

Page 28: ... condenser 11 Replace the Leveling Leg Right with the Lower Hinge and the Leveling Leg Left Then rise the appliance 12 Replace the Door Bushing and the Door Plug FC 13 Assemble the Door FC 14 Replace the Door Bushing and the Door Plug FC 15 Turn the Middle Hinge upside down and screw it Put the thick washer above the Middle Hinge 16 Assemble the Door PC ...

Page 29: ...w the screws fixing the Upper Hinge 18 Install the Hinge Cover 19 Install the Hinge Cover VC 20 Remove the Filling Plugs 21 Unscrew the Handles 22 Screw the Handles on the right side 23 Install the Filling Plugs ...

Reviews: