background image

Owner’s Manual

for advanced features
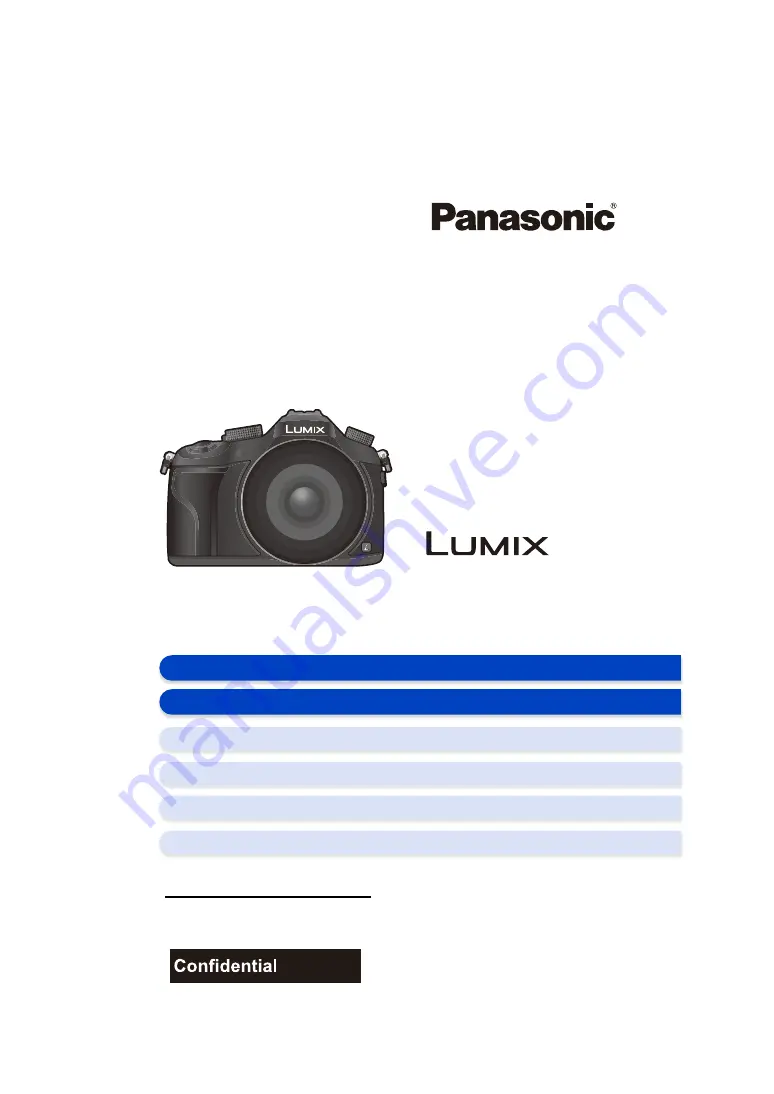
Digital Camera

Model No. 

DMC-FZ1000

SQT0219

F0614YD0

 Please read these instructions carefully before using this product,

and save this manual for future use.

Register online at 

www.panasonic.com/register 

(U.S. customers only)

until 
2014/6/27

Message Display

P330

Troubleshooting

P343

Finding the information you need

P2

Contents

P4

Contents by Function

P10

Menu list

P334

Summary of Contents for LUMIX DMC-FZ1000B9

Page 1: ...these instructions carefully before using this product and save this manual for future use Register online at www panasonic com register U S customers only until 2014 6 27 Message Display P330 Trouble...

Page 2: ...Search from the list of function names Contents by Function Search from Names and Functions of Main Parts Search from Monitor Display Viewfinder Display Search from the list of on screen messages Mes...

Page 3: ...to return to the previously displayed page About the indication of the applicable mode Applicable modes The icons indicate the modes available for a function Black icons Applicable modes Gray icons U...

Page 4: ...dable pictures and available recording time 32 Setting Date Time Clock Set 35 Changing the Clock Setting 36 Setting the Menu 37 Setting menu items 37 Calling frequently used menus instantly Quick Menu...

Page 5: ...different image effects Creative Control Mode 107 Recording motion pictures with manually set aperture value shutter speed Creative Video Mode 118 Recording slow motion pictures High Speed Video 119...

Page 6: ...ctures Stop Motion Animation 180 8 Functions Customized for Various Subjects and Purposes Making Multiple Exposures on One Picture Multi Exp 184 Disabling Operational Sounds and the Output of Light at...

Page 7: ...vel Disp 223 Mic Level Adj 223 Special Mic 223 Adjusting the sound input level automatically Mic Level Limiter 223 Wind Cut 224 Zoom Mic 224 11 Playing Back and Editing Images Playing Back Group Pictu...

Page 8: ...ervices 277 When sending images to web service 277 When sending images to Cloud Sync Service 281 Registering to the LUMIX CLUB 283 About the LUMIX CLUB 283 About Connections 288 Connecting from your h...

Page 9: ...9 Rec 334 Motion Picture 336 Custom 337 Setup 340 Playback 342 Troubleshooting 343 Cautions for Use 360...

Page 10: ...ic P134 i Resolution P134 HDR P135 Long Shtr NR P136 Color Space P137 ISO sensitivity P160 Exposure One Push AE P92 AF AE Lock P157 Exposure Compensation P159 Metering Mode P163 Auto Bracket P171 Flas...

Page 11: ...ns P44 Custom Mode P120 Custom menu P337 Playback Auto Review P60 Picture playback P68 Playback Zoom P68 Multi Playback P69 Motion picture playback P70 Delete P73 Display playback settings Slide Show...

Page 12: ...mation P263 Touch Sharing P298 In combination with other devices Playing back pictures on a TV P268 Printing images P269 Sending images to an AV device P270 Sending images to a PC P273 Sending images...

Page 13: ...oof Avoid using the camera in places with a lot of dust water sand etc Liquid sand and other foreign material may get into the space around the lens buttons etc Be particularly careful since it may no...

Page 14: ...on the country or area where the camera was purchased For details on the accessories refer to Basic Owner s Manual Battery Pack is indicated as battery pack or battery in the text Battery Charger is i...

Page 15: ...Speaker Be careful not to cover the speaker with your finger Doing so may make sound difficult to hear 12 Monitor P18 13 Q MENU button P40 Fn3 button P44 14 Playback button P68 15 Delete Cancel button...

Page 16: ...19 26 Stereo microphone P223 Be careful not to cover the microphone with your finger Doing so may make sound difficult to record 27 Mode dial P62 28 Camera ON OFF switch P35 29 Status indicator P35 30...

Page 17: ...Flash open lever P201 The flash opens and recording with the flash becomes possible 43 Diopter adjustment dial P58 44 REMOTE socket P321 45 HDMI socket P301 46 AV OUT DIGITAL socket P302 310 312 313...

Page 18: ...onitor after opening it wide enough and be careful not to use excessive force as it may be damaged Free angle shooting The monitor can be rotated to suit your needs This is convenient as it allows you...

Page 19: ...follows in this owner s manual Allows you to set the aperture shutter speed and other settings when in modes Pressing the rear dial enables you to set the exposure compensation Rear Dial e g When rota...

Page 20: ...election of items or setting of values etc is performed Pressing MENU SET Confirmation of setting contents etc is performed This owner s manual expresses the up down left and right of the cursor butto...

Page 21: ...it Check that the camera is turned off Close the flash 1 Align the mounting mark under the long side of the lens hood with the mounting projection on the edge of the lens 2 Screw in the lens hood in...

Page 22: ...ed by the lens hood We recommend detaching the lens hood When temporarily detaching and carrying the lens hood we recommend attaching with the orientation reversed Return it to the normal direction wh...

Page 23: ...er strap through the stopper and fasten the shoulder strap A Pull the shoulder strap 2 cm 0 066 feet or more Attach the shoulder strap to the other side of the camera being careful not to twist it Use...

Page 24: ...tery packs are not adequately protected with internal protection to meet the requirements of appropriate safety standards There is a possibility that these battery packs may lead to fire or explosion...

Page 25: ...g time may be longer than normal Battery indication The indication turns red and blinks if the remaining battery power is exhausted The status indicator also blinks Recharge the battery or replace it...

Page 26: ...ecording Rotating the zoom lever from Tele to Wide or vice versa in every recording Turning the camera off every 10 recordings and leaving it until the temperature of the battery decreases The number...

Page 27: ...file will be divided and played back separately These times are for an ambient temperature of 23 oC 73 4 oF and a humidity of 50 RH Please be aware that these times are approximate Actual recordable...

Page 28: ...t 2 Battery Being careful about the battery orientation insert all the way until you hear a locking sound and then check that it is locked by lever A Pull the lever A in the direction of the arrow to...

Page 29: ...ecomes warm after using it and during and after charging The camera also becomes warm during use This is not a malfunction Before removing the card or battery turn the camera off and wait until the st...

Page 30: ...lowing website http panasonic jp support global cs dsc This Site is English only Access to the card The access indication displays red when pictures are being recorded on the card About cards that can...

Page 31: ...h The data on the card may be damaged or lost due to electromagnetic waves static electricity or breakdown of the camera or the card We recommend storing important data on a PC etc Keep the Memory Car...

Page 32: ...spect ratio 3 2 Quality A Aspect ratio 3 2 Quality Approximate number of recordable pictures and available recording time Picture Size 2 GB 8 GB 32 GB 64 GB L 20M 175 720 2910 5810 M 10M 320 1310 5310...

Page 33: ...tinuous recording time exceeds 29 minutes and 59 seconds You can continue recording without interruption even if the file size exceeds 4 GB but the motion picture file will be divided and played back...

Page 34: ...ining Disp Remaining Shots This will display the number of recordable pictures for still pictures Remaining Time This will display the available recording time for motion pictures 9999i is displayed i...

Page 35: ...5 Press 2 1 to select the items year month day hour minute and press 3 4 to set A Time at the home area B Time at the travel destination You can cancel without setting the clock by pressing To set the...

Page 36: ...tained for 3 months using the built in clock battery even without the battery Leave the charged battery in the unit for 24 hours to charge the built in battery If the clock is not set the correct date...

Page 37: ...this menu before proceeding to use the camera Example In the Rec menu change Quality from A to 1 Press MENU SET Setting menu items If you set Menu Resume P53 in the Setup menu to ON the screen shows...

Page 38: ...being used on the camera due to the specifications Rec P334 This menu lets you set the aspect ratio number of pixels and other aspects of the pictures you are recording Motion Picture P221 This menu l...

Page 39: ...ther menus e g Switching to the Setup menu from Rec menu 1 Press 2 2 Press 3 4 to select or another of the menu toggle icons 3 Press MENU SET Select a menu item next and set it You can set the backgro...

Page 40: ...Quick Menu 2 Rotate the rear dial to select the menu item then press the rear dial 3 Rotate the rear dial to select the setting You can also set items by pressing the cursor buttons 3 4 2 1 4 Press Q...

Page 41: ...te the rear dial to select an item and then press the rear dial Rotate the rear dial to select the setting and then press the rear dial to set it You can also set with 3 4 2 1 and MENU SET Switching t...

Page 42: ...row you can replace an existing item with a new select item by selecting the existing item To cancel the setting move to the bottom row by pressing 4 and select an item to cancel and then press MENU S...

Page 43: ...ET to switch to the recording screen Motion Picture menu Custom menu Motion Pic Set Rec Format P212 Rec Quality P212 Picture Mode P219 Silent Mode P186 Peaking P152 Histogram P66 Guide Line P66 Zebra...

Page 44: ...ing in REC mode or Setting in PLAY mode and then press MENU SET 3 Press 3 4 to select the function button you want to assign a function to and then press MENU SET 4 Press 3 4 to select the function yo...

Page 45: ...Set P46 Photo Style P122 Fn1 Aspect Ratio P131 Picture Size P131 Quality P132 AFS AFF P139 Metering Mode P163 Burst Rate P167 Auto Bracket P171 Self Timer P174 Highlight Shadow P124 i Dynamic P134 i R...

Page 46: ...e by pressing the function button during playback The following functions can be assigned to the button Fn1 Fn2 Fn3 or Fn5 Function button settings at the time of purchase Using the function buttons d...

Page 47: ...n the areas displayed on the screen set by the time difference from the home area Clock Set World Time Set the time in your home area and travel destination You can display the local times at the trav...

Page 48: ...ctures Refer to P253 297 for details Travel Date Departure date and return date of the trip as well as the name of the travel destination can be set You can display the number of days that have passed...

Page 49: ...nitor However this does not affect the recorded pictures Beep Set the volume for electronic noises and the electronic shutter noise Beep Volume u High t Low s OFF Shutter Vol High Low OFF Live View Mo...

Page 50: ...ds when recording in MODE1 It will light up brightly again with button operation When AUTO or MODE1 is set the usage time is reduced AUTO is only available in the Recording Mode The initial setting wh...

Page 51: ...optional Auto LVF Monitor Off is fixed to 5MIN Economy The unit can be set up to prevent unnecessary battery consumption Sleep Mode The camera is automatically turned off if the camera has not been us...

Page 52: ...the connected TV 4K The progressive method with 2160 available scan lines is used for output The output size is set to 3840k2160 1080p The progressive method with 1080 available scan lines is used fo...

Page 53: ...ontrolled by the remote control of the VIERA equipment by automatically coupling this unit with the VIERA Link compatible equipment using HDMI micro cable ON Remote control operation of the VIERA Link...

Page 54: ...lowing settings are also reset The World Time home area setting If the camera is turned on and off the home area setting screen is displayed The settings of Travel Date departure date return date loca...

Page 55: ...ressing DISP To enter the same characters in a row move the cursor by rotating the rear dial to the right The following operations can be performed by moving the cursor to the item and pressing MENU S...

Page 56: ...object etc Do not hold the lens barrel as you take pictures There is a risk that your finger will be trapped as the lens retracts This function detects the vertical orientation when you record with t...

Page 57: ...nder automatically when you bring your eye or an object near it Eye sensor might not work properly depending on the shape of your eyeglasses the way you hold the camera or bright light shining around...

Page 58: ...d The Eye Sensor AF sets focus only once when you look at the viewfinder Focus is not adjusted continuously while you are looking at the viewfinder Beep sounds are not emitted when the focus is achiev...

Page 59: ...ent and focusing may take longer than usual When the Focus Mode is set to AFF or AFC A beep will be emitted when focus is first achieved during the pressing halfway If AF Mode is set to Custom Multi s...

Page 60: ...en recording subjects through windows or near shiny objects When it is dark or when jitter occurs When the camera is too close to the subject or when taking a picture of both distant and near subjects...

Page 61: ...ing performed part of the display will disappear Press DISP to make the display reappear This operation is to prevent screen burn in and is not a malfunction When recording a motion picture do not cov...

Page 62: ...you to adjust the brightness and color hue when in Intelligent Auto Mode Program AE Mode P84 Records at the aperture value and shutter speed set by the camera Aperture Priority AE Mode P86 The shutter...

Page 63: ...to take pictures with previously registered settings Scene Guide Mode P93 This mode allows you to take pictures that match the scene being recorded Creative Control Mode P107 Record while checking the...

Page 64: ...istogram of the Custom menu is set to ON It is also possible to display the exposure meter by setting the Expo Meter of the Custom menu to ON P84 2 It is displayed when the Monitor Info Disp of the Cu...

Page 65: ...ppear Press DISP to make the display reappear This operation is to prevent screen burn in and is not a malfunction Switching the display method of the monitor viewfinder style monitor style Switching...

Page 66: ...exposure compensation or in the Manual Exposure Mode When the flash is activated When suitable exposure is not achieved with the flash closed When the brightness of the screen is not correctly display...

Page 67: ...with a vertical orientation the display automatically switches to a vertically orientated display Even after correcting the tilt there may still be an error of approximately 1 When a function button i...

Page 68: ...ustries Association and with Exif Exchangeable Image File Format Files which do not comply with the DCF standard cannot be played back The camera may not play back images recorded on other devices cor...

Page 69: ...to the calendar screen rotate the zoom lever towards L W The recording date of the picture selected in the playback screen becomes the date selected when the Calendar screen is first displayed You ca...

Page 70: ...recording time and playback time B Playback time C Motion picture recording time Operations during Motion Picture Playback The fast forward rewind speed increases if you press 1 2 again To play back t...

Page 71: ...uring motion picture playback sequential playback panorama playback or a slide show 3 This is displayed if Highlight P72 in the Custom menu is set to ON Histogram color is displayed in R red G green B...

Page 72: ...eas appear blinking in black and white This does not affect the recorded image If there are any white saturated areas we recommend compensating the exposure towards negative P159 referring to the hist...

Page 73: ...elete Single and then press MENU SET Confirmation screen is displayed Picture is deleted by selecting Yes To delete a single picture Delete Confirmation in the Playback menu enables you to set which o...

Page 74: ...e Delete All set 3 When Delete Multi is selected Press 3 4 2 1 to select the picture and then press MENU SET to set Repeat this step appears on the selected pictures If MENU SET is pressed again the s...

Page 75: ...elligent Auto Mode or Intelligent Auto Plus Mode At the time of purchase the mode is set to Intelligent Auto Plus Mode 2 Align the screen with the subject When the camera identifies the optimum scene...

Page 76: ...lected mode Scene Detection When taking pictures 1 Only displayed when the built in flash is open 2 Only displayed when iHandheld Night Shot is set to ON P80 3 When Face Recog is set to ON will be dis...

Page 77: ...cog is set to ON and the face similar to the registered face is detected R is displayed in the top right of and About the flash Flash mode is set to when the flash is closed and AUTO when it is open W...

Page 78: ...are performed automatically to allow the camera to make the optimal settings Scene Detection Backlight Compensation Face Eye Detection Auto White Balance Intelligent ISO sensitivity control Red Eye R...

Page 79: ...hrome Live View Constant Preview Expo Meter Dial Guide LVF Disp Style Monitor Disp Style Monitor Info Disp Rec Area Remaining Disp Auto Review Fn Button Set Zoom Lever Manual ring Zoom Zoom Resume Q M...

Page 80: ...le pictures will be taken is displayed Do not move the camera during the continuous shooting after pressing the shutter button If the camera is mounted on a tripod or other type of stand will not be d...

Page 81: ...the camera during the continuous shooting after pressing the shutter button You cannot take the next picture until the combination of pictures is complete A moving subject may be recorded with unnatu...

Page 82: ...operation and normal operation Each time the rear dial is pressed in Intelligent Auto Mode the camera switches between Defocus Control operation and normal operation 2 Set the blurriness by rotating...

Page 83: ...t color This will adjust the color of the image from a reddish color to a bluish color Press MENU SET to return to the recording screen If the Exposure Comp Reset is set to ON the brightness setting w...

Page 84: ...me the rear dial is pressed while the values are displayed The Program Shift indication A appears on the screen To cancel Program Shift turn the camera off or rotate the rear dial until the Program Sh...

Page 85: ...y by the camera at each exposure value 2 Program Shift amount Represents the range of the aperture and shutter speed combination you can change with Program Shift at each exposure value 3 Program Shif...

Page 86: ...xposure meter It will switch between aperture setting operation and Exposure Compensation operation every time the rear dial is pressed Depending on the zoom position some of the values cannot be sele...

Page 87: ...nge are displayed in red If the exposure is not adequate the aperture value and the shutter speed turn red and blink when the shutter button is pressed halfway We recommend using a tripod when the shu...

Page 88: ...meter B Aperture value C Shutter speed D Manual Exposure Assistance Depending on the zoom position some of the values cannot be selected Manual Exposure Mode Aperture value Reduces It becomes easier...

Page 89: ...iciently charged battery P24 The Manual Exposure Assistance does not appear When the ISO sensitivity is set to AUTO it will switch to 125 This function is not available when using the electronic shutt...

Page 90: ...e shutter speed turn red and blink when the shutter button is pressed halfway We recommend using a tripod when the shutter speed is slow When the ISO sensitivity is set to it will switch to AUTO Check...

Page 91: ...Preview P44 The following step is an example in which Preview is assigned to Fn4 2 Switch to confirmation screen by pressing Fn4 Screen is switched every time Fn4 is pressed Depth of field properties...

Page 92: ...de Program Shift can be canceled by pressing the function button to which One Push AE has been set Easily set aperture shutter speed for suitable exposure One Push AE How to tell if the exposure is no...

Page 93: ...ample images the camera will set optimal exposure color and focus allowing you to record in a manner appropriate to the scene 1 Set the mode dial to 2 Press 2 1 to select the scene 3 Press MENU SET to...

Page 94: ...Although White Balance is fixed to AWB for certain types of scene you can fine tune the White Balance or use White Balance bracketing by pressing the cursor button 1 on the recording screen For furthe...

Page 95: ...he subject Silky Skin Brighter face and softer skin color creates a healthy younger look Tips You can enhance the effect by zooming in as much as possible and closing the distance between the camera a...

Page 96: ...r beyond the flash s rated distance may appear too bright or too dark When Silent Mode is set to ON the flash is not activated Relaxing Tone The warm color tone creates an image with a relaxing mood S...

Page 97: ...ery Bright Blue Sky On a sunny day the overall screen brightness is increased to create a vibrant image of the blue sky Romantic Sunset Glow The enhanced purple tone creates a romantic image of the sk...

Page 98: ...o accentuate the nightscape Tips We recommend using a tripod and the self timer The shutter may remain closed after taking the picture This is due to signal processing and is not a malfunction Noise m...

Page 99: ...ps We recommend using a tripod and the self timer The shutter may remain closed after taking the picture This is due to signal processing and is not a malfunction Noise may become visible when you tak...

Page 100: ...trait Fill flash and a longer exposure capture better portraits against the nightscape Tips Open the flash You can set to We recommend using a tripod and the self timer When Clear Night Portrait is se...

Page 101: ...subject is close to the camera the effective focus range is significantly narrowed Therefore if the distance between the camera and the subject is changed after focusing on the subject it may become d...

Page 102: ...e flash and avoid using it Cute Dessert The overall screen brightness is set higher to enhance the cuteness of the dessert Tips You can enhance the effect by zooming in as much as possible and closing...

Page 103: ...103 4 Recording Modes Clear Sports Shot The faster shutter speed prevents blur for example at sporting events Monochrome A monochrome image captures the mood of the moment...

Page 104: ...t right right left bottom top top bottom Adding an image effect 1 Select the menu Rec Panorama Settings Filter Select 2 Press 3 4 to select the image effects filters With the same operation as the Cre...

Page 105: ...nd of the guide Tips Recording from left to right Move the camera at a constant speed Pictures may not be able to be recorded properly if the camera is moved too fast or slow A Recording direction and...

Page 106: ...es depending on the recording direction and the number of combined pictures The maximum number of pixels is shown below Shutter Type is fixed to AUTO Not available in these cases A panorama picture ma...

Page 107: ...e effect filter selection screen display Press DISP to switch the monitor screen Each time DISP is pressed the image effect selection screen is switched When the image effect selection screen display...

Page 108: ...e screen 1 Press the rear dial to display the setting screen Each press of the rear dial switches among brightness setting Defocus Control and end operation 2 Rotate the rear dial to set Pressing on t...

Page 109: ...ct adds a bright soft and nostalgic feel to the overall image Expressive Items that can be set Press 1 to display the setting screen Freshness Understated colors Pop colors Retro Items that can be set...

Page 110: ...tting screen Color Pink emphasized Aquamarine emphasized If you select this effect with Panorama Shot in Scene Guide Mode the effect may not be apparent in places with insufficient brightness Low Key...

Page 111: ...the setting screen Contrast Low contrast High contrast Rough Monochrome Items that can be set Press 1 to display the setting screen Grittiness Less gritty Grittier Display of the recording screen will...

Page 112: ...screen Freshness Black and white Pop colors If this image effect is selected with Panorama Shot in Scene Guide Mode seams between pictures may become visible High Dynamic Items that can be set Press 1...

Page 113: ...trast and a lower saturation to create a calm and tranquil picture Toy Effect Items that can be set Press 1 to display the setting screen Color Orange emphasized Blue emphasized Toy Pop Items that can...

Page 114: ...ay of the recording screen will be delayed more than usual and the screen will look as if frames are dropping No sound is recorded in motion pictures Approximately 1 10 of the time period is recorded...

Page 115: ...nt of defocus Weak defocus Strong defocus Display of the recording screen will be delayed more than usual and the screen will look as if frames are dropping Fantasy Items that can be set Press 1 to di...

Page 116: ...n 1 Press Fn1 to display the setting screen 2 Select the color you want to leave by moving the frame with 3 4 2 1 Press DISP to reset the frame position 3 Press MENU SET to set Depending on the subjec...

Page 117: ...t can be changed to 4 different sizes Pressing DISP returns the light source setting to the default setting 4 Press MENU SET to set Display of the recording screen will be delayed more than usual and...

Page 118: ...g a motion picture Aperture value Set the aperture value to a higher number when you want a sharp focus background Set the aperture value to a lower number when you want a soft focus background Shutte...

Page 119: ...ecording Press the motion picture button or the shutter button to stop recording a motion picture Audio is not recorded You can continuously record a motion picture up to 7 minutes and 29 seconds or t...

Page 120: ...s executed The following menu items are not registered as custom settings Registering Personal Menu Settings Registering custom settings Preparations Set in advance the Recording Mode you wish to save...

Page 121: ...2 Press MENU SET to display the menu 3 Press 2 1 to select the custom setting you want to use and then press MENU SET Saving of the selected custom settings is displayed on the screen Changing the se...

Page 122: ...turned on and off In Scene Guide Mode a Photo Style which matches each scene is fixed Those menu items are shared by the Rec menu and the Motion Picture menu When the setting for either of the two is...

Page 123: ...ess in the picture s Decreases the difference between the brightness and the darkness in the picture Sharpness r The picture is sharply defined s The picture is softly focused Noise Reduction r The no...

Page 124: ...time you press the rear dial you can switch between the adjustment of the dark portion and that of the bright portion To register a preferred setting press 3 and select the destination where the cust...

Page 125: ...n Settings registered to will be stored even after this unit is turned off Turning off this unit will return the setting adjusted with back to the default setting Those menu items are shared by the Re...

Page 126: ...1 Press 1 2 Select the White Balance by rotating the rear dial 3 Press the rear dial to set It will operate as AWB during motion picture recording AWB Automatic adjustment V When taking pictures outd...

Page 127: ...dheld Night Shot Clear Night Portrait Appetizing Food Cute Dessert Auto White Balance Depending on the conditions prevailing when pictures are taken the pictures may take on a reddish or bluish tinge...

Page 128: ...nce again after adjusting to appropriate brightness You can set the color temperature manually for taking natural pictures in different lighting conditions The color of light is measured as a number i...

Page 129: ...he screen will change to blue If you finely adjust the White Balance to G green or M magenta _ green or magenta appears beside the White Balance icon on the screen The White Balance fine adjustment se...

Page 130: ...ertical G to M 2 Press MENU SET is displayed in White Balance icon in the screen when the White Balance Bracket is set The White Balance Bracket setting is canceled in the following cases When you tur...

Page 131: ...th Panorama Shot in Scene Guide Mode Applicable modes Set the number of pixels The higher the numbers of pixels the finer the detail of the pictures will appear even when they are printed onto large s...

Page 132: ...e aspect ratio When the aspect ratio is 16 9 When the aspect ratio is 1 1 Settings Image size Settings Image size L 17M 5472k3080 L 13 5M 3648k3648 M 8M 3840k2160 M 6 5M 2592k2592 S 2M 1920k1080 S 3 5...

Page 133: ...sing 2 If you perform RAW Processing in the Playback menu on a picture taken with Red Eye Removal the effect will be applied to the processed picture in JPEG format About RAW RAW format refers to a da...

Page 134: ...ay be automatically disabled depending on the lighting conditions In the following cases i Dynamic does not work Panorama Shot Scene Guide Mode When HDR is set to ON Applicable modes Pictures with sha...

Page 135: ...comes narrow slightly when Auto Align is set to ON Flash is fixed to forced flash off Not available in these cases HDR does not work for the pictures taken during a motion picture recording HDR is not...

Page 136: ...r noise reduction ongoing is displayed for the same time as the shutter speed for signal processing We recommend using a tripod when the shutter speed is slowed to take pictures Not available in these...

Page 137: ...etting is fixed to sRGB in the following case When recording motion pictures Setting the color space Color Space Rec Color Space sRGB Color space is set to sRGB color space This is widely used in comp...

Page 138: ...AF area selection screen is displayed when 4 is pressed while or is selected For operation in the AF area selection screen refer to P145 The setting is fixed to in the following cases Miniature Effect...

Page 139: ...fway AFF Movement cannot be predicted Children pets etc AFF is an abbreviation of Auto Focus Flexible In this mode focusing is performed automatically when the shutter button is pressed halfway If the...

Page 140: ...re also focused A The eye to be in focus You can change the position and size of the AF area and the eye to be in focus P145 When is selected and Metering Mode is set to multiple the camera will adjus...

Page 141: ...the locked subject when Metering Mode is set to P163 If it fails to lock AF area will flash in red and disappear Try to lock again When AF tracking fails is set Not available in these cases cannot be...

Page 142: ...cus and exposure by pressing the shutter button halfway move the camera to the composition you want with the shutter button pressed halfway and then take the picture Only when the Focus Mode is set to...

Page 143: ...he bottom left of the screen 4 Press 4 AF area setting screen is displayed 5 Select AF areas The selected AF areas are displayed in yellow while the areas that are not selected are displayed in white...

Page 144: ...the screen in step 3 on P143 press 3 2 Press 3 4 to select a destination to which the setting will be registered and press MENU SET Confirmation screen is displayed It is executed when Yes is selecte...

Page 145: ...ted the eye to be in focus will be changed 4 Press MENU SET to set When selecting You can set the focus position by selecting an AF area group The 49 AF areas are divided into groups each consisting o...

Page 146: ...s position with 3 4 2 1 Pressing DISP will bring the focus position back to the center of the assist screen Changing the display of the assist screen Each time the rear dial is pressed an enlarged dis...

Page 147: ...m range Setting the duration for which the screen is enlarged Custom Pinpoint AF Time LONG Approx 1 5 seconds MID Approx 1 0 second SHORT Approx 0 5 second If you release the shutter button the enlarg...

Page 148: ...ter button to take a picture Set the exposure and take a picture Focusing Not focusing in advance As long as the camera is held steady the camera will automatically adjust the focus and focus adjustme...

Page 149: ...ng cases Distinct Scenery Bright Blue Sky Romantic Sunset Glow Vivid Sunset Glow Glistening Water Clear Nightscape Cool Night Sky Warm Glowing Nightscape Artistic Nightscape Handheld Night Shot Scene...

Page 150: ...etermine the area to be enlarged and press MENU SET The assist screen is displayed enlarging the area MF Assist P151 If you press DISP the area to be enlarged will be reset to the center 5 Operate the...

Page 151: ...LOCK is pressed in Manual Focus Auto Focus will work Auto Focus works at the center of the frame If Auto Focus is used while the MF Assist screen is displayed the center of the MF Assist screen will...

Page 152: ...r highlighting does not affect recorded images Peaking does not work with Rough Monochrome in Creative Control Mode Displaying not displaying the MF Guide Custom Peaking ON In focus portions are highl...

Page 153: ...proximately 3 to 6 times when the enlarged display is in a windowed display or up to approximately 3 to 10 times when the enlarged display is in a full screen display The rear dial enlarges reduces th...

Page 154: ...focus may lose its accuracy In that case re adjust the focus After canceling Sleep Mode focus on the subject again If you are taking close up pictures We recommend using a tripod and the self timer P...

Page 155: ...tures of a subject as close as 3 cm 0 098 feet from the lens by rotating the zoom lever upmost to Wide 1k Macro Zoom Use this setting to get close to the subject and then further enlarge when taking t...

Page 156: ...e gives priority to a subject close to the camera Therefore if the distance between the camera and the subject is far it takes longer to focus on it When you take pictures at close range the resolutio...

Page 157: ...ou compose the picture and then press shutter button fully A AE Lock indication When AE LOCK is set after pressing the shutter button halfway to focus press the shutter button fully Setting the functi...

Page 158: ...Lock only is effective when taking pictures with Manual Focus Only the AF lock is active during motion picture recording Once you cancel the AF lock during the recording the AF lock cannot be reactiv...

Page 159: ...exposure 3 Press the rear dial to set When Auto Exposure Comp in Flash in the Rec menu is set to ON the brightness of the built in flash will automatically be set to the level appropriate to the selec...

Page 160: ...O sensitivity to be set Setting to a higher figure enables pictures to be taken even in dark places without the resulting pictures coming out dark 1 Press 3 2 Select the ISO sensitivity by rotating th...

Page 161: ...vity is automatically adjusted according to the brightness Maximum 3200 1 Intelligent The camera detects movement of the subject and then automatically sets the optimum ISO sensitivity and shutter spe...

Page 162: ...an adjust the ISO sensitivity settings for every 1 3 EV Only available when Extended ISO is set When the setting is changed from 1 3 EV to 1 EV Sensitivity will be set to value closest to the value se...

Page 163: ...f the two is changed the setting for the other is also changed Rec Metering Mode Multiple This is the method in which the camera measures the most suitable exposure by judging the allocation of bright...

Page 164: ...h the mechanical shutter The camera starts and ends an exposure electronically Flash Shutter Speed Sec 60 to 1 4000th 1 to 1 16000th Shutter sound Mechanical shutter sound 1 Electronic shutter sound 2...

Page 165: ...c shutter When a moving subject is recorded with the electronic shutter the subject may appear distorted on the picture When the electronic shutter is used under fluorescent or LED lighting etc horizo...

Page 166: ...on is pressed only one picture is recorded Burst P167 Recordings are made in succession while the shutter button is pressed Auto Bracket P171 Each time the shutter button is pressed recordings are mad...

Page 167: ...es taken with a burst speed of SH will be recorded as a single burst group P225 1 Set the drive mode dial to 2 Focus on the subject and take a picture Hold down the shutter button fully to activate th...

Page 168: ...able 1 With RAW files 10 3 4 10 3 4 10 3 4 Without RAW files Max 60 Depends on the capacity of the card 4 1 Number of recordable pictures 2 The electronic shutter will operate 3 Depending on the recor...

Page 169: ...r H when the Focus mode is AFS or MF the exposure and White Balance are fixed at the settings used for the first picture for the subsequent pictures as well When the burst speed is set to H when the F...

Page 170: ...lower Panorama Shot Scene Guide Mode Rough Monochrome Silky Monochrome Miniature Effect Soft Focus Star Filter Sunshine Creative Control Mode When White Balance Bracket is set When recording motion pi...

Page 171: ...uence 0 s r 1 Set the drive mode dial to 2 Focus on the subject and take a picture If you press and hold the shutter button the number of pictures that you set is taken The Auto Bracket indication bli...

Page 172: ...ess 3 4 to select the setting and then press MENU SET You can take one picture at a time when set to You can continuously take pictures up to set numbers when set to Exit the menu after it is set Rec...

Page 173: ...cket is disabled in the following cases Glistening Water Glittering Illuminations Handheld Night Shot Soft Image of a Flower Panorama Shot Scene Guide Mode Rough Monochrome Silky Monochrome Miniature...

Page 174: ...s recording starts Changing the time setting for the self timer 1 Select the menu 2 Press 3 4 to select the mode and then press MENU SET Rec Self Timer Picture is taken 10 seconds after shutter is pre...

Page 175: ...ry slightly when the is selected Not available in these cases It cannot be set to in the following cases When White Balance Bracket is set Multi Exp Self timer is disabled in the following cases Panor...

Page 176: ...are displayed as a set of group pictures P225 1 Set the drive mode dial to To use the settings you used in the previous recording with the drive mode start recording without changing the settings 2 P...

Page 177: ...sing and holding until the recording screen is displayed Start Time Now Starts the recording by fully pressing the shutter button StartTime Set You can set the time to start recording Any time up to 2...

Page 178: ...lso enable you to resume from the pause Confirmation screen for creating a motion picture is displayed next so select Yes 9 Select the methods for creating a motion picture The recording format is set...

Page 179: ...rt by turning on this unit Turn off this unit when replacing the battery or the card When the charge on the battery runs out Turning the camera off Do not connect the AV cable optional the HDMI micro...

Page 180: ...d only when you press MENU SET for the first time after switching the drive mode dial to In other cases the camera operates as usual displaying the menu screen 3 Press MENU SET 4 Select Mode with 3 4...

Page 181: ...ed It is ended when Yes is selected Confirmation screen for creating a motion picture is displayed next so select Yes 11 Select the methods for creating a motion picture The recording format is set to...

Page 182: ...group Selecting Add to Picture Group in step 6 will display group pictures recorded with Stop Motion Animation Select a set of group pictures press MENU SET and then select Yes on the confirmation scr...

Page 183: ...tery or an AC adaptor optional and a DC coupler optional If power supply is lost by unplugging the AC adaptor or due to a blackout while creating a motion picture with the AC adaptor the motion pictur...

Page 184: ...ext picture Press 3 4 to select the item and then press MENU SET for one of the following operations 4 Shooting the second third and fourth exposures If Fn1 is pressed while taking pictures the photog...

Page 185: ...corded until completion The recording information displayed for pictures taken with multiple exposures is the recording information for the last picture taken Items shown in gray on the menu screen ca...

Page 186: ...the flash and the AF Assist lamp are forced off The following settings are fixed Shutter Type ESHTR Flash Mode forced flash off AF Assist Lamp OFF Beep Volume s OFF Shutter Vol OFF Even when ON is se...

Page 187: ...will also work with the Face Recognition function In Recording Mode Display of corresponding name when camera detects a registered face if name has been set for the registered face Names of up to 3 pe...

Page 188: ...to OFF will not be categorized by face recognition in Category Play Even when Face Recognition information is changed P191 Face Recognition information for the pictures already taken will not be chang...

Page 189: ...y the description of the face registration press 1 Face Settings Point of recording when registering the face images Face front with eyes open and mouth closed making sure the outline of the face the...

Page 190: ...birthday 1 Press 4 to select SET and then press MENU SET 2 Press 2 1 to select the items Year Month Day and then press 3 4 to set and then press MENU SET Add Images To add additional face images Add...

Page 191: ...and then press MENU SET 3 Press 3 4 to select the item and then press MENU SET Change or delete the information for a registered person Info Edit Changing the information of an already registered pers...

Page 192: ...aby1 Baby2 or Pet and then press MENU SET 4 Press 3 4 to select Age or Name and then press MENU SET 5 Press 3 4 to select SET and then press MENU SET 6 Press 4 to select Exit and then press MENU SET t...

Page 193: ...enter of the screen Center Marker Custom Center Marker Checking areas that may be white saturated Zebra Pattern Custom Zebra Pattern ZEBRA1 Displays areas above a certain luminance level by a right le...

Page 194: ...rded images will not be affected Recording while monitoring camera images When using the HDMI output you can take pictures while monitoring the camera image on a TV etc Refer to P301 on how to connect...

Page 195: ...a method of taking pictures which involves turning the camera to track the movements of a subject which continues to move in a fixed direction Preventing jitter camera shake When the jitter alert app...

Page 196: ...When there is a lot of jitter When the zoom magnification is high In digital zoom range When taking pictures while following a moving subject When the shutter speed becomes slower to take pictures ind...

Page 197: ...quality Maximum magnification 16k Not available in these cases This function is not available in the following cases Panorama Shot Scene Guide Mode When recording with Zoom Macro With the manual ring...

Page 198: ...H When HDR is set to ON Multi Exp When iHandheld Night Shot is set to ON When iHDR is set to ON When Quality is set to or When recording with Zoom Macro When recording motion pictures Applicable modes...

Page 199: ...imer P174 for taking pictures In the Digital Zoom range the AF area is displayed at the center in a larger size Not available in these cases This function is not available in the following cases Impre...

Page 200: ...ge C Intelligent Zoom range D Digital Zoom range E Current focal distance 35 mm film camera equivalent Step Zoom Stops zooming at preset focal lengths when you operate the zoom Step Zoom is disabled d...

Page 201: ...Be careful not to catch a finger when closing a flash bulb The available flash range approximation If the distance to the subject is close when taking a picture using a flash part of the recorded ima...

Page 202: ...al flash it takes priority over the built in flash Refer to P319 for the external flash In the following cases the flash is fixed to forced flash off When recording motion pictures When using the elec...

Page 203: ...ooking at the first flash the effect may not be evident Changing Flash Mode Rec Flash Forced Flash On The flash is activated every time regardless of the recording conditions Use this when your subjec...

Page 204: ...ording Mode The available flash settings depend on the Recording Mode Available Not available Initial setting of Scene Guide Mode 3 Cannot be set using the Rec menu is set when the flash is opened P77...

Page 205: ...vated when recording motion picture Scene Guide Mode Clear Portrait Silky Skin Backlit Softness Clear in Backlight Relaxing Tone Sweet Child s Face Distinct Scenery Bright Blue Sky Romantic Sunset Glo...

Page 206: ...splayed in the flash icon on the screen if you set Flash Synchro to 2ND Only available when Wireless in Flash is set to OFF P209 The Flash Synchro settings also apply to an external flash except the w...

Page 207: ...vel is adjusted It can be set only when Wireless P209 in Flash is set to OFF and Firing Mode P208 is set to TTL The Flash Adjust setting also applies to an external flash excluding the wireless flash...

Page 208: ...t and then press MENU SET 3 Press 2 1 to select an item and then press MENU SET You can set from 1 1 full brightness to 1 128 in steps of 1 3 Changing the firing mode Manual flash TTL The camera autom...

Page 209: ...n press MENU SET 4 Press 3 4 to select ON and then press MENU SET When Wireless is set to ON WL is displayed on the flash icon on the recording screen When making detailed settings of the wireless fla...

Page 210: ...sh manually OFF The external flash fires only a signal flash Flash Adjust Set the output of the external flash manually when Firing Mode is set to TTL Manual Flash Adjust Set the luminosity ratio of t...

Page 211: ...an be reduced by lowering the output with a diffuser etc Applicable modes When Red Eye Reduction is selected Red Eye Removal is performed whenever the flash is used The camera automatically detects re...

Page 212: ...Select the menu 2 Press 3 4 to select the item and then press MENU SET 3 Press 3 4 to select Rec Quality and then press MENU SET 4 Press 3 4 to select the item and then press MENU SET Exit the menu a...

Page 213: ...o use another device to play back motion pictures recorded in FHD 28M 60p FHD 24M 30p FHD 24M 24p of AVCHD or if you want to transfer them to the device a PC installed with PHOTOfunSTUDIO or a compati...

Page 214: ...nu When the focus mode is set to AFS AFF or AFC if you press the shutter button halfway while recording a motion picture the camera will re adjust the focus Depending on the recording conditions opera...

Page 215: ...picture button right after you press it 2 Stop the recording by pressing the motion picture button again Still picture recording is also possible during the motion picture recording by fully pressing...

Page 216: ...ngle of view for taking pictures and the one for recording motion pictures Custom Rec Area Picture Motion picture When the aspect ratio setting is different in still and motion pictures the angle of v...

Page 217: ...ng It is recommended to use a fully charged battery or AC adaptor optional when recording motion pictures P323 If while recording motion pictures using the AC adaptor optional the power supply is cut...

Page 218: ...o Mode The angle of view of motion pictures in 4K is narrower than those of motion pictures in other sizes When recording motion pictures in 4K use a card rated as UHS Speed Class 3 P30 To record moti...

Page 219: ...re priorities Pictures will be recorded with a picture size of S 2 M The picture quality may be different to S 2 M of standard pictures Only JPEG images are recorded when Quality is set to or When set...

Page 220: ...ect ratio will be fixed to 16 9 Not available in these cases This function is not available in the following cases When Rec Format is set to VGA 4M 30p in MP4 When AVCHD in Rec Format is set to FHD 24...

Page 221: ...menus is reflected in other menu Motion Picture menu is not displayed in the following cases Glistening Water Glittering Illuminations Soft Image of a Flower Panorama Shot Scene Guide Mode Rough Monoc...

Page 222: ...ected to a level position Not available in these cases Level Shot does not work in the following cases When recording with High Speed Video When the O I S switch is set to OFF When Rec Quality is set...

Page 223: ...lues are approximate Not available in these cases This function is not available in the following case Miniature Effect Creative Control Mode This function is not available during High Speed Video rec...

Page 224: ...ction is not available during High Speed Video recording Applicable modes Coupled to the zoom operation it will clearly record far sounds with tele and surrounding sounds with wide Settings ON OFF Whe...

Page 225: ...a time options are displayed Operations during Group Pictures playback A picture group consisting of pictures taken in the Burst Mode with the burst speed SH P167 A picture group consisting of pictur...

Page 226: ...4 2 Press 2 1 to flip through images Press 4 again to return to the normal playback screen Each picture in a group can be treated same as normal pictures when they are played back Such as Multi Playba...

Page 227: ...he motion picture you play back When the motion picture size is set to 4K in Rec Quality M 8 M When the motion picture size is set to FHD HD in Rec Quality S 2 M Still pictures created from a motion p...

Page 228: ...in synchronization with music and you can do this in sequence while leaving a fixed interval between each of the pictures You can also put together a slide show composed of only still pictures only m...

Page 229: ...the slide show for in Category Selection Even if Effect is set it does not work during a slide show of Group Pictures When pictures are displayed on a TV connected via an HDMI micro cable or when vert...

Page 230: ...not be played back Playback Mode Playback Playback Mode Face Recog i Portrait i Night Portrait i Baby in Scene Detection Clear Portrait Silky Skin Backlit Softness Clear in Backlight Relaxing Tone Sw...

Page 231: ...onto images is taking place During a suspended period is displayed Select the period with to restart the recording process from the picture you left off To delete the received location information 1 S...

Page 232: ...onochrome Scenery Portrait i Dynamic Allows you to select an i Dynamic setting HIGH STANDARD LOW OFF Contrast Allows you to adjust the contrast Highlight Allows you to adjust the brightness of bright...

Page 233: ...ach item When you select an item the setting screen will be displayed When Noise Reduction i Resolution or Sharpness is selected the comparison screen cannot be displayed You can enlarge the picture w...

Page 234: ...dentical The range within which you can correct the exposure differs from the one you can correct during recording The White Balance setting of pictures taken with multiple exposures is fixed to the s...

Page 235: ...plied You can set up to 100 pictures at one time with Multi Not available in these cases You cannot use Title Edit for the following pictures Motion pictures Pictures taken with or Title Edit Playback...

Page 236: ...t Stamp Playback Text Stamp Single Multi 2 Select an image you wish to stamp with text appears on screen if the picture is stamped with text Single setting 1 Press 2 1 to select the picture 2 Press ME...

Page 237: ...selected Exit the menu after it is executed Shooting Date W O TIME Stamp the year month and date WITH TIME Stamp the year month day hour and minutes OFF Name Face Recognition Name registered in Face R...

Page 238: ...g is carried out Depending on the printer being used some characters may be cut at printing Check before printing When you stamp pictures in a group the stamped ones are saved separately from the orig...

Page 239: ...the very beginning or end of the motion picture You cannot use Video Divide for the following pictures Motion pictures with a short recording time Video Divide Playback Video Divide 3 Press 3 at the l...

Page 240: ...on P178 for details Also refer to the notes on P179 for created motion pictures A motion picture is created from group pictures taken with Stop Motion Animation Created motion pictures are saved in M...

Page 241: ...esize Single Multi 2 Select the picture and size Single setting 1 Press 2 1 to select the picture and then press MENU SET 2 Press 3 4 to select the size and then press MENU SET Confirmation screen is...

Page 242: ...ure at a time when you want to crop the pictures in a picture group You cannot edit all pictures in a group at once When you crop pictures in a group the cropped ones are saved separately from the ori...

Page 243: ...after it is set Select the menu The pictures are displayed without being rotated when you select OFF Exit the menu after it is set Not available in these cases When you play back pictures on a PC the...

Page 244: ...disabled You can set up to 999 pictures as favorites When you set pictures in a group as Favorite the number of your Favorite pictures is displayed on the Favorite icon of the group s top picture Not...

Page 245: ...ormation visit http panasonic jp dc dpof_110 white_e htm 1 Select the menu 3 Press 3 4 to set the number of prints and then press MENU SET to set When Multi has been selected Repeat steps 2 and 3 for...

Page 246: ...t feature is disabled for pictures that are stamped with text The number of prints can be set from 0 to 999 Depending on the printer the date print settings of the printer may take precedence so check...

Page 247: ...o Protect the number of pictures with the Protect setting is displayed on the Protect icon of the group s top picture Protect Playback Protect Single Multi 2 Select the picture Single setting Press 2...

Page 248: ...ognition information of pictures in a group has to be edited at once You cannot edit one picture at a time Editing of group pictures can be performed only on the first picture of each set You can set...

Page 249: ...eting a picture is displayed 1 Select the menu 2 Press 3 4 to select an item and then press MENU SET Exit the menu after it is set Delete Confirmation Playback Delete Confirmation Yes first Yes is hig...

Page 250: ...intercepted by a third party Do not use the camera in areas with magnetic fields static electricity or interference Do not use the camera in areas with magnetic fields static electricity or interferen...

Page 251: ...s can be selected This owner s manual describes the procedure for New Connection Compatible models This function can be used with the NFC compatible device with Android OS version 2 3 3 or higher excl...

Page 252: ...on may be disrupted A message such as Communication error is displayed When sending images on a mobile network high packet communication fees may be incurred depending on the details of your contract...

Page 253: ...on information on images stored in the camera P254 Easy connection easy transfer You can use easily by pressing and holding Wi Fi or by using the NFC function Displaying pictures on a TV P268 Printing...

Page 254: ...with version updates The service may not be able to be used properly depending on the type of smartphone being used For information on the Image App refer to the support site below http panasonic jp...

Page 255: ...menu items A SSID and password B QR code To change the connection method press DISP and then select the connection method 2 Operate the smartphone Once the connection is complete the image from the ca...

Page 256: ...the scanning is not successful move the camera and the smartphone further away from each other and try again or use a connection method other than the QR code method 4 Install the profile of IMAGE APP...

Page 257: ...on the screen of the camera If you press MENU SET on the camera the QR code will be enlarged When it is difficult to scan the QR code try enlarging it If the scanning is not successful move the camera...

Page 258: ...on P291 to connect the camera to the smartphone 2 Start Image App P254 WPS is a function that allows you to easily set up a connection with a wireless LAN device and make security related settings To...

Page 259: ...martphone has connected an image of this camera will be displayed on the smartphone The connected smartphone is registered to this camera If a connection attempt by touching fails restart the Image Ap...

Page 260: ...of NFC compatible smartphones refer to the operating instructions of your device If there is a metal object between this camera and the smartphone reading may fail Also putting a sticker around the N...

Page 261: ...or with their picture quality size set to MP4 in 4K Playing back images in the camera 1 Select You can switch the images to be displayed by selecting the icon A on the top left of the screen To displa...

Page 262: ...the camera It may take time to complete the connection If a connection attempt by touching fails restart the Image App and then display the screen in step 2 again To transfer more than one image repea...

Page 263: ...ime of recording may be written Keep the following points in mind Set the camera s Home setting in World Time to your region Once you start recording location information with your smartphone do not c...

Page 264: ...for iOS If you press the Home or On Off button of the smartphone while location information is being recorded the recording will stop Not available in these cases The smartphone may fail to acquire l...

Page 265: ...vice For details on how to send images refer to P294 Click the followings to jump to the beginning of each menu Sending images to a smartphone tablet by controlling the camera JPEG RAW MP4 AVCHD Sendi...

Page 266: ...til sending is complete Sending an image each time a recording is made Send Images While Recording New Connection Send Images While Recording Smartphone On your smartphone When connecting with Via Net...

Page 267: ...i function 2 Select the wireless access point you want to connect to and set 3 Start Image App P254 When connecting with Wi Fi Direct or WPS Connection in Direct 1 Start Image App P254 When connecting...

Page 268: ...ou take or play back pictures Effect and Sound of the Slide Show are disabled Not available in these cases Motion pictures cannot be played back During the multi calendar playback pictures displayed o...

Page 269: ...tion cable is connected For details refer to P315 To change the setting or disconnect press Wi Fi P252 Not available in these cases Motion pictures cannot be printed out You can send images to a compa...

Page 270: ...images may not be played back or sent depending on the device For information on the playback of images check the operating instructions of the destination device For details on how to send images re...

Page 271: ...disconnect press Wi Fi P252 You cannot change the settings while sending pictures Wait until sending is complete Preparations When sending a picture to AV devices set your device to DLNA waiting mode...

Page 272: ...the setting or disconnect press Wi Fi P252 Sending selected images Send Images Stored in the Camera New Connection Send Images Stored in the Camera AV device Single Select setting 1 Select the pictur...

Page 273: ...the beginning of each menu You can send pictures and motion pictures recorded with this unit to a PC JPEG RAW MP4 AVCHD Sending an image each time a recording is made Send Images While Recording Send...

Page 274: ...set a password to the folder select Create manually For details refer to the operating instructions of PHOTOfunSTUDIO PDF When not using PHOTOfunSTUDIO For Windows Supported OS Windows XP Windows Vis...

Page 275: ...BIOS name for Apple Mac computers 4 Select the folder you want to send When the connection is complete the screen is displayed To change the send setting press DISP P296 5 Take pictures To change the...

Page 276: ...creen for a user account and password entry appears enter the one you set on your PC When the computer name NetBIOS name for Apple Mac computers contains a space blank character etc it may not be reco...

Page 277: ...me images may not be played back or sent depending on the device For information on the playback of images check the web service For details on how to send images refer to P294 A Wireless access point...

Page 278: ...mages was taken and the location where the image was taken Check this information before uploading images to web services Sending an image each time a recording is made Send Images While Recording P27...

Page 279: ...login ID and password and log in to the service P283 3 Register your email address 4 Select the web service to be used and register it Follow the instructions on the screen to register the service 1 S...

Page 280: ...e setting or disconnect press Wi Fi P252 Sending selected images Send Images Stored in the Camera New Connection Send Images Stored in the Camera Web service Single Select setting 1 Select the picture...

Page 281: ...or sending and images that can be sent Excluding motion pictures recorded with their size set to 4K in Rec Quality Some images may not be played back or sent depending on the device For information on...

Page 282: ...he send setting press DISP P296 4 Select Single Select or Multi Select To change the setting or disconnect press Wi Fi P252 Sending an image each time a recording is made Send Images While Recording N...

Page 283: ...o not need to acquire a new login ID 4 Select the method for connecting to a wireless access point and set Refer to P289 for details A setting screen will be displayed only when connecting for the fir...

Page 284: ...ncel the process without acquiring a login ID 6 Enter a password Enter any combination of 8 to 16 characters and numbers for the password For details on how to enter characters refer to Entering Text...

Page 285: ...ogin ID The login ID and password are displayed The password is displayed as Close the menu if only checking the login ID 4 Select the item to change 5 Enter the login ID or password Refer to Entering...

Page 286: ...enu set the common login ID The login IDs for this unit and the smartphone become the same After connecting this unit to the smartphone the setup screen for a common login ID may appear when you displ...

Page 287: ...Select Yes on the confirmation screen for deleting the LUMIX CLUB account If you want to continue using the service selecting No will only delete the login ID Exit the menu after it is executed 5 Pre...

Page 288: ...reless access points are not available or for when connecting temporarily to a device you do not usually use When connecting with the same settings as the previous ones you can use the Wi Fi function...

Page 289: ...i Protected SetupTM with a WPS mark Press the wireless access point WPS button until it switches to WPS mode Refer to the wireless access point instruction manual for details e g WPS PIN code Save PIN...

Page 290: ...wireless access point you are connecting to then select Set For details on how to enter characters refer to Entering Text section on P55 3 Select the network authentication type For information on ne...

Page 291: ...ush Button 1 Select WPS Push Button 2 Set the device to WPS mode You can wait longer for a connection by pressing the DISP button on this unit WPS PIN code 1 Select WPS PIN code 2 Enter the PIN code o...

Page 292: ...History 3 Select the item you want to register to favorites and then press 1 4 Enter a registration name For details on how to enter characters refer to Entering Text section on P55 A maximum of 30 ch...

Page 293: ...ttempt fails reconnect by using New Connection Editing the items registered to favorites Remove from Favorite Change the Order in Favorite Select the destination Change the Registered Name For details...

Page 294: ...ure recorded in AVCHD can be sent to PC if the file size is 4 GB or smaller It cannot be sent if the size is greater than 4 GB 3 Excluding motion pictures recorded with their size set to 4K in Rec Qua...

Page 295: ...ion before sending is complete unsent pictures will not be resent You may not be able to delete files or use the playback menu while sending Not available in these cases Motion pictures cannot be sent...

Page 296: ...ge size is determined by the circumstances at the destination You can select the image size for Change from M S or VGA The aspect ratio does not change File Format 2 JPG RAWiJPG RAW Delete Location Da...

Page 297: ...t the workgroup To send images to a PC a connection to the same workgroup as the destination PC is required The default setting is WORKGROUP Change Workgroup Name Enter the workgroup of the connecting...

Page 298: ...ions is only available on the version DMC FZ1000P Touch Sharing Sets the camera operation after the connection with the NFC function is complete ON When a Wi Fi connection is complete by using the NFC...

Page 299: ...tically and playback screen will be displayed Refer to P304 for details When you have motion pictures recorded with Rec Format set to MP4 and their size set to 4K in Rec Quality you can also play them...

Page 300: ...set to 4K in Rec Quality to Blu ray discs and DVDs with Panasonic recorders As of June 2014 With the PHOTOfunSTUDIO software on the DVD supplied you can convert 4K motion pictures into smaller sized...

Page 301: ...tible with the terminals Image quality may vary with the connected terminals HDMI socket Video socket High quality To connect with an HDMI micro cable Use a High Speed HDMI micro cable with the HDMI l...

Page 302: ...al and HDMI micro cable are connected The connection with the USB connection cable supplied will take priority when you connect the USB connection cable supplied simultaneously with the HDMI micro cab...

Page 303: ...pictures may not be displayed on the full screen The file format of the motion pictures that can be played back differs depending on the TV model In some cases panorama pictures cannot be played back...

Page 304: ...allows you to use your remote control for the Panasonic TV for easy operations when this unit has been connected to a VIERA Link compatible device using a HDMI micro cable for automatic linked operati...

Page 305: ...tch the input channel For details on how to switch input please read the operating instructions for the TV If VIERA Link does not work properly refer to P357 If you are unsure whether or not the TV yo...

Page 306: ...ot recognized please refer to the below support site http panasonic net avc sdcard information SDXC html PC that can be used The unit can be connected to any PC capable of recognizing a mass storage d...

Page 307: ...F etc that can be displayed on a personal computer LoiLoScope 30 day full trial version Windows XP Windows Vista Windows 7 Windows 8 Windows 8 1 LoiLoScope is a video editing software where that draws...

Page 308: ...ore WindowsR 7 64bit WindowsR 8 64bit WindowsR 8 1 64bit Free hard disk space 450 MB or more for installing software Refer to the operating instructions of PHOTOfunSTUDIO PDF for further operating env...

Page 309: ...X can be installed manually 1 Insert the DVD with the supplied software 2 Double click the application folder on the DVD 3 Double click on the automatically displayed folder 4 Double click the icon in...

Page 310: ...will be automatically connected to the PC without displaying the USB Mode selection screen When the camera is connected to a PC while USB Mode is set to PictBridge PTP a message may appear on the PC s...

Page 311: ...nother maker of camera When there is a picture with file number 999 inside the folder Connection in the PTP Mode Set USB Mode to PictBridge PTP Data can now be read only from the card in the PC When t...

Page 312: ...nient if you wish to pass around dubbed content In this case the content will be played back in standard rather than high definition picture quality When you play back motion pictures on 4 3 aspect ra...

Page 313: ...the direction of the terminals and plug in out straight holding onto the plug It may result in malfunction by the deforming of the terminal if it is plugged in obliquely or in wrong direction Do not...

Page 314: ...ng stop printing at once If not printing disconnect the USB connection cable Do not disconnect the USB connection cable while Cable disconnect prohibit icon is displayed May not be displayed depending...

Page 315: ...inted at one time Press 3 4 2 1 to select the pictures and then press MENU SET When MENU SET is pressed again the setting is canceled After the pictures have been selected press 2 to select OK and the...

Page 316: ...the printer does not support date printing the date cannot be printed on the picture Depending on the printer the date print settings of the printer may take precedence so check if this is the case Wh...

Page 317: ...ge layout Settings on the printer are prioritized L 3 5qk5q 89 mmk127 mm 2L 5qk7q 127 mmk178 mm POSTCARD 100 mmk148 mm 16 9 101 6 mmk180 6 mm A4 210 mmk297 mm A3 297 mmk420 mm 10k15cm 100 mmk150 mm 4q...

Page 318: ...e Layout to and then set Num of prints to 1 for each of the 4 pictures The camera is receiving an error message from the printer when the indication lights orange during printing After finishing print...

Page 319: ...and then press MENU SET While the external flash is connected the following icons are displayed External Flash optional Removing the Hot Shoe Cover The camera comes with a hot shoe cover attached to...

Page 320: ...external flash because it may detach from the camera If you use the external flash when the White Balance is set to finely adjust the White Balance depending on the picture quality P129 If you record...

Page 321: ...on on the camera Always use a genuine Panasonic shutter remote control DMW RSL1 optional Record with Creative Video Mode P118 when using for motion picture recording Motion picture recording can be st...

Page 322: ...MENU SET While the external microphone is connected is displayed on the screen When the external microphone is connected Mic Level Disp P223 is automatically set to ON and the mic level is displayed o...

Page 323: ...fects neither the colors nor the amount of light so it can always be used to protect the camera s lens The ND filter reduces the amount of light to approximately 1 8th equal to adjusting the aperture...

Page 324: ...ode P203 Flash P206 209 Recording format Recording quality P212 Picture size Aspect Ratio P131 Card displayed only during recording P30 Elapsed recording time 1 P215 Simultaneous recording indicator P...

Page 325: ...y indication P25 Picture Mode Still picture priorities P219 Luminance Level P222 Macro recording P155 Level Shot P222 98 98 98 200 00 200 200 60 60 60 2 8 2 8 2 8 AFS AFS AFS L 3 2 0 0 AEL AEL AEL BKT...

Page 326: ...ng 2 P47 AF area P59 145 Spot metering target P163 Self timer 3 P174 Silent Mode P186 External Microphone P322 Zoom Microphone P224 Mic Level display P223 Mic Level Limiter OFF P223 AE Lock P157 Meter...

Page 327: ...67 Auto Bracket P171 Self timer P174 F 2 8 98 AWB 1 60 0 0 0 Fn ISO AUTO Wi Fi L 3 2 AFS AFS C1 EXPS EXPS ISO 200 0 0 WL Time Lapse Shot P176 Stop Motion Animation P180 Focus Mode P139 150 AF Mode P13...

Page 328: ...12 A Quality P132 60 60 60 F2 8 F2 8 F2 8 0 0 AWB AWB AWB 1 1 1 98 1 98 1 98 200 00 200 200 L 3 2 PRQWK GD V PRQWK GD V PRQWK GD V PRQWK GD V 67 67 67 67 SLF SLF SLF 8m30s L 3 2 AVCHD FHD 60i High Spe...

Page 329: ...STD L 3 2 100 0001 1 Recording information Intelligent Dynamic Range Control 3 P134 HDR 4 P135 Intelligent Resolution P134 2 Recorded date and time World Time P47 3 Picture size Aspect Ratio P131 A Q...

Page 330: ...e used with this unit Insert a different card Format the card again with the camera after saving necessary data on a PC etc P31 Data will be deleted Please turn camera off and then on again System Err...

Page 331: ...der numbers that can be used Format the card on this unit after saving necessary data on a PC etc P31 If you execute No Reset in the Setup menu after formatting the folder number is reset to 100 P54 P...

Page 332: ...es that use the 2 4 GHz band No picture to send This is displayed when there is no image to transmit due to the restriction of the destination Check the file format of the image to send P265 269 270 2...

Page 333: ...le format of the image to send P265 269 270 273 277 281 Sending motion pictures may fail if the file size is too large Split the motion picture using Video Divide P239 Unavailable Please set Login set...

Page 334: ...uring brightness P163 Burst Rate Sets the burst speed for burst recording P167 Auto Bracket Sets single burst recording compensation range and recording sequence for Auto Bracket recording P171 Self T...

Page 335: ...62 ISO Increments The ISO sensitivity settings values changes in steps of 1 3 EV or 1 EV P162 Extended ISO You can extend the available ISO sensitivity values P162 Long Shtr NR You can eliminate the n...

Page 336: ...hod for still pictures during motion picture recording P219 Continuous AF Continues to focus on the subject for which focus has been achieved P214 Level Shot The camera automatically detects its tilt...

Page 337: ...ace when you press the shutter button P148 Eye Sensor AF The camera automatically adjusts the focus when the eye sensor is active P58 Pinpoint AF Time Sets the time for which the screen is enlarged wh...

Page 338: ...ter Set whether or not to display the exposure meter P84 Dial Guide Set whether or not to display the dial operation guide P19 LVF Disp Style This will set the display style of the viewfinder P65 Moni...

Page 339: ...P41 Video Button Enables disables the motion picture button P216 Eye Sensor Setting the eye sensor sensitivity and the method for switching between the monitor and viewfinder P58 Menu Guide Set the s...

Page 340: ...shutter noise P49 Live View Mode Set the frame rate of the recording screen Live View screen P49 Monitor Display Viewfinder Brightness color or red or blue tint of the monitor viewfinder is adjusted...

Page 341: ...et An exposure value can be reset when the Recording Mode is changed or the camera is turned off P54 No Reset Returns the image file number to 0001 P54 Reset The recording or setup custom settings are...

Page 342: ...ates a motion picture from a set of group pictures recorded with the Time Lapse Shot P240 Stop Motion Video Creates a motion picture from the Stop Motion Animation group P240 Resize Reduces the image...

Page 343: ...n connected to Wi Fi Turn the camera off frequently by using the Economy etc P51 Is the subject focused Is Focus Release Priority in the Custom menu set to FOCUS P149 You cannot take a picture until t...

Page 344: ...settings Burst Auto Bracket of the self timer P166 White Balance Bracket P130 The subject is beyond the focus range of the camera P60 There is camera shake jitter or the subject is moving slightly P19...

Page 345: ...for each of the items other than Noise Reduction P123 Set the Long Shtr NR to ON P136 Is the Picture Size P131 or the Quality P132 set low Is the Digital Zoom set P199 The recorded picture is blurred...

Page 346: ...ing etc the colors and screen brightness may change or horizontal striping may appear on the screen Set the AF area to the distinctive color of the subject if there is a part that is different from th...

Page 347: ...malfunction When a subject moves across the image very fast the subject may appear slightly distorted When noticeable flicker or striping is seen under lighting such as a fluorescent or LED lighting f...

Page 348: ...te control optional to record motion pictures P321 Is the flash closed Open the flash P201 When the electronic shutter is used the flash is not activated P164 Set Shutter Type to AUTO or MSHTR When Si...

Page 349: ...to switch to monitor display P57 Is the monitor switched off Switch the display by pressing DISP P64 It is only displayed on the monitor when the camera is connected to a PC or printer This is not a m...

Page 350: ...serted Is there a picture on the card Is this a folder or picture which was processed in the PC If it is it cannot be played back by this unit It is recommended to use the PHOTOfunSTUDIO software in t...

Page 351: ...to black It is recommended to take a pictures with the flash closed Flash Mode set to or Red Eye Removal set to OFF P211 The picture quality or sound quality of recorded motion pictures may be deteri...

Page 352: ...the wireless access point Remove the obstacles between this unit and the wireless access point Change the direction of this unit Change the location and orientation of the wireless access point Perfo...

Page 353: ...connecting to the PC may not be possible Some OS versions including Windows 8 use two types of accounts a local account and a Microsoft account Be sure to use the user name and password for the local...

Page 354: ...the network may be busy Try again after a while Check the site of the web service you are sending the image to Is the size of the image too large Reduce the image size at Size P296 and then send Trans...

Page 355: ...P273 P277 281 Capacity or number of images in the web service is full Login to LUMIX CLUB and check the status of the destination on the web service link settings The settings stored in the camera may...

Page 356: ...t setting P52 Depending on the TV model the pictures may be extended horizontally or vertically or they may be displayed with their edges cut off Are you trying to play back the motion pictures by dir...

Page 357: ...nit off and on Disconnect the USB connection cable Connect it again while the card is inserted in the camera If there are two or more USB terminal on a single PC try connecting the USB connection cabl...

Page 358: ...int pictures ask the photo studio if the 16 9 pictures can be printed It is a sound of lens movement or aperture operation when this unit is turned on or off and it is not a malfunction The sound whic...

Page 359: ...essage will be displayed please reset the clock P35 When you perform an operation after taking a certain action the pictures may be recorded in folders with different numbers from the ones used prior...

Page 360: ...rsely affected by electromagnetic equipment and stops functioning properly turn this unit off and remove the battery or disconnect AC adaptor optional Then reinsert the battery or reconnect AC adaptor...

Page 361: ...alfunction If the camera is cold when you turn it on the picture on the Monitor Viewfinder will be slightly darker than usual at first However the picture will return to normal brightness when the int...

Page 362: ...in the country that you are traveling in Dispose of unusable battery The battery has a limited life Do not throw the battery into fire because it may cause an explosion The unusable battery should be...

Page 363: ...the terminals on the back of the card and do not touch the terminals with your fingers Notice for when transferring to another party or disposing of the memory card Format or delete using the camera...

Page 364: ...information such as personal information and wireless LAN connection settings that you have saved within the camera with Reset Wi Fi Settings Delete account P54 287 Reset the settings to protect the...

Page 365: ...you have not used the camera for a long period of time Recorded data may be damaged or lost if the camera breaks down due to inappropriate handling Panasonic will not be liable for any damage caused...

Page 366: ...countries iMovie Mac and Mac OS are trademarks of Apple Inc registered in the U S and other countries App Store is a service mark of Apple Inc Android and Google Play are trademarks or registered trad...

Page 367: ...ith the AVC Standard AVC Video and or ii decode AVC Video that was encoded by a consumer engaged in a personal and non commercial activity and or was obtained from a video provider licensed to provide...

Reviews: