background image

C

2

1

3

4

5

6

7

8

0

R

INT

9

ALL

ON

OFF

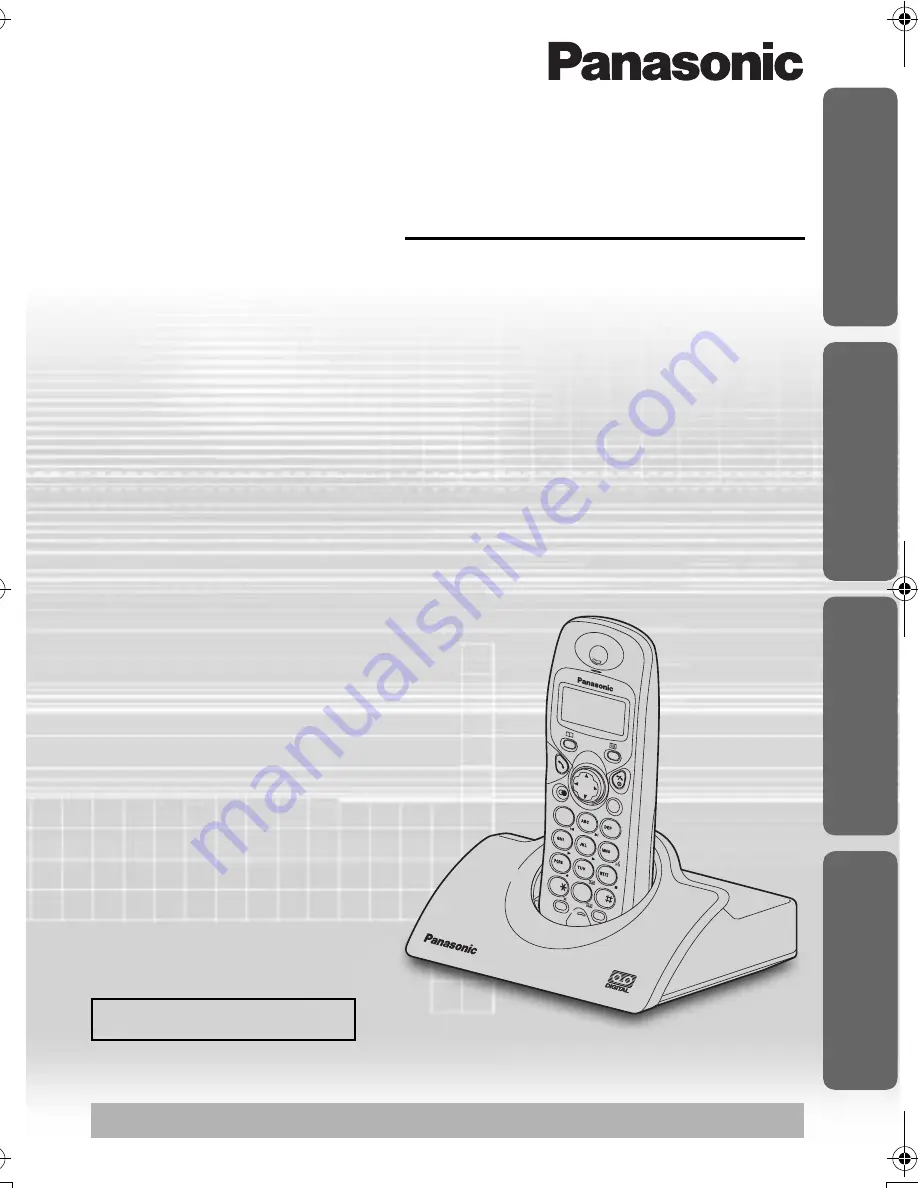
Digital Cordless Answering System

Operating Instructions

Model No. 

KX-TCD420NZ

Caller ID Compatible

PLEASE READ BEFORE USE AND SAVE.

Charge the battery for about 7 hours before initial use.

Prepa

rat

ion

Cordl

ess Tel

e

phone

Usefu

l Inf
o

rmati

o

n

Answeri

ng System

Contents

Preparation

Before Initial Use ......................... 2
Important Information .................. 3
Setting up .................................... 4

Cordless Telephone

Using the Telephone ................... 9
Making Calls .............................. 10
Caller ID .................................... 11
Answering Calls......................... 14
Phonebook ................................ 15
Handset Settings ....................... 19
Base Unit Settings ..................... 25
Initial Settings ............................ 27
Multi-unit User Operation........... 29
Intercom .................................... 33

Answering System

Answering System..................... 34
Remote Operation ..................... 40

Useful Information

Before Requesting Help ............ 42
Technical Information ................ 45
Index.......................................... 46

TCD420NZ_e.book  Page 1  Tuesday, June 17, 2003  2:07 PM

Summary of Contents for KX-TCD420NZ

Page 1: ...e Useful Information Answering System Contents Preparation Before Initial Use 2 Important Information 3 Setting up 4 Cordless Telephone Using the Telephone 9 Making Calls 10 Caller ID 11 Answering Calls 14 Phonebook 15 Handset Settings 19 Base Unit Settings 25 Initial Settings 27 Multi unit User Operation 29 Intercom 33 Answering System Answering System 34 Remote Operation 40 Useful Information Be...

Page 2: ...Accessories included General Warning The grant of a Telepermit for any item of terminal equipment indicates only that Telecom has accepted that the item complies with minimum conditions for connection to its network It indicates no endorsement of the product by Telecom nor does it provide any sort of warranty Above all it provides no assurance that any item will work correctly in all respects with...

Page 3: ...he AC Adaptor is used as the main disconnect device ensure that the AC outlet is located installed near the unit and is accessible Battery Caution Use only specified batteries Only use rechargeable batteries Do not mix old and new batteries Do not dispose of batteries in a fire they may explode Check local waste management codes for special disposal instructions Do not open or mutilate the batteri...

Page 4: ... cover as indicated by the arrow When you replace the batteries part should be removed first The AC adaptor must remain connected at all times It is normal for the adaptor to feel warm during use 1 2 3 4 LINE Fasten the AC adaptor cord to prevent it from being disconnected Hooks To replace the battery Press the notch on the cover firmly and slide it as indicated by the arrow Replace 2 batteries an...

Page 5: ...n use and conditions but in general when using fully charged Ni MH batteries 700 mAh Talk time 10hrs approx Standby time 120hrs approx When using Ni Cd batteries 250 mAh Talk time 4hrs approx Standby time 40hrs approx Times indicated are for peak performance The batteries reach peak performance after several full charge discharge cycles The batteries cannot be overcharged unless they are repeatedl...

Page 6: ... the operation press any time Do not use non rechargeable batteries If non rechargeable batteries are fitted and start charging it may cause the leakage of the battery electrolyte Please use only Panasonic HHR 4EPT Ni MH or P 4NPT Ni Cd batteries Symbol Meaning To search the desired item press UP or DOWN To select the desired item press RIGHT To search and then to select the desired item press UP ...

Page 7: ... 1 3 4 5 6 7 8 0 R INT 9 ALL ON OFF 9 7 6 8 Charge Contact Charge Contact 2 1 3 4 5 Display Receiver Microphone R C C INT LINE PAGE Button and Indicator Within range of a base unit Out of range No registration No power on base unit Paging Making or answering calls Phonebook Mode In Setting Mode Battery strength is low Battery strength is high Answering System ON Call BAR ON p 22 Direct Call ON p 2...

Page 8: ... mounted on a wall Insert screws into the wall The centre of the screw hole should be 8 cm horizontally apart Connect the AC adaptor and the telephone line cord Arrange the wires as shown then mount the unit 8 cm Screws Hooks 8 cm Wall Template ...

Page 9: ... answer a call by pressing any dialling button INTERCOM t or x Setting the Clock Date After a mains power failure the clock needs to be reset Ensure that icon is not flashing To exit the operation press any time 1 For example to set 7 15 enter 0715 2 For example to set the 16th of February 2003 enter 160203 Press for more than 2 seconds 2 Press for more than 1 second 1 Press TALK Phone Number 1 Pr...

Page 10: ...added to the left of the flashing digit If you need to clear and or add more than one number repeat from step 4 Press REDIAL 1 Search the desired dialled item Press TALK Press TALK Press REDIAL 1 1 2 2 3 Press REDIAL 1 Search Select the desired dialled item Search Select EDIT CALL NO The 1st digit of the desired dialled number blinks Move cursor If you need to store a name go to Name on page 15 or...

Page 11: ... The seven X s represent the seven digits of the caller s telephone number A call from a 7 digit Telecom Cellular number will be displayed as 025XXXXXXX For incoming international calls put your display may only show the digits 0000 For business users on a Centrex line your display will show the Centrex extension numbers in the shorter extension number format used within your company Call Waiting ...

Page 12: ...ith a name in the phonebook the display shows caller s name when receiving a call If the caller has requested not to display his her information the display shows PRIVATE If the caller dialled from an area which does not provide Caller ID service the display shows OUT OF AREA When new calls have been received the display shows the numbers of calls For example 4 new calls have been received ...

Page 13: ...ll Received Item s in the Caller List To exit the operation press any time 1 If there is no item stored in the caller list the display shows NO ITEM on the right edge of the display when searching the item in the caller list indicates that the item has been already shown previously 2 Digits are cleared to the left of the flashing digit 3 Digits are added to the left of the flashing digit If you ne...

Page 14: ...e During a call press UP or DOWN to change the volume setting to LOW 0 MEDIUM 00 HIGH 000 Handset Locator Paging Using this feature you can locate a misplaced handset by paging 1 You can also stop paging by pressing any dialling buttons INTERCOM t or x Search Select ON or OFF Search Select OTHER OPT Press MENU Search Select SETTING HS Search Select AUTO TALK 1 2 3 4 5 Press and hold DOWN for over ...

Page 15: ... characters are cleared or added to the left of the flashing digit character To enter digits characters see Character Selection below 2 To continue storing another caller information repeat from step 3 Character Selection Character Table Enter phone number max 24 digits 1 Press MENU Select NEW PHONE Press OK Phone Number Press OK 2 Enter name max 9 characters 1 Name 1 5 6 2 3 4 Keys Number of time...

Page 16: ... to the left of the flashing character If you need to clear or add more than one character repeat from step 7 5 To continue clearing another caller information repeat from step 2 Edit the name 4 Number Edit the phone number 3 Move cursor Phone Number Name Press OK Press CLEAR 2 Press OK Name Move cursor Press CLEAR 2 Search Select desired item Press PHONEBOOK 1 Select EDIT The 1st digit of the des...

Page 17: ... time 1 If there is no item stored in the redial caller list the display shows NO ITEM 2 If you need correction press RIGHT or LEFT to move cursor then clear a digit by pressing CLEAR and or enter digits Digits are cleared or added to the left of the flashing digit Phone Number 1 Press OK twice Press OK to store the number Press OK Enter name 2 Name 1 5 2 3 4 Press REDIAL 1 If you need to store a ...

Page 18: ... display shows NO ITEM 2 The number is flashing if the dialling button is already assigned as a hot key 3 Phonebook registration will be remained even hot key registration is cleared Press PHONEBOOK 1 Search Select desired item Search Select HOT KEY REG Search Select YES Search Select desired dialling button number 2 1 5 2 3 4 Press and hold the dialling button registered as a hot key Press TALK 1...

Page 19: ...tons or key Alarm stops and display returns to the standby mode If ONCE is selected the setting is turned off When in talk or intercom mode the alarm will not sound until the call is ended Before programming please follow steps 1 to 3 Press MENU Search Select TIME ALARM Search Select SETTING HS 1 2 3 Search Select SET TIME Time Enter time 4 digit 24 hour clock Press OK Search Select OFF ONCE or RE...

Page 20: ...wer volume then gradually increase the volume when receiving a call 1 If you select one of the melody ringer patterns it keeps ringing for 10 seconds even if a caller hangs up a call Therefore you may hear dial tone or no one there after you answer a call Before programming please follow steps 1 to 3 Press MENU Search Select RINGER OPT Search Select SETTING HS 1 2 3 Search Select RINGER VOL Search...

Page 21: ...rm will sound when the batteries need to be charged To exit the operation press any time Display Option Selecting the Standby Mode Display To exit the operation press any time 1 Time will only be displayed if the clock has been set When new calls have been received the display shows the number of new call Search Select ON or OFF Search Select KEY TONE CALL WAITING RANGE ALARM or BATTERY LOW Press ...

Page 22: ...be reset to their initial settings p 27 however the Phonebook data will be saved Call Option Call BAR On Off This allows you to bar all calls except emergency and internal calls To exit the operation press any time 1 If ON is selected is displayed Before programming please follow steps 1 to 3 Press MENU Search Select DISPLAY OPT Search Select SETTING HS 1 2 3 Search Select TALK MODE Search Select ...

Page 23: ...firm it We recommend you write down the handset PIN If you forget it please consult your nearest Panasonic Service Centre To exit the operation press any time Before programming please follow steps 1 to 3 Press MENU Search Select CALL OPT Search Select SETTING HS 1 2 3 Search Select DIRECT NO Phone Number Enter the direct call number max 24 digits Press OK 3 times 1 4 5 6 Search Select SET DIRECT ...

Page 24: ...ows you to access some features of your host PBX such as transferring an extension call Dialling Pause for PBX line long distance service users A dialling pause is used when a pause in the dialling of the phone number is necessary using a PBX or accessing a long distance service For example when 9 line access number is dialled followed by a pause to access an outside line through a PBX Entering a ...

Page 25: ...s To exit the operation press any time 1 The selected handset number flashes 2 The selected handset s number s will stop flashing Before programming please follow steps 1 to 2 Press MENU Search Select SETTING BS INPUT CODE 1 2 Current 4 digit Base Unit PIN New 4 digit Base Unit PIN New 4 digit Base Unit PIN again to verify 5 3 6 4 5 Select desired handset number 1 Handset Number Phone Number Press...

Page 26: ...factory preset is in shade Before programming please follow steps 1 to 2 Press MENU Search Select SETTING BS INPUT CODE 1 2 Press CLEAR Press RIGHT repeatedly until desired call restriction number is displayed C Press RIGHT to continue Repeat the steps 5 to 7 to finish 6 3 7 6 8 5 OR Press OFF 4 digit Base Unit PIN Factory preset 0000 4 4 digit Base Unit PIN Factory preset 0000 Press OK 1 2 600mse...

Page 27: ...set Paging Tone Pattern 1 Handset Alarm Tone Pattern 1 Key Tone ON Call Waiting Tone ON Range Warning Alarm OFF Battery Low Alarm ON Standby Mode Display Clock Talk Mode Display Length of the Call Display Language English Call BAR OFF Direct Call Mode OFF Direct Call Number Clear 4 Digit Handset PIN 0000 Auto Talk OFF Base Unit Access Automatic Base Unit Access Redial Memory All Clear Handset Rece...

Page 28: ...e Unit Initial Settings Function Initial Setting Ringer Mode All Handsets Number of Rings 3 Flash Timing 600 msec Pause Timing 3 seconds Call Restricted Handsets All Clear Call Restriction Numbers All Clear 4 Digit Base Unit PIN 0000 Press OK 4 digit Base Unit PIN Factory preset 0000 Press MENU Search Select SETTING BS INPUT CODE 0 1 4 5 2 3 ...

Page 29: ...er 1 minute press then start over again Charge the optional handset batteries for 7 hours before initial use To exit the operation press any time 1 If a handset has been already registered to 4 base units MEMORY FULL is displayed Search Select desired base unit number available to register the handset If all registered handsets start ringing Paging press to stop paging then start over again When a...

Page 30: ... The selected handset number flashes Search Select CANCEL BS 4 digit Handset PIN Factory preset 0000 Search Select YES or NO Press RIGHT Search Select desired base unit number to cancel 1 4 7 8 5 6 Press MENU Search Select REGISTRATION Search Select SETTING HS 1 2 3 4 digit Base Unit PIN Factory preset 0000 Select desired handset number 2 Handset Number Press OK Press MENU Search Select SETTING BS...

Page 31: ...ade 1 The selected handset number flashes 2 Press dialling button through to enter the number of rings Before programming please follow steps 1 to 4 Press MENU Search Select SETTING BS INPUT CODE 4 digit Base Unit PIN Factory preset 0000 1 1 2 3 4 All handsets mode Press OK 1 5 6 Press desired handset numbers Selected handsets mode Handset Numbers 1 Press OK 2 5 6 7 Selected then all handsets mode...

Page 32: ... register and operate your handset with up to 4 base units Each base unit forms 1 radio cell If the individual bases are linked to the same telephone line then you can extend the operating range of the system by positioning the bases so that the two radio cells overlap If the handset is set to AUTO base selection then in standby mode the handset will automatically swap to the second base if the ra...

Page 33: ...et 1 transfers a call to Handset 2 To hang up press 1 You can also press any dialling button INTERCOM t or x 2 If you press after pressing desired handset number a call can be transferred to another handset without speaking to another handset If the transferred call is not answered within 30 seconds Handset 1 will ring again 3 When Handset 2 answers a call transferred press to complete a call tran...

Page 34: ...incoming memo message s p 36 To playback a greeting message p 35 To record a memo message p 36 To record a greeting message p 35 To set the answering system ON p 37 To stop the answering system operation p 36 To set the answering system OFF p 37 To erase one incoming memo message 1 p 36 To erase all incoming memo message s p 37 To erase the recorded greeting message 2 p 35 1 2 4 4 4 7 7 0 OFF 9 6 ...

Page 35: ... p 37 and set the answering system ON the unit will answer a call with a greeting message then hang up It will not record any incoming messages When the recording time is set to greeting only Hello we are not available now Please call again Thank you for your call To Playback Pre Recorded Your Own Greeting Message Recording Your Own Greeting Message The total recording time is approximately 20 min...

Page 36: ...ncoming Memo Message s 1 The display starts to show the length of the recording time 2 If a call is received while you are listening to a message call waiting tone sounds Press to stop playback then press TALK after ringing to answer the call 3 If you press within 5 seconds from the start of playback the previous message will be played If you press after 5 seconds from the start of playback the cu...

Page 37: ...iples enumerated in the Privacy Act 1993 shall be complied with in respect to the nature of the personal information collected the purpose for its collection how it is used and what is disclosed to any other party During recording a beep will sound approximately every 15 seconds Answering System On Off When you set the answering system ON a caller can leave his her messages 3 4 5 ALL Press INTERCO...

Page 38: ...efore programming please follow steps 1 to 2 Quality Recording Time Normal Approx 20 minutes High Approx 10 minutes Toll Saver When set to Auto When you call the unit from a touch tone telephone If the unit answers on the 2nd ring there is at least one new message If the unit answers on the 5th ring there are no new messages Hang up when you hear the 3rd ring This will save you the toll charge for...

Page 39: ... The factory preset is in shade Setting the Remote Code The 3 digit remote code prevents unauthorised use of your unit for listening to recorded incoming memo messages Before programming please follow steps 1 to 2 Press MENU Search Select SETTING BS INPUT CODE 1 2 Off On 1 Press OK 6 3 4 5 4 OR 2 Enter a 3 digit remote code number to set on Press OK 6 3 4 5 OR 1 Off Answering System ...

Page 40: ...r the direct remote commands 7 To end the remote operation hang up If your remote code is not stored you cannot turn on the answering system remotely Direct Remote Commands After entering the remote code you can choose to operate your answering system using direct commands as below in place of listening to the voice menu Hang up to end the remote operation at any time 1 If you press within 5 secon...

Page 41: ... message and the remaining recording time are announced Press 1 to playback new messages Press 2 for other functions Press 1 to record your messages Press 2 for other functions New message playback Please leave your message Talk after you hear this message Hang up Press 1 to erase all messages Press 2 for other functions No message Press 1 to record your greeting Press 2 for other functions Record...

Page 42: ...Batteries not inserted Batteries not charged Insert the 2 rechargeable batteries supplied p 4 Place handset in base and connect AC adaptor to base and AC outlet full charge period 7 hrs Batteries charge icon not counting up Dirty charge contact Base not powered up Clean charge battery contact and retry charge Connect AC adaptor to base unit and AC outlet icon flashes Handset not registered to base...

Page 43: ... battery type selected Set the correct battery type Cannot register handset to base Max number of bases already registered to handset Max number of handsets already registered to base unit Wrong PIN number entered Default 0000 Electrical noise in local area Delete unused base registrations from handset Delete unused handset registrations from base If PIN number is lost contact the Panasonic Servic...

Page 44: ...ring system is off Enter the correct remote code Press each button firmly Turn on the answering system You cannot operate the answering system with the handset Someone is operating the answering system You are too far from the base unit Retry when other user has finished operation Move closer to the base unit While recording a greeting message the unit starts to ring and stops recording A call is ...

Page 45: ... Access Profile Number of channels 120 Duplex Channels Frequency range 1 88 GHz to 1 9 GHz Duplex procedure TDMA Time Division Multiple Access Channel spacing 1728 kHz Bit rate 1152 kbit s Modulation GFSK RF Transmission Power Approx 250 mW Voice coding ADPCM 32 kbit s Power source AC Adaptor 220 240 V 50 Hz Power consumption base unit Standby Approx 3 5 W Maximum Approx 9 2 W Operating conditions...

Page 46: ...g 13 Editing 13 Storing 17 Calls Answering 9 Making 9 10 Redialling 10 Terminating 9 Cancelling a Base Unit 30 Cancelling a Handset 30 Clock Date 9 Conference Call 33 Dialling Pause 24 Direct Call Number 23 Display Standby Mode 21 Talk Mode 22 Flash Timing 26 Handset Display 7 Initial Settings 27 Locator 14 Paging 14 PIN 23 Registration 29 Reset 27 Ringer 20 Intercom 33 Key Lock 24 Tone 21 Making ...

Page 47: ......

Page 48: ...address of dealer Technical specifications are subject to change Sales Department Panasonic New Zealand Ltd 350 Te Irirangi Drive East Tamaki Private Bag 14911 Panmure AUCKLAND NEW ZEALAND Panasonic Communications Co Ltd 1 62 4 chome Minoshima Hakata ku Fukuoka 812 8531 Japan PQQX13828ZA F0703 0 ...

Reviews: