background image

Please read these Operating 
Instructions before using the unit 
and save for future reference.

Operating Instructions

Compact Plain Paper Fax

Model No.


KX-FP143RU

Compact Plain Paper Fax

 with Digital Answering System

Model No.


KX-FP148RU

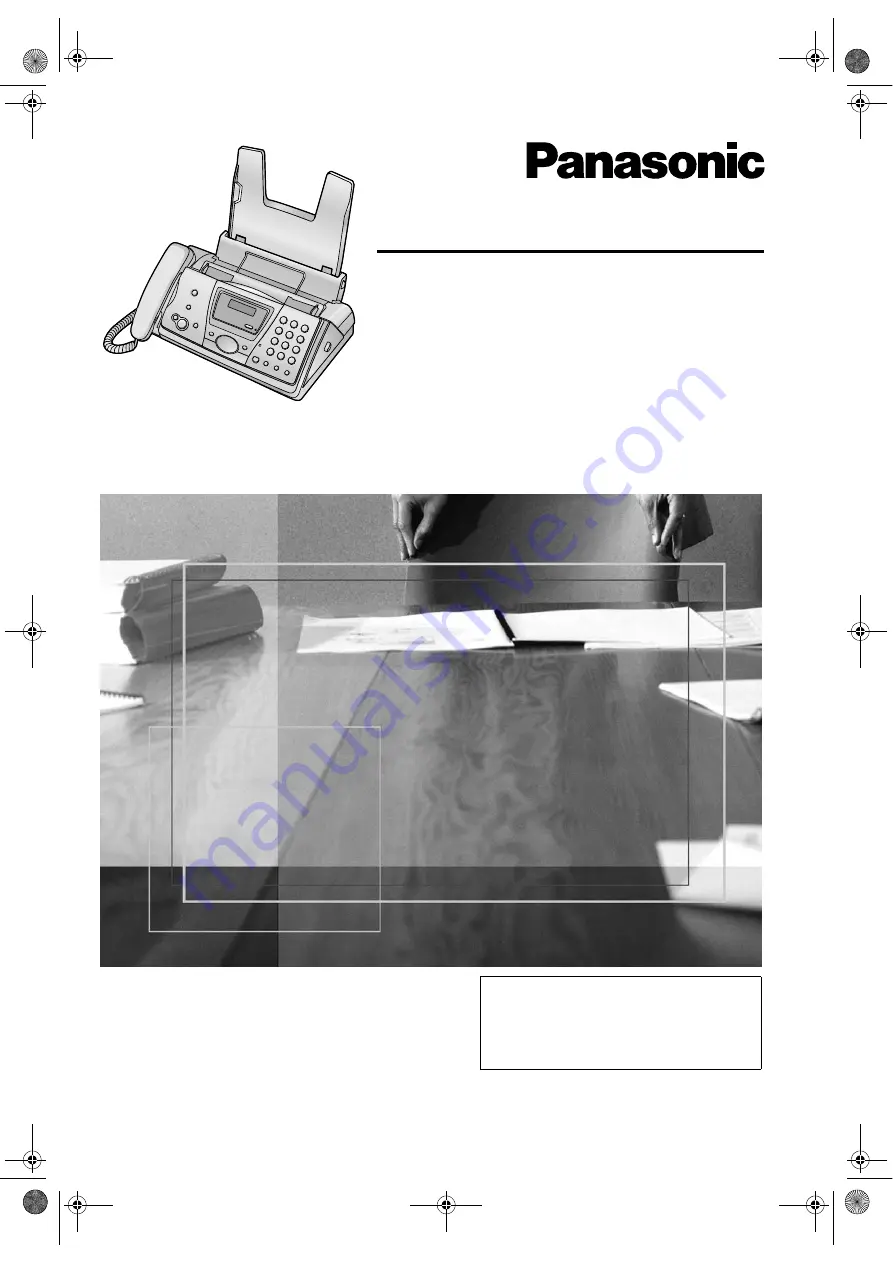
This pictured model is KX-FP143.

FOR ENGLISH USERS:
You can select English for the 
voice guidance, display and 
report (feature #48, page 47).

FP143-148RU_en.

PDF

  Page 1  Thursday, October 30, 2003  11:55 AM

Summary of Contents for KX-FP143RU

Page 1: ...ns Compact Plain Paper Fax Model No KX FP143RU Compact Plain Paper Fax with Digital Answering System Model No KX FP148RU This pictured model is KX FP143 FOR ENGLISH USERS You can select English for the voice guidance display and report feature 48 page 47 FP143 148RU_en PDF Page 1 Thursday October 30 2003 11 55 AM ...

Page 2: ...se the operating instructions When following operating instructions always keep the front cover page next page open so that you will find easy reference to the buttons OPEN FP143 148RU_en book Page i Thursday October 30 2003 11 55 AM ...

Page 3: ... AUTO ANSWER F HELP M RECORD C BROADCAST A MENU O REDIAL S CALLER ID B MONITOR Q SET K COPY J MUTE T SLOW H DIGITAL SP PHONE P NAVIGATOR N START K ERASE D PAUSE S STOP L FAX START K PLAY MESSAGES E TONE G FLASH R QUICK H VOLUME N MONITOR A B K R S Q O J L M N F T G DIGITAL SP PHONE MIC A B C D H G I K R P O J L M N E F T S FP143 148RU_en book Page ii Thursday October 30 2003 11 55 AM ...

Page 4: ...overloading protection means It s allowed to install the product to electric net with grounded neutral Caution L Note that the images of copied or received documents will remain on the used ink film Use discretion when disposing of the used ink film L Do not rub or use an eraser on the printed side of recording paper as the print may smear Note L The suffix in the model number will be omitted in t...

Page 5: ...iquid on the unit 12 To reduce the risk of electric shock do not disassemble this unit Take the unit to an authorised service centre when service is required Opening or removing covers may expose you to dangerous voltage or other risks Incorrect reassembly can cause electric shock when the unit is subsequently used 13 Unplug this unit from power outlets and refer servicing to an authorised service...

Page 6: ...mple near a bathtub washbowl sink etc Damp basements should also be avoided The unit should be kept away from heat sources such as heaters kitchen stoves etc It also should not be placed in rooms where the temperature is less than 5 C or greater than 35 C L Store unused paper in the original packaging in a cool and dry place Not doing so may affect print quality Product life time L For this produc...

Page 7: ...ur fax machine 28 4 6 Receiving a fax manually AUTO ANSWER OFF 29 4 7 Receiving a fax automatically AUTO ANSWER ON 30 4 8 Using the unit with an answering machine KX FP143 only 31 4 9 Receive polling retrieving a fax placed on another fax machine 31 4 10 Junk fax prohibitor preventing fax reception from undesired callers 32 5 Copy Copying 5 1 Making a copy 33 6 Answering Device KX FP148 only Greet...

Page 8: ...eaning 61 8 7 Document feeder scanner glass cleaning 62 8 8 Thermal head cleaning 63 9 General Information Printed Reports 9 1 Reference lists and reports 64 Specifications 9 2 Technical data about this product 65 Warranty 9 3 Warranty 67 10 Index 10 1 Index 69 FP143 148RU_en book Page 6 Thursday October 30 2003 11 55 AM ...

Page 9: ...al carton and packing materials for future shipping and transportation of the unit No Item Quantity Specifications 1 Power cord 1 2 Telephone line cord 1 3 Handset 1 4 Handset cord 1 5 Paper tray 1 6 Starter ink film 10 metres long 1 prints about 30 A4 sized pages 1 7 Operating instructions 1 Russian 1 Ukrainian 8 Quick installation guide 1 1 2 3 4 5 6 7 8 FP143 148RU_en book Page 7 Thursday Octob...

Page 10: ...ilm for continuous use of your unit Please use genuine Panasonic replacement film The ink film is not reusable Do not rewind and use the ink film again Model No Item Specifications Usage KX FA54A KX FA54E Replacement film 1 35 m 2 rolls Each roll will print about 105 A4 sized pages FP143 148RU_en book Page 8 Thursday October 30 2003 11 55 AM ...

Page 11: ...d up message playback page 36 J COPY L To initiate copying page 33 K FAX START SET L To initiate fax transmission or reception L To store a setting during programming L STOP L To stop an operation or programming M HELP L To print a quick reference page 14 N NAVIGATOR VOLUME L To adjust volume page 15 L To search for a stored item page 20 26 L To select features or feature settings during programmi...

Page 12: ...TE L To mute your voice to the other party during a conversation Press this button again to resume the conversation Installation 1 5 Ink film 1 5 1 Installing the ink film 1 Open the front cover by pulling up the centre part 2 Release the back cover by pushing the green button 1 3 Open the back cover 4 Insert the front ink film roll by inserting its blue gear 1 into the left slot of the unit 2 Ins...

Page 13: ...tight 2 L Make sure that the ink film is wrapped around the blue core 3 at least once 6 Close the back cover securely by pushing down on the notched area at both ends 1 7 Close the front cover securely 3 4 1 2 1 2 Correct Tight 1 turn Slack Crease Reverse Incorrect The ink film is not wrapped around the blue core 3 1 FP143 148RU_en book Page 11 Thursday October 30 2003 11 55 AM ...

Page 14: ...Remove the recording paper and the paper tray beforehand or the paper may misfeed or jam 1 Open the covers see steps 1 to 3 on page 10 2 Remove the used core 1 and used ink film 2 3 Remove the stoppers 1 and tags 2 from the new ink film 3 4 Insert the ink film and close the covers see steps 4 to 7 on page 10 5 Install the paper tray page 12 then insert the recording paper page 13 1 6 Handset cord ...

Page 15: ... recording paper 1 Pull the tension plate forward 1 2 Fan the paper to prevent paper jams 3 Insert the paper print side down 1 L The paper should not be over the tab 2 4 Push the tension plate back 1 L If the paper is not inserted correctly readjust the paper or the paper may jam 1 1 2 1 Correct Incorrect FP143 148RU_en book Page 13 Thursday October 30 2003 11 55 AM ...

Page 16: ... and your internet provider instructs you to install a filter please connect it as follows Help Button 2 2 Help function The unit contains helpful information which can be printed for quick reference Feature list How to program the features Directory How to store names and numbers in the navigator directory and how to dial them TAD operation KX FP148 only How to use the answering device Fax receiv...

Page 17: ...ss A or B 2 3 4 Answering device volume KX FP148 only 9 levels high to off are available While listening to recorded messages press A or B Initial Programming 2 4 Date and time You must set the date and time 1 Press MENU SYSTEM SETUP PRESS NAVI 2 Press or repeatedly to display the following SET DATE TIME PRESS SET 3 Press SET L Cursor will appear on the display M 01 D 01 Y 03 TIME 00 00 4 Enter th...

Page 18: ...epeatedly to display the following YOUR LOGO PRESS SET 3 Press SET L Cursor will appear on the display LOGO 4 Enter your logo up to 30 characters See the character table on page 16 for details 5 Press SET L The next feature will be displayed 6 Press MENU to exit the program Note L This information will be printed on each page transmitted from your unit To select characters with the dial keypad Key...

Page 19: ...ert a character 1 Press or to move the cursor to the position to the right of where you want to insert the character 2 Press MUTE to insert a space and enter the character To select characters using A or B Instead of pressing the dial keys you can select characters using A or B 1 Press A or B repeatedly to display the desired character 2 Press to move the cursor to the next space L The character d...

Page 20: ...to exit the program Note L This information will be printed on each page transmitted from your unit L The button enters a and the button enters a space Example 234 5678 Press 2 3 4 5 6 7 8 L To enter a hyphen in a telephone number press FLASH To correct a mistake Press or to move the cursor to the incorrect number and make the correction To delete a number Press or to move the cursor to the number...

Page 21: ...to move the cursor to the incorrect character number and then make the correction To delete a character number Press or to move the cursor to the character number you want to delete and press STOP 3 1 1 Editing a stored item 1 Press 2 Press A or B repeatedly to display the desired item 3 Press MENU 4 Press L If you do not need to edit the name skip to step 6 5 Edit the name see the storing procedu...

Page 22: ...ress B repeatedly to display LISA L To stop the search press STOP L To dial the displayed number press MONITOR KX FP143 DIGITAL SP PHONE KX FP148 or lift the handset Speakerphone operation KX FP148 only L Use the speaker in a quiet room L Adjust the speaker volume using A or B Recording 3 3 Recording a telephone conversation KX FP148 only You can record a telephone conversation This conversation c...

Page 23: ...me will be displayed after the first ring You then have the option of whether or not to answer the call The unit will automatically store caller information telephone number name and the time of the call of the 30 most recent calls Caller information is sorted by the most recent to the oldest call When the 31st call is received the first call is deleted Caller information can be viewed on the disp...

Page 24: ... NO CALLER DATA To stop viewing Press STOP after step 2 on page 22 3 5 1 Editing a caller s telephone number before calling back 1 Press CALLER ID 2 Press A or B repeatedly to display the desired item 3 Press CALLER ID to display the telephone number 4 To insert a number in front of the telephone number press the desired dial key 0 to 9 L You can also initiate the editing mode by pressing 5 Press ...

Page 25: ...lay the desired item 3 Press ERASE L To erase other items repeat step 2 to 3 4 Press STOP 3 6 Storing caller information into the navigator directory L Keep the front cover page open for button locations Important L This feature is not available in the following cases The telephone number includes data other than numbers i e or The caller information does not include a telephone number 1 Press CAL...

Page 26: ...l increase transmission time L If the resolution setting is changed during feeding it will be effective from the next sheet To redial the last number 1 Press REDIAL 2 Press FAX START L If the line is busy the unit will automatically redial the number up to 3 times L To cancel redialling press STOP To send more than 10 pages at a time Insert the first 10 pages of the document Add the other pages up...

Page 27: ...et 45 g m2 to 90 g m2 L Multiple sheets 60 g m2 to 80 g m2 Note L Remove clips staples or other fasteners L Do not send the following types of documents Use copies for fax transmission Chemically treated paper such as carbon or carbonless duplicating paper Electrostatically charged paper Badly curled creased or torn paper Paper with a coated surface Paper with a faint image Paper with printing on ...

Page 28: ...ission By programming items from the navigator directory page 19 into the broadcast memory you can send the same document to multiple parties up to 20 Your programmed items will remain in the broadcast memory allowing frequent re use See page 27 for broadcast transmission instructions L Keep the front cover page open for button locations 4 4 1 Programming items into the broadcast memory 1 Press ME...

Page 29: ... Note L If you select FINE SUPER FINE or PHOTO resolution the number of pages that the unit can transmit will decrease L If the document exceeds the memory capacity sending will be cancelled L If a party is busy or does not answer it will be skipped and redialled later up to 3 times To send the same document to a one time group of parties You can also select a one time group of parties to send the...

Page 30: ...sing AUTO ANSWER repeatedly Note L Set feature 77 page 48 to FAX ONLY beforehand KX FP148 only How to receive calls All incoming calls will be answered as faxes 4 5 3 Mostly phone calls Your situation You plan to answer the calls yourself How to setup Set the fax machine to TEL mode page 29 by pressing AUTO ANSWER repeatedly How to receive calls You have to answer all calls manually To receive a f...

Page 31: ... document reception is required a fax calling tone slow beep is heard or no sound is heard press 9 pre selected fax activation code firmly 3 Replace the handset L The fax machine will start reception Note L To receive fax documents using the extension telephone you must set the remote fax activation to ON feature 41 page 46 beforehand The default setting is ON Turning the AUTO ANSWER mode ON remot...

Page 32: ...ll is being recorded you can monitor it through the speaker If this feature is not required set feature 67 to OFF page 47 How to receive calls When receiving calls the unit works as a fax and or answering device L If the call is a phone call the unit will record a voice message automatically L If a fax calling tone is detected the unit will receive a fax automatically Receiving a voice message and...

Page 33: ...receive calls If the call is a phone call the answering machine will record voice messages If a fax calling tone is detected the fax machine will receive a fax automatically Receiving a voice message and fax document in one call The caller can leave a voice message and send a fax document during the same call Inform the caller of the following procedure beforehand 1 The caller calls your unit L Th...

Page 34: ... repeatedly to display JUNK LIST SET 3 Press SET 4 Press A or B repeatedly to display the item you wish to prevent the fax reception from 5 Press SET L To program other items repeat steps 4 to 5 6 Press STOP to exit the program Note L If there is no space to store new items LIST FULL is displayed in step 3 or step 5 Erase unnecessary items To display the junk fax prohibitor list 1 Press MENU repea...

Page 35: ...e is helpful when you want to copy the document then remove it for other uses To use this feature activate feature 34 page 45 beforehand L The document will be fed into the unit and scanned into memory The unit will then print the data If the document exceeds the memory capacity copying of the exceeded document will be cancelled and this feature will be turned OFF automatically To stop copying Pre...

Page 36: ...pies up to 30 3 Press 2 times to display COLLATE OFF 4 Press A or B repeatedly to display COLLATE ON 5 Press START Example Making 2 copies of a 4 page original document Note L The unit will store the documents into memory while collating the copies If memory becomes full while storing the unit will only print out the stored pages L After copying the collating feature will turn OFF automatically L ...

Page 37: ... time from 60 seconds to 16 seconds your greeting message will be deleted When a call is received the pre recorded greeting message will be played Checking the greeting message 1 Set feature 77 to TAD FAX page 48 beforehand 2 Press AUTO ANSWER repeatedly to display TAD FAX MODE L The unit will play the greeting message 6 1 1 Erasing your recorded greeting message 1 Set feature 77 to TAD FAX page 4...

Page 38: ...conds of the beginning of the message the previous message will be played L To play back a specific message press or and search for the message you want to listen to To skip a message Press to play the next message To stop playback temporarily Press STOP L If you press PLAY MESSAGES within 1 minute the unit will resume playing the rest of the messages Voice time day stamp During playback a synthes...

Page 39: ...ote operations using the remote command key 1 repeats a message If you press this key within 5 seconds of the beginning of a message the previous message will be played 2 skips a message 4 plays back only the new messages 5 plays back all the messages Note L If you do not enter a remote command key within 10 seconds after the last operation the unit will ask you to leave a marker message page 38 A...

Page 40: ... The new greeting message will be played Skipping the greeting message Press 0 during the greeting message playback L The unit will skip the rest of the greeting message Turning message transfer ON or OFF You must program a transfer telephone number beforehand feature 60 page 47 Press 8 1 to turn ON the message transfer Press 8 2 to turn OFF the message transfer L If a transfer telephone number is...

Page 41: ...box number 1 or 2 L A mailbox greeting message will be played 3 After the beep leave a message Note L If the caller does not enter a mailbox number in step 2 the message will be recorded in the common memory 6 6 Recording your mailbox greeting messages The recording time of each greeting is limited to 16 seconds for each mailbox Sample message This is personal name Please leave your name and messa...

Page 42: ...on Note L See the following topics on page 36 for details on features that can be used during playback To repeat a message To skip a message To stop playback temporarily To change the playback speed To erase a specific message To record a memo message into a mailbox 1 Press 2 times 2 Press A or B repeatedly to display the desired mailbox number 3 Press RECORD L A long beep will sound 4 Speak clear...

Page 43: ...over page open for button locations Important L To use this feature program the transfer telephone number first feature 60 page 47 and set the unit to TAD FAX mode L You must set the voice guidance feature to ON feature 47 on page 46 or record your own transfer greeting message beforehand 6 9 1 How this feature works 1 An incoming voice message is recorded in your unit 2 Your unit calls the transf...

Page 44: ... transfer greeting message will be played L If the voice guidance feature is set to OFF feature 47 on page 46 and you have erased your own transfer greeting message the message transfer feature will be cancelled Pager call This feature allows your unit to call your pager when your unit receives an incoming voice message 1 Press MENU 2 Press then 7 0 3 Press A or B repeatedly to select ON 4 Press S...

Page 45: ...ess or repeatedly to display the desired feature L The current setting of the feature will be displayed 5 Press A or B repeatedly to display the desired setting L This step may be slightly different depending on the feature 6 Press SET L The setting you selected is set and the next feature will be displayed 7 To exit programming press MENU Programming by entering the program code number directly Y...

Page 46: ...re the unit answers a call in TAD FAX mode You can select 1 2 default 3 4 TOLL SAVER or RINGER OFF See page 30 for details Note L Set feature 77 to TAD FAX page 48 beforehand Code 06 KX FP148 only Changing the ring setting in FAX ONLY mode FAX RING COUNT RINGS 2 To change the number of rings before the unit answers a call in FAX ONLY mode You can select 1 2 default 3 4 5 6 7 8 or 9 Note L Set feat...

Page 47: ...5 5 Press A or B repeatedly to select ON 6 Press SET 7 Enter the fax number 8 Press SET 9 Enter the transmission start time L If you select English for the language feature 48 on page 46 the time is set using a 12 hour clock Press repeatedly to select AM or PM 10 Press SET 11 Press MENU Note L To cancel after programming press STOP then SET Code 26 Setting the Caller ID list to print automatically...

Page 48: ... the recording time limit by a beeping sound OFF default Deactivates this feature Code 44 Setting the memory reception alert RECEIVE ALERT ON To alert you with a beeping sound when a received fax document is stored into memory due to some existing problem The slow beeps will continue until you clear the printing problem and make sure the unit is supplied with enough paper to print the stored docum...

Page 49: ...s Code 56 KX FP148 only Greeting message for mailbox 2 BOX2 GREETING CHECK See page 39 for details Code 58 Setting the original mode ORIGINAL NORMAL To send or copy a document with faint or dark writing set this feature before starting transmission or copying NORMAL default Used for normal writing LIGHT Used for faint writing DARKER Used for dark writing Code 60 KX FP148 only Setting the message t...

Page 50: ...he correct setting Code 76 Setting the connecting tone CONNECTING TONE ON If you often have trouble when sending faxes this feature allows you to hear connecting tones fax tone ring back tone and busy tone You can use these tones to confirm the status of the other party s machine ON default You will hear connecting tones OFF Deactivates this feature Note L If the ring back tone continues the other...

Page 51: ...eypad see page 18 for details 0 4 Sending report 1 ON 2 OFF default 3 ERROR 0 6 FAX ring count 1 1 2 2 default 3 3 4 4 5 5 6 6 7 7 8 8 9 9 0 6 TAD ring count KX FP148 only 1 1 2 2 default 3 3 4 4 5 TOLL SAVER 6 RINGER OFF 1 0 Recording time for an incoming message KX FP148 only 0 VOX default 1 1 MIN 2 2 MIN 3 3 MIN 4 4 MIN 5 5 MIN 6 6 MIN 7 7 MIN 8 8 MIN 9 9 MIN 1 1 Remote operation ID KX FP148 on...

Page 52: ...or 7 5 4 Greeting time KX FP148 only 1 16S default 2 60S 5 5 Greeting message for mailbox 1 KX FP148 only 1 CHECK default 2 RECORD 3 ERASE 5 6 Greeting message for mailbox 2 KX FP148 only 1 CHECK default 2 RECORD 3 ERASE 5 8 Original mode 1 NORMAL default 2 LIGHT 3 DARKER 6 0 Message transfer KX FP148 only 1 ON 2 OFF default L If you select ON enter the transfer telephone number and press SET then...

Page 53: ...TO ANSWER KX FP148 only 1 FAX ONLY 2 TAD FAX default 8 0 Reset advanced features 1 YES 2 NO default L If you select YES press SET 2 times then press MENU to exit programming FP143 148RU_en book Page 51 Thursday October 30 2003 11 55 AM ...

Page 54: ...ing paper Try again L The document was not fed properly Re insert the document and try again L The other party s fax machine rings too many times Send the fax manually page 24 L The other party s machine is not a fax machine Check with the other party L The number you dialled is not in service PRESSED THE STOP KEY L STOP was pressed and fax communication was cancelled OK L Fax communication was su...

Page 55: ...s positioned near appliances such as TVs or speakers which generate an intense magnetic field FILM NEAR EMPTY L The remaining ink film is low Prepare a new ink film page 8 MEMORY FULL L When making a copy the document being stored exceeded the memory capacity of the unit Press STOP to clear the message Divide the document into sections MESSAGE FULL L There is no room left in memory to record voice...

Page 56: ...t remove the splitter and connect the unit to the wall jack directly If the unit operates properly check the splitter L Disconnect the unit from the telephone line and connect the line to a known working telephone If the working telephone operates properly contact our service personnel to have the unit repaired If the working telephone does not operate properly contact your telephone company L The...

Page 57: ... page 24 I cannot send a fax overseas L Use the overseas transmission mode of feature 23 page 45 L Add two pauses at the end of the telephone number or dial manually The other party complains that letters on their received document are distorted or not clear L If your line has special telephone services such as call waiting the service may have been activated during fax transmission Connect the un...

Page 58: ...ar the jammed paper page 58 I cannot select the desired receiving mode L If you want to set TAD FAX KX FP148 or FAX ONLY mode KX FP143 Press AUTO ANSWER repeatedly to select FAX ONLY mode KX FP148 Set the desired mode using feature 77 page 48 and press AUTO ANSWER repeatedly to select the desired mode L If you want to set TEL mode press AUTO ANSWER repeatedly to select TEL mode 8 3 5 Copying The u...

Page 59: ...mailbox password is wrong Enter the correct password For mailbox 1 password see feature 51 page 47 For mailbox 2 password see feature 52 page 47 The other party complains that they cannot leave a voice message L The memory is full Erase unnecessary messages page 36 40 8 3 8 If a power failure occurs L The unit will not function L The unit is not designed for making emergency telephone calls when t...

Page 60: ...nsion plate forward 1 to remove the installed paper 2 L Do not remove the jammed paper 3 2 Remove the paper tray 1 3 Open the front cover by pulling up the centre part 4 Release the back cover by pushing the green button 1 5 Open the back cover 6 Remove the jammed recording paper 1 1 3 2 1 1 1 1 FP143 148RU_en book Page 58 Thursday October 30 2003 11 55 AM ...

Page 61: ... once 8 Close the back cover securely by pushing down on the notched area at both ends 1 9 Close the front cover securely 10 Install the paper tray page 12 then insert the recording paper page 13 1 2 Correct Tight 1 turn Slack Crease Reverse Incorrect The ink film is not wrapped around the blue core 3 1 FP143 148RU_en book Page 59 Thursday October 30 2003 11 55 AM ...

Page 62: ...ard 1 and insert the paper Push the tension plate back then press START to clear the message 8 5 Document jams sending 1 Open the front cover by pulling up the centre part Remove the jammed document carefully 1 2 Close the front cover securely Note L Do not pull out the jammed paper forcibly before opening the front cover START 1 1 FP143 148RU_en book Page 60 Thursday October 30 2003 11 55 AM ...

Page 63: ... the green button 1 4 Push the green button 1 to release the back cover then open the back cover 5 Open the recording paper feeder cover 1 6 Clean the recording paper feeder roller 1 with a cloth moistened with isopropyl rubbing alcohol and let all parts dry thoroughly Caution L Do not use paper products such as paper towels or tissues 7 Close the covers see steps 8 and 9 on page 59 8 Install the ...

Page 64: ...ver by pulling up the centre part 3 Clean the document feeder rollers 1 and rubber flap 2 with a cloth moistened with isopropyl rubbing alcohol and let all parts dry thoroughly Clean the scanner glass 3 and white plate opposite the scanner glass 4 with a soft dry cloth Caution L Do not use paper products such as paper towels or tissues 4 Close the front cover securely 5 Connect the power cord and ...

Page 65: ...t 3 Release the back cover by pushing the green button 1 4 Open the back cover 5 Remove the ink film 1 6 Clean the thermal head 1 with a cloth moistened with isopropyl rubbing alcohol and let it dry thoroughly Caution L To prevent a malfunction due to static electricity do not use a dry cloth and do not touch the thermal head directly 7 Reinstall the ink film and close the covers see steps 4 to 7 ...

Page 66: ...ications feature 22 page 45 Printer test allows you to check the print quality of your unit If the test print has a smudge or blurred points or lines clean the thermal head page 63 Broadcast programming list provides you with names and numbers which are stored in the broadcast memory page 26 Caller ID list keeps records of the last 30 callers after subscribing to a Caller ID service To print autom...

Page 67: ...64 level Scanner type Contact Image Sensor Printer type Thermal Transfer on plain paper Data compression system Modified Huffman MH Modified READ MR Modified Modified Read MMR Modem speed KX FP143 9 600 7 200 4 800 2 400 bps Automatic Fallback KX FP148 14 400 12 000 9 600 7 200 4 800 2 400 bps Automatic Fallback Operating environment 5 C 35 C 20 80 RH Relative Humidity Dimensions Approx height 139...

Page 68: ...re not happy with the print quality or if misfeeding occurs L For proper paper feeding and best print quality we recommend using long grained paper L Do not use paper of different types or thickness at the same time This may cause a paper jam L Avoid double sided printing L Do not use paper printed from this unit for double sided printing with other copiers or printers This may cause a paper jam L...

Page 69: ...9 General Information 67 Warranty 9 3 Warranty KX FP148RU KX FP143RU FP143 148RU_en book Page 67 Thursday October 30 2003 11 55 AM ...

Page 70: ...9 General Information 68 FP143 148RU_en book Page 68 Thursday October 30 2003 11 55 AM ...

Page 71: ...g machine 31 Auto answer setting Feature 77 48 B Basic features 44 Broadcast transmission 26 Button description 9 C Caller ID 21 Calling back 22 Storing 23 Caller ID list Feature 26 21 45 Caller s recording time Feature 10 44 Character table 16 Cleaning 61 62 63 Communication messages 52 Connecting tone Feature 76 48 Connections 14 Copy 33 Collation 34 Enlarge 33 Reduce 33 D Date and time Feature ...

Page 72: ... Feature 43 46 Recording time for TAD FAX greeting message Feature 54 47 Redialling 24 26 Remote operation 37 Remote operation ID Feature 11 44 Reports Broadcast programming 64 Broadcast sending 27 Caller ID list 45 64 Journal 25 45 64 Power down 57 Printer test 64 Sending 25 44 Setup 64 Telephone number 64 Reset Feature 80 48 Resolution 24 33 Ringer pattern Feature 17 44 Ring setting FAX ONLY Fea...

Page 73: ...71 FP143 148RU_en book Page 71 Thursday October 30 2003 11 55 AM ...

Page 74: ...PFQX1988ZA CC1103YH0 Panasonic Communications Co Ltd 1 62 4 chome Minoshima Hakata ku Fukuoka 812 8531 Japan FP143 148RU_en book Page 72 Thursday October 30 2003 11 55 AM ...

Reviews: