background image

Please read these operating instructions before using the unit and save for future reference.

L

This unit is compatible with Caller ID. To use this feature, you must subscribe to the 
appropriate service of your service provider.

Operating Instructions

Flat-Bed Multifunction Laser FAX 

Model No.


KX-FLB883FX

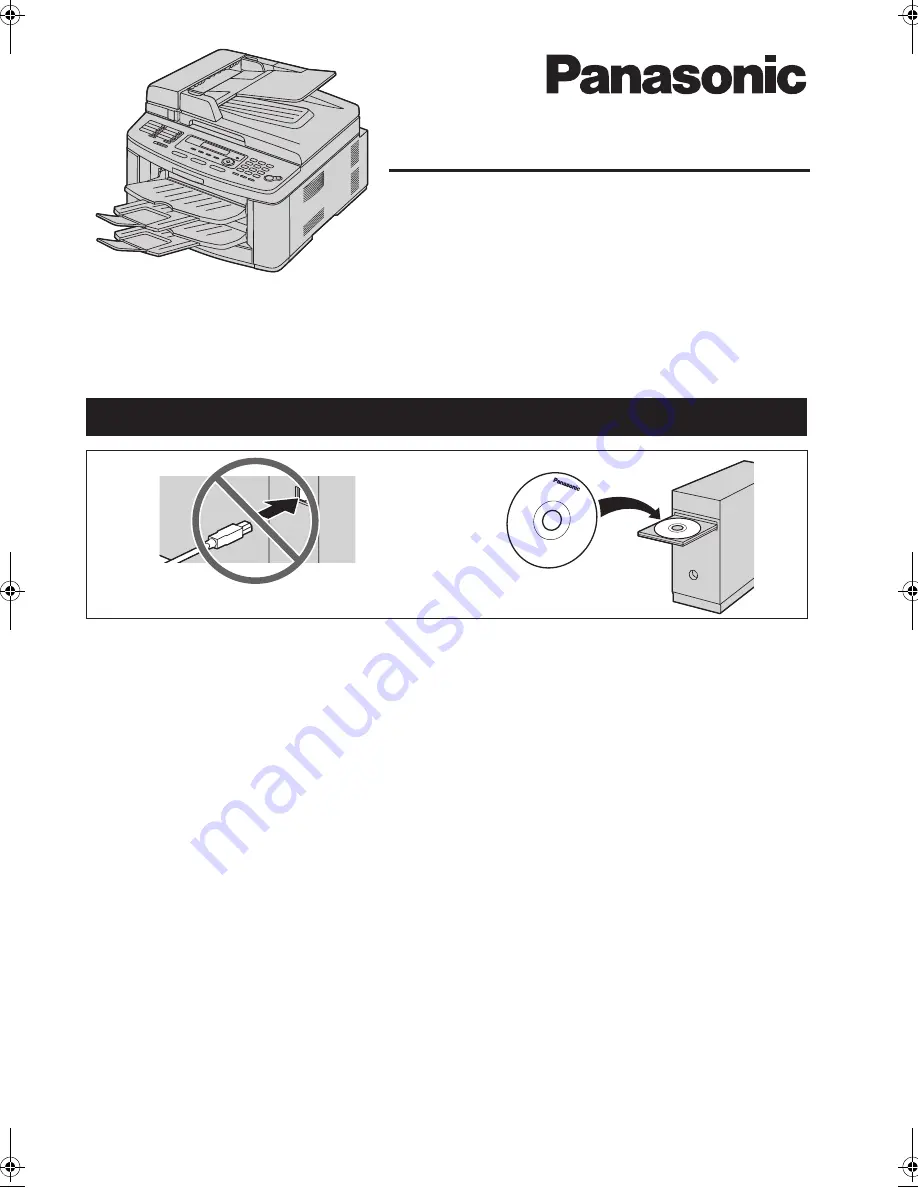
Do NOT connect the USB cable until prompted by the Multi-Function Station (CD-ROM).

1

2

FLB883FX-PFQX2770ZA-OI-en.

PDF

  Page 1  Wednesday, September 26, 2007  10:41 AM

Summary of Contents for KX-FLB883FX

Page 1: ... L This unit is compatible with Caller ID To use this feature you must subscribe to the appropriate service of your service provider Operating Instructions Flat Bed Multifunction Laser FAX Model No KX FLB883FX Do NOT connect the USB cable until prompted by the Multi Function Station CD ROM 1 2 ...

Page 2: ... are either registered trademarks or trademarks of Microsoft Corporation in the United States and or other countries L Pentium is a registered trademark or trademark of Intel Corporation in the United States and or other countries L Screen shots reprinted with permission from Microsoft Corporation L Adobe and Reader are either registered trademarks or trademarks of Adobe Systems Incorporated in th...

Page 3: ...pplied to your home consult your dealer or local power company For safety purposes this unit is equipped with a grounded plug If you do not have this type of outlet please have one installed Do not defeat this safety feature by tampering with the plug Do not place objects on the power cord Install the unit where no one can step or trip on the cord Do not overload power outlets and extension cords ...

Page 4: ... it to become wet at all This may cause a fire If the telephone line cord plug becomes wet immediately pull it from the telephone wall jack and do not use Unplug this unit from power outlets and refer servicing to an authorised service centre when the following conditions occur L If the power cord is damaged or frayed L If liquid has been spilled into the unit L If the unit has been exposed to rai...

Page 5: ...ately 16 kg It is highly recommended that two people handle this unit When moving the unit hold the both side grips 1 CLASS 1 LASER PRODUCT The printer of this unit utilises a laser Use of controls or adjustments or performance of procedures other than those specified herein may result in hazardous radiation exposure Laser diode properties Laser output Max 5 mW Wavelength 760 nm 810 nm Emission du...

Page 6: ...t Damage to the unit Poor print quality Improper operation Toner cartridge L Do not leave the toner cartridge out of the protection bag for a long time It will decrease the toner life Drum unit L Read the instructions on page 13 before you begin installation of the drum unit After you have read them open the drum unit protection bag The drum unit contains a photosensitive drum Exposing it to light...

Page 7: ...s or openings on the unit Inspect the air circulation vents regularly and remove any dust build up with a vacuum cleaner 1 Routine care L Wipe the outer surface of the unit with a soft cloth Do not use benzine thinner or any abrasive powder 1 1 ...

Page 8: ...nding Faxes 7 1 Sending a fax manually 44 7 2 Sending a fax using one touch dial feature and navigator directory 46 7 3 Broadcast transmission 46 7 4 Sending a computer document as a fax message from your computer 48 Receiving Faxes 7 5 Selecting the way to use your fax machine 48 7 6 Receiving a fax automatically Auto answer ON 49 7 7 Receiving a fax manually Auto answer OFF 50 7 8 Using the unit...

Page 9: ... 88 13 Cleaning Cleaning 13 1 Cleaning the white plates and glass 90 13 2 Cleaning the document feeder rollers 93 14 General Information Printed Reports 14 1 Reference lists and reports 95 Specifications 14 2 Specifications 95 Copyrights 14 3 Information of copyrights and licences 98 15 Index 15 1 Index 105 ...

Page 10: ...art No KX FA87E KX FA87X KX FA85E KX FA85X Replacement drum unit 1 L Model No Part No KX FA86E KX FA86X 1 Approx 2 500 sheets of A4 size paper can be printed with KX FA87E KX FA87X and approx 5 000 sheets with KX FA85E KX FA85X To ensure that the unit operates properly we recommend the use of Panasonic toner cartridge and drum unit 1 Power cord 2 CD ROM 3 Output tray 4 Document tray 5 Drum unit 6 ...

Page 11: ... erase a character number L CALLER ID L To use Caller ID features page 54 L To change the display of the caller information page 54 M FAX AUTO ANSWER L To turn the auto answer setting ON OFF page 48 N HELP L To print helpful information for quick reference page 23 O FAX L To switch to the fax mode page 21 44 P COPY L To switch to the copy mode page 21 37 Q SET L To store a setting during programmi...

Page 12: ...t Feeder cover release button 3 ADF cover 4 Document guides 5 Document tray 6 Document cover 7 Handset 8 Output tray 9 Top cover release lever j Document entrance k Paper input tray l Recording paper exit m Document exit 1 2 5 6 3 m 4 9 k j l 8 7 A Recording paper guides B Speaker C USB interface connector D LAN interface connector E LED F External telephone jack G Telephone line jack H Manual inp...

Page 13: ...ty area Do not expose the drum unit to direct sunlight L We cannot be responsible for any damage to the unit or degradation of print quality which may occur from the use of a non Panasonic toner cartridge and drum unit L Do not leave the toner cartridge out of the protection bag for a long time It will decrease the toner life L Do not add toner to the toner cartridge 1 Before opening the protectio...

Page 14: ...r 2 Important L Close the manual input tray 3 before opening the top cover Note L Do not touch the transfer roller 4 L If the lower glass 5 is dirty clean it with a soft and dry cloth 8 Install the drum and toner unit 1 by holding the tabs L Make sure that the triangles 2 match to install the drum and toner unit correctly 9 Close the top cover until locked 1 1 2 4 3 5 1 2 ...

Page 15: ...use of Panasonic toner cartridge Model No KX FA87E KX FA87X KX FA85E KX FA85X and drum unit Model No KX FA86E KX FA86X See page 10 for accessory information L To maintain print quality and machine life we recommend you to clean slots and openings page 7 and the inside of the unit page 90 93 when replacing the toner cartridge and or drum unit Waste disposal method Waste material should be disposed ...

Page 16: ...nter properties See page 30 for details 1 Insert the output tray 1 into the slots 2 then push the tray down until it locks into place 2 Pull the output tray extender 1 forward gently until it clicks into place then press the centre part of the extender 2 to open L Repeat from step 1 to install the upper output tray Note L The upper output tray can hold up to approximately 100 sheets of printed pap...

Page 17: ...he paper input tray unit can hold Up to 250 sheets of 60 g m2 to 75 g m2 paper Up to 230 sheets of 80 g m2 paper Up to 200 sheets of 90 g m2 paper L Please refer to page 96 for information on recording paper L The unit is set for printing A4 size paper by default If you want to use letter or legal size paper change the setting feature 380 on page 59 1 Pull the paper input tray 1 completely out 2 P...

Page 18: ...er the snubbers 3 5 Insert the paper input tray into the unit Note L If the paper is not loaded correctly re adjust the paper guides or the paper may jam L If the paper input tray does not close the plate in the paper input tray may be lifted Push the paper and make sure that the paper is laid flat in the paper input tray Caution for the paper input tray L Do not drop the paper input tray L Hold t...

Page 19: ...on jack if attached 3 Insert the tab 3 and rib 4 Caution L When moving the unit be sure to hold by the grip Do not hold by the handset unit To remove the handset unit 1 Pull the handset unit slightly forward 1 then lift it in the direction of the arrow 2 to remove the rib 2 Remove the tab 3 then disconnect the handset connector 4 1 2 4 3 Correct Incorrect 1 2 3 4 ...

Page 20: ... you to install a filter 8 please connect it as follows 1 Power cord L Connect to a power outlet 220 240 V 50 60 Hz 2 Telephone line cord L Connect to a single telephone line jack 3 EXT jack L You can connect an answering machine or an extension telephone Remove the stopper if attached 4 Answering machine not supplied 5 Network router Network hub not supplied L Also connect networked computers 6 T...

Page 21: ...he operation mode Fax Copy Scan You can select the desired mode by pressing one of the following buttons FAX Select this mode when using the unit as a fax machine page 44 COPY Select this mode when using the unit as a copier page 37 SCAN Select this mode when using the unit as a scanner for the computer page 34 Note L The default operation mode is the copy mode L You can change the default operati...

Page 22: ...Check that ink paste or correction fluid has dried completely L Remove clips staples or other fasteners L Do not set the following types of documents Make a copy of the document using the scanner glass and set the copy instead Chemically treated paper such as carbon or carbonless duplicating paper Electrostatically charged paper Badly curled creased or torn paper Paper with a coated surface Paper ...

Page 23: ...90 g m2 L Multiple sheets 60 g m2 to 80 g m2 Help 2 5 Help function The unit contains helpful information which can be printed for reference BASIC SETTINGS FEATURE LIST DIRECTORY FAX RECEIVING COPIER REPORTS CALLER ID 1 HELP 2 Press or repeatedly to display the desired item i SET 600 mm 216 mm 216 mm 208 mm 4 mm 4 mm 4 mm 4 mm HELP SET ...

Page 24: ...al Programming 2 7 Date and time 1 MENU i 1 0 1 i SET D 01 M 01 Y 07 TIME 00 00 2 Enter the current date month year hour minute by selecting 2 digits for each Press repeatedly to select AM or PM or 24 hour time entry Example 10 August 2007 10 15 PM 12 hour clock format 1 Press 1 0 0 8 0 7 1 0 1 5 D 10 M 08 Y 07 TIME 10 15 2 Press repeatedly to select PM 3 SET 4 Press MENU to exit Note L The other ...

Page 25: ... the correction L To erase all characters press and hold STOP 2 9 Your fax number You can program your fax number so that it appears on the top of each page sent 1 MENU i 1 0 3 i SET NO 2 Enter your fax number up to 20 digits L To enter a press L To enter a space press L To enter a hyphen press RECALL L To erase a number press STOP 3 SET 4 Press MENU to exit To correct a mistake Press or to move t...

Page 26: ...our network administrator does not manage the network with a DHCP server When two or more units are connected to the LAN You need to assign an IP address subnet mask and default gateway manually 1 MENU i 5 0 0 DHCP ENABLED V 2 Press 0 to select DISABLED i SET 3 Set each item For the IP address 1 Press 5 0 1 IP ADDRESS PRESS SET 2 SET i Enter the IP address of the unit i SET For the subnet mask 1 P...

Page 27: ...ter is equipped with the Hi Speed USB 2 0 interface L USB cable is not supplied Please purchase a shielded Type A male Type B male USB cable 2 11 2 Installing Multi Function Station on a computer L Install Multi Function Station CD ROM before connecting the unit to a computer with USB cable If the unit is connected to a computer with USB cable before installing Multi Function Station the Found New...

Page 28: ...er for each unit as follows Start i All Programs or Programs i Panasonic i the unit s name i Add Printer Driver Then follow the on screen instructions Note L You cannot connect more than one unit to the same computer at the same time To modify the software You can select the components to install anytime after the installation For Windows 2000 Windows XP and Windows Vista users you must be logged ...

Page 29: ...t function properly in the following situations When the unit is connected to a computer that was custom built by the user When the unit is connected to the computer via a PCI card or other expansion card When the unit is connected to another piece of hardware such as a USB hub or interface adapter and not connected directly to the computer To change the settings You can change the settings for Mu...

Page 30: ...er see page 17 31 L When using the manual input tray load the recording paper after step 4 L For details about the paper specifications see page 96 L If a printing error occurs the Device Monitor will be started automatically and display the error information Setting the printer properties You can change the printer setting in step 3 We recommend that you test paper especially special sizes and ty...

Page 31: ...lowing PAPER IN TRAY 2 FOR PC PRINTING L To use the manual input tray you must change the paper source in the Basic tab when setting the printer properties page 30 You can also select the desired media type To print on transparencies Use transparencies designed for laser printing We recommend the following 3M CG3300 CG5000 L Use the manual input tray to print transparencies L Load transparency she...

Page 32: ...You can load 1 envelope of 90 g m2 paper at a time for printing print side down 1 L Printed envelope will be stacked on the upper output tray L Remove each envelope after printing Note L Wrinkles and waving may occur in some cases even if high quality envelopes are used L Avoid printing in high humidity High humidity may cause the envelope to curl or seal the envelope L Store envelopes away from m...

Page 33: ...se may cause damage to the unit L Envelopes with clasps snaps or tie strings L Envelopes with transparent windows L Envelopes that use encapsulated types of adhesive that do not require moistening but rely on pressure to seal them Waved Dog eared Self adhesive Clasp Transparent window ...

Page 34: ...r scanning However when you select PDF as a file format the software that is associated to open PDF file will start Note L To stop scanning see page 73 L You can save the images in TIFF JPEG BMP or PDF formats L See page 22 for document requirements 4 1 2 Scan to save as a file 1 Set the original page 22 2 SCAN 3 Press V or repeatedly to select FILE i SET 4 For USB connection Press V or repeatedly...

Page 35: ...he e mail address using the dial keypad page 71 6 SET 7 If necessary change the scanning settings Press press V or repeatedly to select the desired setting i SET i START Note L If you select black white for the scan type you can save the images in TIFF or PDF formats If you select greyscale or colour for the scan type you can save the images in JPEG or PDF formats 4 1 4 Scan to OCR With OCR softwa...

Page 36: ... image set the document to preview again 6 Scan L If you preview the scanned image using the auto document feeder in step 5 set the document again and click Scan L The scanned image will be displayed in the Multi Function Viewer window after scanning L To save the scanned image select Save As from the File menu L To cancel scanning while the document is being scanned click Cancel Note L You can di...

Page 37: ...If necessary enter the number of copies up to 99 5 START L The unit will start copying 6 After you finish copying press STOP to reset the settings you set in step 3 and 4 Note L To stop copying see page 73 L You can change the default operation mode feature 463 on page 59 and the timer before returning to the default operation mode feature 464 on page 59 L Copied documents will be stacked on the u...

Page 38: ... 100 50 200 97 LTR A4 94 A4 LTR 83 LGL A4 78 LGL LTR L If you select ZOOM 100 press V or repeatedly to change the enlargement reduction rate by 1 at a time from 25 to 400 You can also enter the desired percentage specifically by using the dial keys 3 SET 4 If necessary enter the number of copies up to 99 i START 5 After you finish copying press STOP to reset this feature Note L Enlargement reducti...

Page 39: ...selected setting in step 3 See the following table for details The shaded area will be scanned 2 Press PAGE LAYOUT repeatedly to select QUIK ID COPY i SET 3 Press V or repeatedly to select the number of original documents from 2 in 1 4 in 1 or 8 in 1 i SET 4 Press V or repeatedly to select the page layout from LANDSCAPE or PORTRAIT i SET 5 If necessary enter the number of copies up to 99 i START L...

Page 40: ...be reduced to fit the recording paper 1 Set the original page 22 L To make a portrait copy set the original in portrait direction To make a landscape copy set the original in landscape direction 2 Press PAGE LAYOUT repeatedly to select N in 1 i SET 3 Press V or repeatedly to select the number of original documents from 2 in 1 4 in 1 or 8 in 1 i SET 4 Press V or repeatedly to select the layout from...

Page 41: ...edly to display ON and continue copying steps 3 to 6 on 5 2 5 To collate multiple copies page 41 During N in 1 feature 1 Set the original and enter necessary settings for N in 1 copy steps 2 to 4 on 5 2 4 To copy several pages onto 1 page N in 1 feature page 40 2 Press COLLATE repeatedly to display ON and continue copying steps 3 to 6 on 5 2 5 To collate multiple copies page 41 Proof set feature T...

Page 42: ...her items repeat steps 2 to 3 4 MENU Note L A hyphen or a space entered in a telephone number counts as 2 digits 6 1 3 Editing a stored item 1 DIRECTORY 2 Press V or repeatedly to display the desired item i MENU i 3 Edit the name if necessary For further details see the storing procedure on page 42 i SET 4 Edit the telephone number if necessary For further details see the storing procedure on page...

Page 43: ...initiate the navigator directory 3 Press 5 repeatedly to display any name with the initial L see page 71 for character entry L To search for symbols press 4 Press V or repeatedly to display LISA L To stop the search press STOP L To dial the displayed party press MONITOR or lift the handset ...

Page 44: ...aded drawings etc 3 SET L Using the FINE SUPER FINE and PHOTO settings will increase transmission time To select the contrast You can adjust this setting depending on the darkness or lightness of the document 5 levels light to dark are available 1 CONTRAST 2 Press V or repeatedly to select the desired contrast L To make lighter press V L To make darker press 3 SET Note L You can hold the previous ...

Page 45: ... pressing FAX 2 Set the original page 22 3 If necessary change the resolution and contrast according to the type of document L To select the resolution see page 44 L To select the contrast see page 44 4 MONITOR 5 Dial the fax number 6 When a fax tone is heard Press START When the other party answers your call Lift the handset and ask them to press their start button When the fax tone is heard pres...

Page 46: ... the fax number using one touch dial or navigator directory 4 START 7 3 Broadcast transmission By storing one touch dial and navigator directory items page 42 into the broadcast memory you can send the same document to multiple parties up to 20 Your programmed items will remain in the broadcast memory allowing frequent re use L The broadcast function utilises stations 1 3 The one touch dial functi...

Page 47: ...e scanner glass 1 Set the original page 22 2 If necessary change to the desired resolution page 44 and the desired contrast page 44 3 Press BROADCAST 1 2 or MANUAL BROAD L To send a single page skip to step 5 L To send multiple pages go to the next step 4 Place the next page i SET L To send more pages repeat this step 5 START L After transmission the unit will automatically print a report broadcas...

Page 48: ...ect to change the active unit Receiving Faxes 7 5 Selecting the way to use your fax machine Depending on your situation select the way you prefer to use your fax machine Use only as a fax FAX ONLY mode Use mostly as a telephone TEL mode Use as a telephone and or fax TEL FAX mode Use with answering machine 7 5 1 Use only as a fax FAX ONLY mode Your situation You have a separate telephone line just ...

Page 49: ...xternal telephone answering machine and set the ring count of the answering machine to less than 4 L Set the ring count in FAX ONLY mode of the fax machine to more than 4 if you use with auto answer ON How to receive calls When receiving phone calls the answering machine will record voice messages 7 6 Receiving a fax automatically Auto answer ON Note L Received documents will be stacked on the low...

Page 50: ... fax activation code firmly 3 Replace the handset Note L To stop receiving see page 73 L To receive fax documents using the extension telephone make sure remote fax activation is turned ON feature 434 on page 62 beforehand The default setting is ON 7 7 2 Activating TEL FAX mode 1 Make sure feature 404 is set to TEL FAX beforehand page 60 2 Press FAX AUTO ANSWER repeatedly to display TEL FAX MODE L...

Page 51: ...g up the unit and an answering machine 1 Connect the answering machine 1 L Answering machine is not supplied L Remove the stopper 2 if attached 2 Set the number of rings on the answering machine to 4 rings or less L This will allow the answering machine to answer the call first 3 Record a greeting message on the answering machine L We recommend you record a message up to 10 seconds long and not to...

Page 52: ...o display POLLING i SET 2 Dial the fax number i START 7 10 Junk fax prohibitor preventing fax reception from undesired callers If you subscribe to Caller ID service page 54 this feature prevents fax reception from calls that do not show caller information Additionally the unit will not accept faxes originating from numbers that match the ones on a programmable junk fax prohibitor list Important L ...

Page 53: ...49 2 Start Multi Function Station i PC FAX 3 When a fax call is received your computer will receive a document through the unit Note L You can view print or transfer the received document using your computer Viewing a received document 1 Select PC FAX from Multi Function Station 2 Select Received Log in Communication Log 3 Click the item you want to view 4 Click File in the menu bar then select Vi...

Page 54: ...is connected to a PBX Private Branch Exchange system caller information may not be received properly Consult your PBX supplier L If the unit cannot receive caller information the following will be displayed OUT OF AREA The caller dialled from an area which does not provide Caller ID service PRIVATE CALLER The caller requested not to send caller information LONG DISTANCE The caller made a long dist...

Page 55: ...he correct number To delete a number Press or to move the cursor to the number you want to delete and press STOP 8 4 Erasing caller information 8 4 1 Erasing all caller information 1 Press MENU repeatedly to display CALLER SETUP i SET L CALL LIST ERASE will be displayed 2 SET L To cancel erasing press STOP then MENU 3 SET i STOP 8 4 2 Erasing specific caller information 1 CALLER ID 2 Press V or re...

Page 56: ... desired station key 2 Press V or repeatedly to select DIAL MODE i SET i SET For stations 4 7 Press the station key i SET For stations 8 14 Press LOWER then press the desired station key i SET For navigator directory Press or i SET 5 SET Note L To edit a name or number see page 42 L If you assign an item to a station key which already contains an item the previous item will be replaced L Station 1...

Page 57: ...ies i Embedded Web L You can also access the unit by entering its IP address on the web browser 2 Select the desired category from the menu bar Device Configuration features of the unit Network Configuration features of the network 3 Type root as the user name then enter the password feature 155 on page 58 i OK 4 Select the desired feature tab at the top of the right frame 5 Change the settings or...

Page 58: ...400ms 4 300ms 5 250ms 6 200ms 7 160ms 8 110ms 9 100ms 90ms 80ms Note L If the unit is connected via a PBX PBX functions transferring a call etc might not work correctly Consult your PBX supplier for the correct setting Changing the LCD display contrast 1 4 5 1 NORMAL default 2 DARKER Changing the password for feature programming via remote operation 1 5 5 1 MENU i 1 5 5 i SET 2 Enter the current p...

Page 59: ...ng the power save mode the unit needs to preheat the fuser unit before printing Holding the previous contrast setting 4 6 2 0 DISABLED default Deactivates this feature 1 ENABLED The unit will hold the previous setting Note L The previous setting will be held individually for copying and sending faxes Setting the default operation mode 4 6 3 To select the default operation mode when the selected ti...

Page 60: ...ransmissions and receptions 1 ON default The unit will print a journal report automatically after every 30 new fax transmissions and receptions page 45 Changing the receiving mode in the manual answer setting 4 0 4 1 TEL default Telephone mode page 50 2 TEL FAX Telephone Fax mode page 50 Sending documents overseas 4 1 1 If you cannot send a fax overseas even if the number is correct and the line i...

Page 61: ...The document will be fed into the unit and scanned into memory The unit will then send the data at the specified time Note L To cancel after programming press STOP while the unit is idle and then press SET Setting the Error Correction Mode ECM 4 1 3 This feature is available when the sending receiving fax machines are ECM compatible 0 OFF Deactivates this feature 1 ON default If there is an error ...

Page 62: ...ng friendly reception 4 3 8 To receive a fax automatically when you answer a call and hear a fax calling tone slow beep 0 OFF You have to press START for fax reception 1 ON default You do not have to press START for fax reception Setting the output tray to use for faxing 4 4 1 You can select the output tray that will be used for printing received faxes 1 1 Upper output tray Up to approx 100 sheets...

Page 63: ...ill be used for receiving a fax See page 26 for details Resetting fax features to their default settings 4 5 9 0 NO default 1 YES To reset the fax features 1 MENU i 4 5 9 2 Press 1 to select YES i SET i SET i MENU Note L The PC fax reception feature 443 on page 26 will not be reset Feature Code Selection ...

Page 64: ...You can select the output tray that will be used for copying 1 1 default Upper output tray Up to approx 100 sheets 2 2 Lower output tray Up to approx 50 sheets Holding the previous page layout setting 4 6 7 0 DISABLED default Deactivates this feature 1 ENABLED The unit will hold the previous setting Holding the previous zoom enlargement reduction setting 4 6 8 0 DISABLED default Deactivates this f...

Page 65: ...rtrait direction 2 LANDSCAPE The document will be printed in landscape direction Setting the A4 wide feature in PCL 7 6 6 You can change the margin and printable area of A4 size recording paper so that 80 characters in 10 cpi font may be printed on a line 0 OFF default Deactivates this feature 1 ON The margin and printable area of A4 recording paper will be changed Setting the line per page in PCL...

Page 66: ...ceiving CR LF and FF codes 1 CR LF FF default CR CR LF LF FF FF 2 CR LF LF FF CR CR LF LF LF FF FF 3 CR CR LF CR FF CR CR LF CR LF FF CR FF Setting the waiting time for auto continue mode 7 7 3 To set the length of time before the unit recovers if memory overflow occurs 1 OFF default Deactivates this feature 2 20s 20 seconds 3 30s 30 seconds 4 60s 60 seconds 5 90s 90 seconds 6 120s 120 seconds Cha...

Page 67: ...ng for scan to e mail via e mail server LAN connection only This feature can be programmed only by the web browser page 70 Registering the scan to e mail destinations via e mail server LAN connection only L This feature can be programmed only by the web browser When you send scanned files via e mail server you can register e mail destinations up to 30 destinations to the unit using the web browser...

Page 68: ...DNS server of the network on the LAN using the dial keypad i SET i MENU Setting the secondary DNS server for the LAN connection 5 0 5 This feature is available when feature 500 is deactivated 1 MENU i 5 0 5 i SET 2 Enter the secondary DNS server of the network on the LAN using the dial keypad i SET i MENU Setting the machine name 5 0 7 1 MENU i 5 0 7 i SET 2 Enter the name of the unit to recognize...

Page 69: ...9 Programmable Features 69 Setting HTTPD for the LAN connection 5 3 4 0 DISABLED Denies access to the web browser 1 ENABLED default Allows access to the web browser Feature Code Selection ...

Page 70: ...ure Tab Selection Setting the location where you use this unit LAN FEATURE Enter the location information of the unit SMTP setting for scan to e mail via e mail server E MAIL FEATURE Enter the SMTP server information to send scanned image from the unit via e mail server Consult your service provider or network administrator for details Setting the error notify feature ERROR NOTIFY ENABLED The unit...

Page 71: ...lect characters using V or Instead of pressing the dial keys you can select characters using V or 1 Press V repeatedly to display the desired character Characters will be displayed in the following order 1 Uppercase letters 2 Number 3 Symbol 4 Lowercase letters L If you press the order will be reversed 2 Press to insert the displayed character 3 Return to step 1 to enter the next character Keypad ...

Page 72: ...ur computer 1 Start Multi Function Station 2 Utilities i Device Monitor L The Device Monitor window will appear 3 Confirm the status of the unit Status Current status of the unit Note L Additional information toner and recording paper status unit information etc will be displayed in Status tab by clicking Advanced Information L The status of the unit will be updated by clicking Refresh L If a prin...

Page 73: ...p file by selecting p from Multi Function Station 10 4 Cancelling the operations You can cancel the current operation from the unit You can also select the desired operation to cancel 1 STOP L USER STOPPED is displayed L When USER STOPPED is not displayed go to step 2 2 To cancel printing Press STOP repeatedly to display STOP PRINTING To cancel scanning Press STOP repeatedly to display STOP SCANNI...

Page 74: ...K FAX PROH REJECT L The junk fax prohibitor feature of this unit rejected fax reception MEMORY FULL L The memory is full of received documents due to a lack of recording paper or a recording paper jam Install paper page 17 or remove the jammed paper page 85 L If feature 442 is set to ALWAYS page 62 check the connection between the computer and the unit NO DOCUMENT FAILED PICKUP L The document was ...

Page 75: ... 42 DRUM LIFE LOW REPLACE SOON L The drum life is near its end Replace the drum unit as soon as possible FAX IN MEMORY L The unit has a document in memory See the other displayed message instructions to print out the document For fax memory capacity see page 95 L If feature 442 is set to ALWAYS page 62 check the connection between the computer and the unit KEEP COPYING L Copying has stopped due to...

Page 76: ...600 mm using the auto document feeder Press STOP to remove the document Divide the document into two or more sheets and try again REMOVE PAPER IN INPUT TRAY 2 L The recording paper is installed in the manual input tray when trying to copy receive faxes or print reports Remove the recording paper from the manual input tray REPLACE DRUM CHANGE SUPPLIES L The drum unit s service life is finished Repl...

Page 77: ...ailable for the version of Windows installed on your computer See the Microsoft web site for details L If you have any other multifunction softwares installed on your computer uninstall them L Check that your computer has enough memory and hard disk space If your computer warns of insufficient memory close other applications If there is not enough space on the hard disk delete unnecessary files L ...

Page 78: ... when printing from Microsoft PowerPoint or other applications L Select Colour or remove the check next to Greyscale in the print dialogue so that coloured text will be printed in greyscale I cannot find the PCL driver L The PCL driver can be found in the following folder on the supplied CD ROM D Drivers Printer 2kXp PCL where D is the drive letter of your CD ROM drive For more details refer to ht...

Page 79: ...L You used a coloured paper as a document Change the contrast page 37 and make a lighter copy of the document using TEXT resolution page 37 Problem Cause Solution I cannot send documents L The telephone line cord is connected to the EXT jack on the unit Connect to the LINE jack page 20 L The other party s fax machine is busy or has run out of recording paper Try again L The other party s machine i...

Page 80: ... working normally The other party may have sent a faint document or there may be something wrong with the other party s machine Ask them to send a clearer copy of the document or to check their fax machine L If documents can not be copied properly refer to 11 3 2 Printing problems page 78 The other party complains that they cannot send a document L The memory is full of received documents due to a...

Page 81: ...L If you connected the unit through a computer modem connect the unit directly to a telephone line jack I cannot make calls L The dialling mode setting may be wrong Change the setting feature 120 on page 21 The unit does not ring L The ringer volume is turned OFF Adjust it page 24 The other party complains they only hear a fax tone and cannot talk L FAX ONLY mode is set Tell the other party the nu...

Page 82: ...ually feature 501 on page 68 The IP address of the computer and the unit must be in the same local IP address class as shown below Set the IP address in the range of the number specified in the class corresponding to your local network scale Class Subnet mask IP address Class A 255 0 0 0 10 0 0 1 10 255 255 254 Class B 255 255 0 0 172 xx 0 1 172 xx 255 254 1 Class C 255 255 255 0 192 168 xx 1 192 ...

Page 83: ...alogue box appears and asks if you want to block PCCMFLPD and I cannot operate the following functions after installing the Microsoft Windows XP Service Pack 2 PC printing Scanning Remote Control PC FAX Device Monitor L Click Keep Blocking and run the Windows Firewall Setting Tool to allow the data transmission for Multi Function Station page 83 Problem Cause Solution I cannot receive documents au...

Page 84: ... Windows Firewall dialogue box will appear 3 Click the Exceptions tab 4 Confirm that Panasonic Trap Monitor Service and PCCMFLPD are displayed and checked on the Programs and Services list To confirm the security settings For Windows Vista users 1 Start i Control Panel i Security Center L The Windows Security Center window will appear 2 Windows Firewall L The Windows Firewall dialogue box will app...

Page 85: ...not pull out the jammed paper forcibly before opening the top cover L To prevent injuries be careful not to put your hands under the top cover 1 Lift the top cover release lever 1 and open the top cover 2 Important L Close the manual input tray 3 before opening the top cover Note L Do not touch the transfer roller 5 2 Remove the jammed paper Caution The fuser unit 4 gets hot Do not touch it 1 4 2 ...

Page 86: ...efully by pulling it upwards Remove the jammed paper 1 carefully by pulling it toward you 3 Insert the paper input tray into the unit Case 2 When the recording paper has jammed near the fuser unit 1 Lift both green levers 1 until they stop 2 Remove the jammed paper 1 carefully by pulling it upwards 3 Push back the green levers 1 to the original position 1 1 1 1 1 ...

Page 87: ... 2 When the recording paper is not fed into the unit properly The display will show the following CHECK PICK UP INPUT TRAY 1 1 Pull the paper input tray completely out then remove the recording paper and straighten it 2 Re load the recording paper 3 Insert the paper input tray into the unit Note L If the error message is still displayed check the recording paper specifications and re install recor...

Page 88: ...f the error message is still displayed check the recording paper specifications and re install recording paper See page 31 for details 12 2 Document jams Auto document feeder Caution L Do not pull out the jammed document forcibly before lifting the ADF cover 1 Hold the ADF cover firmly and lift it to open the upper part 1 of the ADF cover 2 When the document has jammed near the document entrance R...

Page 89: ...r Jams 89 When the document has jammed near the document exit Press the ADF cover release button 1 and open the middle part 2 of the ADF cover Remove the jammed document 3 carefully 3 Close the ADF cover 1 3 2 ...

Page 90: ...13 for details L Do not use paper products such as paper towels or tissues to clean the inside of the unit 13 1 1 White plates and scanner glass 1 Disconnect the power cord 2 Open the document cover 1 3 Press the ADF cover release button 1 and open the middle part 2 of the ADF cover 4 Clean the scanner glass 1 and the white cover sheet 2 and its circumference 3 with a soft and dry cloth L Clean th...

Page 91: ...mes off from the unit 1 Attach the hinges 1 to the document cover 2 L Make sure that the inserted direction is correct Otherwise the hinges cannot be inserted into the slots in step 3 2 Lay down the hinges 1 3 Insert the hinges 1 into the slots 2 on the unit 4 Close the document cover 1 1 2 1 1 2 ...

Page 92: ...ning the top cover Note L Do not touch the transfer roller 5 3 Remove the drum and toner unit 1 by holding the tabs 4 Clean the lower glass 1 with a soft and dry cloth 5 Reinstall the drum and toner unit 1 by holding the tabs L Make sure that the triangles 2 match to install the drum and toner unit correctly Caution The fuser unit 4 gets hot Do not touch it 1 4 2 5 3 1 1 1 2 ...

Page 93: ...over 7 Re connect the power cord 13 2 Cleaning the document feeder rollers Clean the rollers when the document frequently misfeeds 1 Disconnect the power cord 2 Hold the ADF cover firmly and lift it to open the upper part 1 of the ADF cover 3 Press the ADF cover release button 1 and open the middle part 2 of the ADF cover 1 1 2 ...

Page 94: ...llers 1 with a cloth moistened with isopropyl rubbing alcohol and let all parts dry thoroughly L Clean the rollers in the direction of the arrow to avoid the discharge brush 2 from being pulled 5 Close the ADF cover 6 Re connect the power cord 2 1 ...

Page 95: ...smission time 1 Approx 4 s page ECM MMR Memory transmission 2 Scanning density Scanning resolution Up to 600 1 200 dpi Optical Up to 9 600 9 600 dpi Interpolated Copy resolution Up to 600 600 dpi Fax resolution Horizontal 8 pels mm Vertical 3 85 lines mm in standard resolution 7 7 lines mm in fine photo resolution 15 4 lines mm in super fine resolution Photo resolution 64 level Scanner type Colour...

Page 96: ...nly accepts print on one side Try using the other side of the paper if you are not happy with the print quality or if misfeeding occurs L For proper paper feeding and best print quality we recommend using long grained paper L Do not use paper of different types or thickness at the same time This may cause paper jams L Avoid double sided printing L Do not use paper printed from this unit for double...

Page 97: ...elephone Answering Machine Table of Contents2 1 Table of Contents 1 1 Included accessories 1 2 Accessory information Finding the Controls 1 3 Description of buttons 1 4 Overview Installation1 5 Toner cartridge and drum unit 1 6 Document tray 1 7 Output tray1 8 Recording paper2 Preparation 2 1 Connections 2 2 Turning the power switch ON Help Button2 3 Help function Volume 2 4 Adjusting volume Initi...

Page 98: ... ANY DIRECT INDIRECT INCIDENTAL SPECIAL EXEMPLARY OR CONSEQUENTIAL DAMAGES INCLUDING BUT NOT LIMITED TO PROCUREMENT OF SUBSTITUTE GOODS OR SERVICES LOSS OF USE DATA OR PROFITS OR BUSINESS INTERRUPTION HOWEVER CAUSED AND ON ANY THEORY OF LIABILITY WHETHER IN CONTRACT STRICT LIABILITY OR TORT INCLUDING NEGLIGENCE OR OTHERWISE ARISING IN ANY WAY OUT OF THE USE OF THIS SOFTWARE EVEN IF ADVISED OF THE ...

Page 99: ... of California All rights reserved Copyright c 1988 Stephen Deering Copyright c 1988 University of Utah Copyright c 1988 1989 1993 The Regents of the University of California All rights reserved Copyright c 1988 1991 1993 The Regents of the University of California All rights reserved Copyright c 1988 1992 1993 The Regents of the University of California All rights reserved Copyright c 1988 1993 T...

Page 100: ...ndation Inc All rights reserved Copyright c 1998 1999 2000 2001 The NetBSD Foundation Inc All rights reserved Copyright c 1998 2000 The NetBSD Foundation Inc All rights reserved Copyright c 1998 2000 2001 The NetBSD Foundation Inc All rights reserved Copyright c 1999 The NetBSD Foundation Inc All rights reserved Copyright C 1999 WIDE Project All rights reserved Copyright c 1999 2000 Jason L Wright...

Page 101: ...RE Part 2 Networks Associates Technology Inc copyright notice BSD Copyright c 2001 2003 Networks Associates Technology Inc All rights reserved Redistribution and use in source and binary forms with or without modification are permitted provided that the following conditions are met Redistributions of source code must retain the above copyright notice this list of conditions and the following discl...

Page 102: ... NEGLIGENCE OR OTHERWISE ARISING IN ANY WAY OUT OF THE USE OF THIS SOFTWARE EVEN IF ADVISED OF THE POSSIBILITY OF SUCH DAMAGE Part 4 Sun Microsystems Inc copyright notice BSD Copyright c 2003 Sun Microsystems Inc 4150 Network Circle Santa Clara California 95054 U S A All rights reserved Use is subject to license terms below This distribution may include materials developed by third parties Sun Sun...

Page 103: ...ANY SPECIAL INDIRECT OR CONSEQUENTIAL DAMAGES OR ANY DAMAGES WHATSOEVER RESULTING FROM LOSS OF USE DATA OR PROFITS WHETHER IN AN ACTION OF CONTRACT NEGLIGENCE OR OTHER TORTIOUS ACTION ARISING OUT OF OR IN CONNECTION WITH THE USE OR PERFORMANCE OF THIS SOFTWARE Copyright 1995 1998 1999 2000 by Jef Poskanzer jef acme com All rights reserved Redistribution and use in source and binary forms with or w...

Page 104: ...ed in part on the work of the Independent JPEG Group Copyright 1995 by Jef Poskanzer jef acme com Copyright 1998 by Jef Poskanzer jef acme com Copyright 1999 by Jef Poskanzer jef acme com Copyright 1995 2000 by Jef Poskanzer jef acme com Copyright 1999 2000 by Jef Poskanzer jef acme com Copyright 1995 1998 2000 by Jef Poskanzer jef acme com ...

Page 105: ...g 68 533 Auto IP 68 534 HTTPD 69 760 Input tray in PCL 65 761 Output tray in PCL 65 762 Number of copies in PCL 65 763 Paper size in PCL 65 764 Image reduction feature in PCL 65 765 Recording paper direction in PCL 65 766 A4 wide printing in PCL 65 767 Line per page in PCL 65 768 Font source in PCL 65 769 Font number in PCL 65 770 Font pitch point in PCL 66 771 Symbol set in PCL 66 772 Line breaks...

Page 106: ...466 64 Fax Feature 441 62 Overseas mode Feature 411 60 P Page layout hold Feature 467 64 Paper size Paper input tray Feature 380 59 Password Feature 155 58 PC fax reception Feature 443 26 PC fax setting Feature 442 62 PCL A4 wide printing Feature 766 65 Font number Feature 769 65 Font pitch point Feature 770 66 Font source Feature 768 65 Image reduction Feature 764 65 Input tray Feature 760 65 Lin...

Page 107: ...y 46 One touch dial 46 Sending report Feature 401 45 60 Set fax default Feature 459 63 Setup list 95 Storing Broadcast 46 Navigator directory 42 One touch dial 42 Subnet mask Feature 502 68 T Telephone number list 95 TEL mode 50 Toner cartridge 13 Toner life 97 Toner save Feature 482 15 59 Transparency 31 V Volume 24 Z Zoom hold Feature 468 64 ...

Page 108: ...PFQX2770ZA CM0907DW0 Panasonic Communications Co Ltd 1 62 4 chome Minoshima Hakata ku Fukuoka 812 8531 Japan Global web site http panasonic net Manufacturer 0682 ...

Reviews: